Convert EXE to MSI - Create an MSI package from EXE
The following article uses options that are available starting
with the Enterprise edition and project
type.
This tutorial will guide you in creating an MSI Wrapper over one or more EXE installers.
When it comes to create an MSI installer for an application that comes in a different installer package file format, the recommended approach is to repackage it. In this way, you can take full advantage of Windows Installer technology. However, there might be scenarios when you just need to wrap the EXE file into an MSI package without to be needed to repackage it.
A common usage scenario is when you have a package to be deployed through GPO but also need to include some EXE installers which need to be executed silently. Because feature-based prerequisites can only be included with full UI, the only solution is the use the "MSI from EXE(s)" project type.
For this tutorial we'll convert the 7-zip File Manager into a .MSI. We will use the Advanced Installer tool as an EXE to MSI converter.
Please keep in mind the following steps are for illustration purposes
only, thus you can convert as many .EXE packages as you need into a single
.MSI installer.
1. Start a “Convert” > "MSI from EXE(s)" project
If Advanced Installer is not currently running, launch it by double-clicking its desktop icon or selecting it from the "Start" menu. On the application's Start Page you can choose “Convert” > “MSI from EXE(s)” project type.
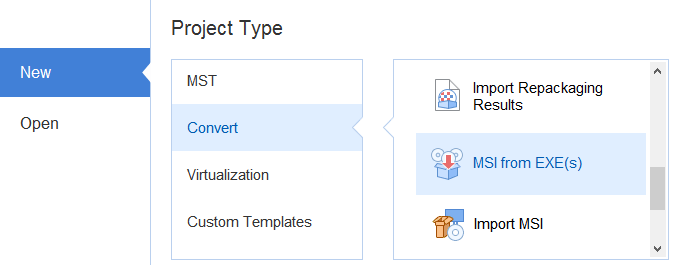
The Wizard will be launched assisting you to include and configure the .EXE packages into the main .MSI.
2. Enter details about your product
Configure the product details for your .MSI installer:
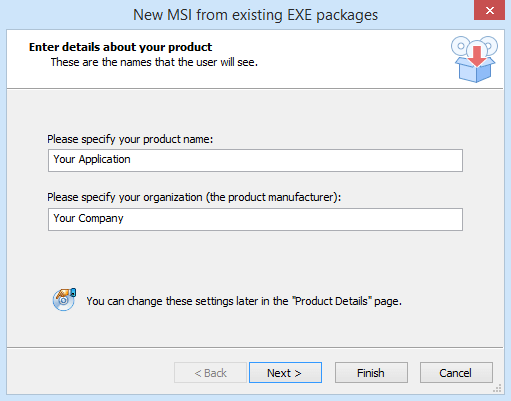
You can change these settings later in the Product Details Tab from Product Details Tab.
3. Set project and package paths
In this dialog you can specify project location and output folder. By default the package name will be the same as the project name but you can change this later:
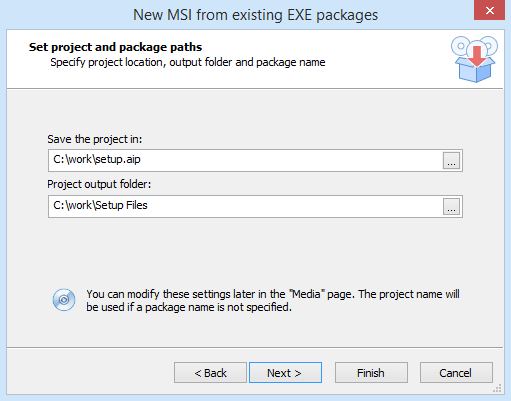
You can change these settings later in the Configuration Settings Tab from Builds Page.
4. Configure .EXE packages
In this dialog you can choose the location of the .EXE packages you want to include either from disk ( button) or from URL ( button):
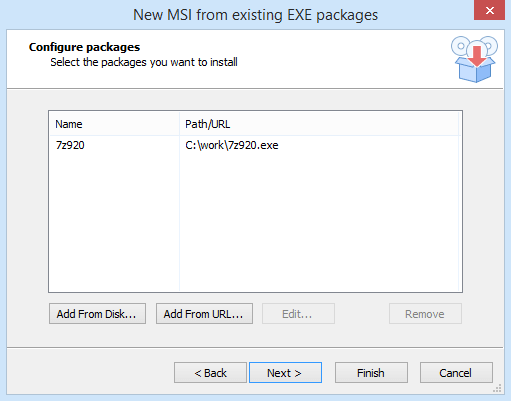
4.1 Include an .EXE package
We will use the button to include the 7-zip File Manager .EXE installer. The Configure Package dialog will pop up allowing you to change its install time configuration:
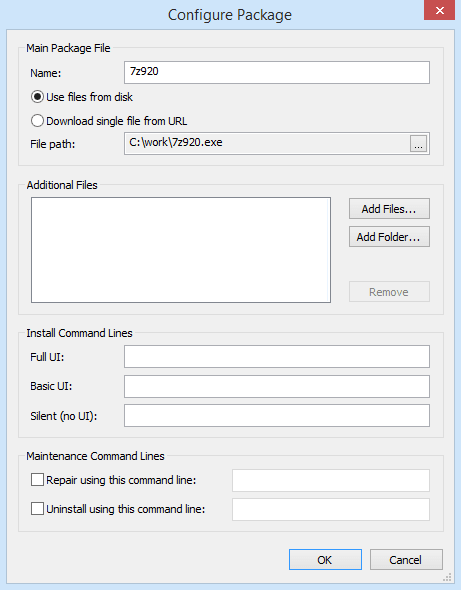
Each of the .EXE packages included this way will be added as
post-install prerequisites. You can change these settings later in
their Setup Files Tab
from Prerequisites Page - Installer Project.
5. Set Package Options
This dialog allows you configure general installation package options. For this example you can leave the default:
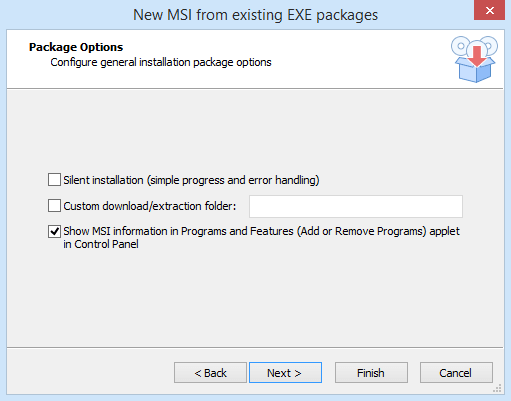
Show MSI information in Program and Features (Add or Remove Programs) applet in Control Panel - If disabled, this option prevents the product from being displayed in the "Add or Remove Programs" applet from Control Panel.
These settings and more related can be changed later in the Install Parameters, Prerequisites Page - Installer Project or
Product Details Tab.
6. Build project
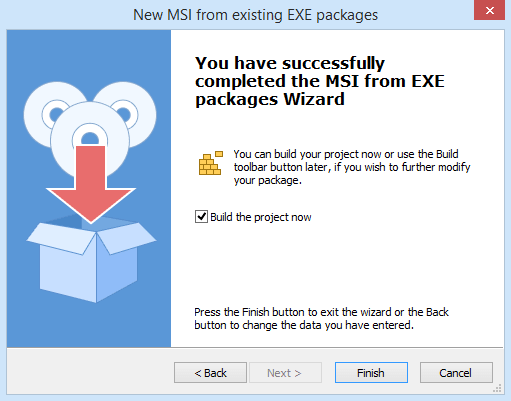
![]() Choose to build the project or press
to continue configuring it. You managed to convert the EXE packages into an MSI installer.
Choose to build the project or press
to continue configuring it. You managed to convert the EXE packages into an MSI installer.
