Efficient Project Duplication with Advanced Installer's 'Save as Template' Feature
Ever invested days, weeks, or even months crafting an Advanced Installer project, only to face the task of creating a similar one for a new requirement?
Picture this: a new .DLL file arrives, enhancing your application, but it needs separate delivery. The thought of starting from scratch for a project almost identical to your previous labor of love is daunting, isn't it?
Fear not, for the Save as Template feature in Advanced Installer is your knight in shining armor.
The Pitfall of Copy-Paste
The intuitive yet flawed first response to this situation is often to copy-paste the existing project and modify it.
Although that sounds like a good idea, from a Windows Installer perspective, that is wrong, because it triggers something known as "Shared Components”.
Missteps here can lead to errors like the infamous:
“Another version of this product is already installed. Installation of this version cannot continue. To configure or remove the existing version of this Product, use Programs and Features from Control Panel.”
This is due to unchanged ProductCode properties – unique GUID is vital for distinguishing your application.
Windows Installer, being the stickler for uniqueness that it is, doesn't permit two products with the same ProductCode.
The Domino Effect of Component GUID Duplication
In the same manner, each component from your setup package is uniquely identified by its Component GUID.
Altering the ProductCode might seem like a fix, but it just transfers to the below level - the GUID of the components.
Install the second setup, and Windows Installer, recognizing existing components by their GUIDs, won't bother installing them again. The visible symptom? Missing files from the new project.
You may ask yourself: “Ok, the file is not installed, but what actually happens behind the scenes?”
Somewhere in the registry, based on the compressed/repacked GUID of the component, we’ll be able to see all the setups that refer to it.
Through these registry entries, Windows Installer will know whether it should delete the file or not (see the next issue).
This brings us to the next problem.
The Inability to Uninstall Files and their Shortcuts
Imagine we’ve installed the setup from the build process of our copied project.
Later, we decided to remove it.
We go to the Control Panel, select the product and proceed with the uninstall process, only to discover the shared file is still there. How?
This happens due to the registry entries mentioned above. In those entries, Windows Installer will see that the executable file is still referenced by another setup and therefore will not remove it.
If you create a log file for the uninstallation, you will be greeted by the following message in it:
Disallowing uninstallation of component: {GUID} since another client exists
ProductCode, UpgradeCode, and Components – Oh My!
Each setup package has two very important properties that help Windows Installer differentiate itself from other setup packages - namely Product Identification (ProductCode and UpgradeCode)ProductCode and UpgradeCode.
The ProductCode is your product's unique ID, while the UpgradeCode links different versions within the same product family.
For instance, although version 2.0 of one product is different from version 1.0 (i.e. it has a different ProductCode), it is still part of the same family, therefore it should have the same UpgradeCode.
The UpgradeCode helps Windows Installer identify the previous versions of the same setup and upgrade them.
You can see these two properties in your Advanced Installer project by going to the “Product Details” page → “Product IDs” tab.

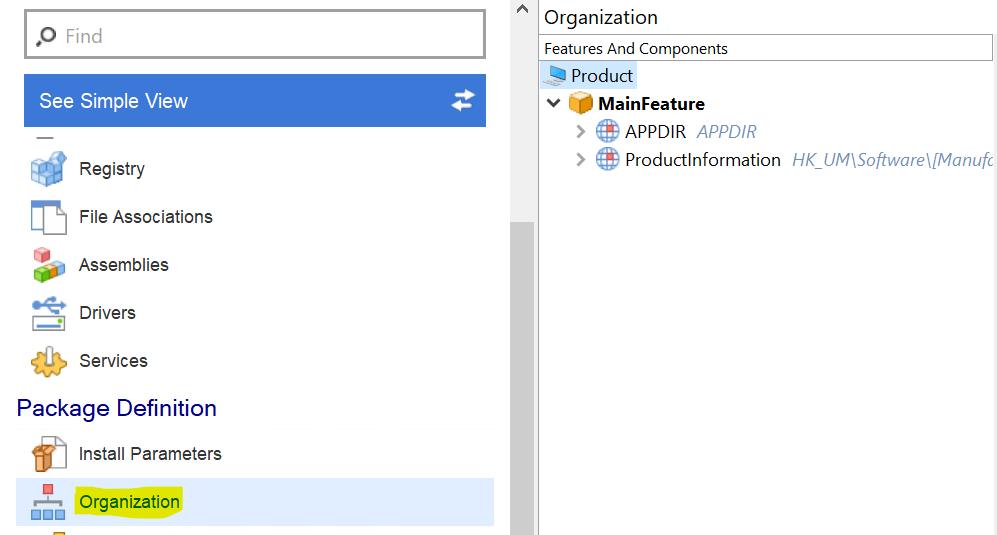
At its core, each setup package consists of components. Each file you add to your package will be automatically assigned to a component. This can be seen by going to the Organization page.
The “Organization” page for an empty project:
The Organization page when we add the “test.txt” file in the Files and Folders page:
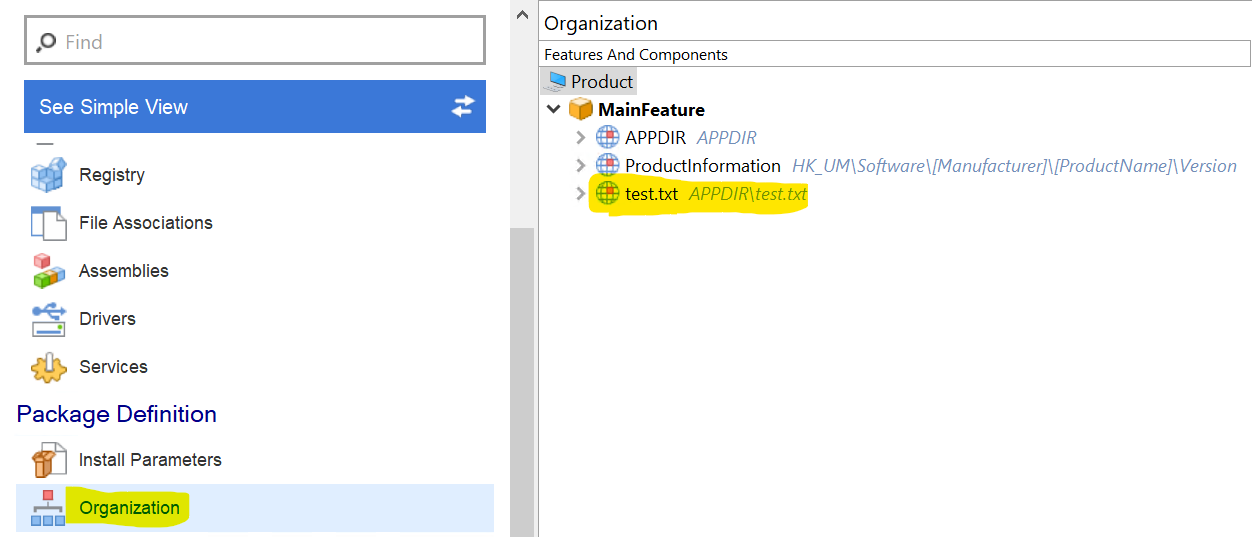
As we can see, the component was created automatically for the “test.txt” file.
A Practical Example
Enough with the theory!
Let's roll up our sleeves and apply these concepts:
1. We’ll start with an executable “sample.exe” and then create the first setup.
2. We will then copy the project and add one more .txt file to the project and see what happens when trying to install the resulting package.
3. Next, we create a new Advanced Installer project.
4. Add our “sample.exe” file in the “Files and Folders” page.
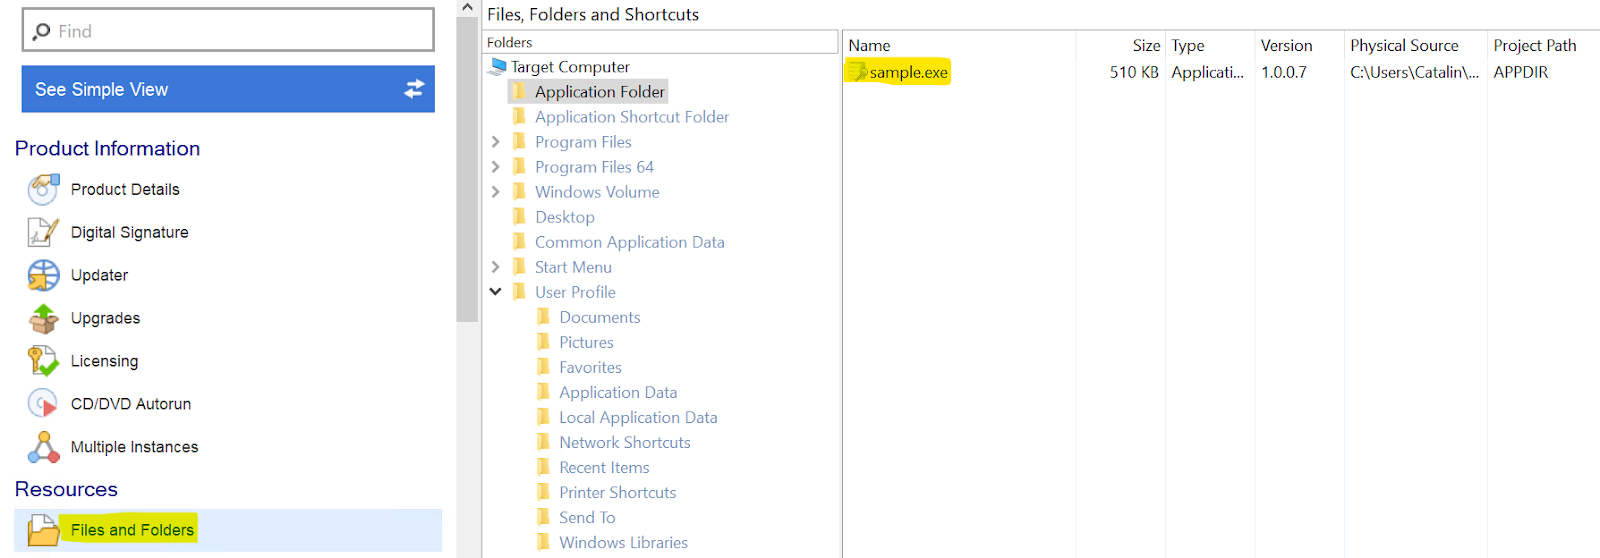
5. Check the “Organization” page to see the created component and its GUID (we will need the GUID at a later stage in our sample).
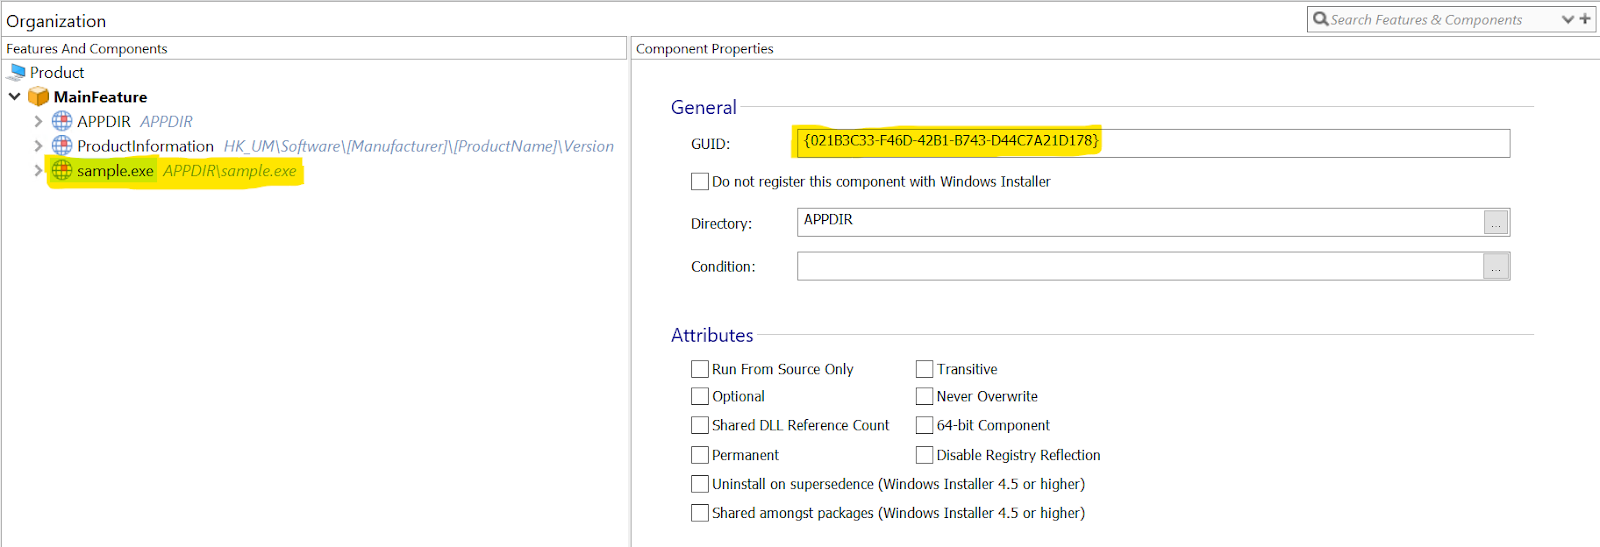
As we can see, the GUID assigned to our executable’s component is: {021B3C33-F46D-42B1-B743-D44C7A21D178}
6. Build this project and then install the setup.
7. Check the installation folder to see whether the executable was installed or not.

As we can see, the resource was installed.
Let’s keep in mind the installation folder (will be useful in the steps to come): C:\Program Files (x86)\Caphyon - Catalin\Shared Resources Sample
8. Create the copy of the previously created .AIP file.
If we open both and put them side by side, we will notice that they have the same ProductCode GUID, the same UpgradeCode GUID and that all components have the same GUIDS.

9. Add the .txt file to it and then build and install the resulting MSI.
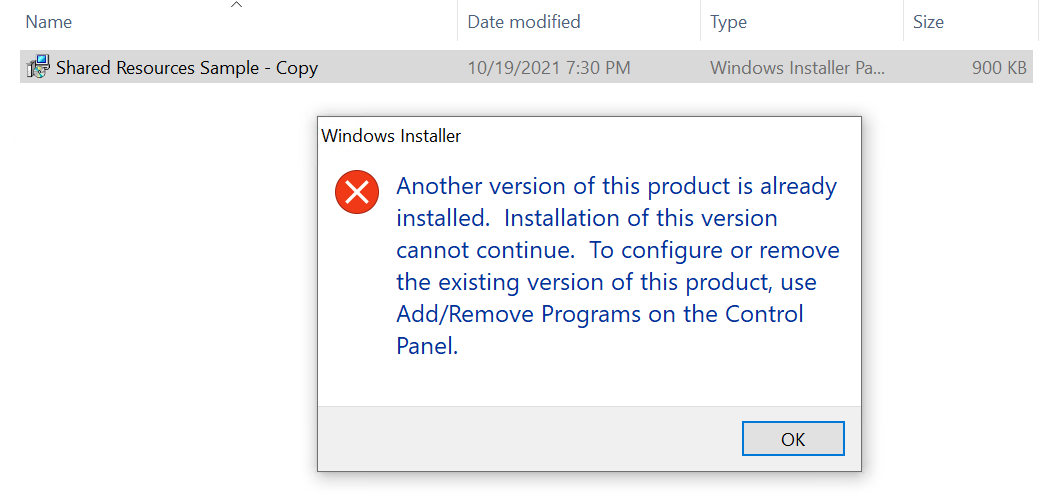
As we can see, we are getting the Another version of this product is already installed error, as discussed above.
10. Change the ProductCode and UpgradeCode properties in the copied project, so we can face the next problem.
To do so, open the project, go to Product Details page → Product IDs tab → double click the ProductCode and click Generate.
11. Repeat the above steps for the UpgradeCode.
12. Rebuild the project and try to install the setup once more.
Now, we can notice that the installation can be done.
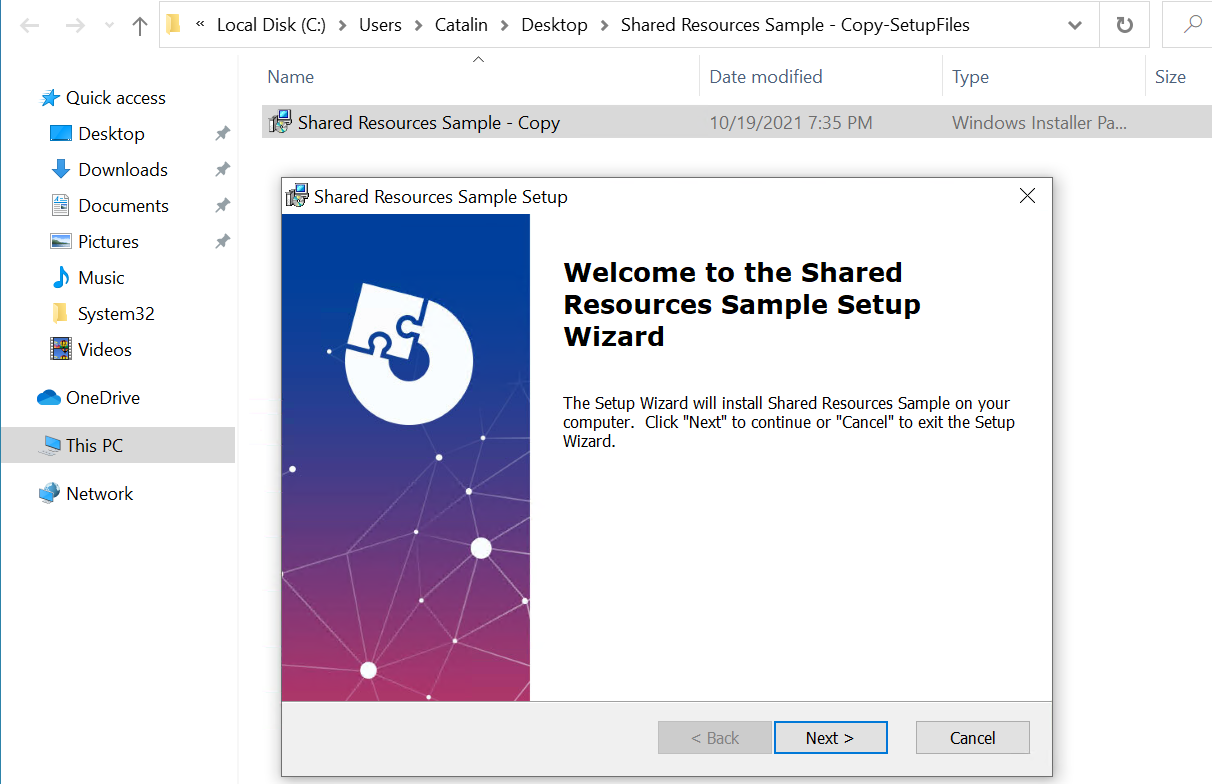
If we open the installation folder, we will see that both the EXE and the TXT file are there.
However, if we try to uninstall one of the setups, we will notice that the EXE will still stay in the directory. Let’s see why that is.
Not so long ago, I have mentioned the term “compressed/repacked GUID”. A compressed GUID can be obtained by applying a transform to the normal GUID.
The algorithm looks like this:
- Remove the curly braces and separating dashes from the standard GUID
- Write each group of the first three groups of hexadecimal characters in a standard GUID in reverse order
- Switch every two characters in the fourth and fifth group in a standard GUID
We are facing this scenario regularly here on Advanced Installer’s support.
To ease and speed up things a bit I have the following PowerShell script that turns a GUID to a compressed GUID:
      function Convert-GuidToCompressedGuid {
	<#
	.DESCRIPTION
		This converts a GUID to a compressed GUID also known as a product code.

	.EXAMPLE
		Convert-GuidToCompressedGuid -Guid '{GUID}'
	    Convert-GuildToCompressedGuild ('{GUID}')
	#>
	[CmdletBinding()]
	[OutputType()]
	param (
		[Parameter(ValueFromPipeline, ValueFromPipelineByPropertyName, Mandatory)]
		[string]$Guid
	)
	begin {
		$Guid = $Guid.Replace('-', '').Replace('{', '').Replace('}', '')
	}
	process {
try {
			$Groups = @(
				$Guid.Substring(0, 8).ToCharArray(),
				$Guid.Substring(8, 4).ToCharArray(),
				$Guid.Substring(12, 4).ToCharArray(),
				$Guid.Substring(16, 16).ToCharArray()
			)
			$Groups[0..2] | foreach {
				[array]::Reverse($_)
			}
			$CompressedGuid = ($Groups[0..2] | foreach { $_ -join '' }) -join ''

			$chararr = $Groups[3]
			for ($i = 0; $i -lt $chararr.count; $i++) {
				if (($i % 2) -eq 0) {
					$CompressedGuid += ($chararr[$i+1] + $chararr[$i]) -join ''
				}
			}
			$CompressedGuid
		} catch {
			Write-Error $_.Exception.Message
If you open PowerShell ISE and run the above script, you should be able to use the “Convert-GuidToCompressedGuid” cmdlet.
Let’s run the cmdlet against our project GUIDS such as the ProductCode from the original project, the ProductCode from the copied project and the component GUID of our executable


Now, we open the Registry Editor and search for the compressed GUID of our executable.
The search will take a while, but it should return something as it follows in the end.

As you can see, both our setups (identified by their compressed ProductCode properties) are referencing the executable.
If we try to remove one of the setups, the executable will remain on the machine, since it is referenced by one more product.
The executable will only be removed when the last product referencing it will be
removed.
How to avoid all of the above mess with a few clicks?
In order to avoid the above scenarios, we should use the “Save as Template” feature from Advanced Installer.
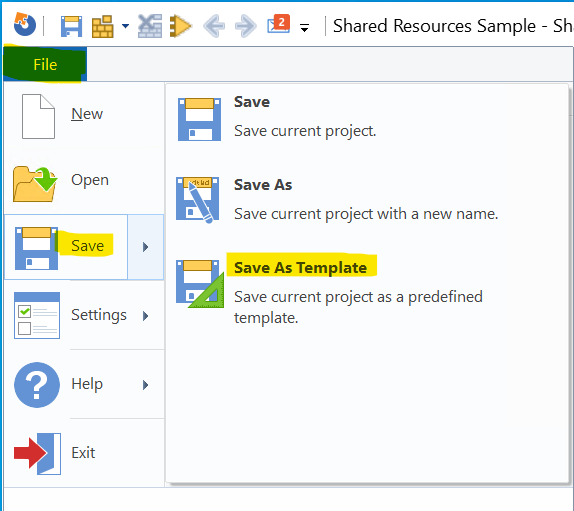
You can find this option in your project by clicking on “File” → “Save” → “Save as Template”.
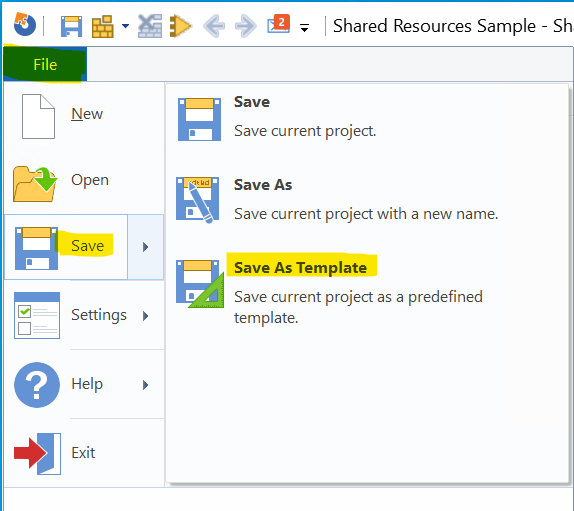
The template is saved in the following folder: C:\ProgramData\Caphyon\Advanced Installer\Repository\Project Templates
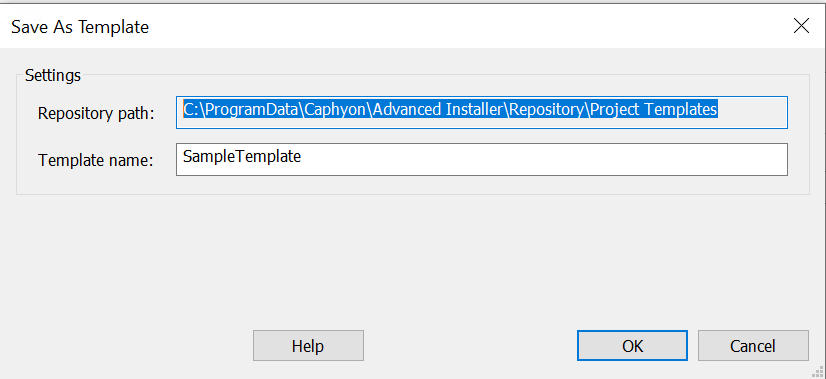
After that, to open a new project starting from our template, we can proceed as it follows:
-cOpen Advanced Installer.
- “New” → “Custom Templates” → select our template.
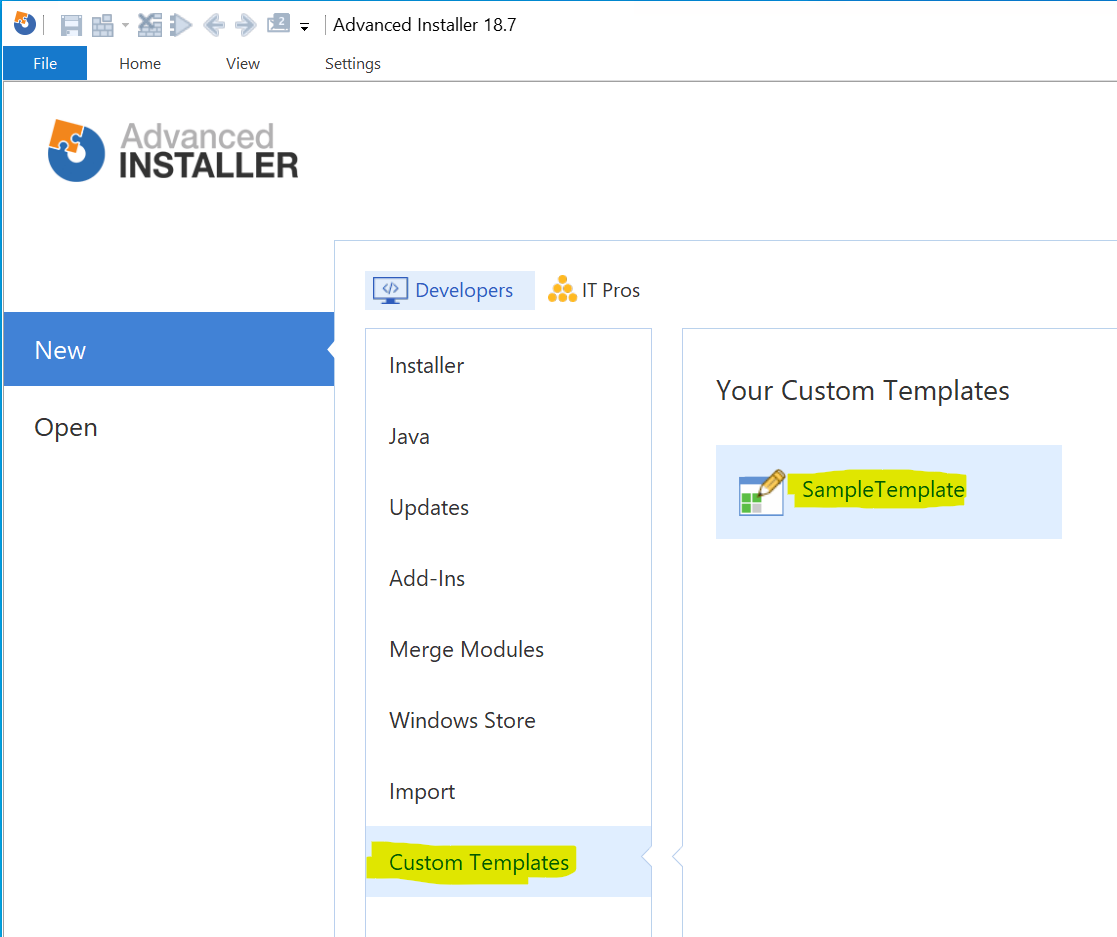
Behind the scenes, this feature will generate new GUIDs such as:
- ProductCode
- UpgradeCode
- each GUID assigned to your components
Thanks to “Sample Template” the above problems are not encountered.
Hope you will find this article helpful!