Create a package to deploy an Office Add-In developed in Visual Studio
The following article uses options that are available starting
with the Professional edition and project
type.
This tutorial will guide you step by step in creating a package for your VSTO Office Add-In using our Office Product Addin wizard.
- 1. Start the Office Product Addin wizard
- 2. Enter details about your product
- 3. Select a distribution type
- 4. Set project and package paths
- 5. Select the type of Add-In you want to deploy
- 6. Select the location of the Add-in resource files
- 7. Choose what project or solution configuration you want to import
- 8. Select the resource files that will be added to the project
- 9. Choose the targeted office version and product
- 10. Specify the Add-in Office integration settings
- 11. Grant code trust to the add-in assemblies
- 12. Configure add-in launch conditions
- 13. Configure add-in prerequisites
- 14. Specify the languages in which to localize your package
- 15. Specify a License Agreement file
- 16. Build the project
The first step is to launch the Office Product Addin wizard. After launching Advanced Installer, you will be presented with a dialog where you can choose the type of the project you want to create:

Click on Add-Ins option from Project Type section, choose Office Add-In and press the Create Project button.
2. Enter details about your product
This first dialog of the wizard contains two fields that must be filled. The first one is the product name and the other the Organization name:
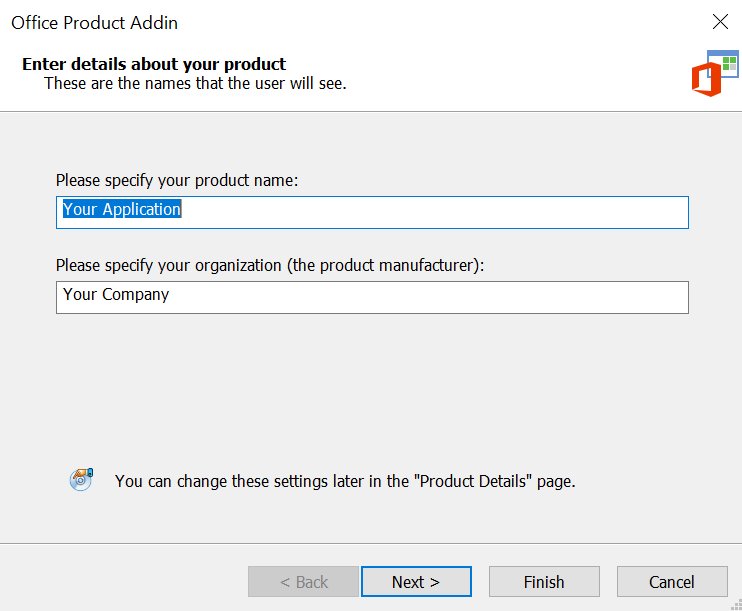
After filling these fields, click on the Next button to continue.
3. Select a distribution type
In this dialog select a distribution type for your installation package:
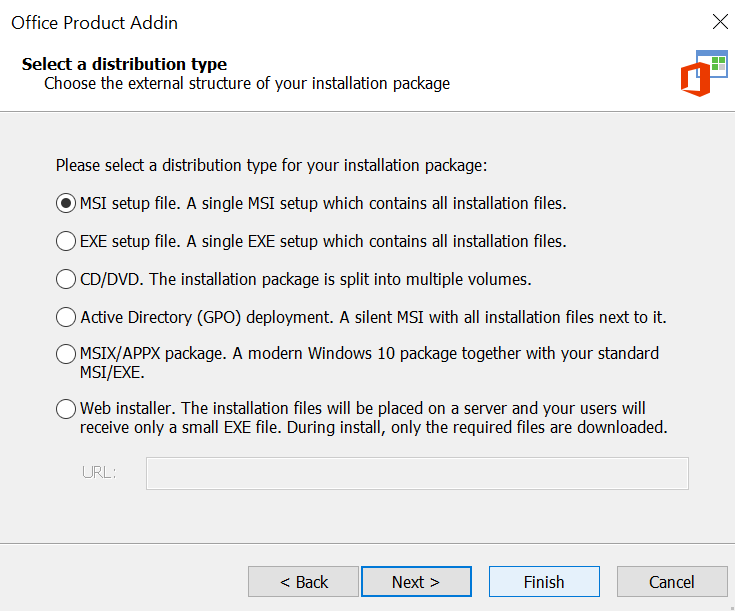
Choose one type of package type from the available options:
- MSI setup file. A single MSI setup which contains all installation files.
- EXE setup file. A single EXE setup which contains all installation files.
- CD/DVD. The installation package is split into multiple volumes.
- Active Directory(GPO) deployment. A silent MSI with all installation files next to it.
- MSIX/APPC package. A modern Windows 10 package together with your standard MSI/EXE.
- Web installer. The installation files will be placed on a server and your users will receive a small EXE file. During install, only the required files are downloaded.
After selecting one of the above options, click on the Next button to continue.
4. Set project and package paths
In this dialog you can set the paths of your project and the output folder:
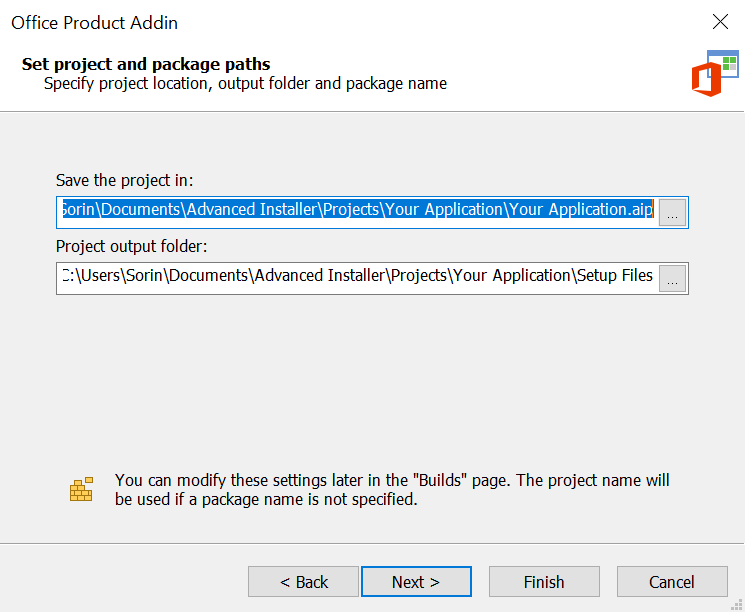
- In "Save the project in" field you can pick the folder that will contain the .AIP project that will be generated by this wizard.
- In the "Project output folder" field you can pick the folder where the installation package will be placed.
After picking the above two paths, click on the Next button to continue.
5. Select the type of Add-In you want to deploy
In this dialog you can choose the Office Add-In type:
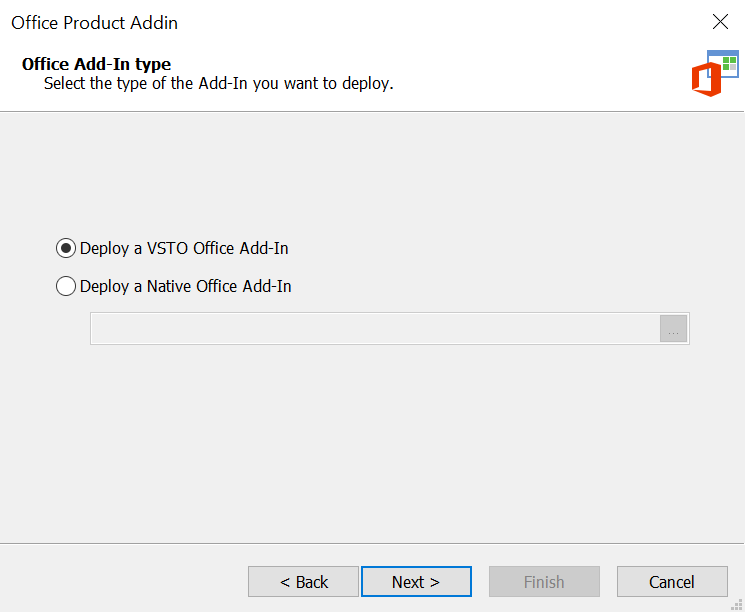
The available options are:
- Deploy a VSTO Office Add-In - this type of Add-ins are developed using Visual Studio Tools for Office
- Deploy a Native Office Add-In - use this option for native Office Add-ins : Excel Addins - *.xla and *.xlam files, Word Addins - *.dot files, PowerPoint Addins - *.ppa files, Access Addins - *.mds files, Access MDE Databases - *.mde files
Let's assume you want to deploy a VSTO Add-In. Select this option and click on the Next button to continue.
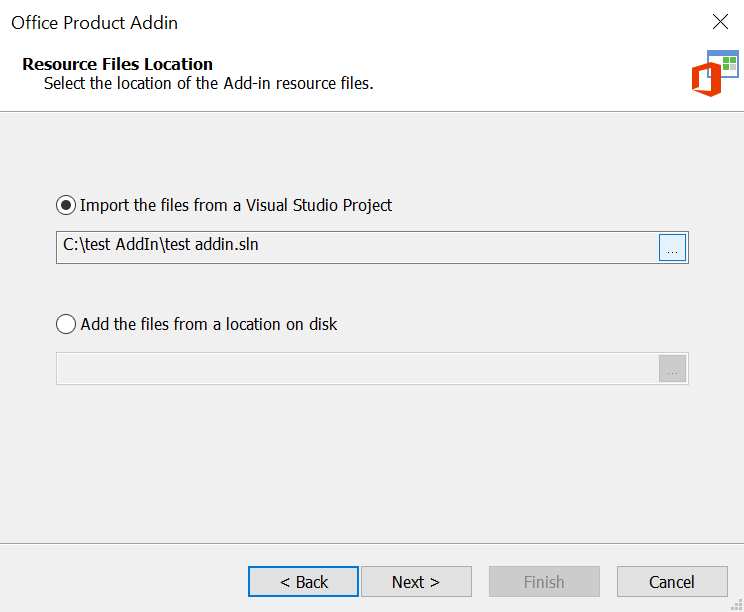
6. Select the location of the Add-in resource files
You have the option to either import the files from a Visual Studio Project or to Add the files from a location on disk
To import a Visual Studio solution pick the .sln file from disk from "Import the files from a Visual Studio Project" field and click on the Next button to continue:
7. Choose what project or solution configuration you want to import
Select the project configuration you want to import, for example Debug or Release.
You also have the option to build the selected configuration before proceeding.
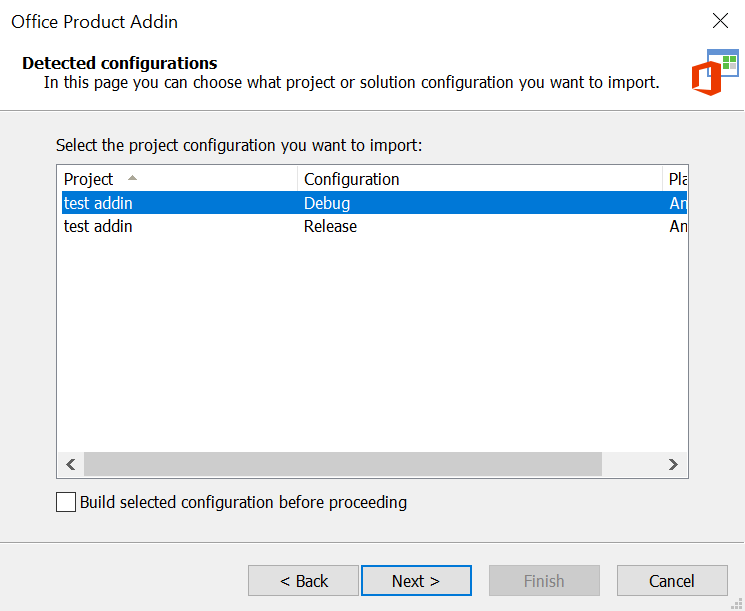
Them click on the Next button to continue.
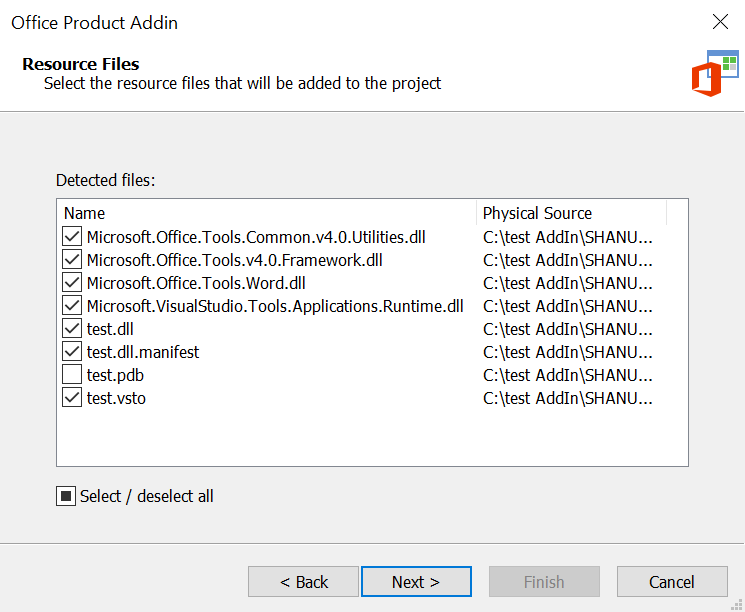
8. Select the resource files that will be added to the project
In this dialog a list of the detected resource files will be displayed. Choose the one that you want to include in your package and click on the Next button to continue:
9. Choose the targeted office version and product
The available options are:
- Select the version of the Visual Studio Tools for office to create the AddIn
- Select the targeted Microsoft Office version
- Select the targeted Microsoft Office Product
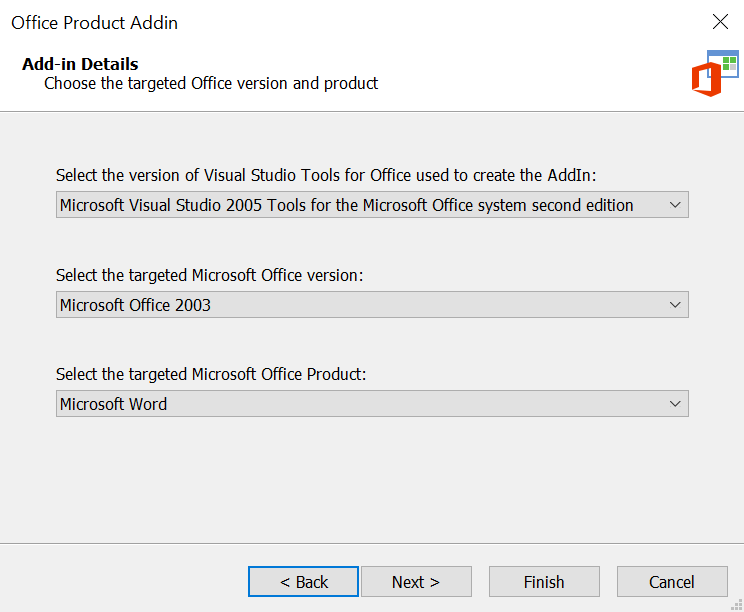
Select your desired configuration them click on the Next button to continue.
10. Specify the Add-in Office integration settings
In this dialog you can configure the following items:
- Description
- Friendly name
- Load behavior
- Manifest
- CSIDL
You cand also specify if you want to install the Addin for the current user only or for all users.
Choosing to install the AddIn only for the current user will set the
"Per user only" installation type in Install Parameters page for the resulted .AIP project.
Similary, choosing to install the AddIn for all users will set "Per
machine only" installation type in Install Parameters page.
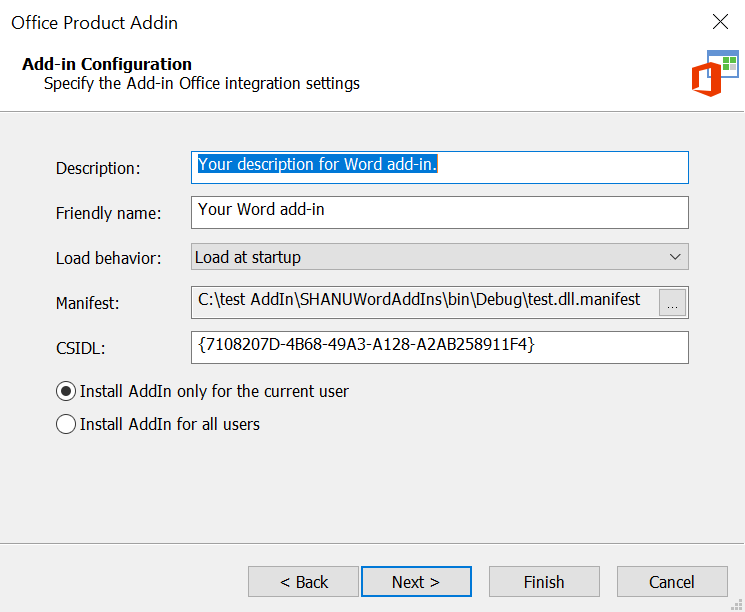
After configuring the above items, click on the Next button to continue.
11. Grant code trust to the add-in assemblies
In this dialog you can select which assembly files you want to grant trust:
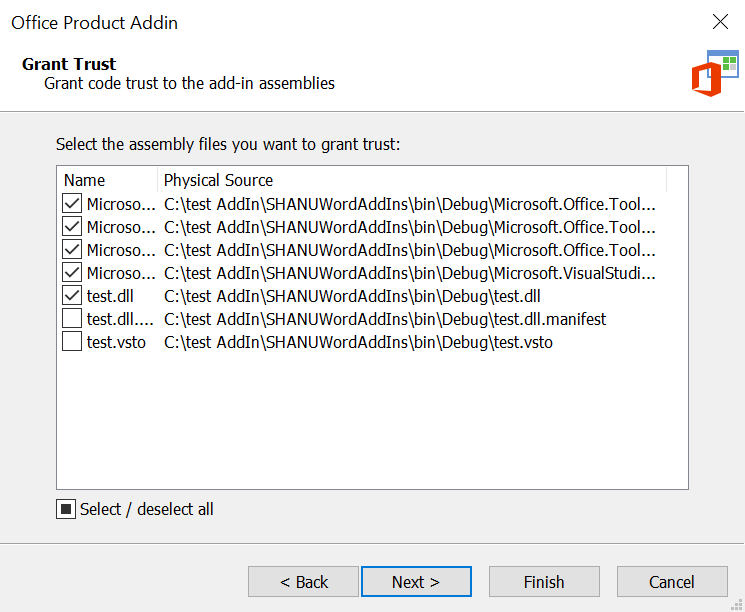
Then click on the Next button to continue.
12. Configure add-in launch conditions
In this dialog you can specify some launch conditions for your package:
- Minimum .NET version
- Whether Microsoft Visual Studio 2005 Tools for the Microsoft Office system second edition should be installed
- Whether Word 2003 Primary Interop Assembly should be installed
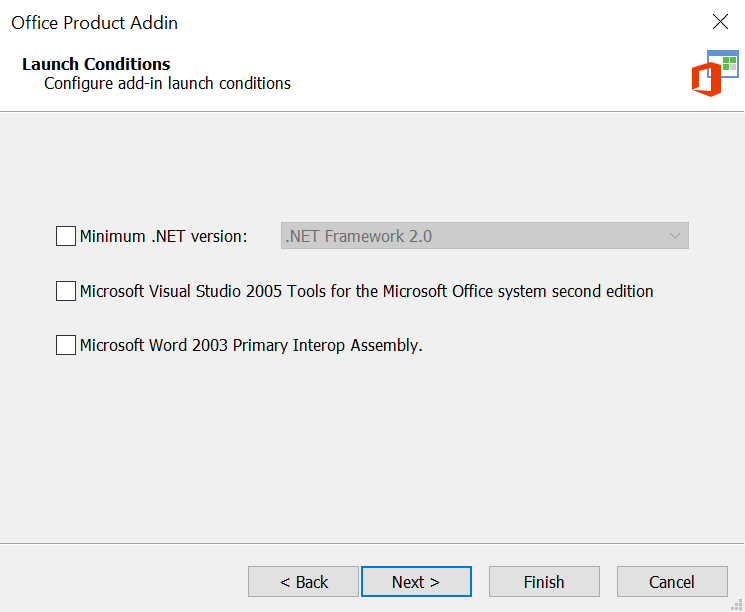
Then click on the Next button to continue.
13. Configure add-in prerequisites
In this dialog you can add the following prerequisites to your package:
- .NET Framework
- VSTO Runtime
- Office Primary Interop Assemblies
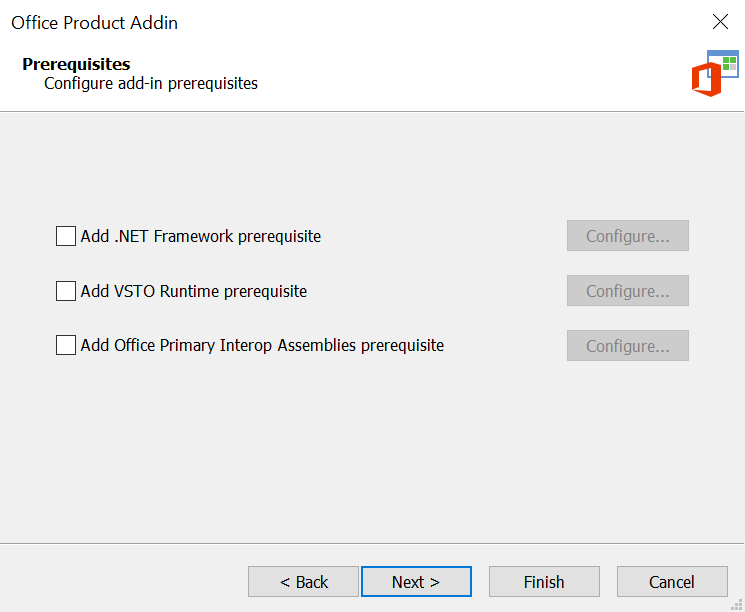
Then click on the Next button to continue.
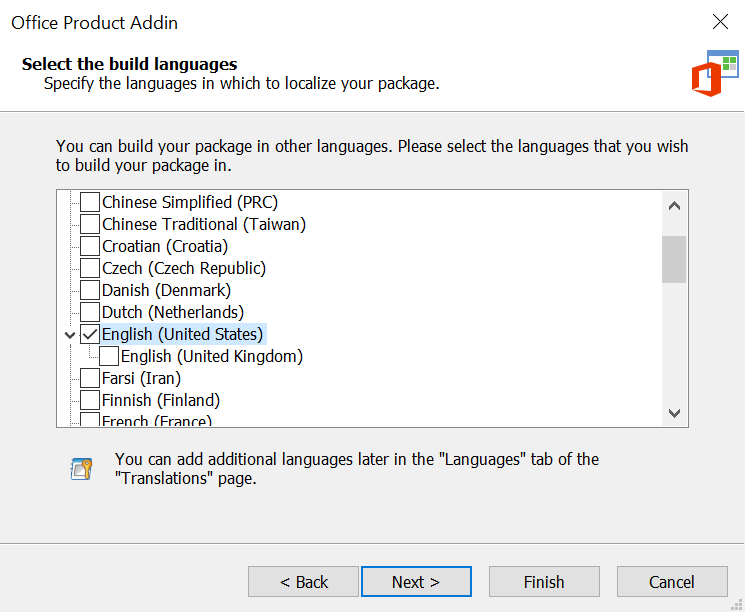
14. Specify the languages in which to localize your package
In this dialog you can choose the languages that you wish to build your package in:
Then click on the Next button to continue.
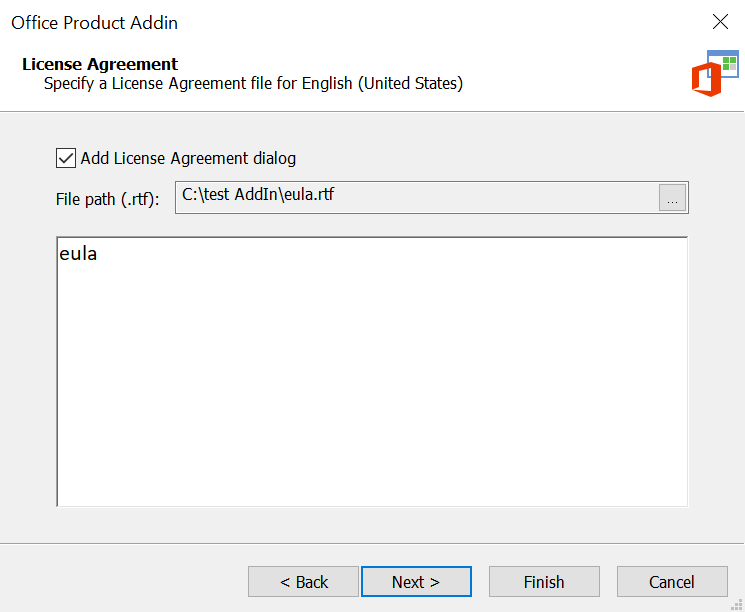
15. Specify a License Agreement file
In this dialog you can add a license agreement dialog to your package by picking a .rtf license file:
Then click on the Next button to continue.
16. Build the project
In the last dialog of the wizard you have the option to build the project immediately:
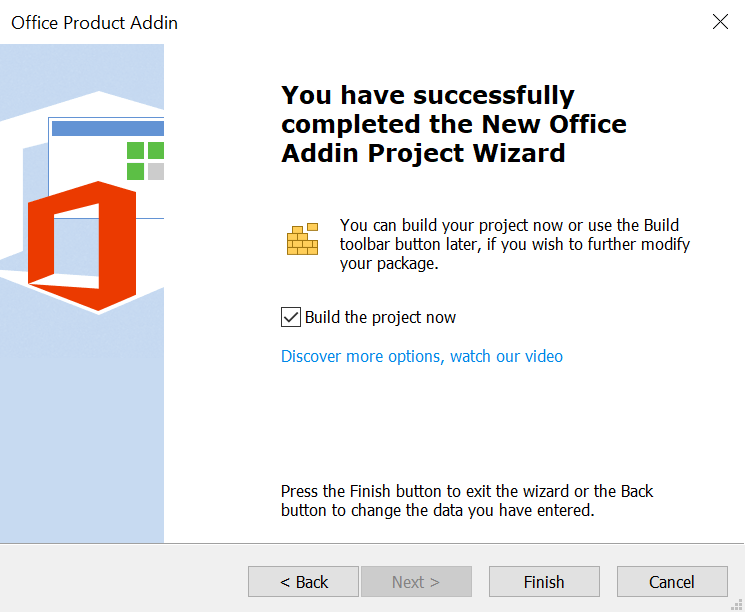
Then click on the Finish button to end the wizard to open the resulted .AIP project.