Always run EXE as administrator or in compatibility mode
Do you need to execute your application (exe file) as an administrator or apply compatibility options to it?
There are situations where we need to run applications in admin mode, such as when your application is actively modifying the system and requires permissions, or when a legacy application is not working correctly in a modern system because it needs compatibility adjustments.
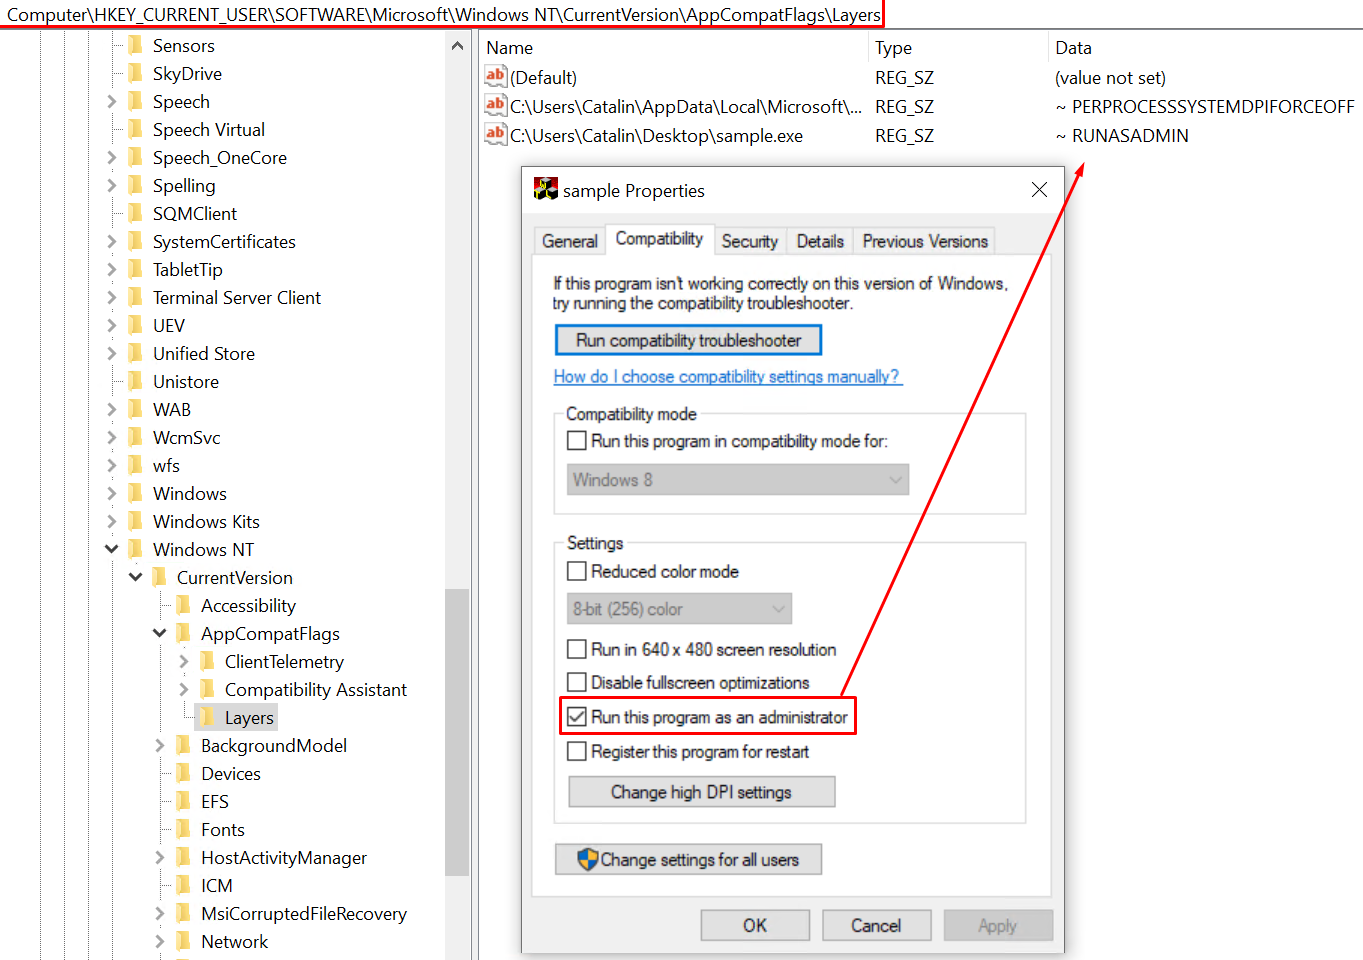
To manually set an application to run as administrator, you can right-click your EXE --> "Properties" --> "Compatibility" tab --> "Run this program as an administrator" option (or maybe "Run this program in compatibility mode for:" option).
But what if you want to do this programmatically? In this article, we'll provide a step-by-step guide to help you code your way into admin mode.
Step-by-Step: Coding Your Application into Admin Mode
1. Finding the settings
The Windows registries are critical. Whenever you tweak any settings, it's mirrored in these registries.
Opting for “Run as Administrator” or “Run this program in compatibility mode” modifies the following registry entries:
"HKCU:\Software\Microsoft\Windows NT\CurrentVersion\AppCompatFlags\Layers"
"HKLM:\Software\Microsoft\Windows NT\CurrentVersion\AppCompatFlags\Layers"

As seen in the screenshot above, when you select "Run this program as an administrator" for an executable, the "RUNASADMIN" value is added to the registry.
1.1 Scripting the Process
To automate the process, scripting is your best ally. While you can use different scripting options like VBS or .DLL/.EXE using C#, this guide emphasizes PowerShell.
Here's a rudimentary PowerShell script for the task:
# The registry key that stores the option
$runAsAdminReg = "HKCU:\Software\Microsoft\Windows NT\CurrentVersion\AppCompatFlags\Layers"

# The path to our .EXE application
$name = "C:\Users\Catalin\Desktop\sample.exe"

# The registry value for our option
$value = "RUNASADMIN"

# The cmdlet that adds the value
New-ItemProperty -Path $runAsAdminReg -Name $name -Value $value -PropertyType string -Force | Out-Null
For compatibility modes, adjust the $value variable to an appropriate option, like:
- WIN95
- WIN98
- WIN4SP5
- WIN2000
- WINXPSP2
- WINXPSP3
- VISTARTM
- VISTASP1
- VISTASP2
- WIN7RTM
- WINSRV03SP1
- WINSRV08SP1
- WIN8RTM
1.2 Using Advanced Installer to Run EXE as Administrator
Now that we know how to make a program always run as an administrator or run in compatibility mode programmatically, let’s see how we implement it through the Advanced Installer.
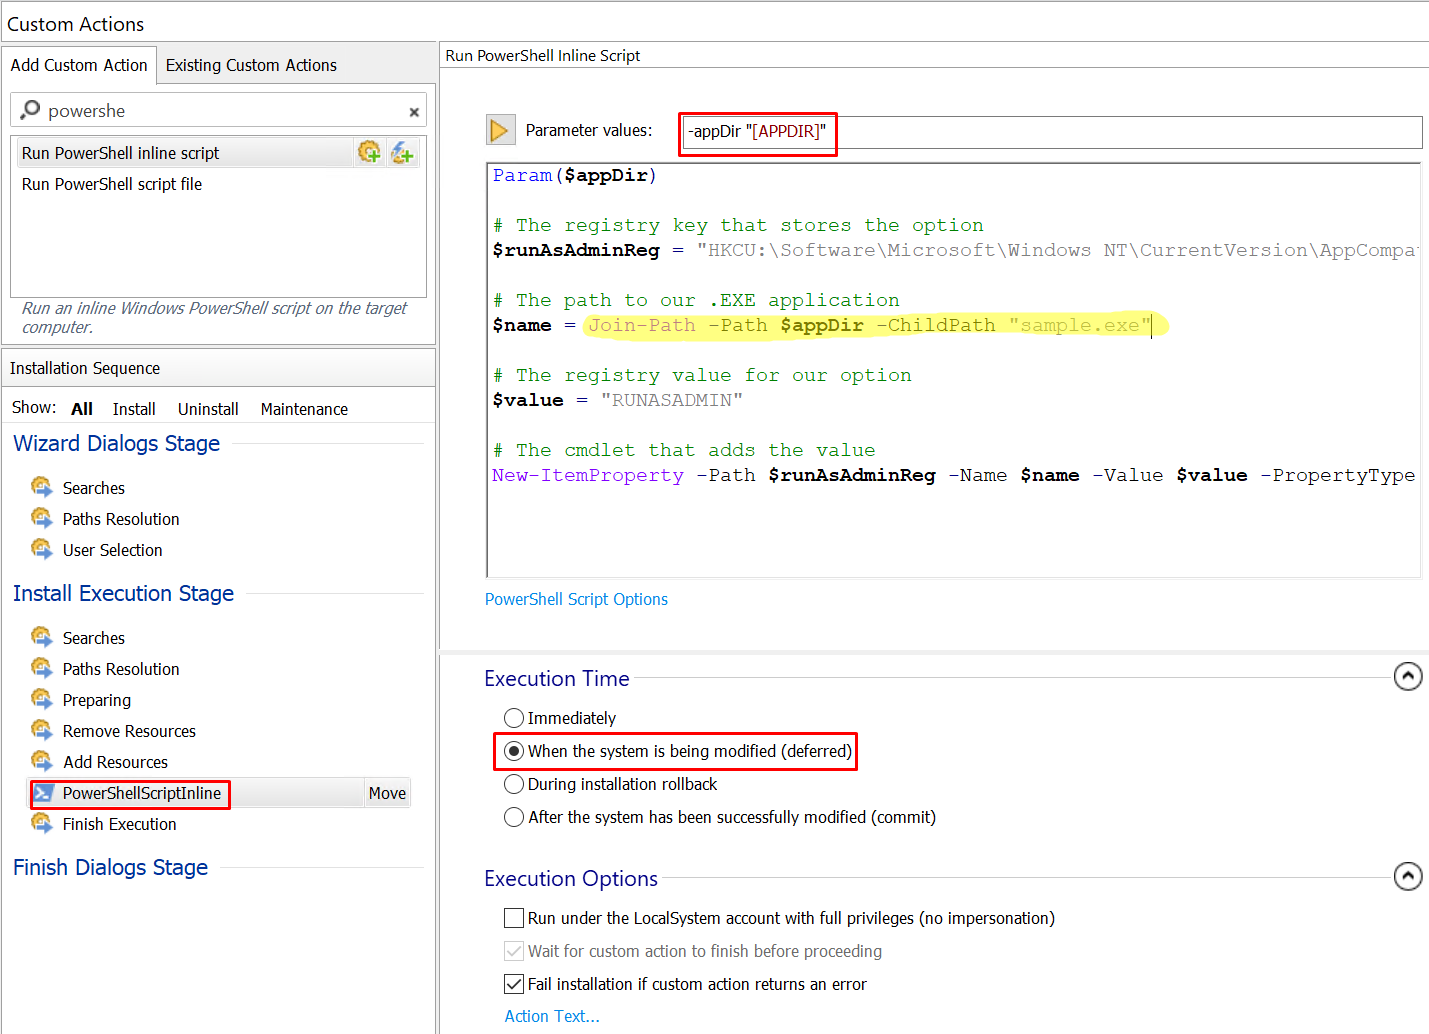
You can add the PowerShell script as a "Run PowerShell Inline Script" custom action. The steps to add the script are:
- Go to the Custom Actions Page.
- Use the "Add custom action with sequence" button, located adjacent to the custom action name.
- Schedule the custom action after the "Add Resources" action group.
- Set the custom action execution time to "When the system is being modified (deferred)".
- Uncertain about your setup's platform? Simply select "Auto" for "Platform".
- Use of the installer properties to avoid hard-coded paths in your script. If the .EXE is added in the Files and Folders page, under the "Application Folder" folder, your script can look like this:

Here, we are taking the path that is stored in the "APPDIR" property and adding the name of our .EXE to the path.
Remember: For a seamless script execution, administrative rights
are crucial, especially for registry write operations.
- To wrap up, simply click "Build" on the top left.
Conclusion
Voilà! You're now adept at configuring any EXE application to launch as an administrator or with the desired compatibility adjustments.
Any queries or guidance needs? We are here to assist. Dive deep, code smart, and elevate your software prowess.