Creating an Enterprise package
The following article uses options that are available starting with the Enterprise edition and project type.
This tutorial will expose advanced features that you can add on top of the Professional tutorial settings. It is addressed to those who have completed the Professional Installation tutorial.
- 1. Create project
- 2. Enter product details
- 3. Add files and folders to your project
- 4. Working with XML files
- 5. Edit dialogs to get user input
- 6. Switch to the view to add the SQL script
- 7. Retrieve values from XML file during the upgrade
- 8. Configure automatic task to check for updates
- 9. Create a firewall exception for your application
- 10. Installer Analytics
- 11. Protect from unauthorized distribution using the Licensing support
- 12. See also
1. Create project
Let’s suppose that you need to create an installer for an application that requires some interaction with the user during installation, such as:
- During installation, the user needs to select a server and database to run some SQL scripts
- Selected database and server are saved in the config file for the connection string attribute
After launching Advanced Installer, you will be presented with a dialog where you can choose the type of project you want to create.
Select Enterprise and press the Create Project button. The new project has been created and from now on you will edit it.
Save the project and give it an appropriate name - let's say "Tutorial" for this example.
English is the default project language, but you can change it to any of the languages known by Advanced Installer.

2. Enter product details
Now you can see the main view split into two panes. In the left pane, you can see all the options you have to edit in your current project, grouped in categories.
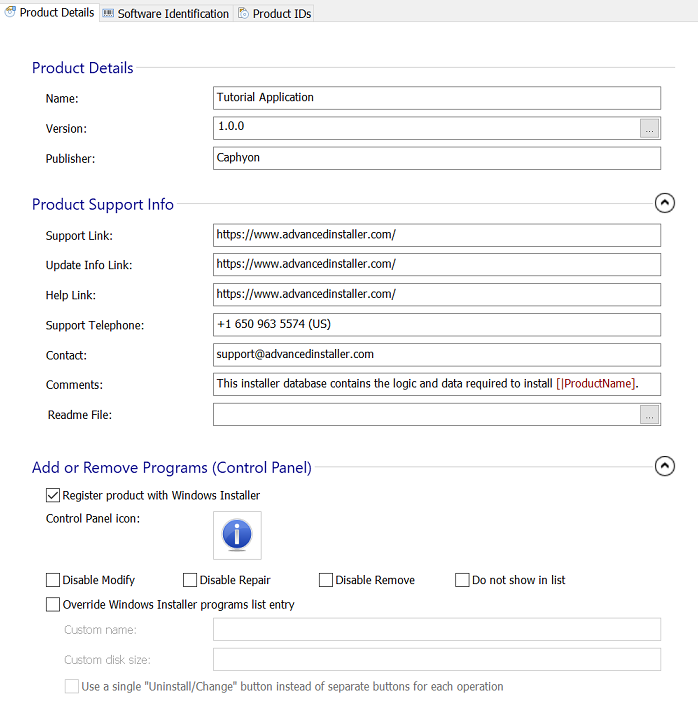
Switch to “Product Details” page to set the information seen by the user for your installation package. Fill the fields in the right pane with the corresponding data.
3. Add files and folders to your project
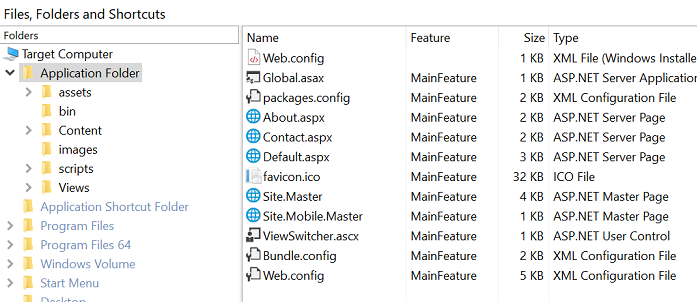
The next step is to add to the project the files and/or folders that compose your application.
Select “Files and Folders” from the “Resources” menu on the left pane.
Click on the [ Add Files ] toolbar button and select the files of your application or you can directly add them to the setup by using a drag-and-drop operation.
4. Working with XML files
XML files can be added in Advanced Installer as regular files or can be imported as XML files.
The config file that you need to update with the user input should be imported as an XML file by clicking on Import Files - Import XML toolbar button. When adding a file in XML format in Advanced Installer, the XML file can be edited in the XML Editor.
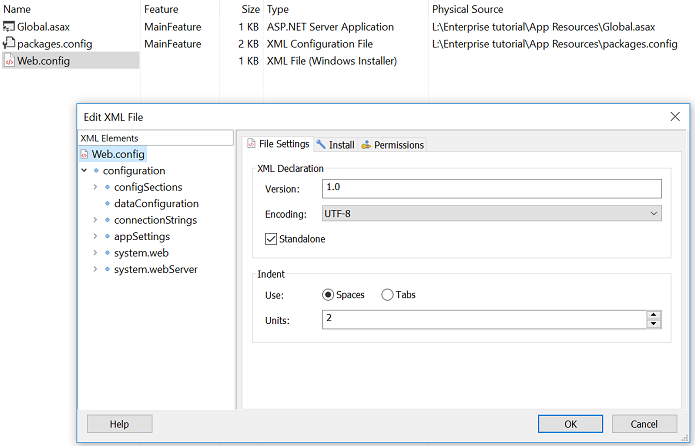
Take a look on the How to import and edit an XML file article that explains how to import and edit XML files into your installation project.
The attribute that we are trying to update looks as follow in the config file:
        <connectionStrings>
           <add name="ApplicationTutorial" providerName="System.Data.SqlClient" connectionString="##APPLICATION_CONNECTION_STRING##" />
       <!--<add name="ApplicationTutorial" providerName="System.Data.SqlClient" connectionString="Server=myServerAddress;Database=ApplicationTutorial3May;User ID=sa;Password=sa123" />-->
</connectionStrings>After loading the XML attribute that needs to be updated in the XML Editor, replace the ##APPLICATION_CONNECTION_STRING## with a value public property.e.g. APPLICATION_CONNECTION_STRING
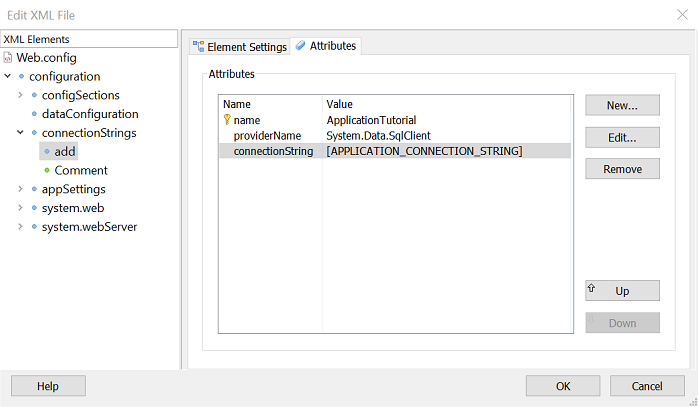
During dialogs, the APPLICATION_CONNECTION_STRING property is set with the connection string. We will later see how to set the APPLICATION_CONNECTION_STRING depending the authentication method that was selected by the user during installation.
5. Edit dialogs to get user input
Before working with the Dialog Editor and change dialogs, it is recommended to select the theme of the installer. This is happening because any change to the dialogs is not saved when changing the installer’s theme, the following warning being displayed:
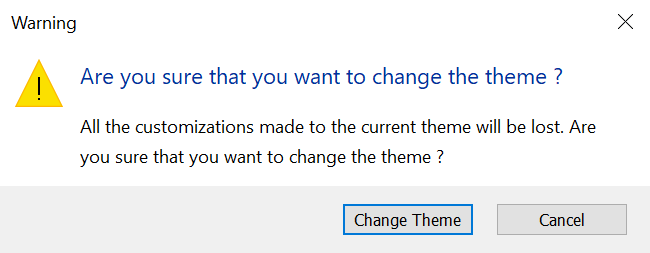
In this tutorial, the Surface -> WhiteSurface was selected as theme of the installer.
Select the Dialogs page from the left view. The Dialog Editor allows you to customize the existing install dialogs or to create new custom dialogs.
To connect to the SQL Server, add the predefined SQLServerConnectionDlg dialog from the Build-In list of Dialogs.
This predefined SQLServerConnectionDlg dialog has all the predefined functionality for both Windows Authentication and SQL Authentication. Once this dialog is added, a server and database browse operations are added for free. Also, you can select the authentication method and check the server connection.
Depending on the theme that was selected, the dialog will look accordingly:
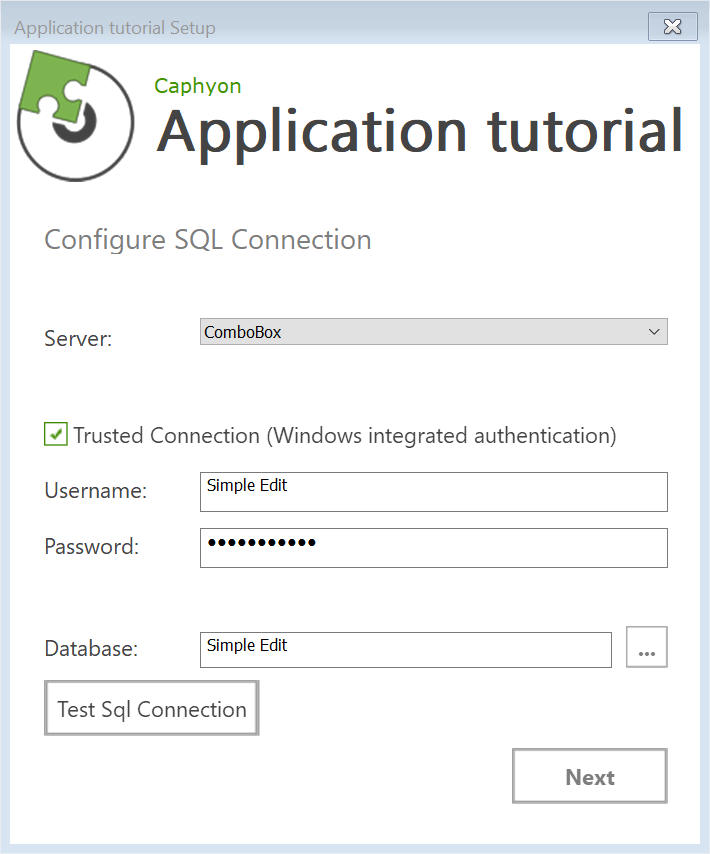
As stated before, we need to set the APPLICATION_CONNECTION_STRING property with connection string that will be used for database connection. Notice that the user can either select the SQL Authentication (with username and password) or the trusted connection where no username or password are being provided.
That means, the APPLICATION_CONNECTION_STRING property will be set depending on the selected option by the user.
This can be done using the Set installer property value- SetProperty event. In fact, two events need to be used. These events can be executed on the Next from this dialog, so that when the user will move forward with the installation, the events will be executed.

The APPLICATION_CONNECTION_STRING is set depending if the SQL_TRUSTED_CONNECTION property is set or not. The SQL_TRUSTED_CONNECTION property is assigned to the Trusted Connection (Windows integrated authentication) checkbox from the dialog.
When the checkbox is selected, the related property assigned to it is set, otherwise the property is empty.
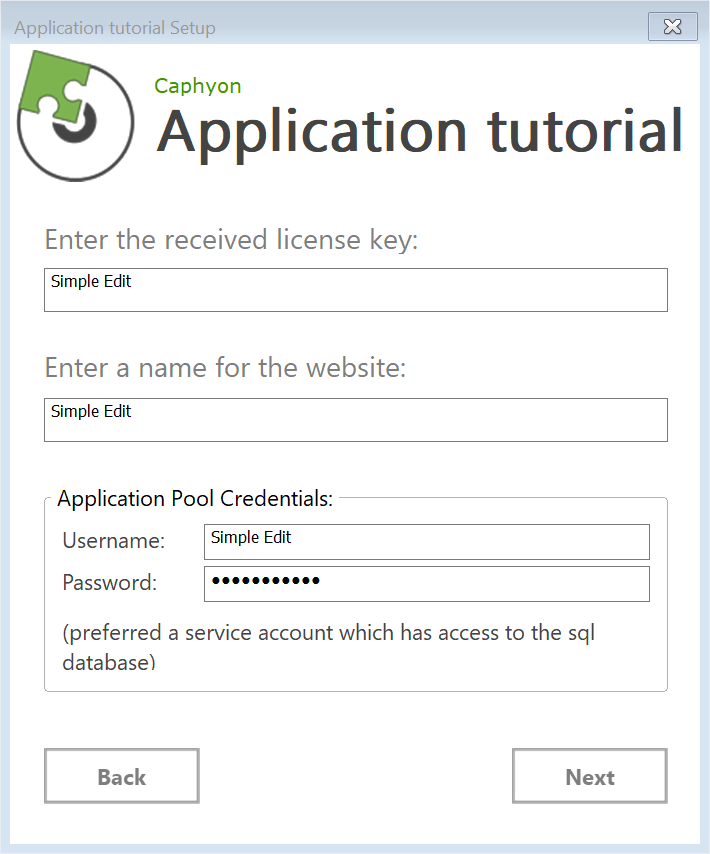
If another other user input is required during installation, you can add a new dialog after the SQLServerConnectionDlg and edit accordingly:
6. Switch to the SQL Databases view to add the SQL script
The SQL Database view allows you to configure SQL scripts, queries or SSRS reports that will be executed during installation. It's useful when the application you are installing depends on certain database content and configuration or if the installation needs to upload reports, datasets or data sources to an instance of Microsoft SQL Server Reporting Services.
In this case, we already have some functionality, the Server and Database browse operations were added when adding the built-in SQLServerConnectionDlg dialog.
The SQL Script can be added under PredefinedConnection that is using the selected database and server by the user during installation.
Use the SQL Script toolbar button to add the script. You can add an existent script file from your hard drive or a new inline script.
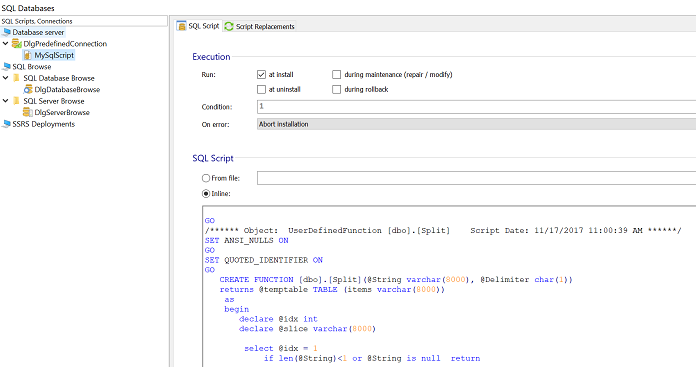
If some values needs to be replaced in the sql script go to the SQL Script Replacement tab. This tab enables you to replace certain sections of your script. These replacements can use installer properties and they are executed when the package is built.
The SQL Database is a complex feature, it is highly recommended to take a look on the SQL/ODBC how-to for configuring ODBC and SQL features.
7. Retrieve values from XML file during the upgrade
During an upgrade, it is recommended to retrieve the entered values by the user when installed the first time the application. This way, the user will not have to enter those details once again. Also, you can prevent entering wrong information during the upgrade operation.
For this, the predefined support for XML file comes in handy. The XML Search can be useful during the installation, upgrade or removal process in order to copy or delete certain files or features based on the content of an XML file.
In the Search view from the left menu, use the [ New XML Search ] toolbar button or the “New XML Search” context menu item. The resulted search operation will be added in the left-side tree with its name displaying the search path and the XML filename. It can not be renamed as it will always display the search path and the XML file on which the search operation is performed.
Take a look on the Creating an XML Search tutorial with related information for hints and guidance.
8. Configure automatic task to check for updates
Any application needs updates. Using our Updater, your users will always have access to the latest version of the application and no code is required to be written for this. Take a look on the How the Updater works article for a better understanding of this feature.
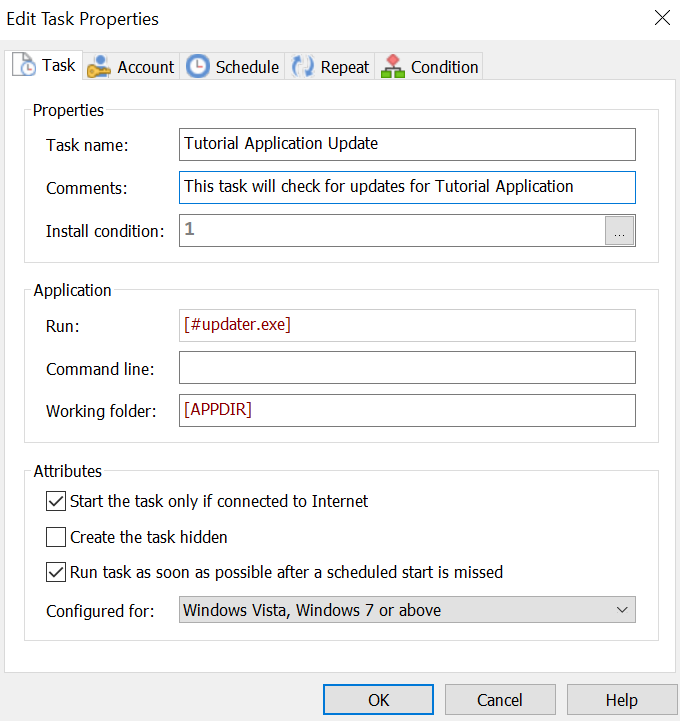
The Updater is an executable tool whose roles are to check for updates, inform the user of their presence and offer to download and install them. After launching the Updater, it checks if a newer version of the application exists by using a predefined rule.
The Updater can be configured for a manual check for updates, or automatically through a scheduled task. Let’s face it, most software have automatic updates capability, the user is not checking for updates manually (e.g. from a shortcut desktop) or worse, check for updates on the vendor’s website.
With the predefined support from the Updater and the Scheduled Tasks these 2 features combined will ensure the user will have access to the latest version installed and this will be happening automatically behind the scene. Also, you don’t have to write any code to implement this in the installer.
First, enable the Check for updates using Advanced Updater option in the Updater view
Select the Automatic: using a Windows scheduled task option from the Updater Execution section. This way a Windows scheduled task will be created for Updater executable file. Click [ Configure Task ] to specify the scheduled task's behavior.
9. Create a firewall exception for your application
In the Windows Firewall page you can add or import applications or ports that you want to authorize / register in Windows Firewall. If your application requires inbound network connections and Windows Firewall is turned on, your connections will be blocked by the firewall (in the best case scenario the user will be prompted to allow a connection) unless you register a proper firewall exception rule. You can choose to authorize a certain TCP or UDP port or authorize a whole process (your application).

The firewall provides a barrier against network-based intrusions. It blocks unsolicited incoming traffic, and makes the system mostly invisible on the internet by rejecting Internet Control Message Protocol (ICMP) requests.
Advanced Installer comes with a predefined list of custom actions that may come in handy to automatically check if a certain port is free or get a free port that will be used by the application. For details, check the Check TCP port and Get a free TCP port.
10. Installer Analytics
In the Analytics Page, you can enable and configure automatic tracking of your application's installs. You get detailed information about which versions are installed more often, what is your upgrade rate, exceptions occurred during installation, OS environment details, the geographic distribution of your users base and much more.

Each distributed package will send out data to Advanced Installer's Analytics servers enabling you to view reports and installation statistics from all your clients.
Using the exclusive Installer Analytics, information regarding installation are available in real time. Installer Analytics will provide with really great insights on how customers use the product. It will help to improve the overall user experience and conversion rates.
11. Protect from unauthorized distribution using the Licensing support
In the Licensing page you can add licensing support for your application.
Trial and Registration feature allows your users to evaluate your product before purchasing. It also enables users to register after they have received a valid key. After the trial period expired the user will be able to run your application only after registration.
Trial and Registration main characteristics:
- After the trial limit has been reached the application will run on the target machine only after user registration.
- Registration keys are generated and validated using cryptographic secure algorithms based on RSA public-key signature.
- Registered copies of your product revert to trial mode when copied on another machine.
- The user is assisted in evaluating or registering your product by a modern Graphic User Interface.
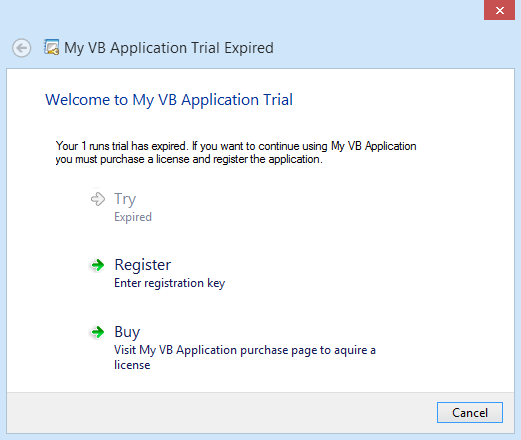
Select the “Trial & Registration” list/tree element and use the [ New Trial ] toolbar button, context menu item in order to add a licensing configuration.
For scenarios where the license will only be valid on the system which the license was requested, the Computer specific option needs to be selected for the License Format in the Licensing Registration TabRegistration tab.
Using this option, the license cannot be moved from one computer to another, the license file will be invalid.
The licensing library defines some properties that you can read from your application. Take a look on the Trial and Licensing Properties article for related information.
The Licensing support is a complex feature, a detailed list of tutorials on how to integrate the Licensing support with your application are available: