Creating packages in other languages
The following article uses options that are available starting
with the Professional edition and project
type.
This tutorial will guide you step by step into the creation of an MSI package in languages other than that of the project. It is addressed to those who have previous experience in using the Advanced Installer application to create MSI packages, but only in English.
1. Create project
Follow the Professional Installation tutorial to create the Advanced Installer project. Select English as the project language.
2. Add other languages to build
It is recommended that you do not add other languages until you
have completed all the steps for creating your package (adding files,
registry entries, etc.).
Let's specify the languages in which we want to have MSIs created.
![]() Switch to the
“Translations” page by selecting it in the left-side
panel.
Switch to the
“Translations” page by selecting it in the left-side
panel.
![]() Select the
“Languages” tab.
Select the
“Languages” tab.
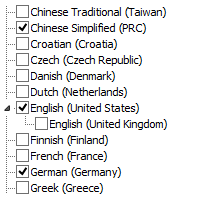
In the tree, select the languages you want to generate MSI packages in. Let's say Chinese Simplified and German.

3. Build the MSI packages
Now that you have specified the languages you want MSIs in, let's build them.
![]() Click the
toolbar button and a “Build
Project” dialog will appear showing the build progress.
Click the
toolbar button and a “Build
Project” dialog will appear showing the build progress.
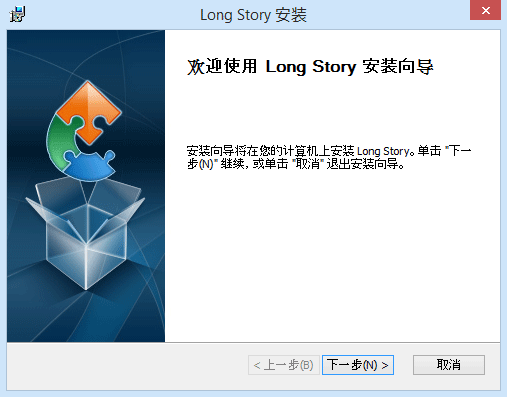
To find the created MSI packages, look on your hard drive in the folder where the project MSI is being created. The localized MSIs will be built in sub-folders, named by their language identifiers. In our case, a folder “zh” will contain the Chinese build and a folder “de” the German one. Run the Chinese MSI.

4. Expand package localization
By default, Advanced Installer will attempt to translate only package elements that are specified for translation. This includes all UI strings and certain Windows Installer Properties. However, sometimes you want to translate other elements as well.
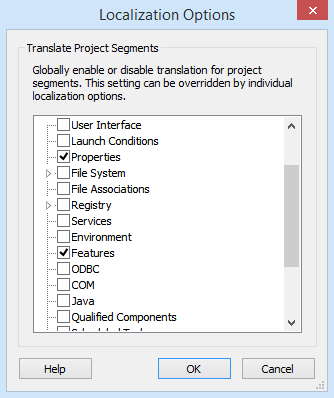
Go to the Project Strings Tab from the Translations page, click on in the “Translations” group. This is the Localization Options Dialog. Let's select “Features” and click .

If we build again, Advanced Installer will try to translate the “Features” localizable strings; the main feature's Title and Description, but it won't have translations for them so the Localization IDs will be displayed instead.
5. Create translation dictionary
Advanced Installer translated almost all the texts, only that in certain cases - like the product name - it just didn't have the corresponding German or Chinese string. So we have to help it with a Translation Dictionary.
There are two ways of translating project strings to a custom
dictionary and including it into your project. One is using Advanced
Installer's predefined editor from the Project Strings Tab -> "Project Strings" section. The
other involves manually editing the dictionary file and is described in
this tutorial.
Still in the Project Strings Tab from the Translations page, click on , also in the Translations group. The wizard will create a dictionary file containing all the strings without translation in one of the build languages.
![]() The created dictionary will be
added automatically to the translations list. Switch to the Dictionaries Tab and notice the dictionaries added to your
project.
The created dictionary will be
added automatically to the translations list. Switch to the Dictionaries Tab and notice the dictionaries added to your
project.

6. Translate dictionary
When you need to translate project strings to a custom dictionary, you can do this by editing it directly from our GUI. Use Advanced Installer's predefined dictionary editor from the Project Strings Tab -> "Project Strings".
Optionally, since the dictionary file is a regular XML file saved in the UTF-8 encoding you can also edit it with any Unicode aware editor that can save in UTF-8. Notepad on Windows is such an editor, although a fully featured validating XML editor would be preferred.
After opening the dictionary file in Notepad just translate the entries you want and comment out (or delete) the rest.
You will notice that the dictionary also contains the strings in one
or more "start" languages. Those are placed there only to help you in
your translation. Do not edit them, as they are being ignored at
build.
<?xml version="1.0" encoding="UTF-8" standalone="yes"?>
<DICTIONARY type="multilanguage">
  <ENTRY id="Feature.Title.MainFeature">
    <STRING lang="en" value="MainFeature"/>
    <STRING lang="zh" value="Main Chinese Feature"/>
    <STRING lang="de" value="Main German Feature"/>
  </ENTRY>
  <ENTRY id="Property.ProductName">
    <STRING lang="en" value="Long Story"/>
    <STRING lang="zh" value="Long Chinese Story"/>
    <STRING lang="de" value="Long German Story"/>
  </ENTRY>
</DICTIONARY>Build and run the Chinese MSI again. Note how the strings were now taken from the supplied dictionary.
