Multiple Build Configurations
The following article uses options that are available starting
with the Enterprise edition and project
type.
This tutorial will guide you in creating a project with multiple build configurations.
Lets suppose our product is a Java application and we need to distribute it in three different forms: one for MacOS X and two for Windows (with and without bundled JRE).
- 1. Add your application files to the project
- 2. Create a new build configuration
- 3. Create and configure your Java products
- 4. Select the JRE to be bundled in the product
- 5. Configure build properties
- 6. Create a second feature and add files to it
- 7. Add a prerequisite for a build configuration
- 8. Configure a Mac OS X Build
- 9. Build your project
- 10. Video tutorial
1. Add your application files to the project
![]() Select “Files and
Folders” from the “Resources” menu on the
left pane and add your application files.
Select “Files and
Folders” from the “Resources” menu on the
left pane and add your application files.
2. Create a new build configuration
![]() Go to the Builds page by clicking on
“Builds” on the left pane.
Go to the Builds page by clicking on
“Builds” on the left pane.
![]() Use the toolbar button to add a new build configuration. Rename
it "BuildWithJre". This build will contain the bundled JRE.
Use the toolbar button to add a new build configuration. Rename
it "BuildWithJre". This build will contain the bundled JRE.
3. Create and configure your Java products
![]() Go to the Java Products page by clicking on
“Java Products” on the left pane page
menu.
Go to the Java Products page by clicking on
“Java Products” on the left pane page
menu.
![]() Create a new Java Product
by clicking on the toolbar button and
configure it as necessary.
Create a new Java Product
by clicking on the toolbar button and
configure it as necessary.
4. Select the JRE to be bundled in the product
![]() Go to "Settings", select
"BuildWithJre" from the "Build" ribbon section and
press the "Add JRE Bundle..." button to select the desired
JRE.
Go to "Settings", select
"BuildWithJre" from the "Build" ribbon section and
press the "Add JRE Bundle..." button to select the desired
JRE.
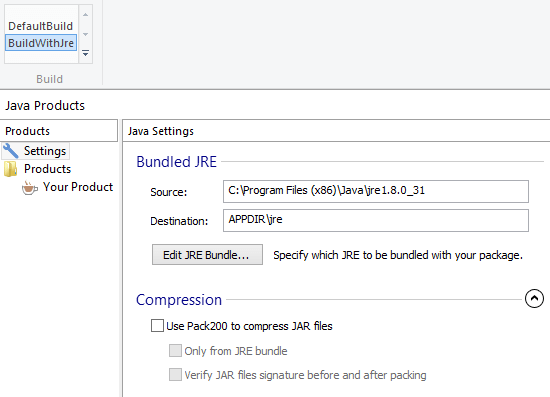
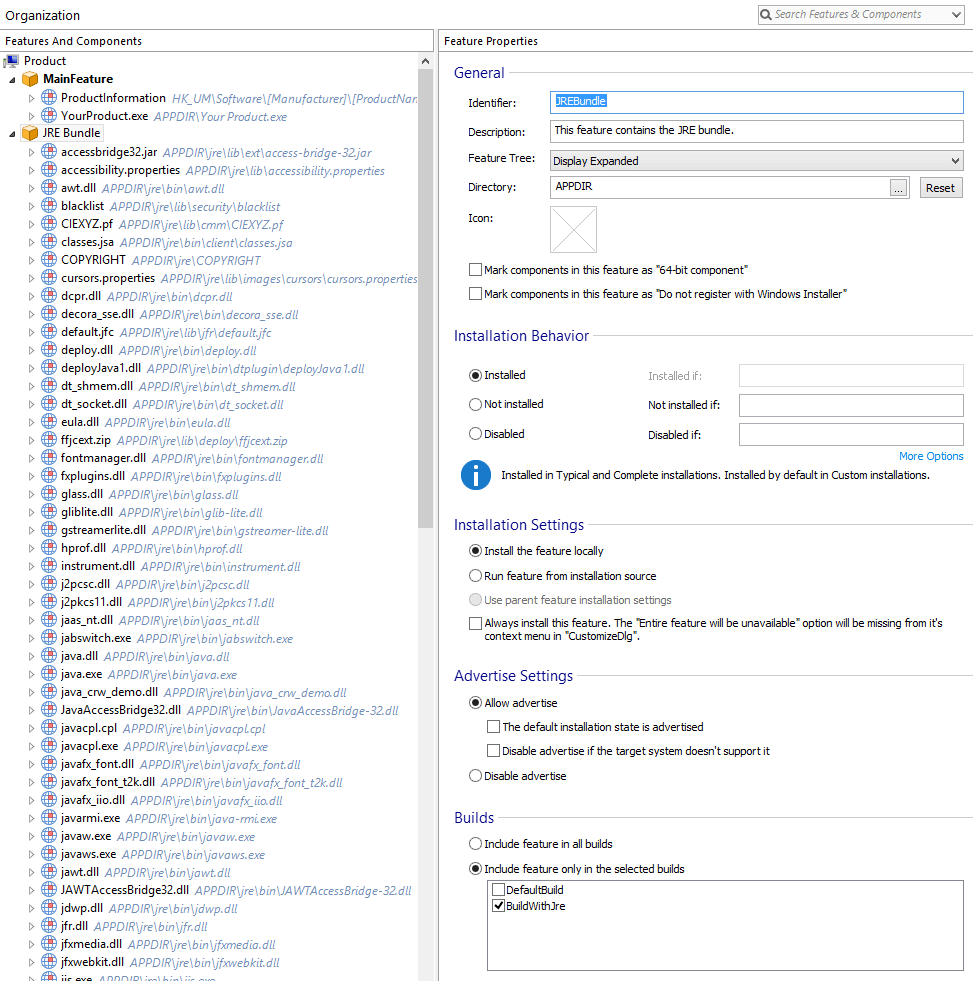
This operation automatically created a new feature called "JRE Bundle" and added all JRE files to it.
This feature will also be automatically marked to be included
only in the "BuildWithJre" build.
5. Configure build properties
![]() The "DefaultBuild" build will use the
default output configuration (MSI, with one cab file inside), while the
"BuildWithJre" build will be configured to use LZMA compression (EXE, with all
files inside). These settings will be independently
configured for each of the project builds. Select a build from the
"Builds" pane and then edit its properties in the "Configuration"
tab.
The "DefaultBuild" build will use the
default output configuration (MSI, with one cab file inside), while the
"BuildWithJre" build will be configured to use LZMA compression (EXE, with all
files inside). These settings will be independently
configured for each of the project builds. Select a build from the
"Builds" pane and then edit its properties in the "Configuration"
tab.
6. Create a second feature and add files to it
![]() Go to the Organization page by
clicking on “Organization” on the left pane page
menu.
Go to the Organization page by
clicking on “Organization” on the left pane page
menu.
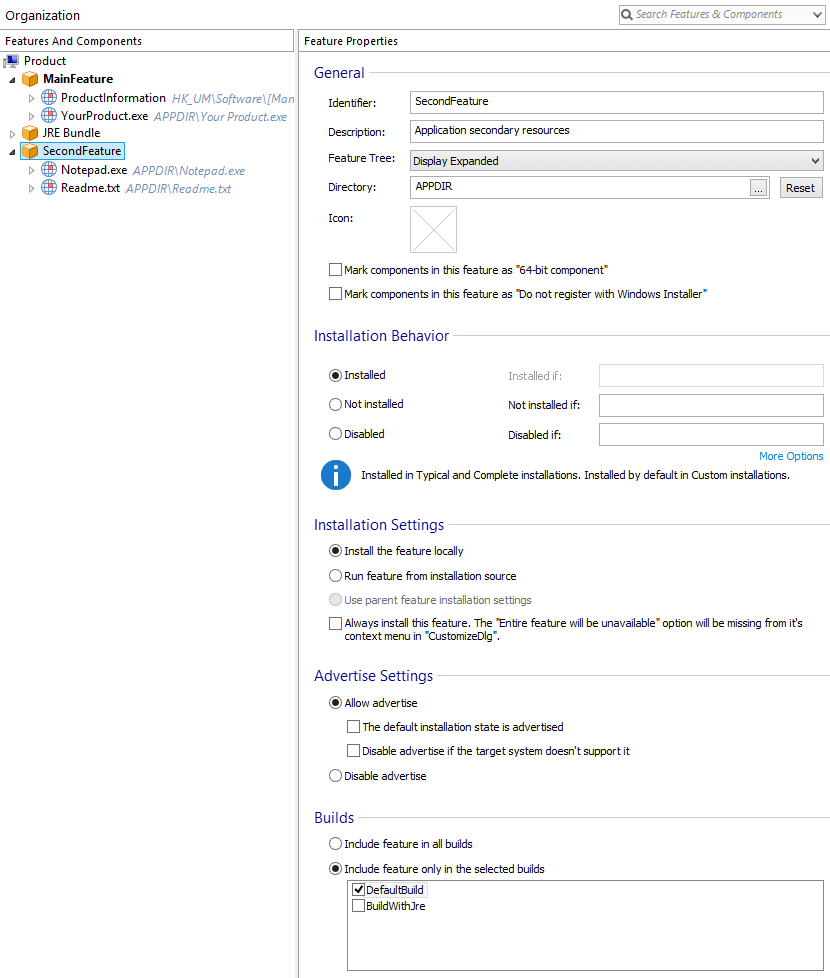
![]() Use the toolbar button to add a new feature named
"SecondFeature".
Use the toolbar button to add a new feature named
"SecondFeature".
In the "Feature Properties" pane choose the "Include feature only in the selected builds" option and select only the "DefaultBuild" configuration in the list.
7. Add a prerequisite for a build configuration
![]() Go to the Prerequisites
page by clicking on “Prerequisites” from the
“Requirements” menu on the left pane.
Go to the Prerequisites
page by clicking on “Prerequisites” from the
“Requirements” menu on the left pane.
In the "Additional Packages" pane click on and select Java -> Java Development Kit.
For more information on how to set "Prerequisites" please see: Prerequisites Page - Installer Project.
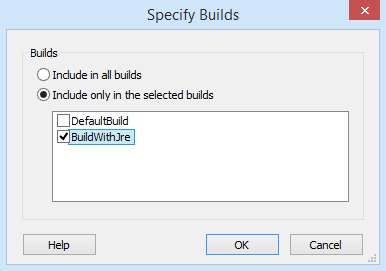
From this prerequisite's context menu select "Builds..." (CTRL + B), and choose to include it only in the "BuildWithJre" build configuration.
8. Configure a Mac OS X Build
![]() Go to the Build page by clicking on
“Build” on the left pane.
Go to the Build page by clicking on
“Build” on the left pane.
![]() Use the toolbar button to add a Mac OS X build
configuration named "BuildMacOS". This build will contain all the Java
products in the project and all the files that were selected in the
Mac OS X settings tab from the Java Products.
Use the toolbar button to add a Mac OS X build
configuration named "BuildMacOS". This build will contain all the Java
products in the project and all the files that were selected in the
Mac OS X settings tab from the Java Products.
9. Build your project
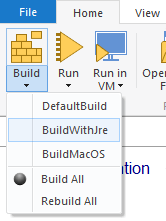
![]() You can build all the output
configurations at once or you can choose to build only a certain build
configuration by selecting it in the "Build" drop-down menu.
You can build all the output
configurations at once or you can choose to build only a certain build
configuration by selecting it in the "Build" drop-down menu.
