How to create an MSIX App Attach Image
The following article uses options that are available starting with the Professional edition and project type.
This article will guide you step by step on how to create an MSIX App Attach image using Advanced Installer.
1. What is an MSIX App Attach image and what it is used for?
An MSIX App Attach uses VHDs - virtual hard disks (.VHD,.VHDX, and .CIM files) to deploy applications to active user sessions in Azure Virtual Desktop instead of the classic MSIX/MSIXBUNDLE package.
For more detailed information regarding MSIX App Attach please see our blog article: MSIX App Attach Step-by-Step Guide: How to configure MSIX App Attach for Azure Virtual Desktop
2. Create Project
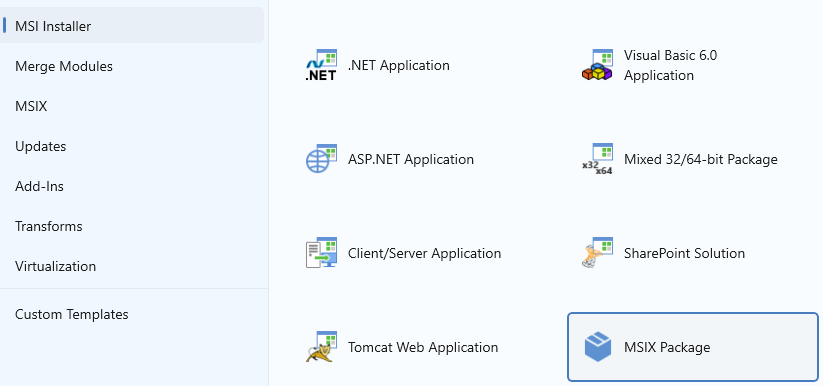
The first step is to create a new MSIX Package type project from Advanced Installer. To achieve this, just go to Start Page, click on MSI Installer category and choose MSIX Package:

3. Configure the installer project
In this step configure your .AIP project to suit your requirements. For example:
- Add your application files in Files and Folders page
- Configure Digital Signature settings
- Configure Updater
- Configure MSIX specific settings like the ones from Package Information page.
If you want to know more regarding how to configure your MSIX installation project please see our Create an MSIX package tutorial.
4. Configure a post-build event to create an App Attach image
The official tool from Microsoft for creating MSIX images is MSIXMGR. This tool has to be run as an Administrator and can convert an MSIX package to a VHD, VHDX, or CIM disk image using different command line parameters.
To automatically create an MSIX App Attach image when building your Advanced Installer Project you can use a post-build event configured to call MSIXMGR tool with specific parameters. This can be done by going to Builds page, Build Events tab.
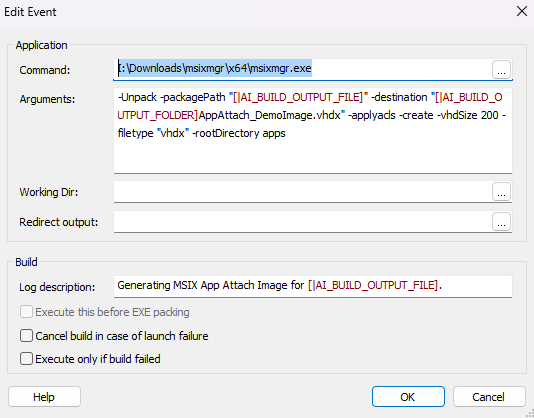
Here you need to create a new Post-Build Event by clicking on Add button then on Post-Build Event ->> New configured like this:

In Command field you should specify the path to msixmgr tool, for example:
I:\Downloads\msixmgr\x64\msixmgr.exe
In Arguments field enter the following argument:
-Unpack -packagePath "[|AI_BUILD_OUTPUT_FILE]" -destination "[|AI_BUILD_OUTPUT_FOLDER]AppAttach_DemoImage.vhdx" -applyacls -create -vhdSize 200 -filetype "vhdx" -rootDirectory apps
When executed, the above command will create a .vhdx type MSIX App attach image located in the build output folder.
In Log Description field enter:
Generating MSIX App Attach Image for [|AI_BUILD_OUTPUT_FILE].

5. Build the project
Advanced Installer should be launched as an Administrator, otherwise the Post-Build
event created at the above step will fail!
The last step is to build the project. Just go to Builds page and click on Build ribbon button or press F7 hotkey anywhere in your project.
The MSIX package will be built and then the MSIX App Attach image (.vhdx file) will be automatically created in the build folder.