Creating SharePoint Solution Installers
The following article uses options that are available starting
with the Enterprise edition and project
type.
This tutorial will guide you in creating a project for a SharePoint solution. As an example we will create a single EXE installation file that will contain the SharePoint Solution package (WSP) with the possibility to select the deployment server during the installation.
1. Start a SharePoint Solution project
If Advanced Installer is not currently running, it can be launched from its desktop icon or by selecting it from the "Start" menu. When the application starts from the Start Page we will select the SharePoint Solution template.
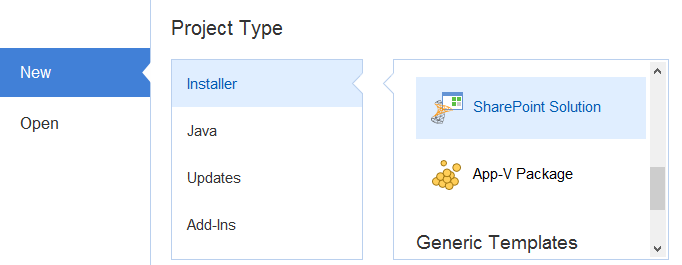
This will launch the SharePoint Solution Wizard that will enable you to configure the project.
2. Enter project details
The first three dialogs let you enter the generic information about your project, like product and company name, the distribution type of your installer, project and output folder.
2.1 Product Information
In the edit boxes we will write the name of the application and organization. The name corresponds with the Product Name while the organization name corresponds with the Company Name and they can be later changed if needed, from the Product Details Tab.
2.2 Select the installer type and logic
We will use the default option which will create a single EXE installer containing the SharePoint solution as this is the strongly recommended and safest way to distribute.
2.3 Set Project and Package paths
In the first edit box select the location where the project will be saved. In the second edit box select the location where the EXE installer will be created.
Optionally, in the "Installation package name" edit box we can specify a different name for the EXE installer. By default, the name under which the project was saved (AIP file) is shared with the EXE installer's name.
For more information about these dialogs please see the Project Information Wizard Dialogs page.
3. Include SharePoint solution files
In this dialog you can browse to the folder that contains your solution files.
3.1 Choose solution resource type
You can choose between adding an unpacked solution folder (Add solution from disk radio button) or importing a packed solution (Import solution from .WSP file radio button). For this example we'll select the first option:
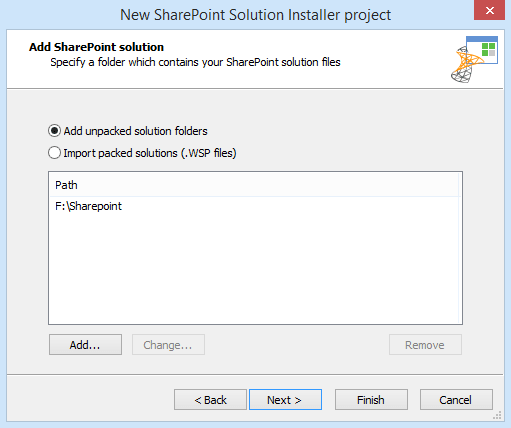
3.2 Add solution
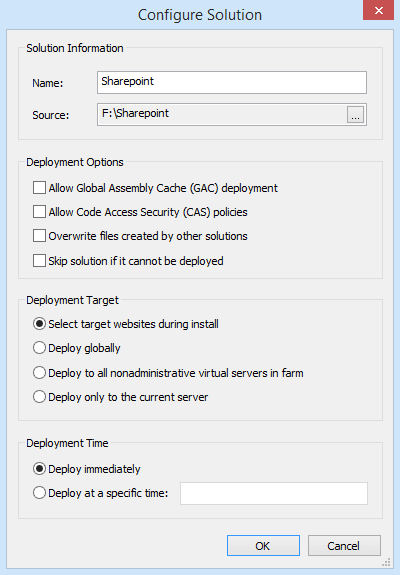
Press the button to browse and select the location where the SharePoint solution's files are stored. Once you do, the Configure Selection dialog will show up:
3.3 Set solution options
The Deployment Options group contains the options that will influence the SharePoint solution deployment behaviour. We will enable the following option:
- Overwrite files created by other solutions
- When this option is enabled the files created by other solutions can be overwritten if they share the same name.
Since our package does not contain assemblies nor do we want to use CAS policies, the other options will be left disabled.
3.4 Set deployment target
The Deployment Target group enables us to specify which servers will be used to deploy our solution and the time when the deployment will take place. We will use the following settings:
- Select target websites during install
- A dialog will be displayed allowing the end user to select one or more websites where to deploy the SharePoint solution.
- Deploy to all servers immediately
- The deployment to the selected websites will start during the installation process.
You can change these settings later in the SharePoint Solution Options Tab from SharePoint Page.
4. Set deployment options
In this dialog you can set logging deployment options. We will enable the following option:
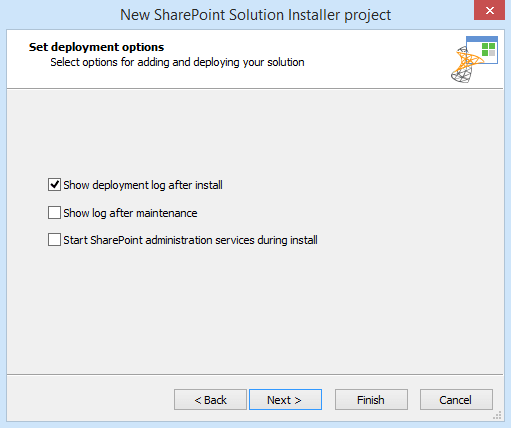
- Show deployment log after install
- Once the deployment operation is ended a dialog containing the installation log will be displayed.
You can change these settings later from SharePoint General Options in SharePoint Page.
5. Configure Launch Conditions
In this dialog you can configure the requirements that must be met in order to successfully deploy your SharePoint solution. In our example we can deploy on servers with Microsoft SharePoint Services 3.0 or higher, the user must have deployment permissions and "Administrator" and "Timer" services should be started.
If these conditions are not met, the installation will show an error message and stop.
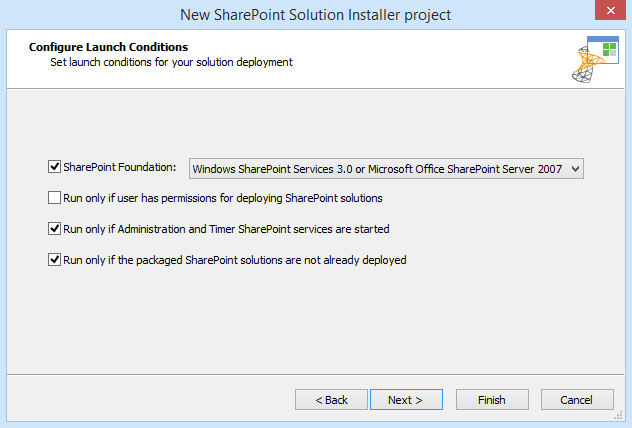
You can change these settings later from the Launch Conditions Page.
6. Specify License Agreement
This dialog enables you to specify the license agreement file for English (United States):
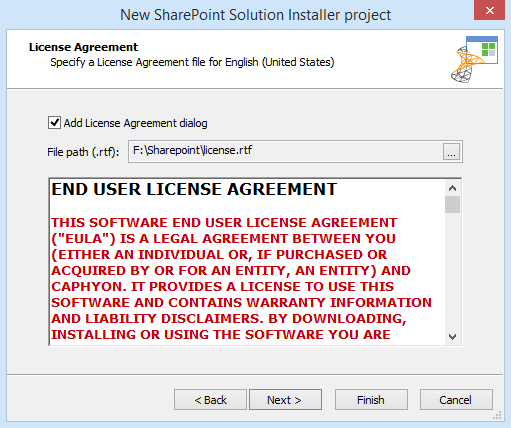
You can change these settings later from the LicenseAgreementDlg
dialog in Dialog Editor Page.
7. Create the SharePoint Solution Installer
Pressing the button will take us to the last page from where we can queue to build the project once the wizard is finished. Pressing the button will end the wizard so we can view all the actions the wizard made for us or add more custom modifications.
![]() The project can be build at any time by using the
"Build" button from the toolbar. Once the installer is created test
it.
The project can be build at any time by using the
"Build" button from the toolbar. Once the installer is created test
it.
In order to deploy a SharePoint Solution on 64-bits servers the
install package type must be set to 64-bits, otherwise the deployment
will be unsuccessful. The package type can be changed from the Install Parameters.