IntelliJ IDEA module import
The following article uses options that are available starting
with the Professional edition and project
type.
This tutorial will show how easy it is to import your IntelliJ IDEA project/module and create a setup package for your Java application, that you can later deploy on Window and Mac OS machines.
The support we offer is wizard based, so all you need to do is to specify the folder containing your workspace, then select the project/module from the list shown by Advanced Installer and configure the options presented to you. In under 5 minutes your should be able to get your project building.
1. Create project
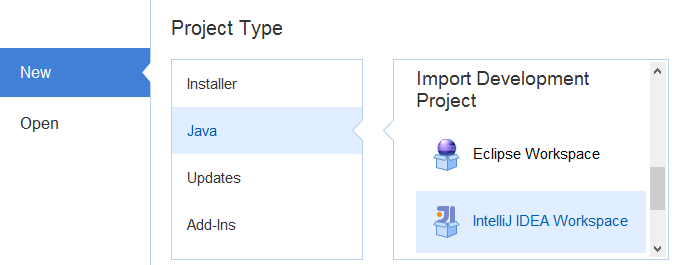
If Advanced Installer is not currently running, start it by double-clicking on the desktop icon or by selecting it from the “Start > All Programs > Advanced Installer” menu. When the application starts, you will be presented a dialog where you can choose the type of the project you want to create.

Select the “Java” > “IntelliJ IDEA Workspace” type and double click it or press the button. Now the wizard is launched, assisting you to configure the import parameters.
2. Configure application
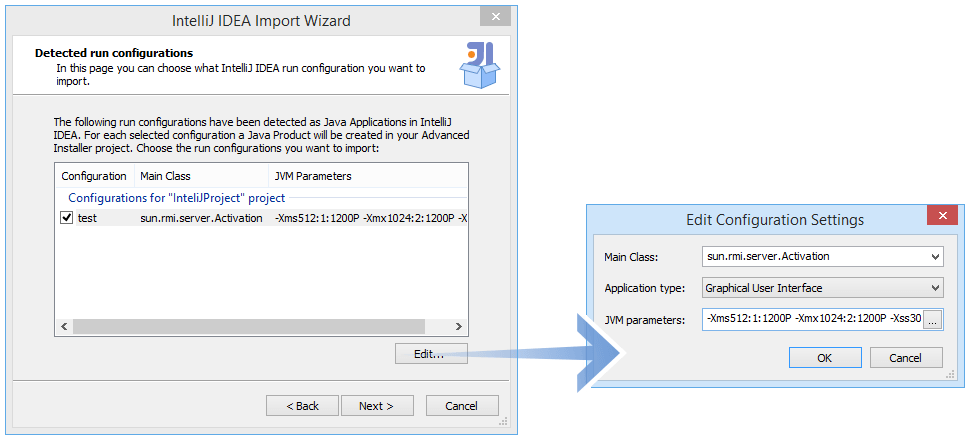
In the first dialog of the wizard you must select the folder where your workspace is found. When you go on the next page Advanced Installer will scan the workspace and present you with the list of projects and modules that it can handle. After you selected the project/module interested in and its correspondent artifacts you will be able to setup your java launcher configurations.
In the below image you can see the a short resume of your configuration(s) and you can use the button to change it.

In the “Edit Configuration Settings“ dialog you can set your main class, application type and additional JVM parameters using the .
3. Configure setup package
The next dialogs from the wizard will assist you in configuring your basic schema of the package, i.e. specifying the product name and company, choosing your installation dialogs theme, specyfing your EULA file, etc...
After the wizard is completed you will get a new project created in Advanced Installer. The changes you made in the wizard related to your application will be visible in the pages “Files and Folders“ and “Java Products“. Here you can change the options you set in the wizard or define new settings. Additional settings can be found in the rest of the pages from Advanced Installer, for more details about each page please press F1 while you are in the respective view.