How to Perform MSI Package Validation Using a .CUB File
A full application package validation is an essential step to take after setting up your installer. It ensures that your software package meets all the necessary standards and requirements for its successful use.
In this article, we have prepared a step-by-step guide that uses a .CUB file as an example to show you how to conduct a full package validation in Advanced Installer.
To execute this process, Advanced Installer has a handy Package Validation tool that checks your project for compliance with each Internal Consistency Evaluators (ICEs).
How to enable ICE package validation in Advanced Installer?
To get started, we need to enable ICE validation in Advanced Installer, since it is disabled by default.
If you want to activate ICE Validation in Advanced Installer, follow these steps:
1. Navigate to File>Settings>Package Validation:
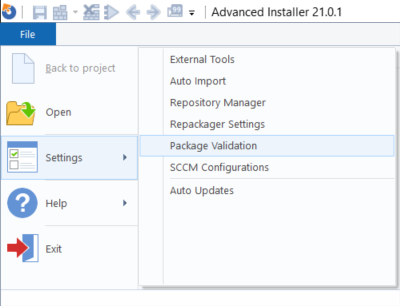
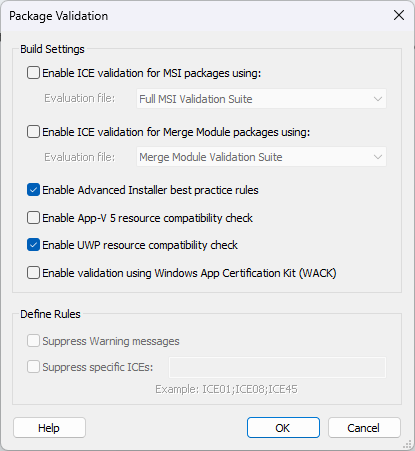
2. Next, the Package Validation window will pop up. As you can see, both ICE validations for MSI and Merge Module packages are disabled.
3. Check the Enable ICE validation for the MSI packages.
4. Then, a pop-up window will appear prompting you to install MSIVal2, as shown in the image below:
If you don’t get this message, it means that you already have the MSIVal2 tool installed
on your machine.
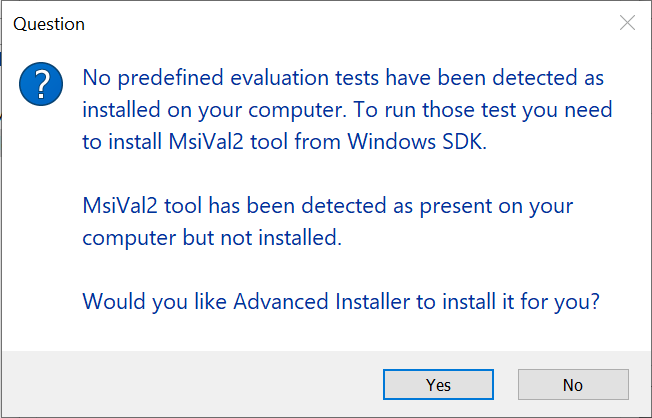
5. Select “Yes” and Advanced Installer will install MsiVal2 for you.
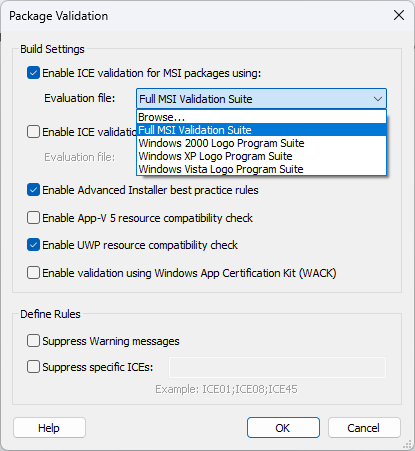
6. After the setup is complete, you will see the Full MSI Validation Suite, along with three other Evaluation files (each file is a .cub file).
How can you execute package validation from a .CUB file in Advanced Installer?
Now, let’s go through the process of executing the package validation from a .CUB file using Advanced Installer.
To ensure that your package validation is performed accurately, it is highly recommended that you use the latest .cub file available.
This .cub file is part of the Windows SDK.
Once the latest version of MSIVal2 is installed, here's what you need to do to execute the package validation with your .CUB file:
Once you have the latest version of MSIVal2 installed, you can proceed to execute the package validation using your .CUB file by following these steps:
1. Go to the Advanced Installer Package Validation window:

2. Click Browse…
3. Navigate to the .cub file path: c:\Program Files (x86)\MsiVal2
4. Select darice.cub
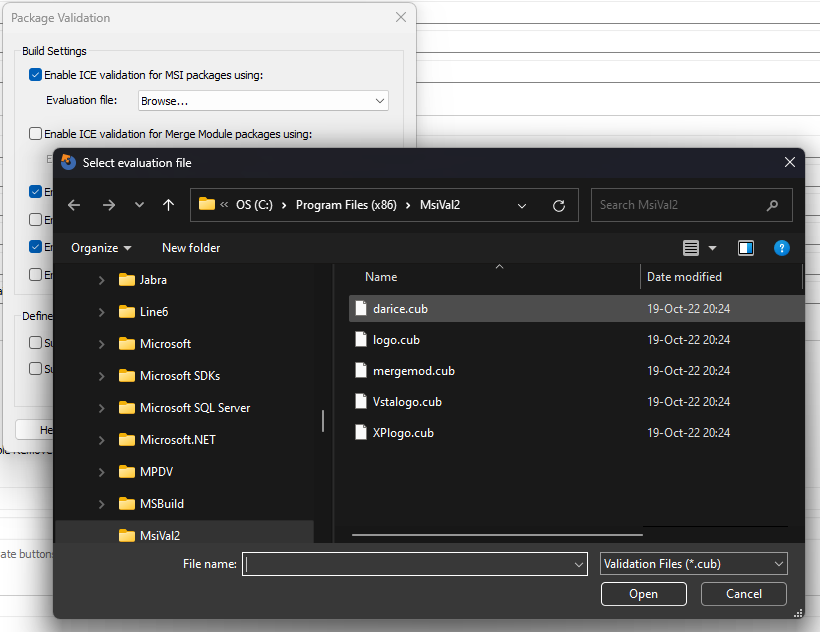
At the time we're writing this article, Windows SDK 2014 contains the darice.cub file.
You can download the SDK kit and install only the MSI Tools. The darice.cub file will then
be located under c:\Program Files (x86)\MsiVal2\darice.cub
Embed the darice.cub file as downloadable
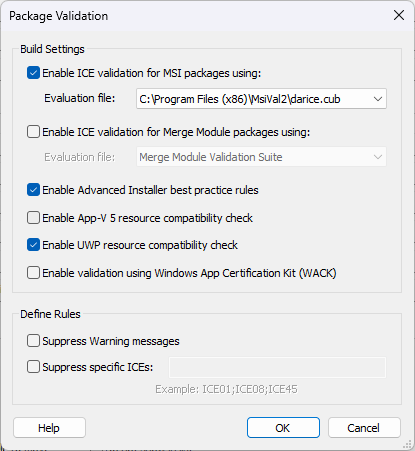
And that’s it. The package validation is now configured to use the package validation rules within the darice.cub you selected. Next time, you either save your MSI package or build your Advanced Installer project file and the validation is executed.
Conclusion
In conclusion, by following the above steps, you can ensure that your software package is fully compliant with all necessary standards and requirements.
If you download and install the latest .cub file as part of the Windows SDK and use the handy Package Validation tool in Advanced Installer, you can perform accurate package validation and guarantee the successful use of your application.
We hope you found this tutorial useful.