Running scripts inside MSIX
Although standard captures are sufficient to package an application in most cases, custom actions enable you to extend the capabilities of a standard package by including PowerShell scripts.
In the latest Package Support Framework, Microsoft added script support that allows IT Pros to customize the app for the user environment dynamically.
Most scripts that are currently used in productive environments typically change certain registry keys or files to match the machine where the app is present.
To allow these PowerShell scripts to be executed, the execution
policy must be set to Unrestricted or
RemoteSigned. This must be performed on both x64 and x86
PowerShell executables.
More info about how to change the execution policy can be found on the
official Microsoft docs
page.
However, unlike MSI, these scripts cannot be placed in a certain install sequence order, they can only be placed to run before or after the execution of the packaged exe present in the package. In short, these are not executed during installation, only when you launch or close an exe present in your package.
The scripts are added to the config.json file present in the package. For example:
"applications": [
  {
  "id": "Sample",
  "executable": "Sample.exe",
  "workingDirectory": "",
  "stopOnScriptError": false,
    "startScript":
    {
      "scriptPath": "RunBefore.ps1",
      "scriptArguments": "\\\"First argument\\\" secondArgument",
      "runInVirtualEnvironment": true,
      "waitForScriptToFinish": false
    },
    "endScript":
    {
      "scriptPath": "RunAfter.ps1",
    }
 }
]
Each script has its own set of configuration items that can be placed in the config.json.
For more details about the script configuration items, check out out this page.
Add Scripts with Advanced Installer
Advanced Installer, with its powerful UI, makes it easy to add your own custom scripts inside the package.
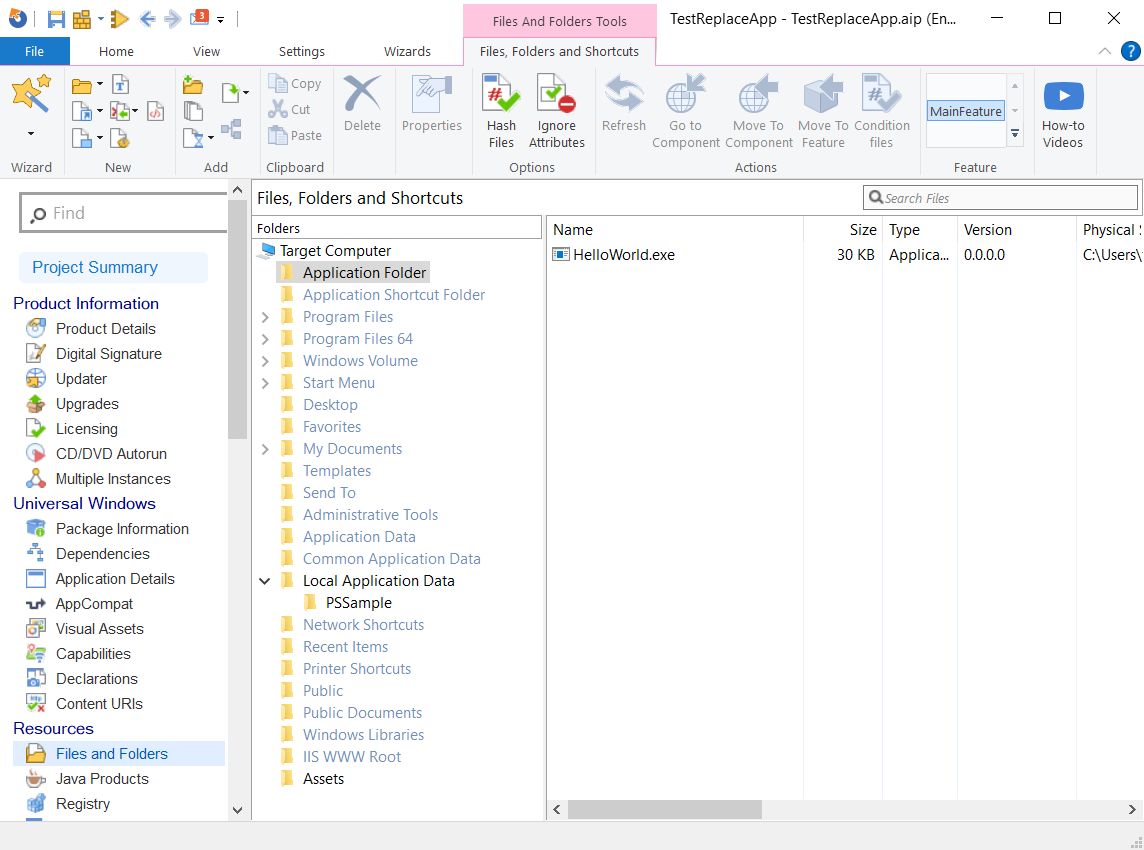
We made a simple example package with an executable that only outputs “Hello World” and adds it in the package.
We also added a file called Config.file that has the text
ReplaceMe inside it. We place this file in a folder PSSample in Local
Application Data.
Let's assume that Config.file is a configuration
file for HelloWord.exe.

After that, we create a shortcut called "Test" that points to HelloWorld.exe in the Application Details page.
The scenario we create is one in which you need to de-hardcode the text inside a file during the first launch of an application.
For this, we made a simple powershell script that replaces the text "ReplaceMe" with "HelloWorld":
((Get-Content -path "$env:LOCALAPPDATA\PSSample\Config.file" -Raw) -replace 'ReplaceMe','HelloWorld') | Set-Content -Path "$env:LOCALAPPDATA\PSSample\Config.file"
Once you have your script ready, save it locally on the machine. In our case, we named it “Replace.ps1”.
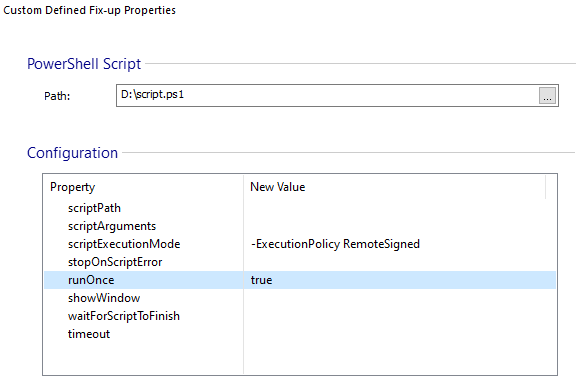
With the files added in the project and the PowerShell script saved locally, navigate to the AppCompat page. Here, we want to add a Powershell script that executes before the installed application lanches, so click on Start Powershell Script.
Next, select the path where you saved your script. You also need to specify the scriptPath, in this case only type the name of the script.
Advanced Installer automatically adds the PowerShell script to your project in the AppDir, so you don’t need to manually specify a location for the scriptPath, you can leave only the file name.

We only need to de-hardcode at first launch, so we need to configure the script to only run once. This is done with runOnce = true.
Once you have everything done, click Build in the top left corner and install the MSIX.
The application launches successfully.

Conclusion
Adding script support for MSIX is a huge step in the right direction, and with Advanced Installer, you can easily add your scripts in the project.