How to install the Visual C++ Redistributable
The following article uses options that are available starting with the Professional edition and project type.
Installing the Microsoft C++ Redistributable often comes as a must when you install a Windows application. You have to install this redistributable to make sure that the application will run properly.
In this article, we will be covering the main aspects of the C++ Redistributables, including which version you need and how you can include them as a prerequisite.
What is a Visual C++ Redistributable?
A Visual C++ Redistributable is a package that contains Microsoft C and C++ runtime libraries.
If you are developing an application and building it with Microsoft C and C++ tools, there is a good chance you are using these runtime libraries.
This means that your application is dependent on Visual C++ Redistributables and you have to install them on the targeted system before you install your main application. Otherwise, your application will not function properly and there will be missing components.
What Visual C++ Redistributable version do I need?
The version of Visual C++ you need will depend on the version of the MSVC build tools used when you developed and built your application. The Redistributable version must have at least the same version as the toolset or a newer version.
Make sure to maintain the same processor architecture.
Let’s take an example!
If your application uses Microsoft Visual C++ (VC++) 2022 x64 runtimes during build time, then you will need the 64-bit VC++ 2022 or a newer version installed on the targeted machine.
Microsoft's Visual C++ Redistributable latest release file contains all the runtimes found
in versions 2015, 2017, 2019, and 2022. For a detailed evolution and support of the Visual C++
redistributables, check out the official Microsoft Visual C++ Redistributable latest supported downloads
How do I install the Visual C++ runtime merge module?
Keep in mind this is a deprecated method and as a best practice, Microsoft suggests
installing the Visual C++ redistributable as a standalone prerequisite.
When naming a merge module, the VC++ runtime was first distributed as a shared component.
A merge module comes in the form of a .msm file and this can be attached to the .msi installer package. The shared components are included inside the .msm – in our case, the Visual C++ Redistributables.
To install the Visual C++ runtime merge module, you must first get the .msm file and add it to the package. This file is usually located in the Redist folder, where your Visual Studio program is installed.
C:\Program Files (x86)\Microsoft Visual Studio\[Year]\[EditionHere]\VC\Redist\MSVC\[VersionHere]\MergeModules
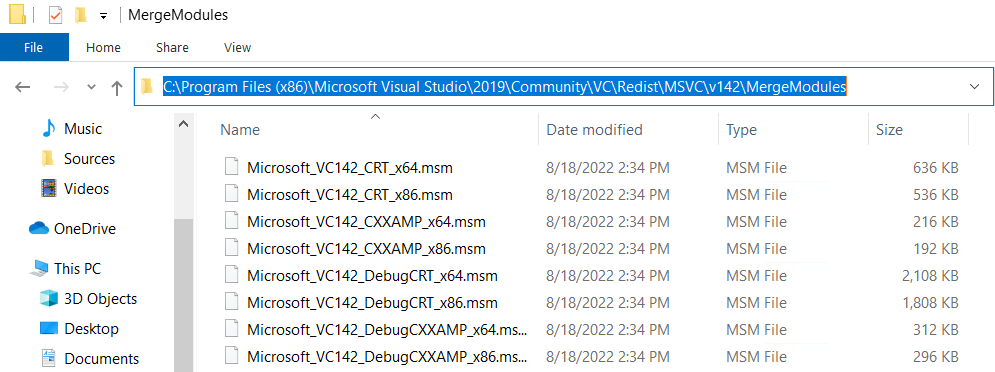
How to install the Visual C++ runtime merge module in Advanced Installer?
When you install the Visual C++ runtime module, you no longer need to remember the installation location.
Thanks to its tight integration with Visual Studio, Advanced Installer enables you to automatically search for the installation location. Here’s how:
- 1. From the left pane, under Requirements, choose the Merge Modules page
- 2. Click on the Visual Studio Merge Module button
- 3. Select your desired merge module from the list
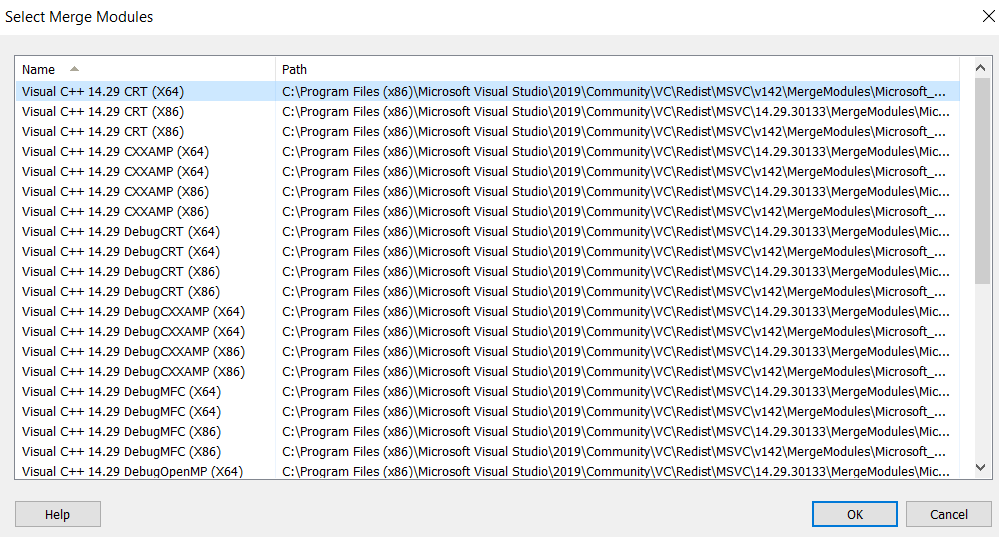
The merge module is automatically added to the package and there are no other extra steps you need to configure.
Need to automate the installation of the Visual C++ runtime merge module? Check out
Advanced Installer’s Complete Integration with Microsoft Visual Studio through our 30-day free trial.
How do I install the Visual C++ runtime as a prerequisite?
As I previously mentioned, adding Visual C++ runtime as a merge module is an outdated method that is no longer recommended. That's why you should include Visual C++ as a prerequisite for your package.
To add Visual C++ as a prerequisite using Advanced Installer, you can follow these easy steps:
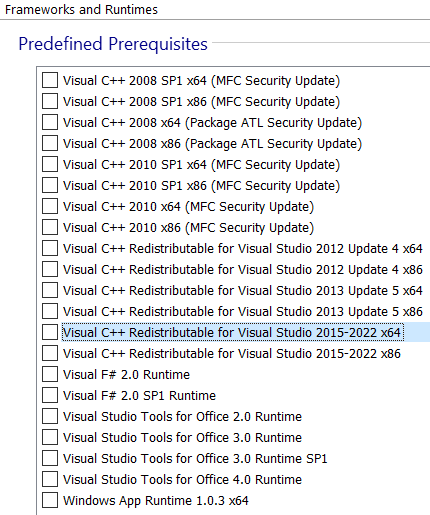
1. Go to the Prerequisites tab and select one of the "Visual C++" predefined prerequisites.
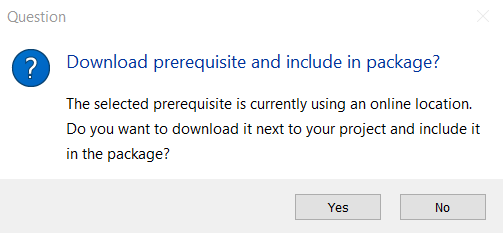
2. Once you select the prerequisite, you will get the below message. As a best practice, choose Yes. This way, the install wizard will install the package in offline mode (no internet connection).
3. Set the minimum and maximum versions of the Visual C++ version required (this will be shown to the user and does not affect the prerequisite) using "Ver Min" and "Ver Max" fields.
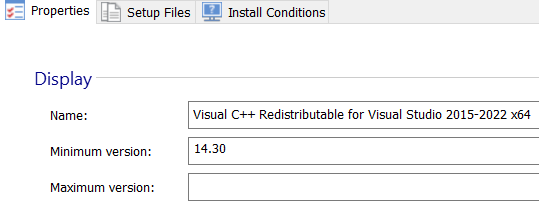
4. The "Location" combo can be left to the default value.

If you chose "NO" when the requirement was added and chose "download" during the install,
the "URL" field must contain a URL to the installation package of the Visual C++ version your
application needs.
Make sure that this URL is correct by running it in Internet
Explorer (it should show you the Internet Explorer's "Save As..." dialog with the "Run",
"Save" and "Cancel" options).
5. Leave the "Folder" field as is, or set it to where the prerequisite files will be placed, extracted, or downloaded.
Use the [ Browse... ] button in the "Integrity Check" section to select the Visual C++ installation package you want to add as a prerequisite after selecting it, the "Exact Size" and "MD5" fields are populated automatically.
7. The "Command Line" field sets the command line parameters you want to pass to the Visual C++ installation package. You can leave it empty or you can add silent parameters for all the fields so the prerequisite is installed without any user interaction.
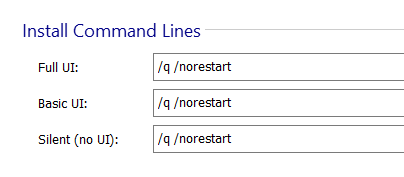
8. Use the "Install Conditions" section to select the Windows platforms on which the prerequisite can be installed. You don't need to modify the predefined search in the "Search" section because it has been configured automatically.