How to package a Node.js application and deploy it to users
The following article uses options that are available starting with the Professional edition and project type.
If you want to know how to deploy a Node.js web application to IIS, check out this tutorial.
This article will guide you step by step on how to create an MSIX App Attach image using Advanced Installer.
1. Add resource files
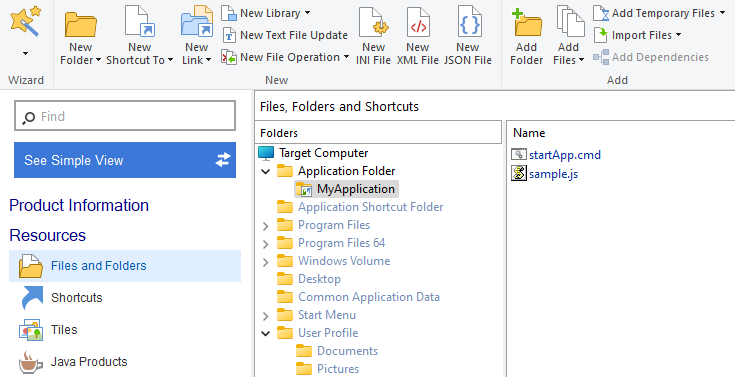
To create the installation package, you need to add the resource files first. Create a folder under Application Folder from the Files and Folders view and add the resources there.
To ensure that any changes that arise during the development process are automatically
updated, you can use the Advanced Installer folder
synchronization feature. With this feature, you can easily synchronize your
resource files with any changes made to your source code, allowing for seamless integration
and streamlined development.
2. Set the install options
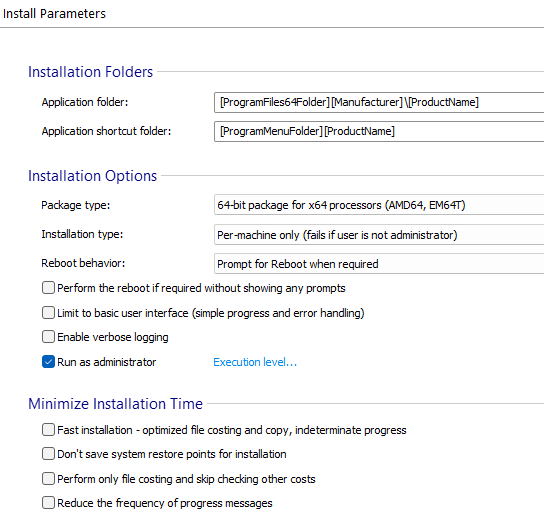
When creating an installer package, sometimes it’s important to enable it to run as admin for ensure that the software is installed with the appropriate permissions, security settings, and dependencies. To achieve this, go to the Install Parameters page and check the Run as administrator option. Additionally, let’s set the package type to x64-bit
3. Set the package type
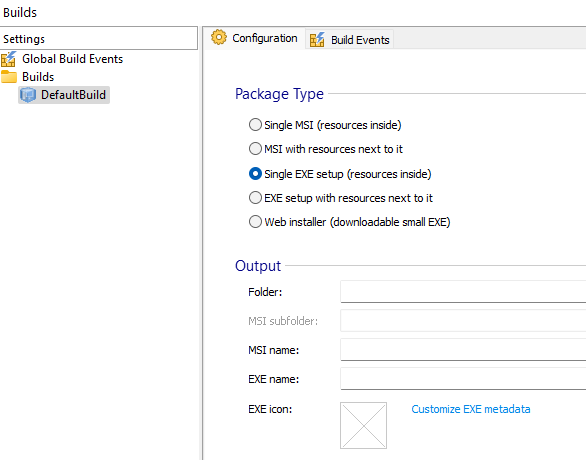
To simplify the installation process, let’s include all resources inside an EXE package:
- Go to the Builds page
- Check the Single EXE setup (resources inside) option under the Package type section.
4. Add prerequisites
To provide the runtime environment for the application to run, we need to add the Node.JS x64 installer as a pre-install prerequisite. For this, follow the next steps:
1. Go to the Prerequisites page.
2. Under the Packages section, right-click on Pre-install → New Package Prerequisite.
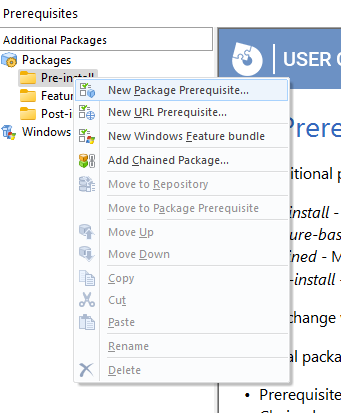
3. Select the node-x64 installer.
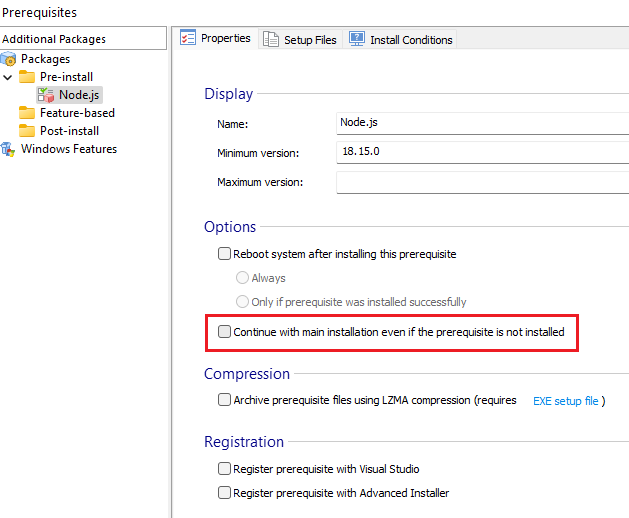
4. Make it a mandatory prerequisite by unchecking Continue with main installation even if the prerequisite is not installed.
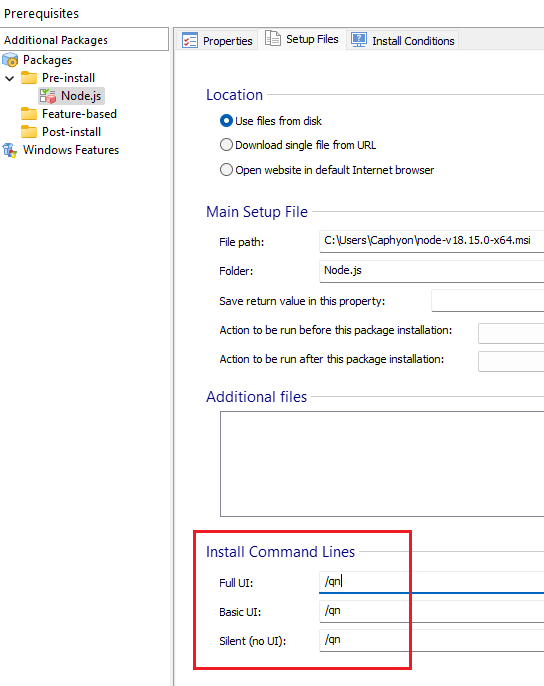
Set the prerequisites to install silently:
- Select the Node.js prerequisite on the Setup Files tab.
- Add the “/qn” command-line option under the Install Command Lines section.
5. Add custom actions
To automate the process of starting the application, we have to add a custom action to run the BAT file that starts node.exe:
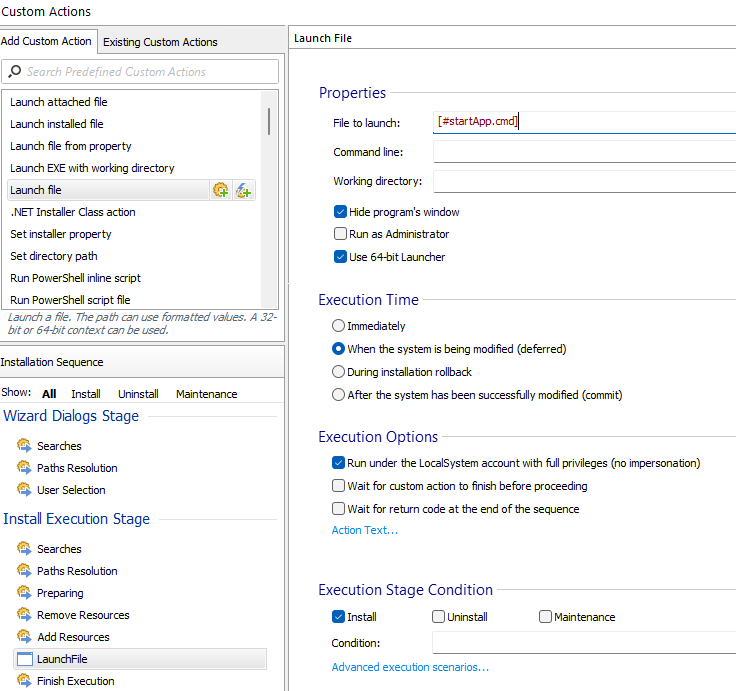
- Go to the Custom Actions page.
- From the custom actions list, select Launch file.
- Go to the Launch file property and specify the BAT file in the File to launch field.
- Hide the shell window and use the 64-bit file launcher.
- Mark the custom action as deferred with no impersonation.
- The custom action needs to run independently from the sequence only on install.
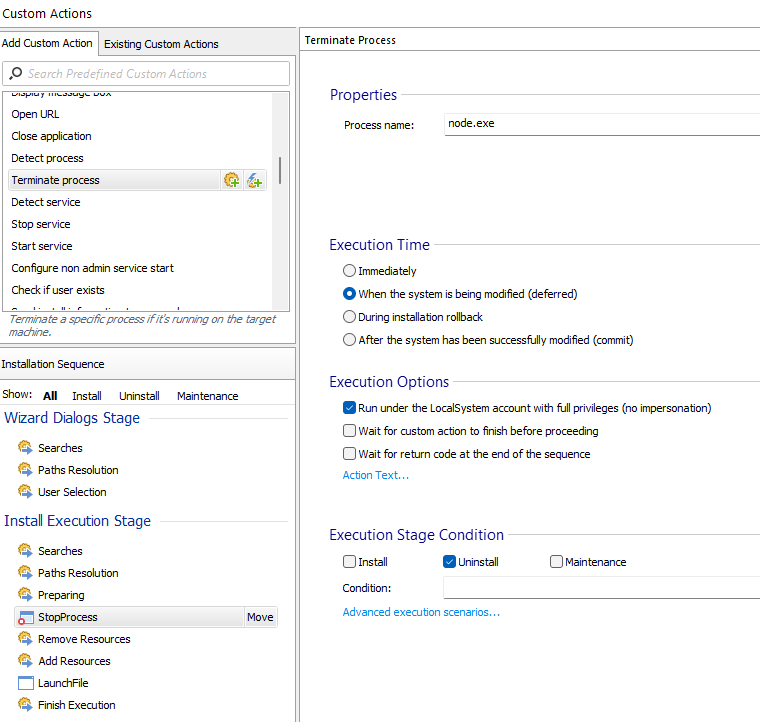
On uninstallation, node.exe needs to stop. So add a new custom action:
- From the custom actions list, select Terminate Process.
- Add node.exe to the Process name text field.
- Apply the same execution settings as in the case of the Launch file custom action, except this custom action runs only on uninstall.
6. Open the application at the end of the installation
To open the application in the browser when the user clicks on the Finish button, follow the next steps:
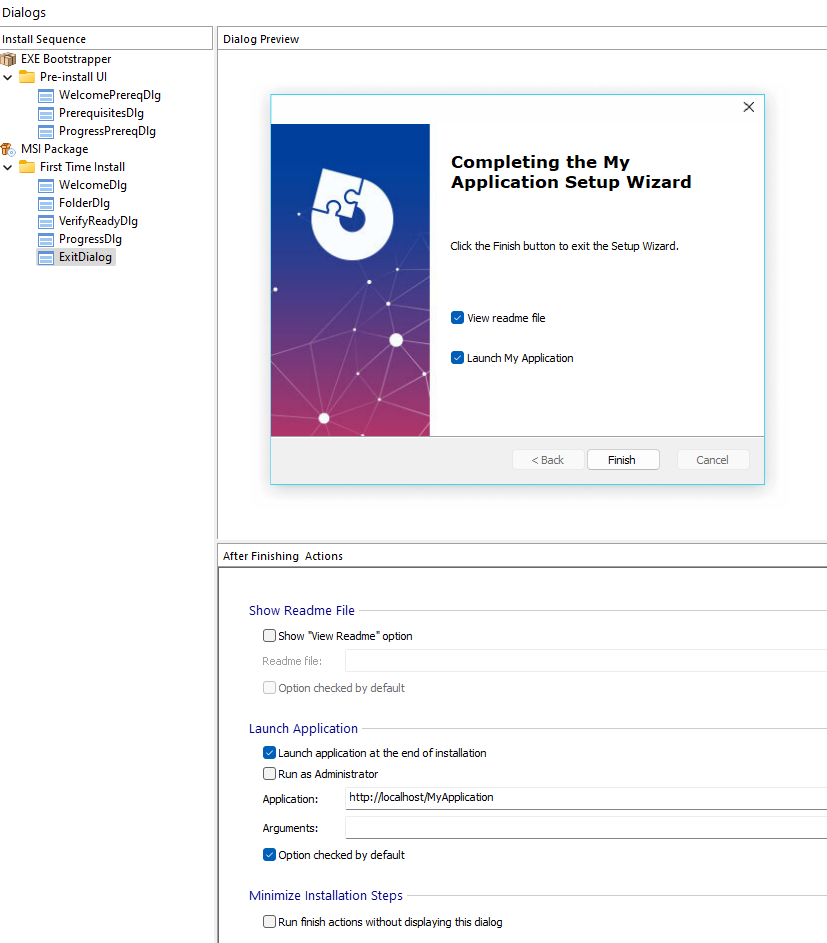
- Go to the Dialogs view and open the ExitDialog.
- Enable Launch application at the end of installation.
- Select any installed file to activate the option’s fields.
- Delete the file reference and type in the URL of the app.
