Add trial support to your Electron Application
The following article uses options that are available starting with the Enterprise edition and project type.
This tutorial will guide you through integrating the Advanced Licensing Support with your Electron application. All the necessary steps are described below, a relatively straightforward integration process.
1. Create an Electron application
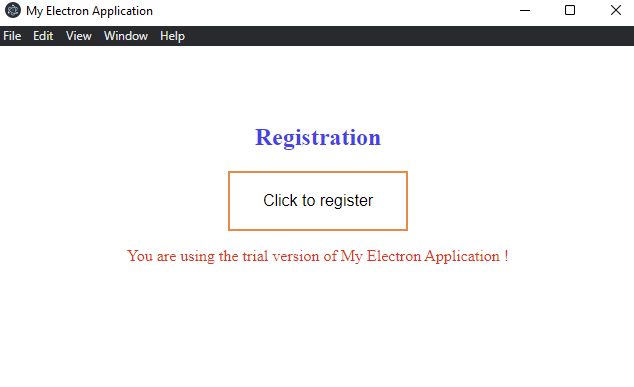
For the scope of this tutorial, we created a simple Electron application, but you can use your own project.
2. Loading a native DLL in Electron
Our Electron application has to load and call the licensing library, which consists of a Dynamic Load Library. To address this aspect, we need to install two additional modules. The first one is node-ffi-napi module. One of its main roles is to handle the translation of types across JavaScript and C. It can be used to create bindings to native libraries without writing any C++ code.
The second module is the ref-napi module, whose purpose is to use Node’s fast Buffer instead of a slow C++ pointer class. Both modules can be easily installed from the terminal using nmp install ffi-napi, respectively nmp install ref-napi command.
3. Add Trial and Licensing
Licensing and trial options can be configured from the Licensing page that can be found in the left pane.
Add a licensing library to your project by clicking the [New Trial] toolbar button.
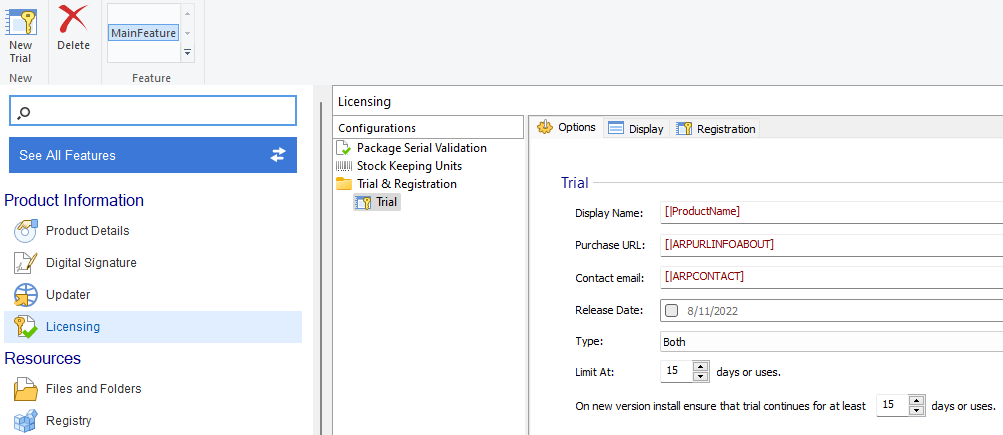
The licensing library will be placed into the Application Folder and can be seen on the Files and Folders page. The name of the library file corresponds with the trial configuration name.
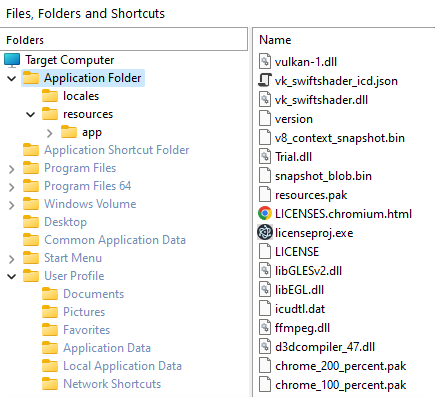
In our example, the licensing library will be loaded from the directory where the main.js file is, so make sure you place it in the same folder as below.
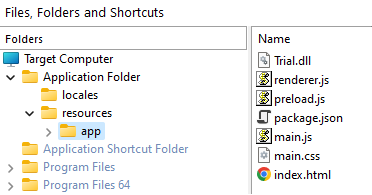
You can also specify another directory from which to load the library, but make sure you move the dll in that folder before creating the MSI.
4. Choose Trial Options
4.1 Trial Options
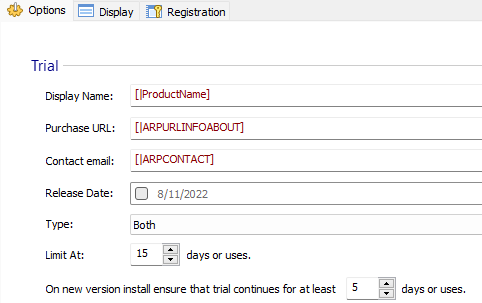
Display Name - the application name which will be used in the Licensing user interface. By default, it will be the Product Name you entered on the Product Details page.
Purchase Url - your Web Site page that handles purchases. By default, it will be the “Product URL” specified on the Product Details page.
Advanced Installer supports several types of trial periods:
- Time-Limited - the trial period will end after a predefined number of days have passed since the installation of the product
- Uses Limited - the trial period will end after a predefined number of runs of the application
- Both - the trial period will end when one of the above ends.
Seeing the available types of trial, let’s select “Both” because it will expire faster. We will set the trial period quantity in the “Limit At” field to 15. This way the trial expires after 15 runs or after 15 days since installation
The number of days and uses that we are prepared to extend the trial by when a new version of the application is installed can be set in the “On new version install extend to” field. Let’s set this value to 5. To keep things simpler, let’s not choose to support the trial extension option.
4.2 Application / Library Type
The type of application that will use the licensing library should also be specified.
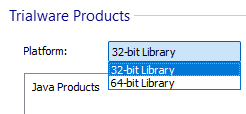
The are several types of library:
- 32-bit Library - unicode, supports any 32 bit Windows OS and can be used in DEP enabled applications
- 64-bit Library - unicode, supports any 64-bit OS and can be used in DEP enabled applications
5. Link with the Licensing library
To use the licensing support, firstly the DLL file must be loaded into the application. It is worth mentioning that for a 32-bit Node.js version, the 32-bit license library must be used, whereas, for a 64-bit Node.js version, the 64-bit license library must be used. Loading the library can be achieved through the Library function of the node-ffi-napi. This API is used to specify the dynamic library to link with, along with a list of functions that are available for that library. Our license library exports the following functions:
- ReadSettingsStr - the DLL entry function that does the initialization and validation of the license support - must be called each time the application starts.
- ReadSettingsRetStr - the DLL entry function that does the initialization of the licensing support but will NOT kill the application when the trial expired and is unlicensed, instead will return a value greater or equal to 4.
- DisplayRegistrationStr - the DLL entry function that displays (if necessary) the registration dialog - should be called when the user wants to register the application.
- RegisterStr - the DLL entry function that you can explicitly call from your application to register the license - can be used as an alternative to the “DisplayRegistrationStr” function.
On usable library object that is created based on a specific DLL must have at least one function defined with the next signature:
ffi.Library(libraryFile, { functionSymbol: [ returnType, [ arg1Type, arg2Type, ... ], ... ]);The next code added in main.js loads the licensing library for our Electron application and defines the exported functions:
var ffi = require('ffi-napi');
var ref = require('ref-napi');
var ptr = ref.refType('int');
var libPath = path.join(__dirname, 'Trial.dll');
var libm = ffi.Library(libPath, {
"ReadSettingsStr": [ "UINT" , [ "string" , ptr ] ],
"ReadSettingsRetStr": ["UINT" , ["string" , ptr]],
"DisplayRegistrationStr": [ "UINT" , ["string" , ptr] ],
"RegisterStr": [ "UINT" , [ "string" , ptr] ],
6. Integrating the licensing with the application
By calling the functions exported by the licensing library we can check various information regarding the licensing status, such as if the application is registered, is in trial mode or the trial expired, and we can also open the registration dialog. But, for any function call, it is necessary to provide the Library Key (which is meant to prevent unauthorized use of the library) from the Advanced Installer Project > Licensing > Registration page.

The example below calls the DLL functions using the specific generated key:
libm.ReadSettingsStr("F693285DB665EA8793BBE768BE5CD7723BCEBCBAC8E6AA60591138B5004CFD293F12EF3EC7C0", null);

//Return values:

// “0” - the application is registered (a valid license key was found)

//”2” - the application is in trial mode

// If the application trial period has expired and the user will NOT enter

// a valid license key, the process will be killed by the function
// instead of returning one of the codes above.

libm.ReadSettingsRetStr("F693285DB665EA8793BBE768BE5CD7723BCEBCBAC8E6AA60591138B5004CFD293F12EF3EC7C0", null);

//Return values:

//0 - valid license
//1 - extended trial
//2 - in trial
//4 - invalid serial / license
//5 - missing serial / license
//8 - trial expired
//10 - invalid configuration

libm.DisplayRegistrationStr("F693285DB665EA8793BBE768BE5CD7723BCEBCBAC8E6AA60591138B5004CFD293F12EF3EC7C0", null);


//Return values:


//”0” - the application is registered


//”2” - the application is in trial mode

libm.RegisterStr("F693285DB665EA8793BBE768BE5CD7723BCEBCBAC8E6AA60591138B5004CFD293F12EF3EC7C0", null);
//”Return values:
//”0” - license was successfully saved on the local machine
// “different than 0” - the license could not be saved on the local machine
You will not be able to test the application until you install the MSI package. After that, you can run the application from its install location. If you want to run it from its package location, you have to copy the “Trial.dll” library from the installation location to the resources folder of the package.
7. Build and Install
Now that we have integrated the licensing functionality let's go back to Advanced Installer and build the installation package.
Click on the [ Build ] toolbar button and a “Build Project” dialog will appear showing you the build evolution.
Once the build is complete, click on the [ Run ] toolbar button. A setup wizard will appear that will guide you through the installation process.
Congratulations! You have successfully created your licensed application. By default, the application file will be installed under C:\Program Files\Your Company\. Browse to that folder in Windows Explorer and run the application.
8. Register the application
After 15 tries (or days - remember the trial type used) the trial period must expire. At this point, the application needs to be registered since the trial extension option was not enabled. Registration codes can be generated from the Advanced Installer - Licensing - Registration page by using the “Generate Registration Key” link.
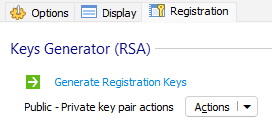
In the “Generate Registry Keys” dialog you can generate any number of keys you want. The keys will be saved into a file from which you can easily pick one when you want to send it to a user.
Copy a registration code from the file you have just saved. Now, return to the trial expired page and click [Register] and paste the registration code (if it was not already detected in the clipboard) into the text area from the Registration Tab.

Click [Continue] to validate the registration key, then Click [Continue] to exit the Registration Wizard and resume the Electron application. The application is now registered.
9. Uninstall and Clean-up
During testing or development, you may want to remove any trace of the application to reproduce the conditions before the first installation. For that you must:
- Uninstall the package - that will delete the installed files.
- Delete the registration code from the registry - by default, it is saved in Current User\Software\Your Company\Your Product\Registration Key and can be configured from the Advanced Installer -> "Licensing" -> "Registration" page.
- Delete the trial information from the system - in Advanced Installer -> "Licensing" page right-click on the trial configuration and choose "Testing" > "Remove Trial Info" (Advanced Installer must have administrator rights for this operation to succeed).
- Reinstall the application, the trial should now work as it did the first time you installed it. You can now continue debugging it.