Creating an upgrade package to deploy application updates
The following article uses options that are available starting
with the Freeware edition and project
type.
This article will guide you in creating a major upgrade for your package
1. What is a Major Upgrade
A major upgrade is essentially the removal of an older product followed by the installation of the newer product.
2. What is the difference between a Major Upgrade package and a Patch?
A patch only contains the differences between two versions of the same product. This means that through a patch you can only update a package that is already installed on the target machine.
An upgrade package is a stand-alone installer that can perform a first-time install in case the old product is not installed on the target machine.
For more information regarding how to create a patch take a look on our Creating a Windows Installer Patch article.
3. How to create an upgrade package
- Before starting editing the .AIP project we recommend creating a backup copy of the project file. This would be referenced as the “old .AIP Project”
- Edit the Installer Project as you wish in order to configure the new version of your software.
Please note that the "Files and Folders" page of this upgrade
project should contain all the files and folders of your
application, not only the ones that are updated by this upgrade
installation.
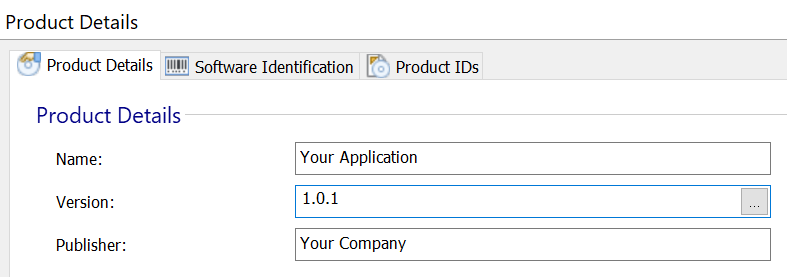
- Go to "Product Details" page and increment the "Version" from “Product Details” section:

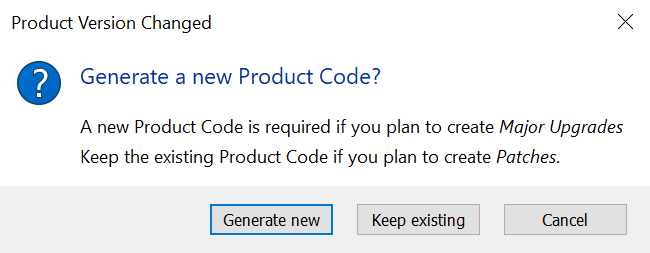
- When leaving the page you will be prompted if you want to generate a new Product Code:

- Select "Generate New" in order to change the Product Code
- The last step is to build the new .AIP project to create the upgrade package.
4. Custom Upgrade behavior
By default, during the major upgarade process the old product will be removed before the new package is installed. You can change the order of these actions or add custom Upgrade rules in Upgrades page.