Add an MSIX build to your Visual Studio solution
The following article uses options that are available starting
with the Professional edition and project
type.
This tutorial will show you how to add an MSIX build to your Visual Studio solution.
We will start from having a Visual Studio solution containing an Advanced Installer project. In order to configure your Visual Studio Solution follow the steps from this tutorial : Create an installer from Visual Studio
1. Add an UWP build to the Advanced Installer project
First step is to add the UWP build to your project:

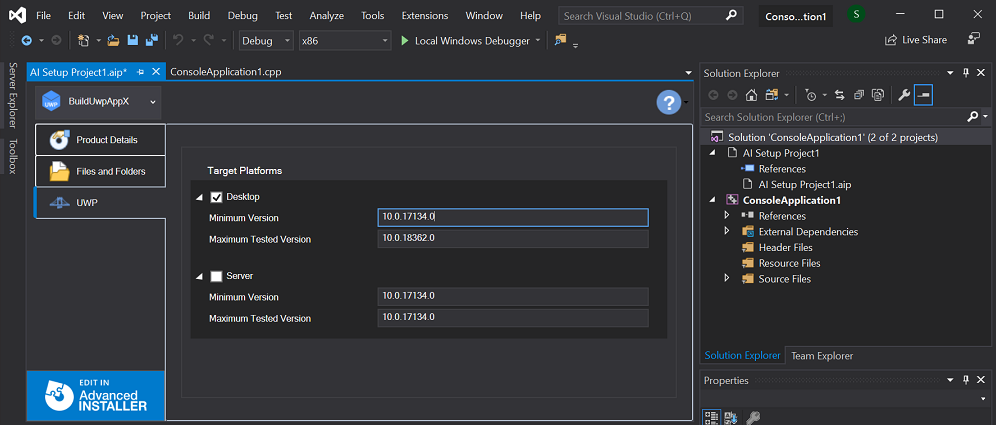
- In Visual Studio, go to the Advanced Installer project and open the UWP page
- Click on "Add UWP APPX Build" button
- Select the targeted platform (Desktop/Server or both)
- The Minimum/Maximum targeted Windows SDK version can also be configured
2. Configure the Visual Studio solution build
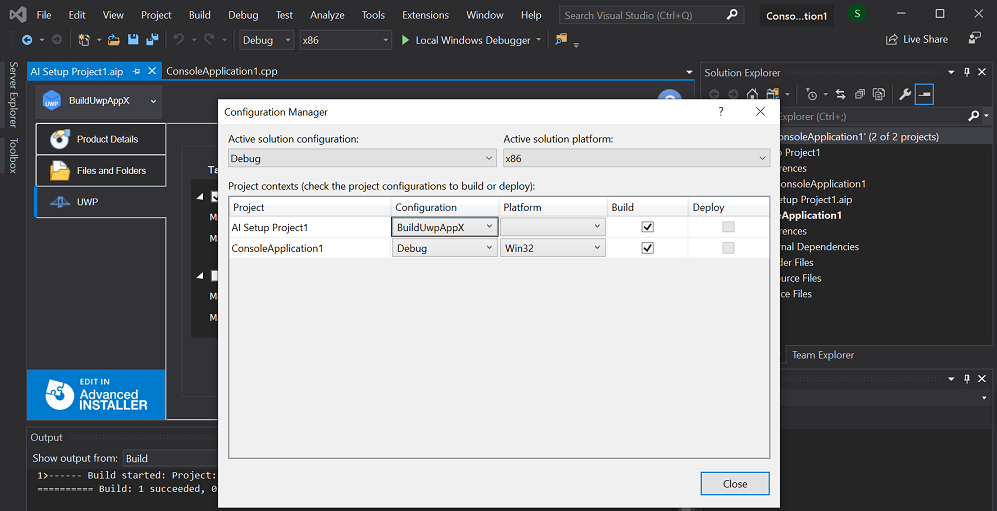
Before building the Visual Studio solution you have to change the default build, which is the MSI, for the Advanced Installer Project. To achieve this, open the Visual Studio Configuration Manager from "Build" menu In Visual Studio.
In the "Configuration" section for the Advanced Installer Project choose the UWP build or All builds.
