WiX Toolset Visual Studio Extension
As part of the software packaging industry, you're most likely familiar with Windows Installer XML, or WiX. The WiX Toolset is widely used to build Windows Installer packages.
WiX is more like a programming tool; it uses XMLs and does not have a graphical interface like some other similar tools. So, it uses a different approach to define the elements inside an installation package.
WiX Toolset has an extension that lets you use the Visual Studio IDE to create and compile setup projects. In this article, we will be guiding you through the creation of an installation package for a Windows Forms application using the WiX Toolset Visual Studio Extension.
How to add the WiX Toolset extension to Visual Studio?
We first need to add the WiX Toolset extension to the Visual Studio IDE before creating the installation package for the application. To do that, follow the next steps:
1. Go to Extensions → Manage Extensions.
2. In the Manage Extensions dialog, go to the Online section.
3. Search for WiX Toolset Visual Studio Extension.

4. Press the Download button. Pay attention to the fact that the changes will be made after you close Visual Studio IDE.
In addition to installing the WiX extension, you also need to install the WiX Toolset build tools if you haven’t already. That way, you’ll be able to build the setup project that will be added to your application.
When creating the setup project for an application, you need to add the deployable files and keep them up-to-date. This task can be difficult if you are using WiX, especially when you are a beginner, as it needs to be done programmatically.
So, we will install a second extension, namely the Wax extension. It provides an interactive GUI that helps you create, verify, and maintain the list of deployed files. To add this extension, follow the same steps as above, but this time search for the Wax extension.

How to add the Setup project to your application?
Once the environment setup is complete, let’s create the setup package for our application. Suppose you already have the Windows Forms application. Follow the next steps to create the setup project:
1. Right-click on the project solution → Add → New project.
2. From the project list, choose Setup Project for WiX.
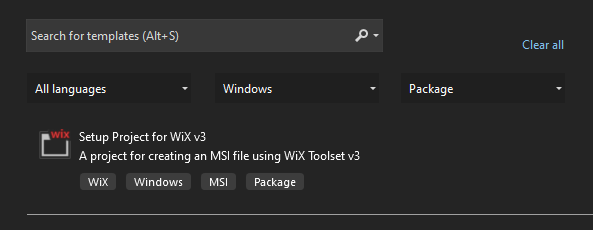
After creating the setup project, you should see it in the Solution Explorer.
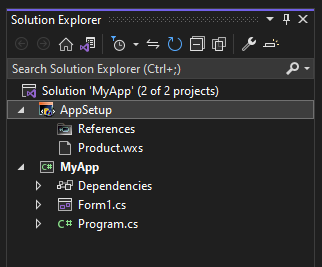
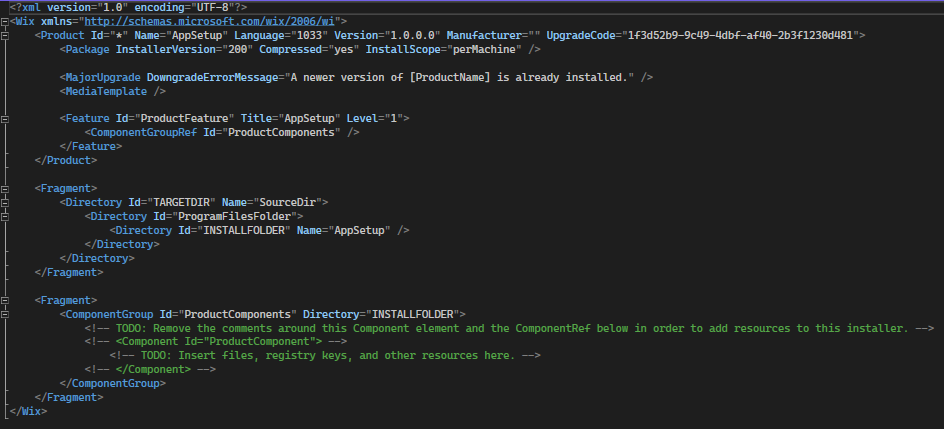
The Product.wxs file contains the setup project logic.
How to edit product details?
To edit the product details, open the Product.wxs file and edit the corresponding fields. For example, we set the version to 1.1 and the manufacturer to Caphyon.

How to add project output to your setup project?
To add the deployable files to the setup project, use the Wix Setup Editor. To open the editor, go to Tools → WiX Setup Editor.
You have to make some configurations here:
- select the setup project added to your application, in our case it is AppSetup.
- in the Root directory, select INSTALLFOLDER.
- In the Projects to install section, select the application you’re creating the installer for. In our case, we selected MyApp.
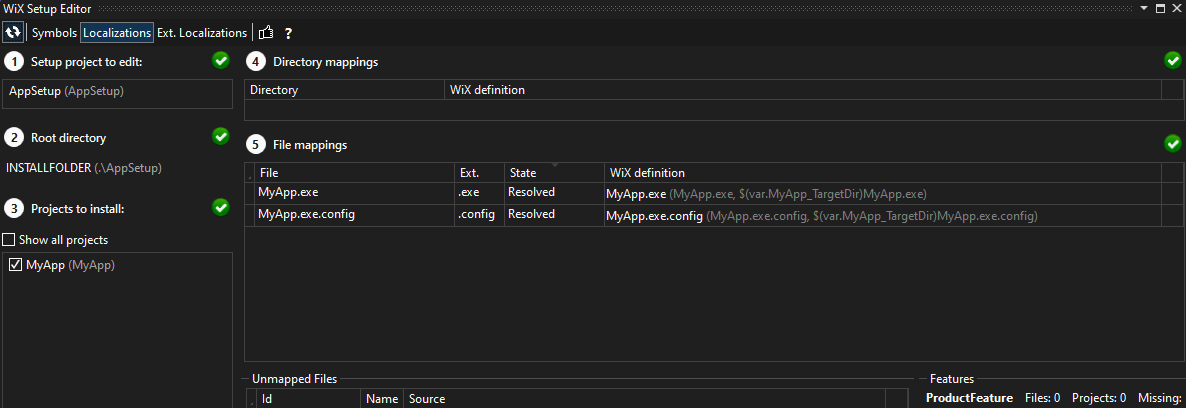
If the files have the unmapped state like in the image below, make sure you change the state to resolved by pressing the plus button under the warning sign.

Now, you should see the files in the Products.wxs file.

How to create Shortcuts for your application?
Creating a shortcut is a common requirement when installing an application, but not such an easy task when using WiX. It can't be done from the Setup Editor, so you have to edit the XML file. Follow the next steps to add a shortcut on the Desktop and in the Programs Menu also:
1. Define the directory structures.
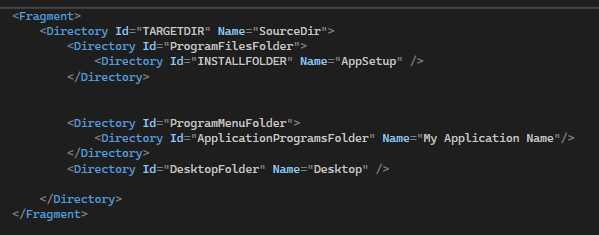
2. Add the shortcuts to the installer package.

3. Tell Windows to install the shortcuts.

How to add installation dialogues?
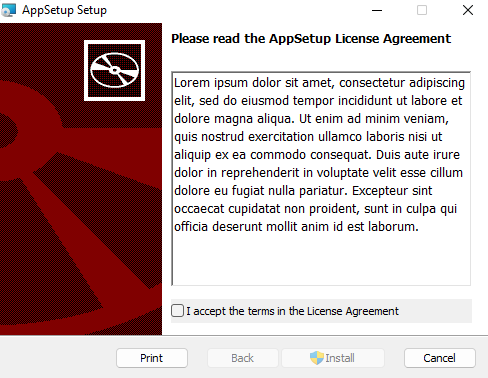
When using Wix to create an installer package, it will not have the UI included by default. To add a minimal UI, you can follow the next steps:
1. Right click in the setup project → Add → References. In the Add Reference dialog, look in the bin folder of the WiX Toolset and add WinUiExtension.dll.
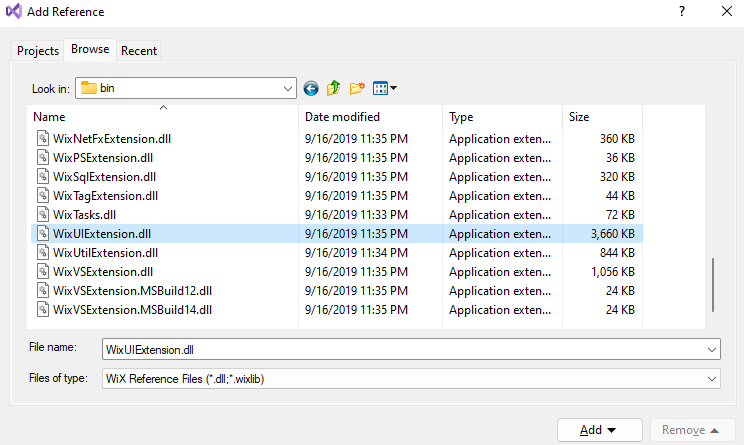
2. Go to the Product.wsx file and add the next line inside the <Product> element to reference the UI:
<UIRef Id="WixUI_Minimal" />
How to install your application?
Now, you can build the setup project. Then, go to the bin folder inside the setup project folder to find the MSI file. Run the file and install the application. After installation, you should find the shortcuts on the Program Menu and Desktop.
Conclusion
WiX is a great tool for software packaging, but it can be tricky sometimes. It is clearly not the best option for beginners or if you want to save time.
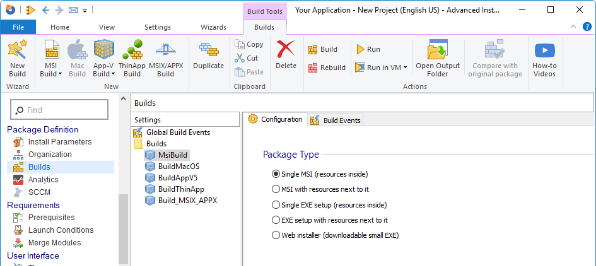
You can have the same functionalities using Advanced Installer, but with a modern and powerful GUI. Advanced Installer also provides an extension to help you create and manage installers directly from Visual Studio. It offers a Viewer to quickly edit basic information, and you can also open the project in AI to have access to all available features.
Check out this tutorial to see how to create Advanced Installer projects from Visual Studio.
