How to create non-advertised shortcuts for all users / per machine with WiX Toolset
When you define shortcuts in WiX Toolset, their default installation is non-advertised (Standard Shortcuts).
Even though this characteristic shouldn’t be a serious issue, it can be a source of ICE errors in some instances (for example, when you define components that have both per-user and per-machine data, with a per-machine keypath).
This article will show you how to fix ICE errors when creating non-advertised shortcuts using the WiX Toolset.
Advertised vs. Non-advertised shortcuts
What is an advertised shortcut?
Advertised shortcuts are helpful for developers when making sure a software is installed and running as intended, without any missing pieces.
When an advertised shortcut is launched, Windows Installer checks to see if all the components included in the same feature as the shortcut are installed on the device. If that’s not the case, the shortcut will automatically launch the MSI from which the program was installed and reinstall the .msi file missing resources.
What is a non-advertised shortcut (Standard Shortcut)?
We call a non-advertised shortcut (Standard Shortcuts) a standard Windows shortcut. In this case, you can see the target field points to the executable that will be launched if you right-click on it. If this executable is missing for any reason, the application will immediately crash.
How to create non-advertised shortcuts?
According to ICE43, Microsoft recommends using separate registry keys in the HKCU (HKEY_CURRENT_USER) as keypaths of the non-advertised shortcuts.
To implement this method, you only need to create a new component where you will build the shortcut and the registry value that will serve as the shortcut’s keypath.
This method is actually very simple to implement. All you need to do is create a new component where you will build the shortcut and the registry value that will serve as the shortcut’s keypath.
<Component>
      <Shortcut Id="NonAdShortApp" Directory="DesktopFolder"     Name="NonAdShortApp.exe" WorkingDirectory="INSTALLFOLDER" Target="[#NonAdShortApp.exe]"/>
      <RegistryValue Root="HKCU" Key="Software\[Manufacturer]\[ProductName]" Type="string" Value="" KeyPath="yes" />
</Component>Keep in mind that his method forces you to add registry entries in your setup package, which may not be as practical in a multi-user scenario. This means that if a user uninstalls the application, all the other users will have orphaned registry entries in their respective HKCU hives.
A major difference between advertised and non-advertised shortcuts is the use of files (that are already installed per machine) as keypaths – which is not possible for non-advertised shortcuts.
To overcome this situation, we will turn an advertised shortcut into a non-advertised one.
Let’s get started!
First, declare the shortcut using the following lines:
<Component Id="NonAdShortApp.exe" Guid="4f4d8d47-72a3-4e00-b959-ccae259837df">
	<File Id="NonAdShortApp.exe" Name="NonAdShortApp.exe" Source="$(var.NonAdShortApp_TargetDir)NonAdShortApp.exe" KeyPath="yes">
		<Shortcut Id="NonAdShortApp" Directory="DesktopFolder" Name="NonAdShortApp.exe" WorkingDirectory="INSTALLFOLDER" Advertise="yes"/>
	</File>
</Component>
We have created a new advertised shortcut in our component which uses a file as a KeyPath.
Now, we will use the DISABLEADVTSHORTCUTS property to turn our advertised shortcut into a non-advertised one, bypassing the ICE43 condition.
<Property Id="DISABLEADVTSHORTCUTS" Value="1" />
That’s it! By adding this line of code into your WiX project, you can turn any advertised shortcut into a non-advertised one without declaring additional registry entries for each shortcut.
How to create a non-advertised shortcut with Advanced Installer
Through Advanced Installer’s GUI, you have a straightforward way to generate non-advertised shortcuts without using any code.
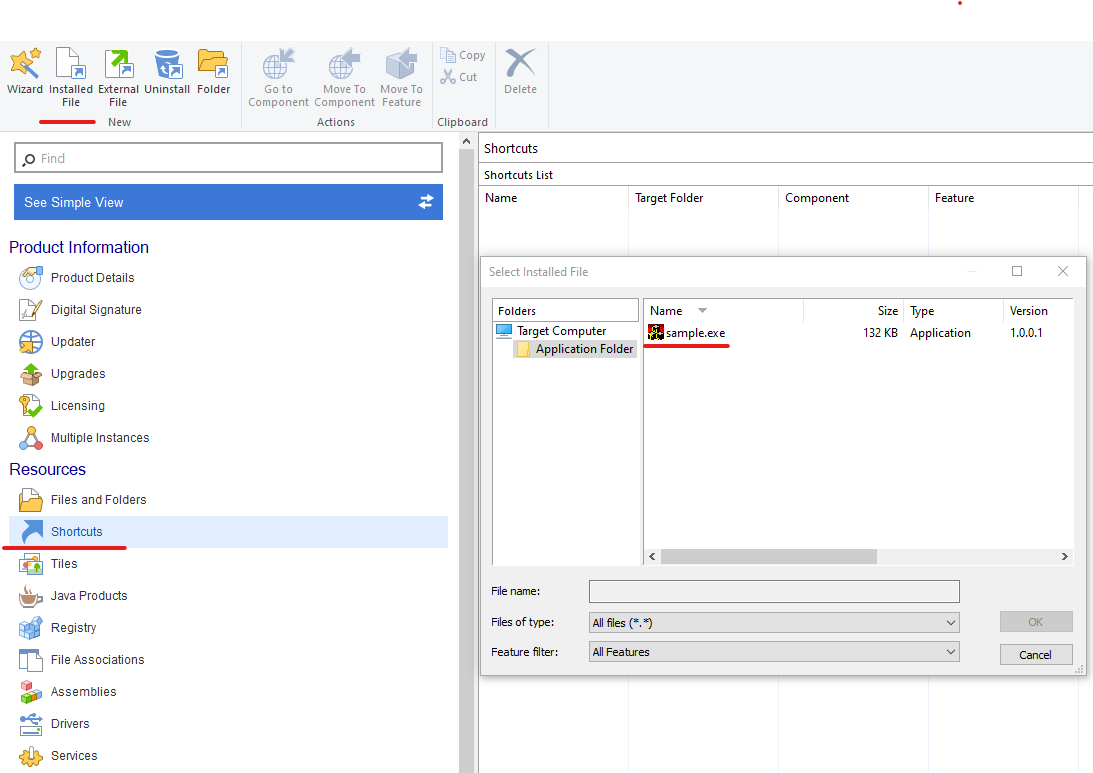
1. Go to the Shortcuts Page and create a new shortcut for an installed file.

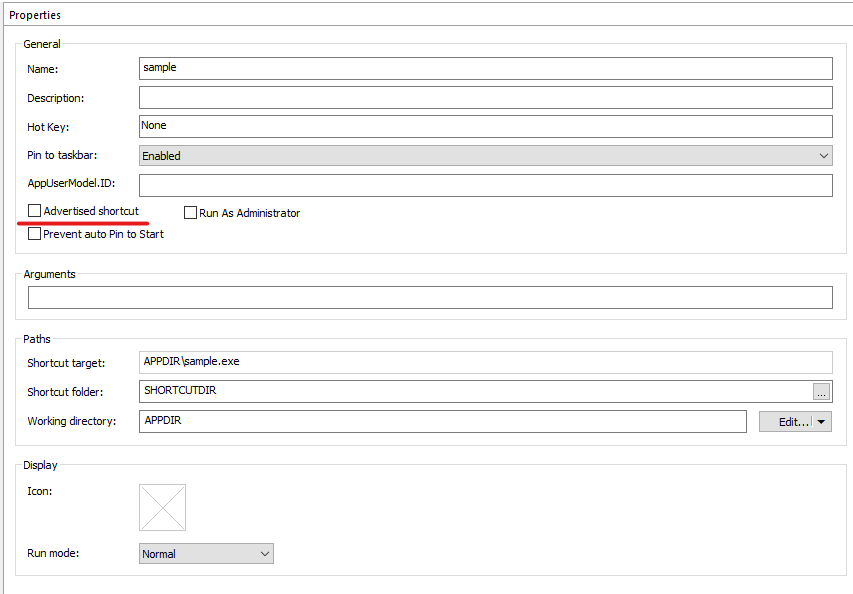
2. In the shortcut’s properties, you can use the "Advertised Shortcut" checkbox to make your shortcut an advertised one. (This option is unchecked by default, leave it as it is to create a non-advertised shortcut).

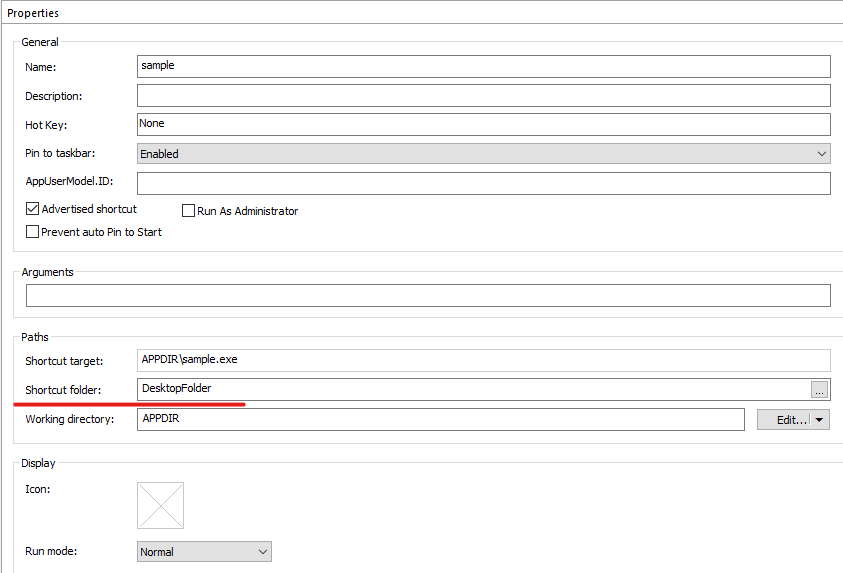
3. To place the shortcut on the Desktop go to the Paths section.
4. Once in the Paths section, change the Shortcut folder option from SHORTCUTDIR to DesktopFolder.

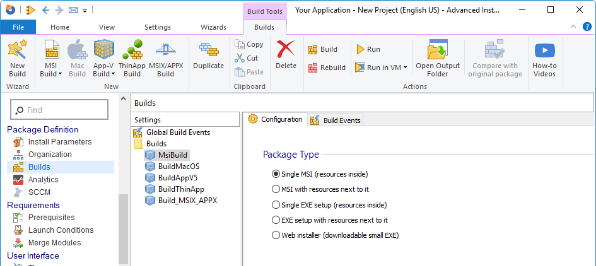
5. To make sure that your setup package is ICE valid, go to: File - Settings - Package Validation
6. In the Build Settings section, check the "Enable ICE validation for MSI packages” checkbox.

Done!
Check out Advanced Installer’s friendly GUI through our 30-day full featured trial. (No credit card required)
Conclusion
Now we know how to avoid ICE errors by creating non-advertised shortcuts with the WiX Toolset.
Of course, you can always choose a tool that doesn't require any code to create non-advertised shortcuts, such as Advanced Installer.
We hope you found this article useful.
