How to Create a Desktop Shortcut using WiX Toolset
In this article, we want to focus on desktop shortcut creation specifically for a Windows Forms application using the WiX Toolset.
Shortcuts serve as a valuable tool in the development of applications, allowing for an easier way to find and launch programs. It's a common practice to create shortcuts during application installation, especially for desktop access.
Before we get started, you need to make sure you have the WiX Toolset extension for Visual Studio. Check out this article: WiX Toolset Visual Studio Extension to see how you can add the extension to Visual Studio.
How to add the WiX setup project
Once you have the WiX Toolset extension added to Visual Studio and your Windows Forms application is up and running, you need to create a setup project.Follow these steps to create a setup project for your application:
1. Right-click on the project solution → Add → New Project.
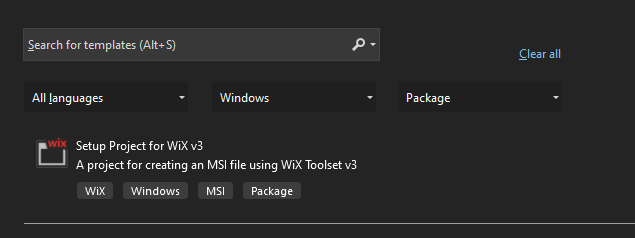
2. Choose Setup Project for Wix from the project list.

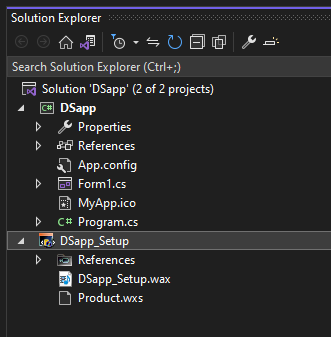
3. Once you add the setup project, you should find it in the Solution Explorer.

4. To add the desktop shortcut, we have to edit the Product.wxs file.
How to edit the Product.wxs file to add your desktop shortcut
1. Define the directory structure
To include a desktop shortcut in your package, it is necessary to declare the desktop directory. You can achieve this by modifying the <Directory> structure to include the desktop directory declaration by using the TARGETDIR ID.
<Directory Id="TARGETDIR" Name="SourceDir">
  …
  <Directory Id="DesktopFolder" Name="Desktop" />
</Directory>
2. Add the shortcut to your package
Once the desktop directory is added to the directory structure, let’s add the shortcut to the installer package.
Follow these steps:
2.1. Add a reference to the desktop directory structure created at the previous step using <DirectoryRef> element.
<DirectoryRef Id="DesktopFolder">
2.2. Define an atomic unit of installation using a <Component> element.
<Component Id="ApplicationShortcutDesktop"
Guid="305dc292-f9af-4961-9fd1-bf38f5ad08db">2.3. Specify the shortcut to be installed using a <Shortcut> element. Here you have to set some attributes, including: ID (is unique), name, description (optional), target (points to the executable file), and the working directory for the shortcut.
<Shortcut Id="ApplicationDesktopShortcut"
          Name="DSapp"
          Description="My Application"
          Target="[INSTALLFOLDER]DSapp.exe"
WorkingDirectory="INSTALLFOLDER" />2.4. Create a registry entry by using a <RegistryValue> element.
<RegistryValue Root="HKCU" Key="Software\MyCompany\DSapp" Name="installed" Type="integer" Value="1" KeyPath="yes" />
Here is how the final code should look:
<Fragment> <DirectoryRef Id="DesktopFolder"> <Component Id="ApplicationShortcutDesktop" Guid="305dc292-f9af-4961-9fd1-bf38f5ad08db"> <Shortcut Id="ApplicationDesktopShortcut" Name="DSapp" Description="My Application" Target="[INSTALLFOLDER]DSapp.exe" WorkingDirectory="INSTALLFOLDER" /> <RegistryValue Root="HKCU" Key="Software\MyCompany\DSapp" Name="installed" Type="integer" Value="1" KeyPath="yes" /> </Component> </DirectoryRef></Fragment>
3. Add an icon to your desktop shortcut
You can help your users find your application easier by adding an icon to your shortcut. By doing this, you not only establish familiarity with your application but also improve its recognition and accessibility.
Follow these steps to include the icon in your setup project:
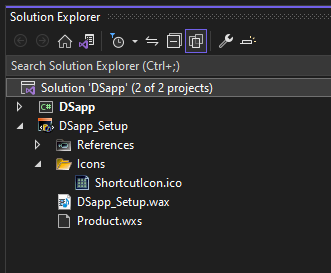
3.1. Create a folder under the setup project (Icons), and copy the icon (Shortcuticon.ico) to that folder.

3.2. Then, you can add the icon to your installation package by declaring the <Icon> element within the <Fragment/> element. Make sure to set an Id for the icon and specify the path to the icon file.
<Fragment>
	<Icon Id="MyIcon" SourceFile="Icons\ShortcutIcon.ico" />
</Fragment>
3.3. Next, you have to add a reference to the icon on the shortcut element using the Id you set for the icon.
          <Shortcut Id="ApplicationDesktopShortcut"
          Name="DSapp"
          Description="My Application"
          …
          Icon ="MyIcon"
          />
4. Install the shortcut
In the final step, we need to instruct the installer to install the shortcut. We can achieve that by using a <Feature> element and referencing the shortcut component with a <ComponentRef> element, which includes the component ID as a reference.
<Feature Id="ProductFeature" Title="AppSetup" Level="1">
   …
   <ComponentRef Id="ApplicationShortcutDesktop" />
</Feature>
Conclusion
While creating a shortcut with WiX can be a time-consuming process involving multiple modifications to the XML file, there is a more efficient solution available.
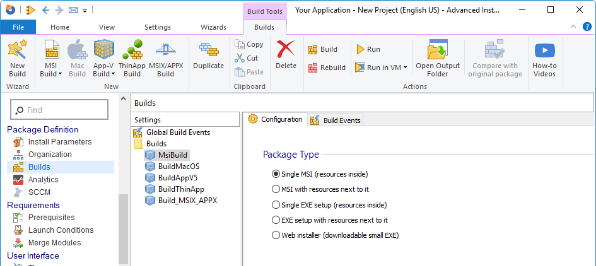
Using a tool with a powerful GUI, such as Advanced Installer, simplifies the process by offering a visual interface for creating shortcuts.
Additionally, if you already have a WiX project, Advanced Installer even allows you to import it, making the task faster and more straightforward to complete.
You can check out the following video to see how to create a desktop shortcut using Advanced Installer:
Transform your application packaging process with ease and efficiency by trying Advanced Installer's 30-day full-featured free trial now!
