If your application requires any runtime to be present on the target machine so that your application can work as expected, then you can add it as a prerequisite.
In the below tutorial, we will add the PostgreSQL v.15.1 to be installed by the setup. We will add it from its online location, so it will only be downloaded by the setup if it is missing. In case the Postgre SQL is already installed, the setup will not download the runtime as it will not be scheduled for installation.
Adding the runtime from its online location is a great way to reduce the size of the installer. You can read more about runtimes installation in the the prerequisites faqs.
So, the first step is to create the project. In our case, we want to install the Postgre SQL silently and allow the user to configure the Postgre SQL installation through the main setup dialogs. The user input will be passed to the Postgre SQL through the install conditions.
Since we want to edit dialogs, we need to have access to the Dialog Editor feature which is available starting with the Enterprise edition. If you do not need to capture user input or to edit the setup dialogs and you only need to install the Postgre SQL with some predefined switches, then you can use the Professional template.
1) Create project
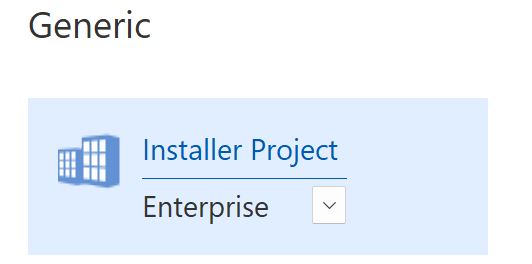
In the Start Page of Advanced Installer select the Enterprise project type:
2) Configure the Postgre SQL installation
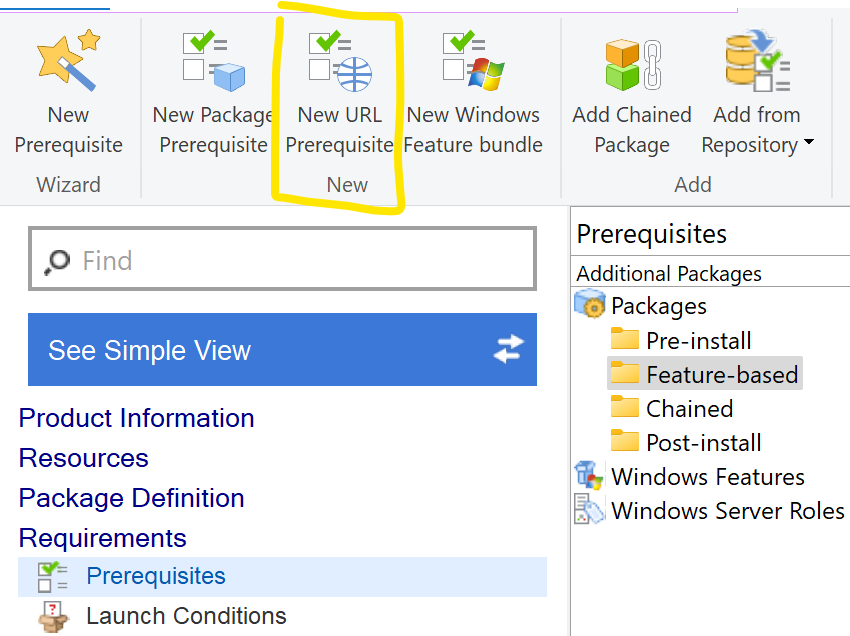
In the Prerequisites view use the New URL Prereq from the toolbar:
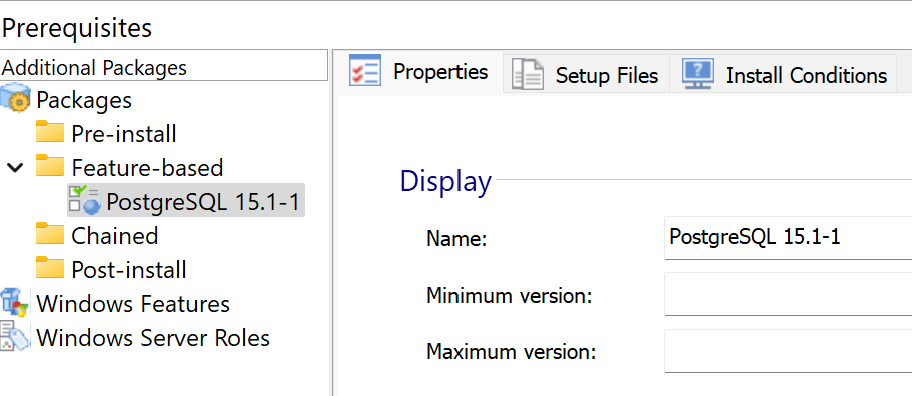
Enter the URL where the prereq will be downloaded from:
e.g.
Code: Select all
https://get.enterprisedb.com/postgresql/postgresql-15.1-1-windows-x64.exe3) Define install conditions for the Postgre SQL
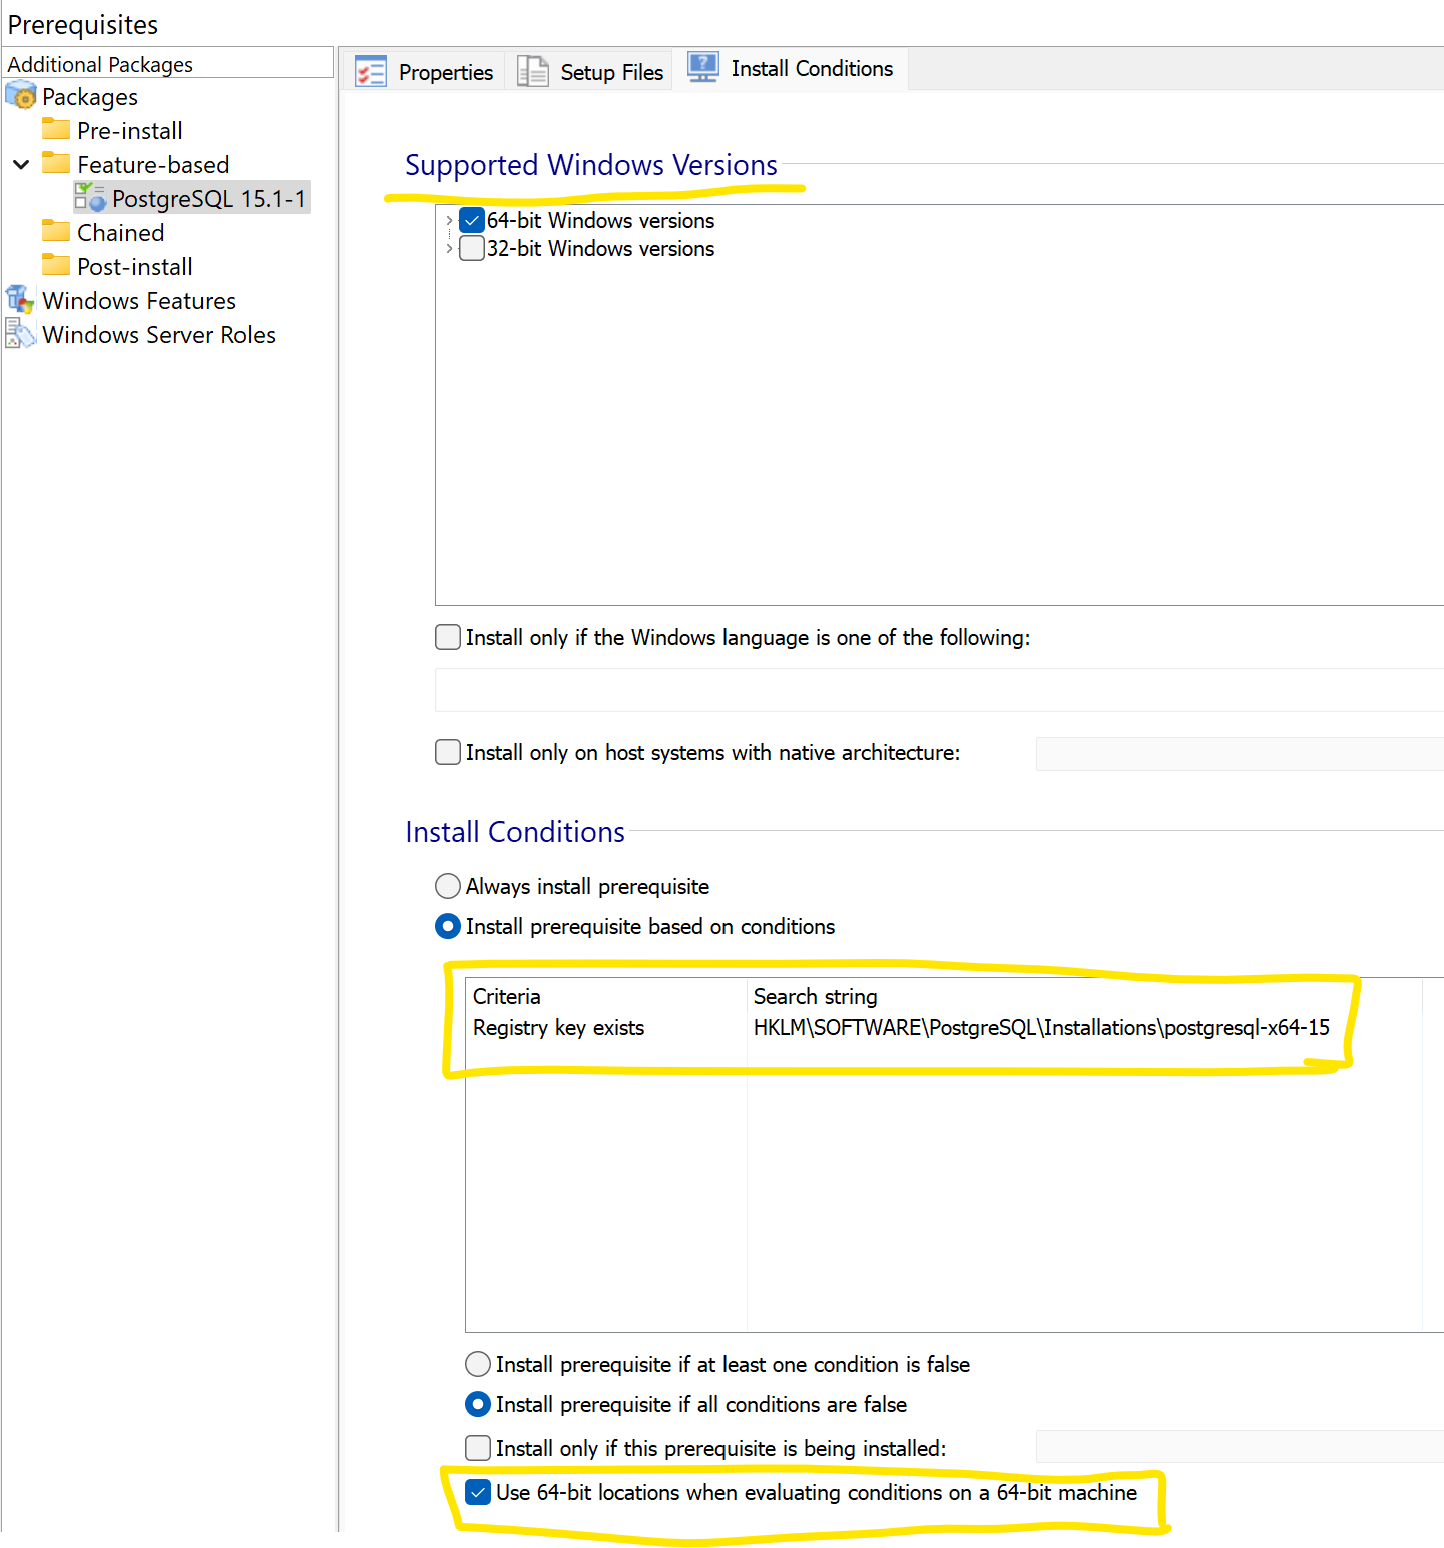
By default, the runtime is scheduled to always be installed. However, it should be installed only on the machines where it is missing.
Take a look on the Prerequisite install detection criteria - How to create one to have a better view about this.
A simple install conditions looks like this:
4) Pass command line switches to the PostgreSQL
Through the Install Command Line section from the Prerequisite Setup tab you can pass parameters to the runtime:
Notice the red parameters enclosed in square brackets. Basically, the related properties will contain the values entered by the user during the UI Wizard of the main setup. To access their values, the properties needs to be enclosed between square brackets. Because the related values might contain spaces, they also need to be enclosed in double quotes.
Read more about installer properties in formatted field in the Windows Installer Formatted Type article.
5) Create dialog to capture user input:
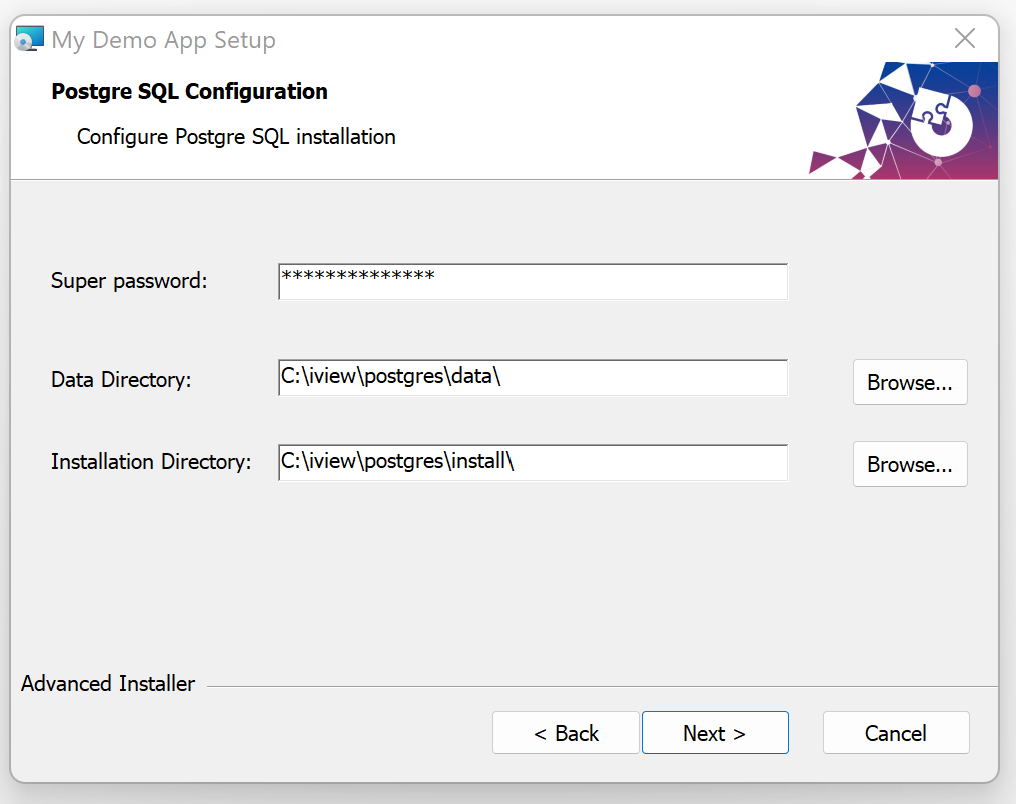
Here's how the dialog that will capture the user input for the Postgre SQL installation looks like:
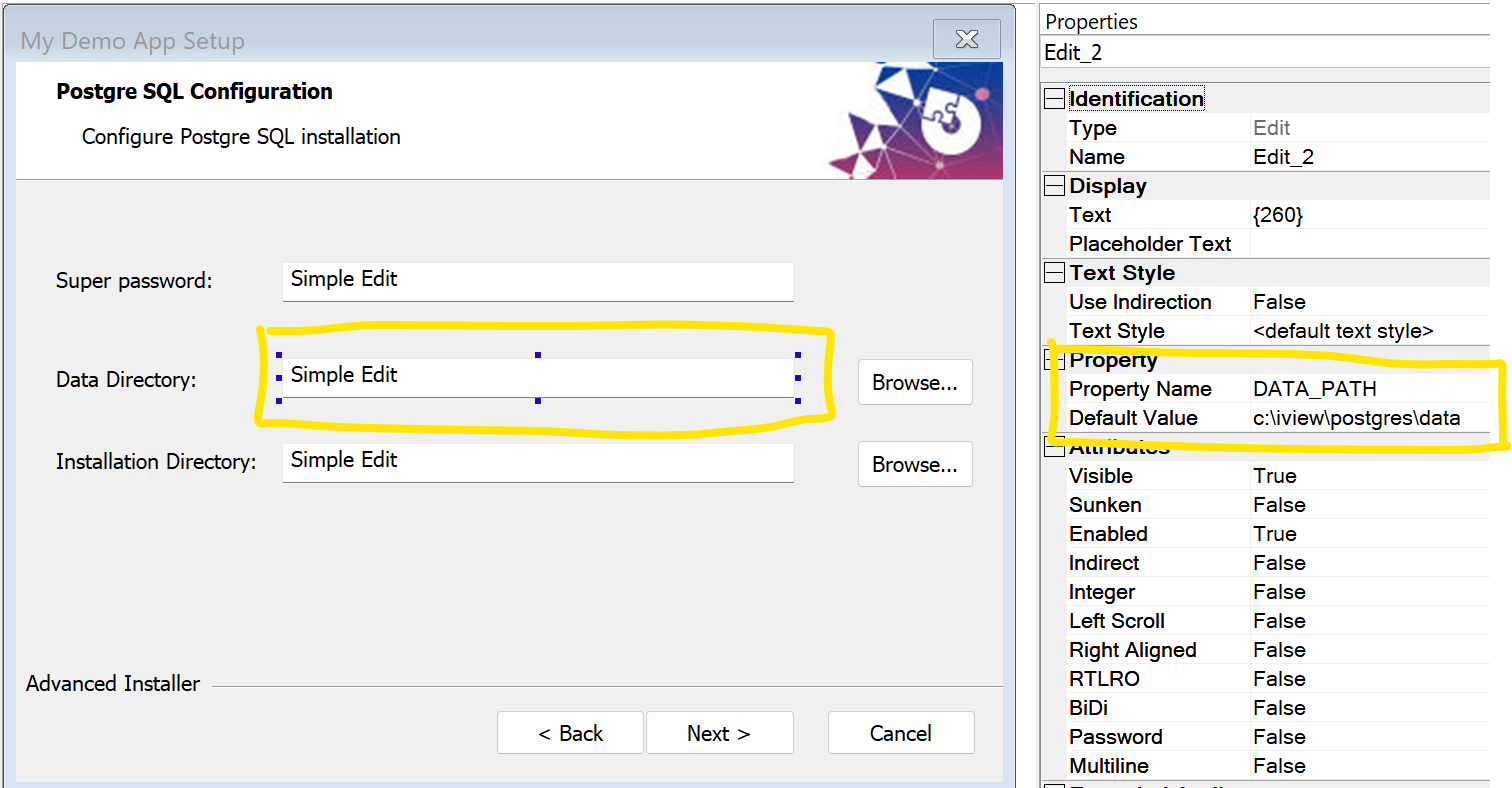
Each editbox from the dialog has a property attached that is further used to pass its value to the runtime installation as command line:
Allow user to select different paths. For this, you can check the How to browse for a folder at install time article that has all the related information about this functionality.
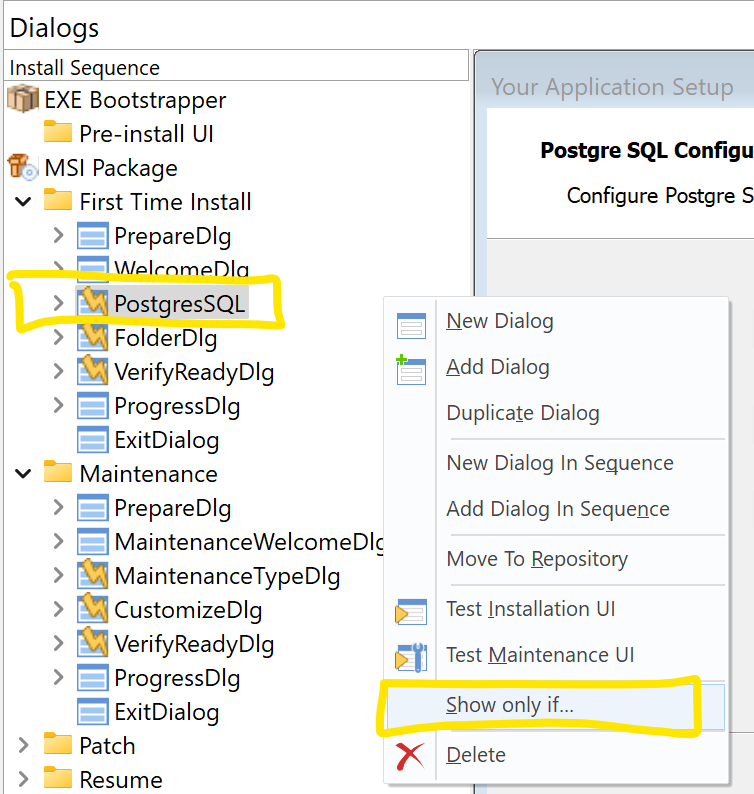
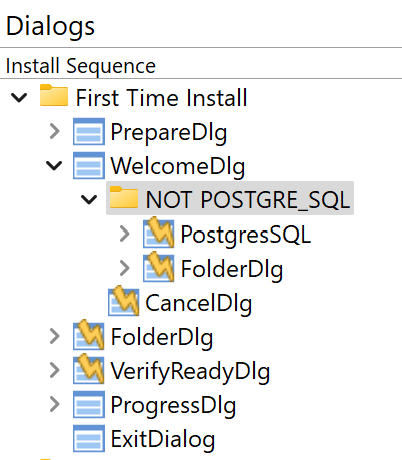
Since this dialog is only necessary when the Postgre SQL runtime is missing, you might want to consider to conditionally display this dialog.
For this, you can use the Show only if context menu option, adding the following condition:
Use the following condition:
Code: Select all
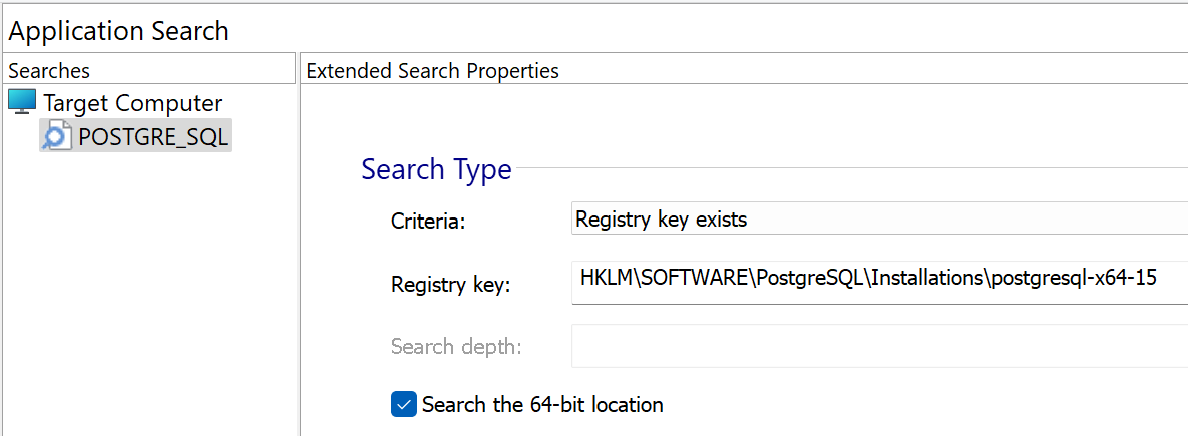
NOT POSTGRE_SQL6) Create a search conditions that will search if the Postgre SQL is installed:
In the Search view we can define a search operation that will set the POSTGRE_SQL property in case the runtime is installed. A simple search operation can look like this:
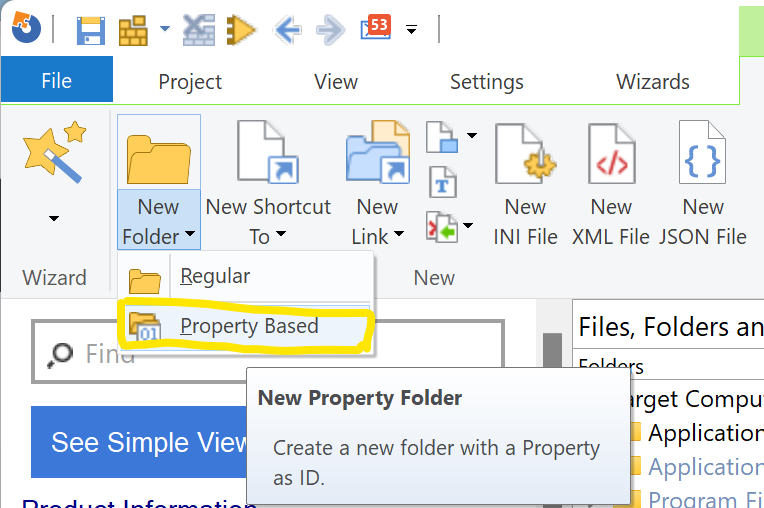
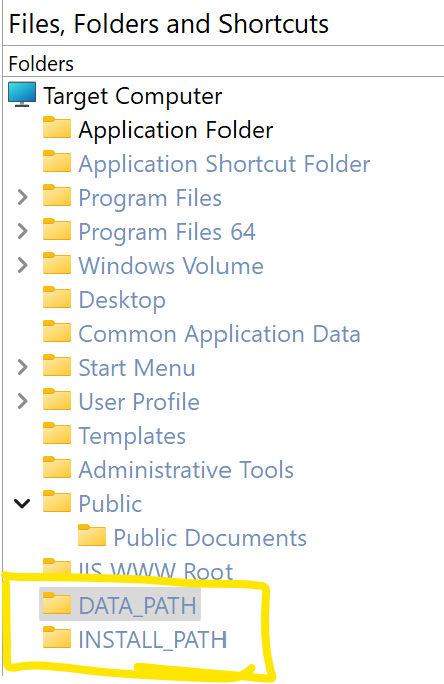
7) Define the DATA_PATH and INSTALL_PATH as directories in the Files and Folders view.
For this, use the New -> Property based folder toolbar option:
In the end, the following folder strucutre needs to be present in the Files and Folders view:
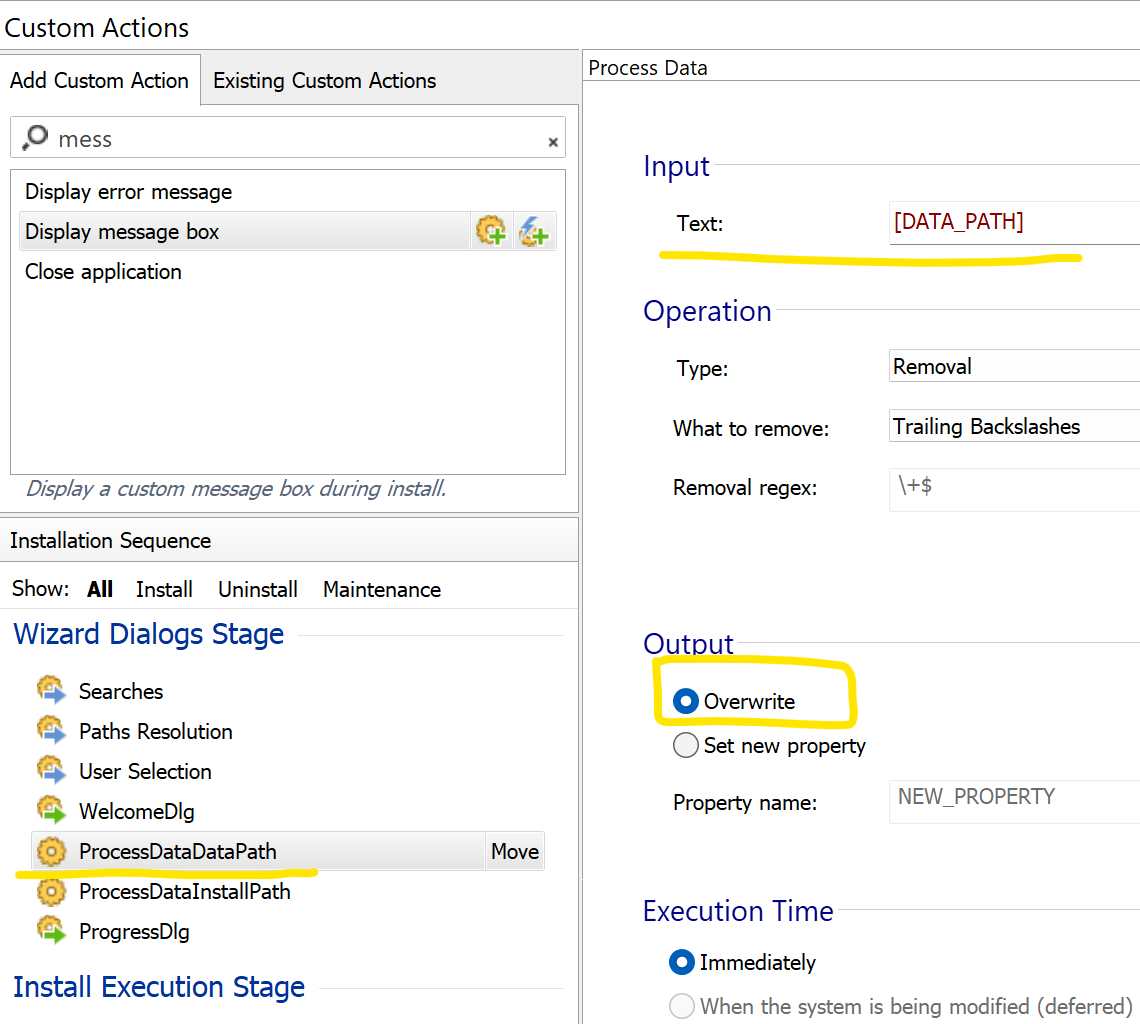
While testing the sample project, I've noticed that the Postgre SQL setup does not accept "\" as the last character for install path. The paths are resolved with a trailing backslash by default, this is the behavior for Windows Installer.
To overcome this, Advanced Installer offers predefined support through the Process Data custom action to remove the trailing backslash from a property:
The sample project is attached to this thread, so if you are interested to take a look directly at my project, you are more than welcome to download the ZIP file.
Best regards,
Dan
