Automating the Digital Signing Process of your MSIX Packages with MSIX Tweaker
A while ago we released a free tool for APP-V called TweakAPPV at Advanced Installer. Our purpose with this tool was to take App-V 5.x editing from the command-line to a new level by offering full access to the package contents.
TweakAPPV saves us weeks of manual work because it automates operations for hundreds of packages.
Seeing how TweakAPPV helped many of our customers, we decided to launch MSIX Tweaker - a new tool intended to automate any MSIX operation.
You can download the MSIX Tweaker from here.
Introducing the MSIX Tweaker
The MSIX Tweaker has the same functions and commands as TweakAPPV, with a slight addition of the /SIGN command, allowing you to automate the digital signing of MSIX packages.
To see an example of how it works, let’s assume that you have a registry key in your MSIX package which points to:
HKEY_LOCAL_MACHINE\Software\SecondKey\MyFirstValue
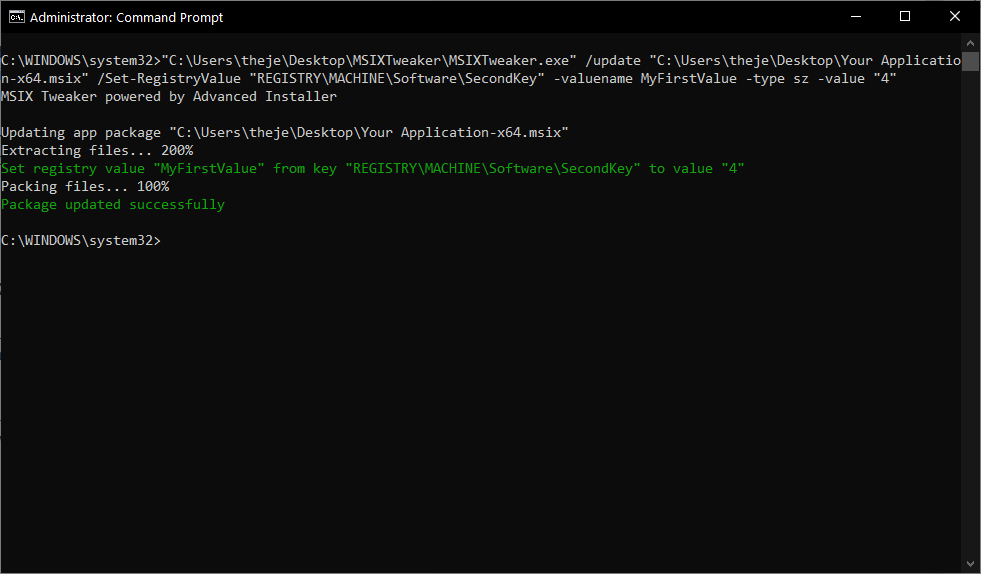
The MyFirstValue has the value 1 assigned. But, you want to change this programmatically, without opening the package. To do this, use the following command line:
MSIXTweaker.exe /update Your Application-x64.msix /Set-RegistryValue "REGISTRY\MACHINE\Software\SecondKey" -valuename MyFirstValue -type sz -value "4"

Seems simple, right? The MSIX Tweaker will:
- Open the MSIX file.
- Modify the registry in the registry.dat file.
- Repack the MSIX with the changes applied.
But, let’s not forget the new command addition for the MSIXTweaker tool -- /SIGN.
Automatically Sign Your MSIX Packages with MSIX Tweaker
As previously said, the /SIGN command lets you automate the signing of your MSIX packages.To make it easier for our users, we kept the same "sign" parameters as Microsoft's official signtool.
At this moment, we don’t automatically extract the subject of the
digital certificate, so to sign a package, we must create a batch file
to handle multiple commands.
To extract the subject of your digital certificate, execute a simple command in CMD:
certutil -dump "C:\YourCertificate.pfx"
For example, we will create the following batch file to sign an MSIX package:
Set-ElementAttribute AppxManifest.xml -xpath "appx:Identity" -attributename "Publisher"  -attributevalue "CN=Test-sha2, OU=Test, O=Test, E=someemail@myemail.com"
Sign /f "C:\digital-sign-no-pass.pfx" /fd SHA256 /t "http://timestamp.digicert.com"
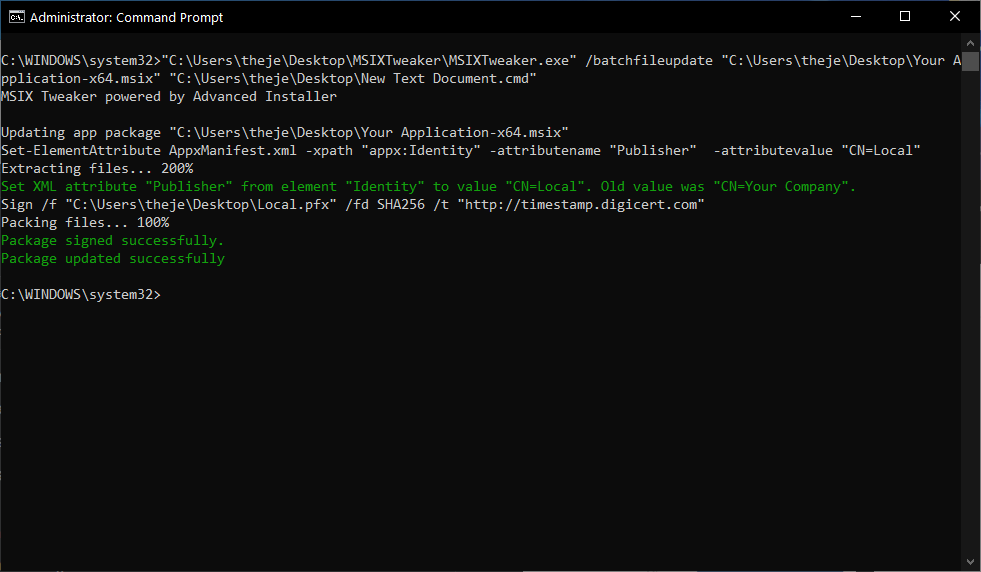
After the batch file is created, save it somewhere on your local machine (in our case in C:\test.cmd). Afterwards, open the CMD as an administrator and type the following command:
MSIXTweaker.exe /batchfileupdate Your Application-x64.msix "C:\test.cmd"

The MSIX Tweaker will:
- Extract the MSIX files
- Sign everything that is needed,
- Change the publisher of the MSIX package inside the AppxManifest.XML,
- Repackage the MSIX
- Sign the MSIX.
Using PowerShell Script to Sign Your MSIX Packages
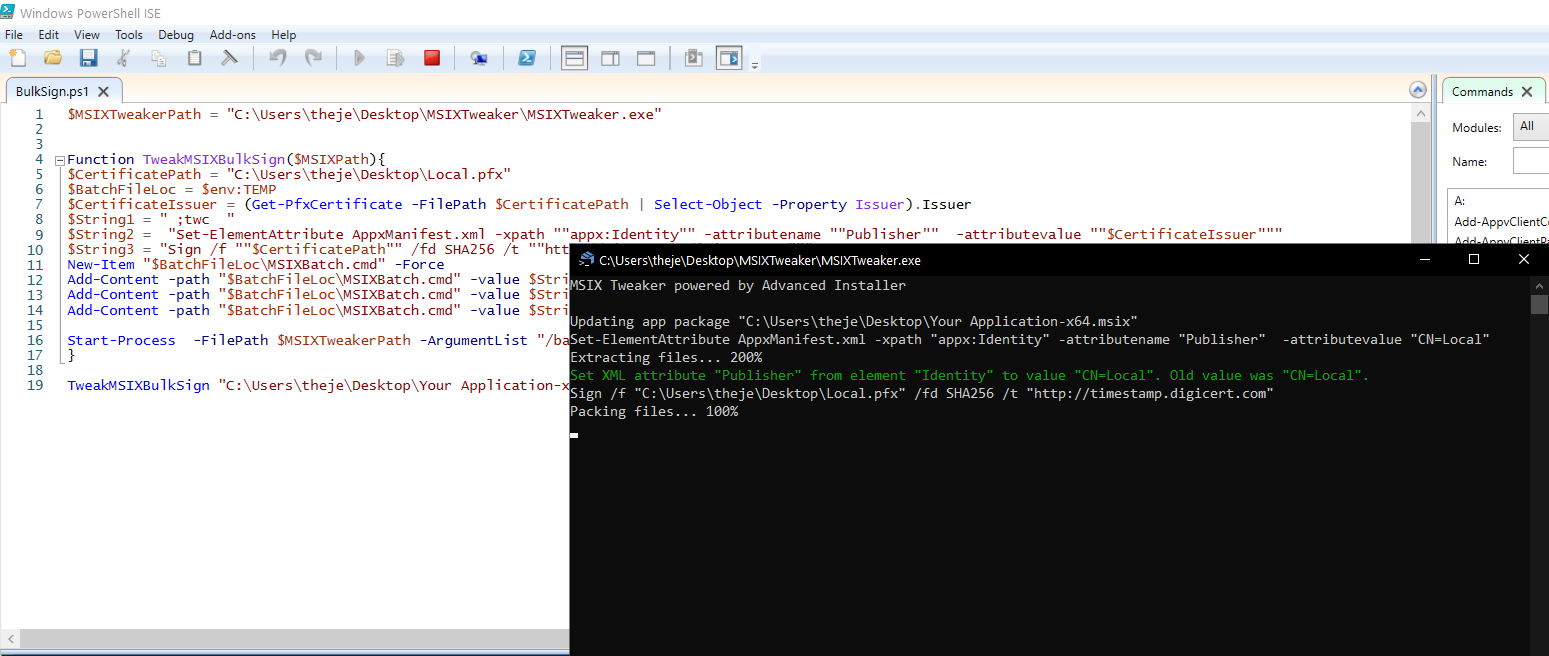
At first glance, it might seem time-consuming to create the batch file and run the necessary commands for your MSIX, but here's a sample PowerShell script that you can use to sign your packages:
$MSIXTweakerPath = "C:\Temp\MSIXTweaker\MSIXTweaker.exe"


Function MSIXTweakerBulkSign($MSIXPath){
$CertificatePath = "C:\Temp\digital-sign-no-pass.pfx"
$BatchFileLoc = $env:TEMP
$CertificateIssuer = (Get-PfxCertificate -FilePath $CertificatePath | Select-Object -Property Issuer).Issuer
$String1 = " ;twc  "
$String2 =  "Set-ElementAttribute AppxManifest.xml -xpath ""appx:Identity"" -attributename ""Publisher""  -attributevalue ""$CertificateIssuer"""
$String3 = "Sign /f ""$CertificatePath"" /fd SHA256 /t ""http://timestamp.digicert.com"""
New-Item "$BatchFileLoc\MSIXBatch.bat" -Force
Add-Content -path "$BatchFileLoc\MSIXBatch.bat" -value $String1
Add-Content -path "$BatchFileLoc\MSIXBatch.bat" -value $String2
Add-Content -path "$BatchFileLoc\MSIXBatch.bat" -value $String3

Start-Process  -FilePath $MSIXTweakerPath -ArgumentList "/batchfileupdate", """$MSIXPath""", """$BatchFileLoc\MSIXBatch.bat""" -Wait
}

MSIXTweakerBulkSign "C:\Users\theje\Desktop\Your Application-x64.msix"
Let’s break down the script and understand what it does:
1. The first thing we need to do is set the path for the MSIXTweaker.exe. Next, we created a function called MSIXTweakerBulkSign.
2. In this function, we must also declare the path to our certificate, which in our case is C:\Temp.
Because we want to create the batch file required for signing
dynamically, we are using the Get-PfxCertificate PowerShell cmdlet in order to
extract the issuer of the certificate.
3. After we extract the issuer, we create a batch file in %temp% and we place the details we previously extracted from the certificate in it.
4. Once the batch file is created, all that is left to do is start the MSIXTweaker (with the previously explained arguments that point to the MSIX and batch file).
5. In the end, we call the MSIXTweakerBulkSign function with an MSIX that we want to sign.
Although it may seem that the script only signs one package, with a simple addition, you can parse a folder, search for all the MSIX packages and sign them altogether. This addition to the code will look like this:
$files = Get-ChildItem "C:\Temp" -Filter *.msix
foreach ($f in $files){
MSIXTweakerBulkSign "C:\Temp\$f"
}We are excited to hear your thoughts or success stories with this new tool, so please leave us your feedback in the comments or by email.
Subscribe to Our Newsletter
Sign up for free and be the first to receive the latest news, videos, exclusive How-Tos, and guides from Advanced Installer.