Contents
- Advanced Installer
- How to Create an Advanced Installer Project
- How to Add Files and Folders
- How to Add Registry
- How to Build and Install
- How to Remove an Installed MSI
- How to Edit Product and Company names
- How to Create Shortcuts
- How to Change the Product Version
- Wise Package Studio
- First Time Settings
- How to Create a Project
- How to Add Files
- How to Add a Registry
- How to Edit Product and Company Names
- How to Create Shortcuts
- How to Change the Product Version
- How to Build and Install
Wise Package Studio
Wise Package Studio is a suite of tools that allows you to create and edit packages, transforms, patches, and more.
First Time Settings
Before we create MSI packages, we must install Wise Package Studio. Once installed, we need to make some configurations.
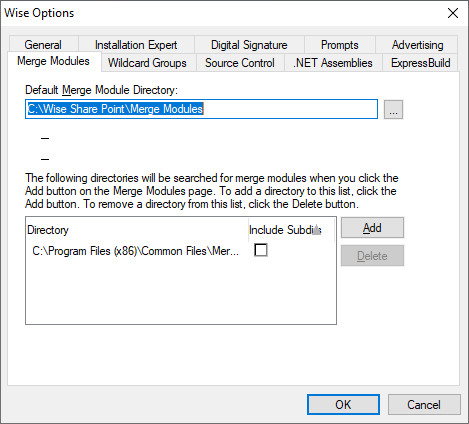
One of these configurations is related to merge modules. To include these files in the package, we must either populate the default directory of the Wise with merge modules, or we must redirect to a directory that contains these modules.
You can do this with the Windows Installer Editor, Tools \ Options \ Merge Modules menu, Default Merge Module Directory option:
It is also recommended to set Advertising options before starting any captures. Because dll registration is done through registries, it is not recommended to have it be captured, since Wise registers them automatically.
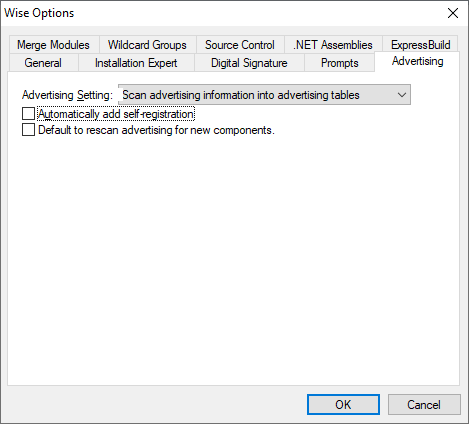
The “Automatically add self-registration” option must be unchecked.
How to Create a Project
After launching Wise Package Studio, you will be presented with a page where you can choose the type of project you want to create.
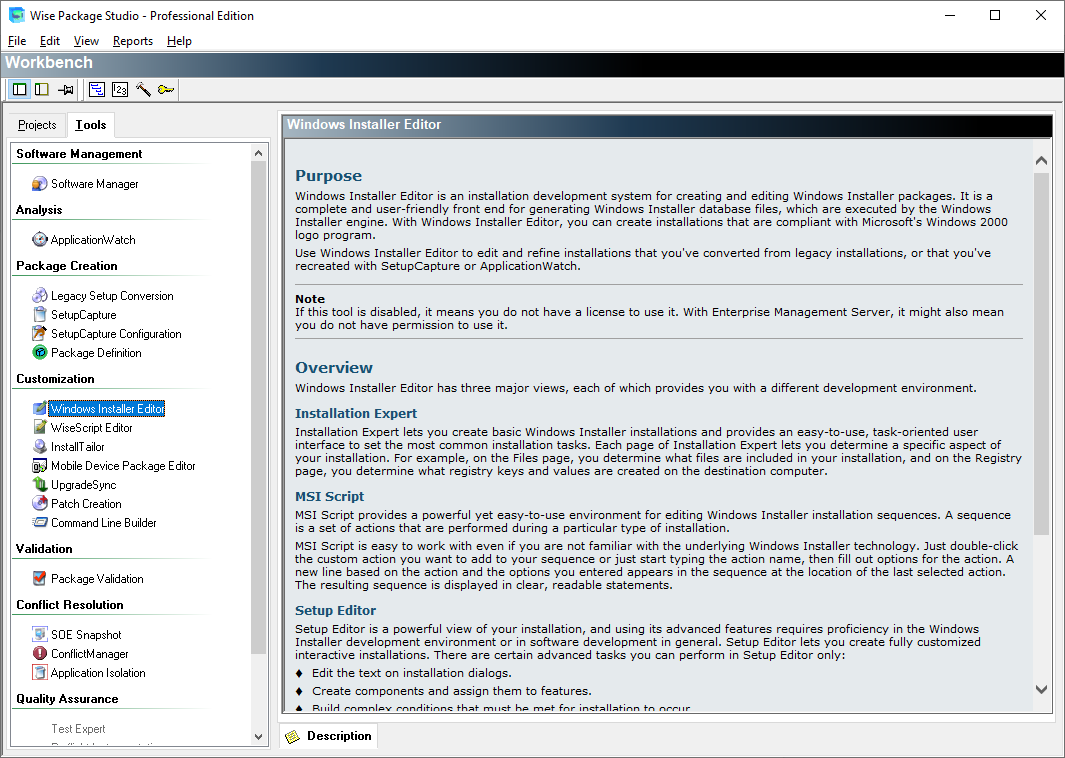
- Select Windows Installer Editor
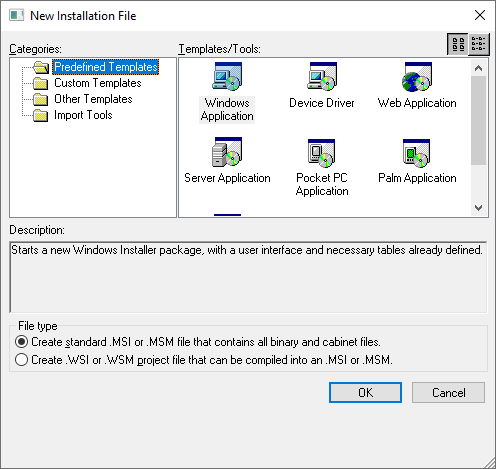
New Installer window in Wise Package Studio - From the Predefined Templates, select Windows Application and click OK
That’s it! The project is now created and you can start adding information to your MSI package.
How to Add Files
The most important step in creating an MSI package is adding a file or folder.
- Navigate to the Files page by selecting it from the left-side panel.
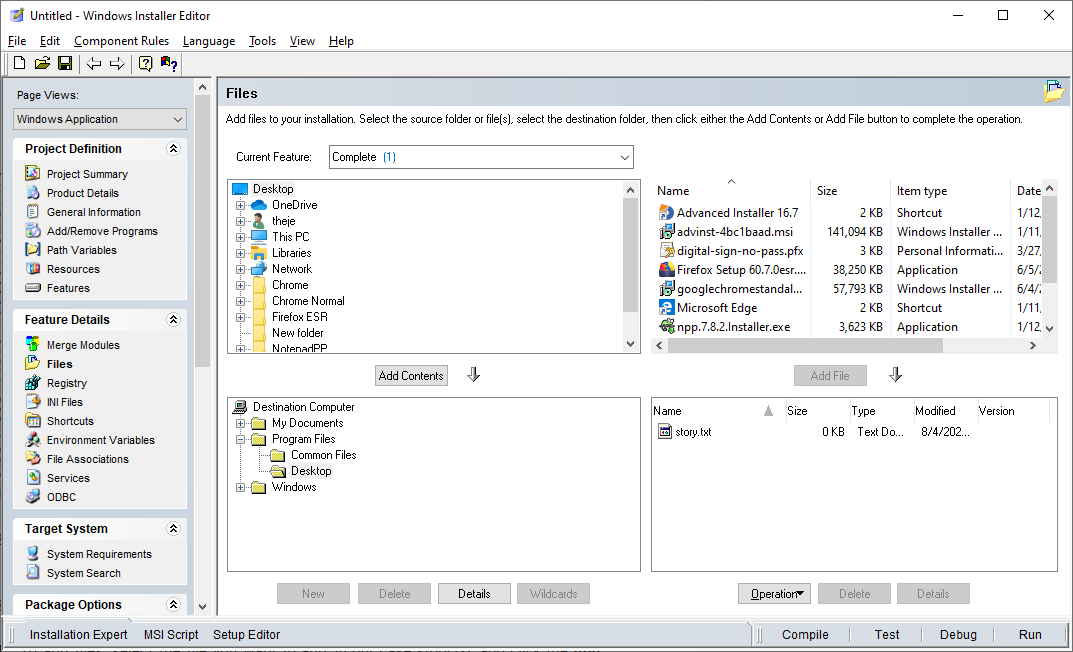
Wise Files Editor Page - In this window, the explorer tabs located in the top show the folders, files and overall content stored in the machine. On the left you have the folders, and on the right, the contents of a specific folder.
- The bottom two tabs show what’s present in the Windows Installer package. Again, on the left, you can find the folders, and on the right, the folder contents.
- To add files, select the file you want to add, in our case story.txt, and click the Add file button.
Wise Package Studio will then create the features and components automatically..
How to Add a Registry
To add a registry to your package:
- Navigate to the Registry page in the left pane. As with the Files page, the page is split in 4 areas. The top two areas show registries and values that are present on your machine, and the bottom panes display what will be added from the package.
- Click the Add button.
- A Registry Details window will
appear where you can specify the registry root, key, name, value and data type.
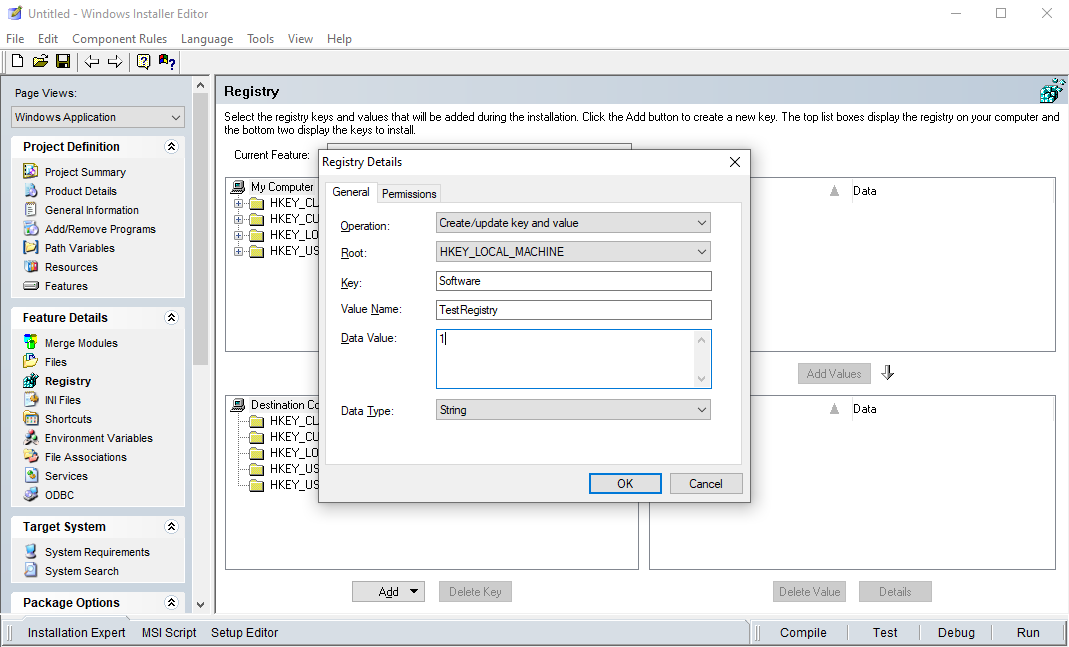
Wise Registry Editor Page - Input the values and click OK. When finished, the registry
will appear in the bottom view area.
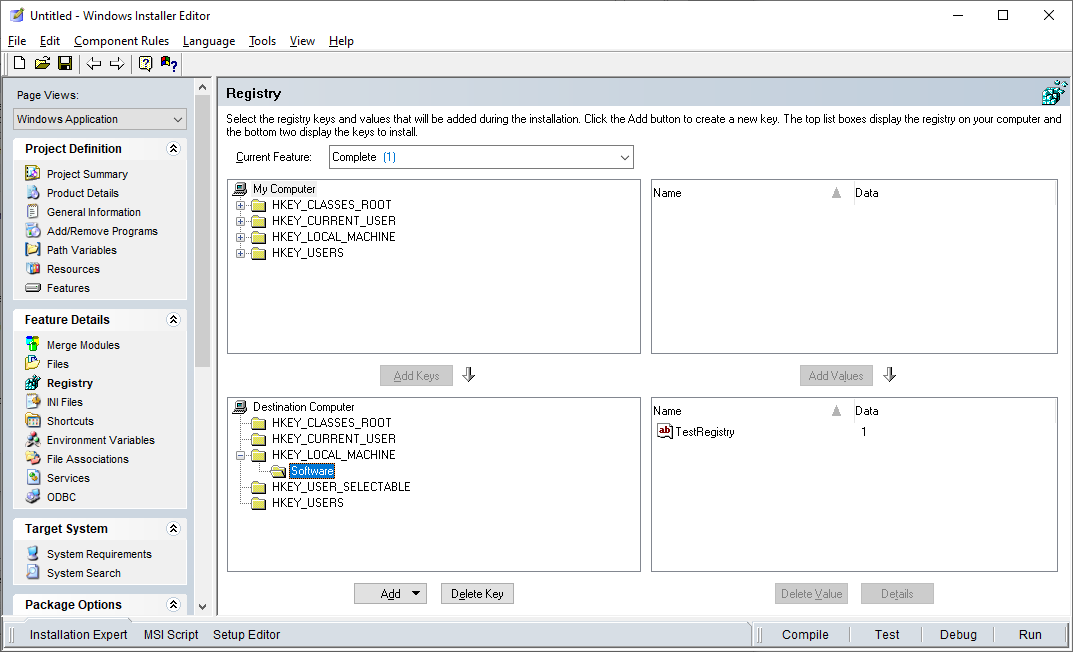
Wise Registry Editor Page
How to Edit Product and Company Names
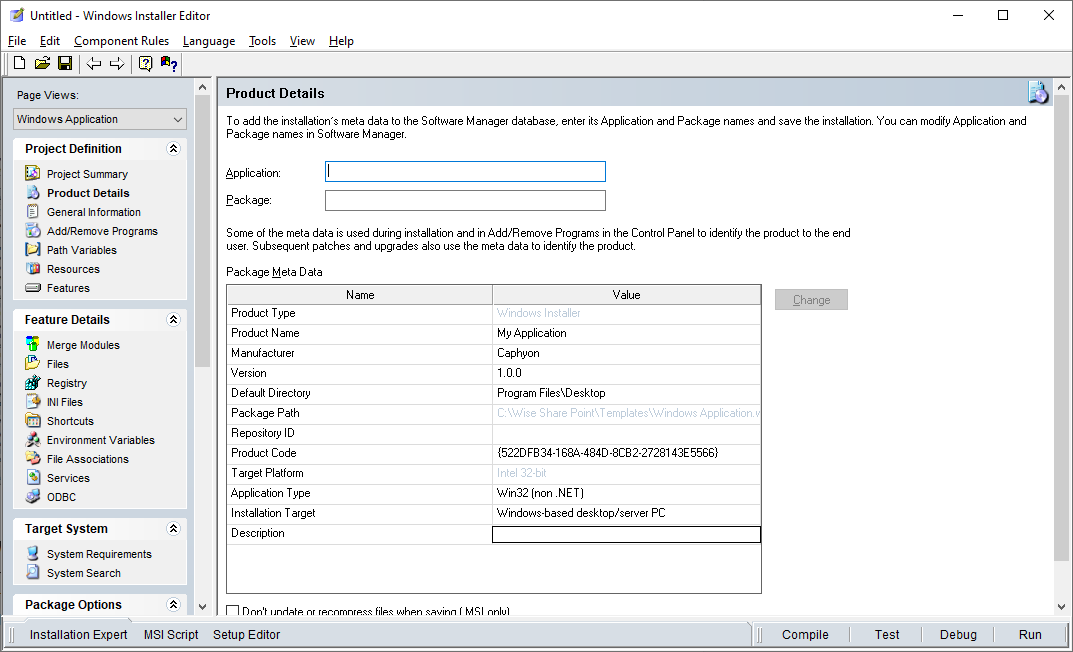
You need to specify a name and manufacturer for your MSI. To do this, navigate to the Product Details page. There, modify the Product Name and Manufacturer.
How to Create Shortcuts
We need to create shortcuts to the installed files to allow for easier access. So, let’s create a shortcut in the Start Menu.
- Start by navigating to the Shortcuts Page, and click the Add button from the right
pane.
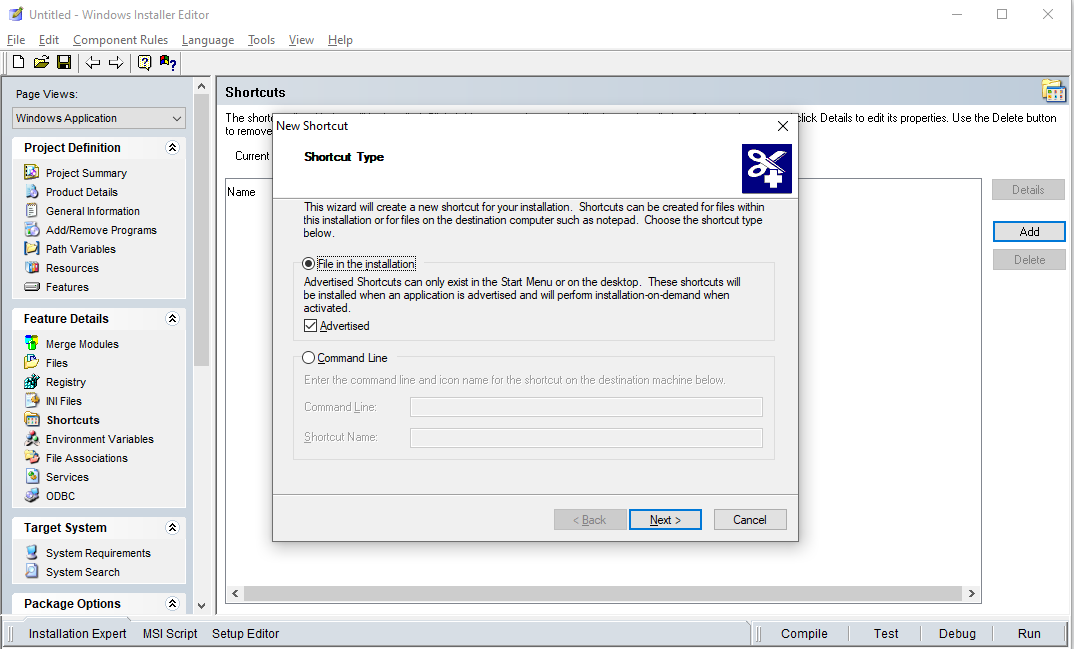
Wise Shortcuts Page - Keep the default settings and click Next.
Wise Shortcuts Page - Select the file for which the shortcut will be made. In our
case it’s story.txt. Then, click Next.

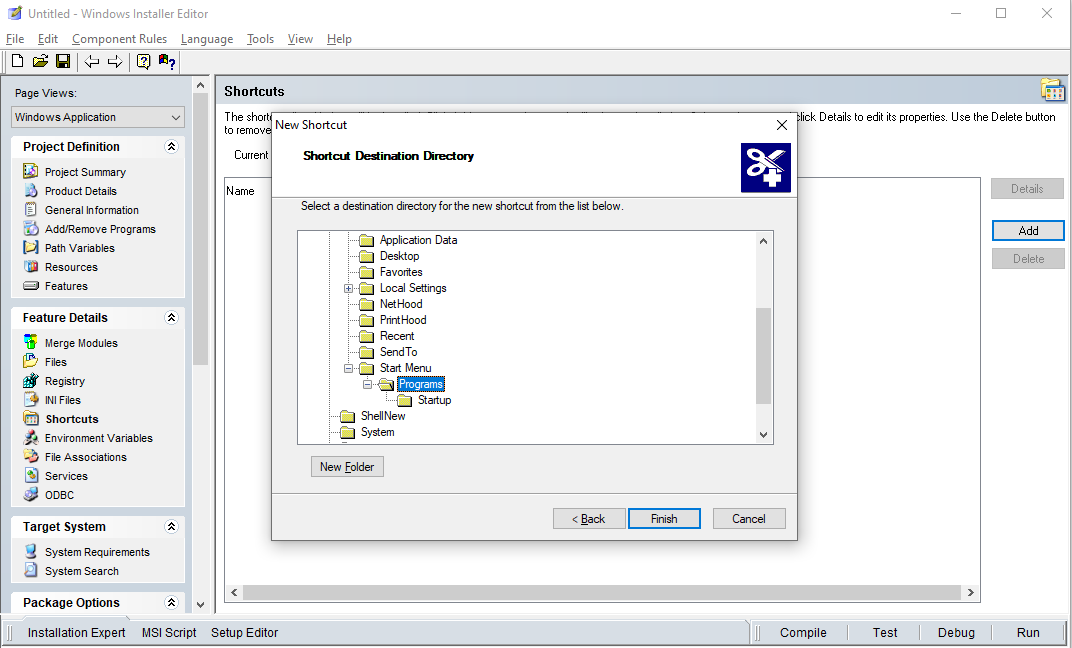
Wise Shortcuts Page - We also need to specify the directory where the shortcut
will be created. In our case, we configured the shortcut to be placed in Start Menu\Programs. After you choose your directory, click Next.
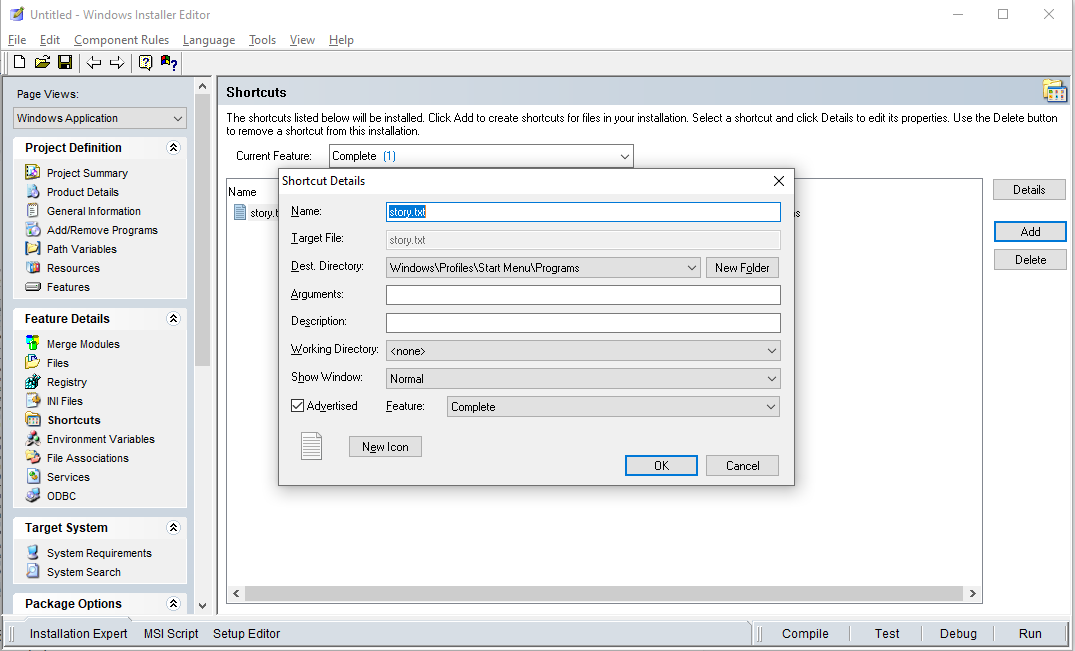
Wise Shortcuts Page - If you have any additional arguments or settings, configure
them here. Otherwise click OK.
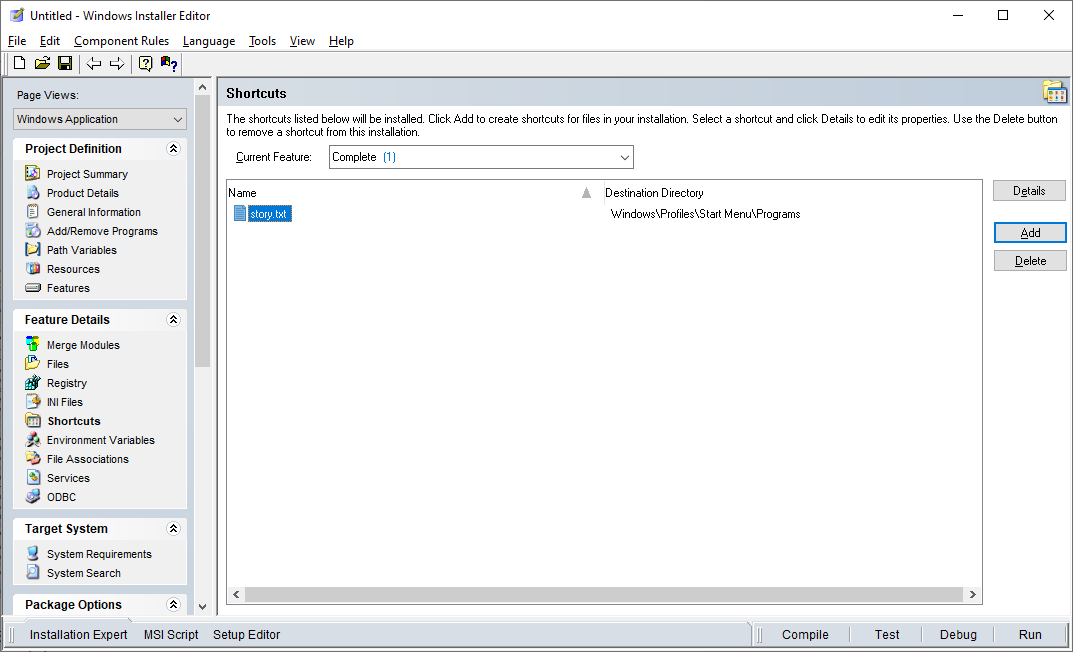
Wise Shortcuts Page - The shortcut will now be created when the package is installed on the machine.
How to Change the Product Version
At some point, you may need to release a new version of the story -- including fixes to some issues discovered in the first release.
- Switch to the Product Details page by selecting it
in the left-side panel. Then, edit the Version field to “2.0.0”.
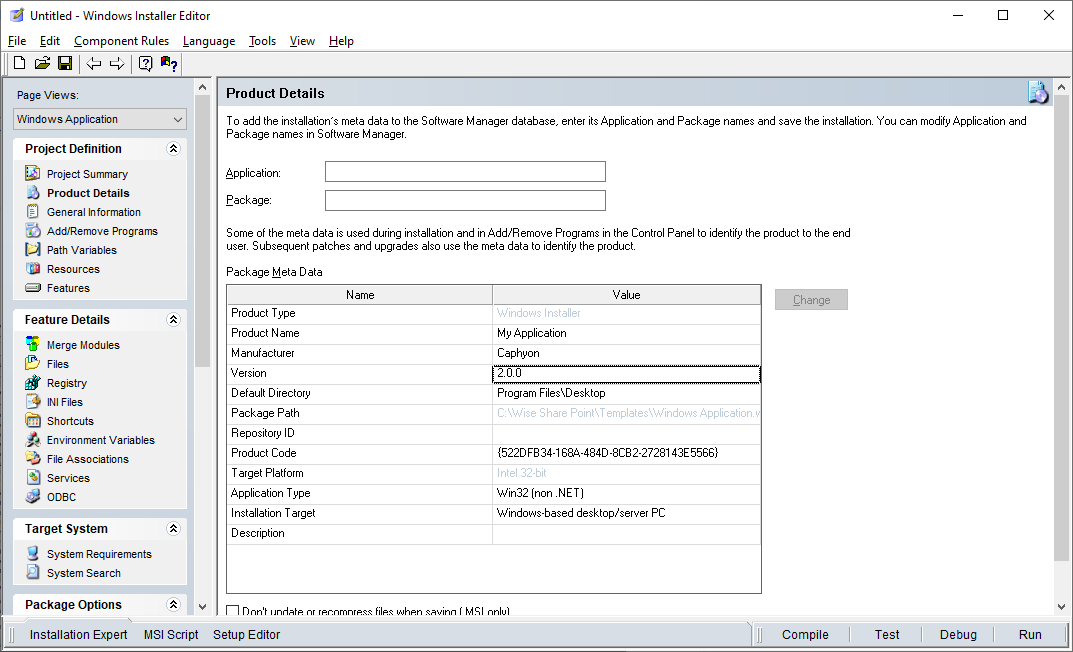
Wise Product Details Page Note: When changing the version of an MSI package, the Product Code must also be changed.
- Select the Product Code and click the Change button.
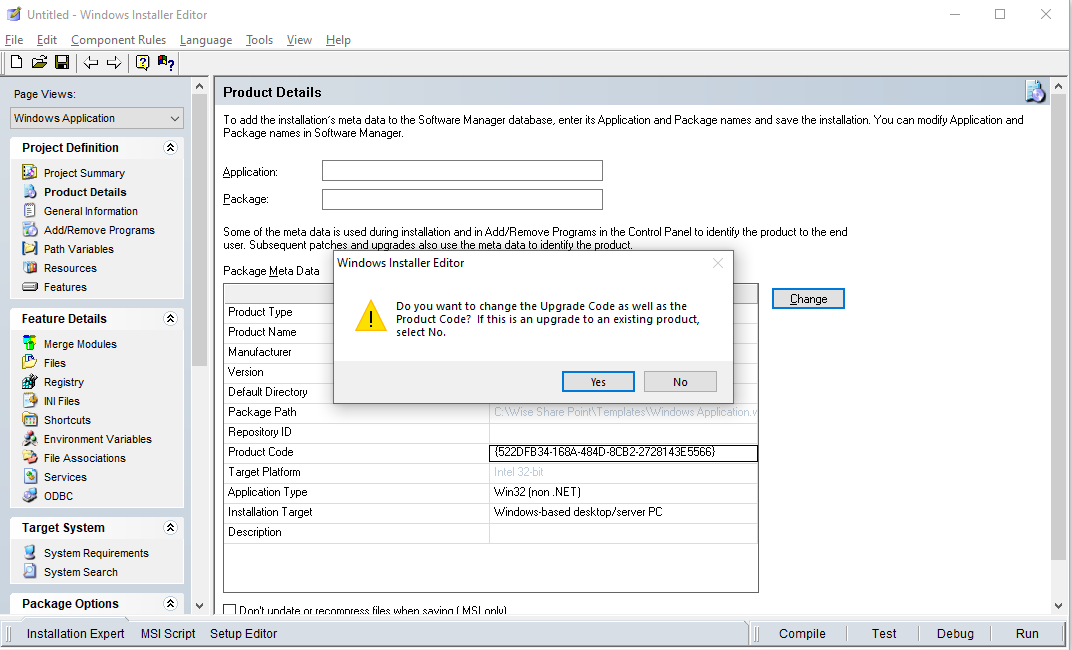
Wise Product Details Page - Wise Package Studio will warn you that if this is an upgrade
package, you shouldn’t change the upgrade code.
In our case, this is a newer version of the package, so we will click NO.
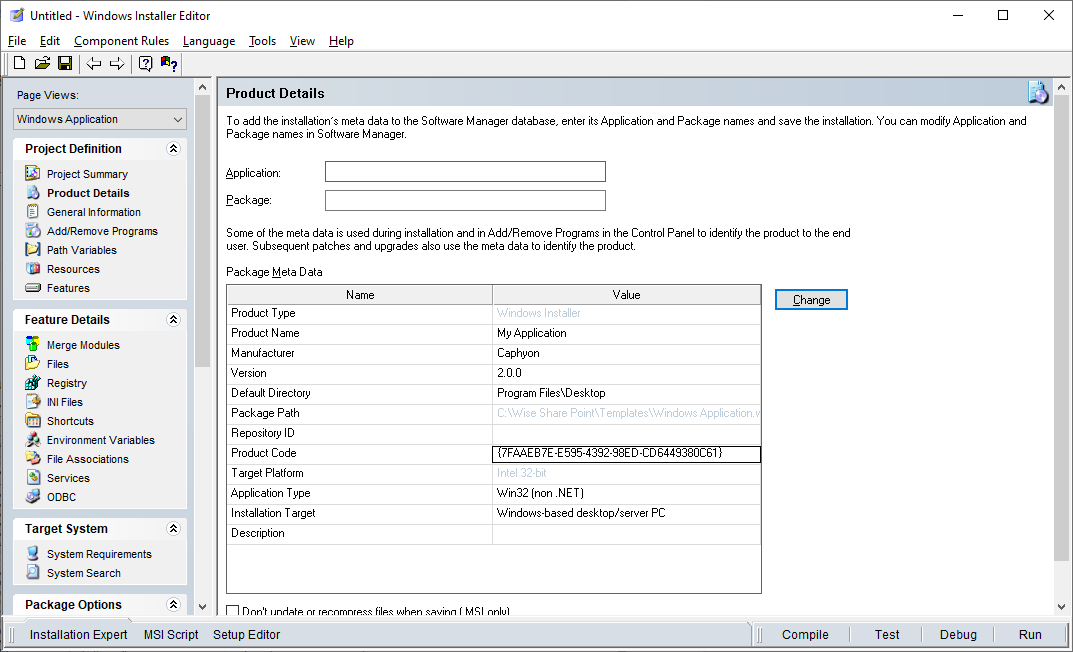
Wise Product Details Page - Once NO is clicked, Wise Package Studio automatically generates a new Product Code. A new version of the installer is now properly configured.
How to Build and Install
- To build the MSI package, click navigate to File >
Compile or F7.
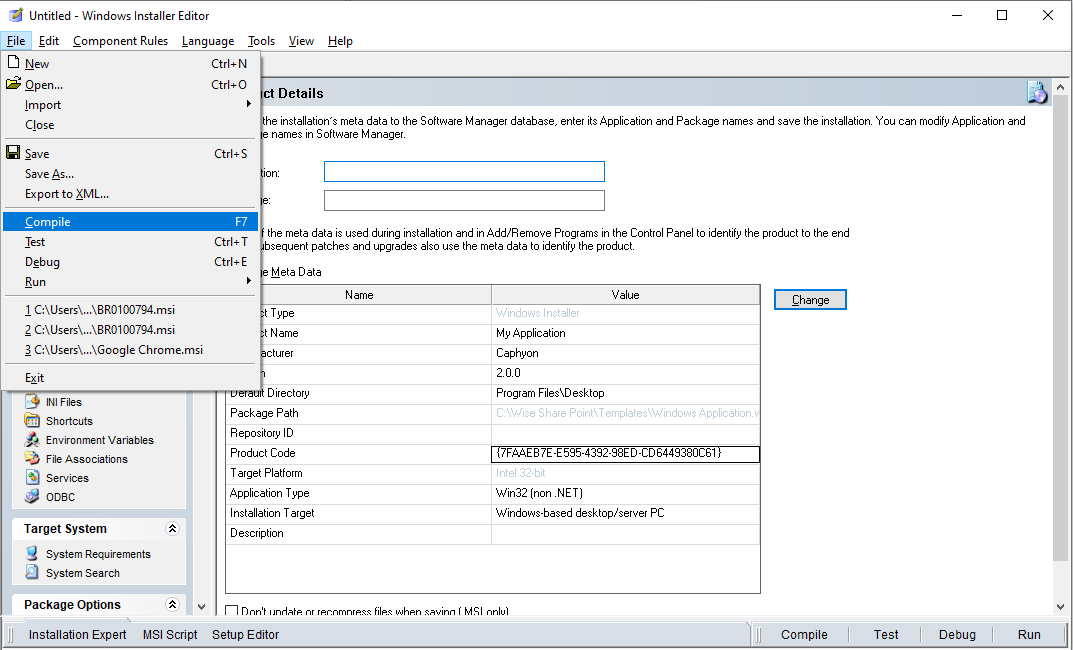
Compile the project in Wise Package Studio - A window will appear asking where the MSI should be changed.
Type the MSI name and save it to the location you wish.
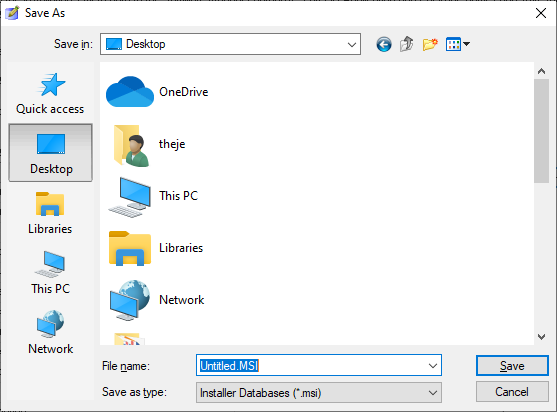
Save location dialog
Congratulations! You have created your first Wise Package Studio MSI package.
Now, if you navigate to the build location and try to install the package, all of the previous settings will be applied on the machine.
