While Advanced Installer provides a comprehensive list of predefined launch conditions to ensure smooth installations, there are situations where a custom approach becomes necessary. One such scenario is when you need to abort the installation based on specific conditions, like checking if the target host is a domain controller.
In this article, we'll walk you through the process of implementing a custom launch condition using a custom action. By creating a PowerShell script custom action, we'll demonstrate how to set a property based on the target host's domain controller status. With this property in place, we can then use it as a custom launch condition to control the installation flow effectively.
Let's dive in and learn how to harness the power of custom launch conditions in Advanced Installer!
1) Creating a Custom Action to Detect the Domain Controller
For our custom action, we'll utilize a PowerShell script, though you have various options, including C# or C++ DLLs or script custom actions like VBScript. Within the Custom Actions view, we'll add the Run PowerShell Inline script custom action as a custom action with sequence.
The following code snippet checks the target host's domain controller status and sets an installer property accordingly.
Code: Select all
Param()

Function Test-IsDomainController() {

	$domainRole = (Get-WmiObject Win32_ComputerSystem).DomainRole

	If ($domainRole -eq '4' -or $domainRole -eq '5'){
			AI_SetMsiProperty DOMAIN_CONTROLLER "True"
	}
}

Test-IsDomainController
Based on the return values, you can determine if it is a standalone workstation or not:
- Standalone Workstation (0)
- Member Workstation (1)
- Standalone Server (2)
- Member Server (3)
- Backup Domain Controller (4)
- Primary Domain Controller (5)
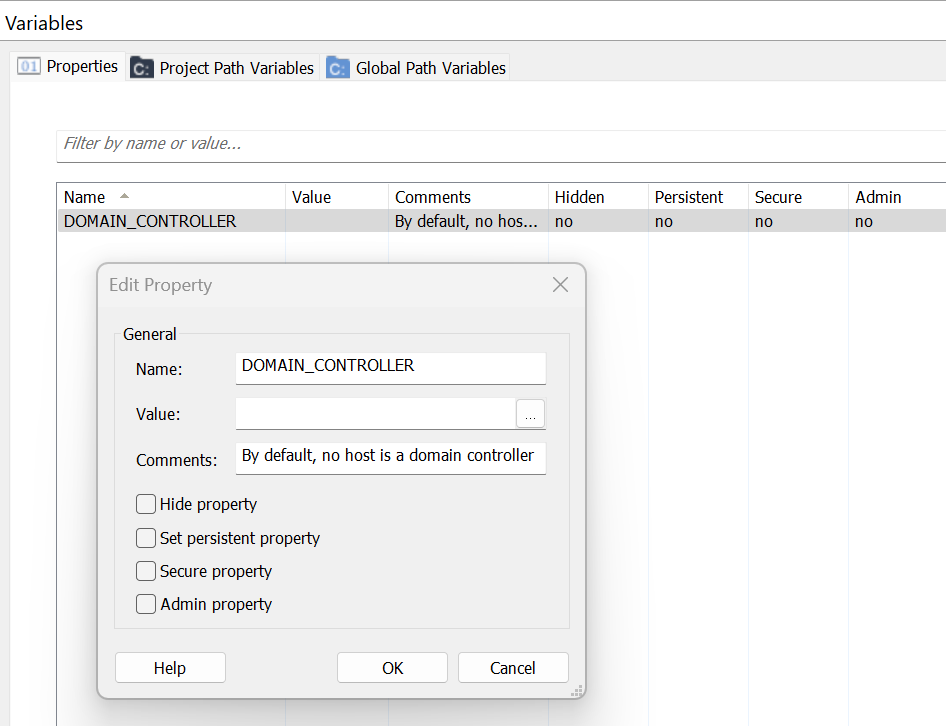
You might want to declare the property in the Properties view:
Important!
Make sure the Value field is empty!
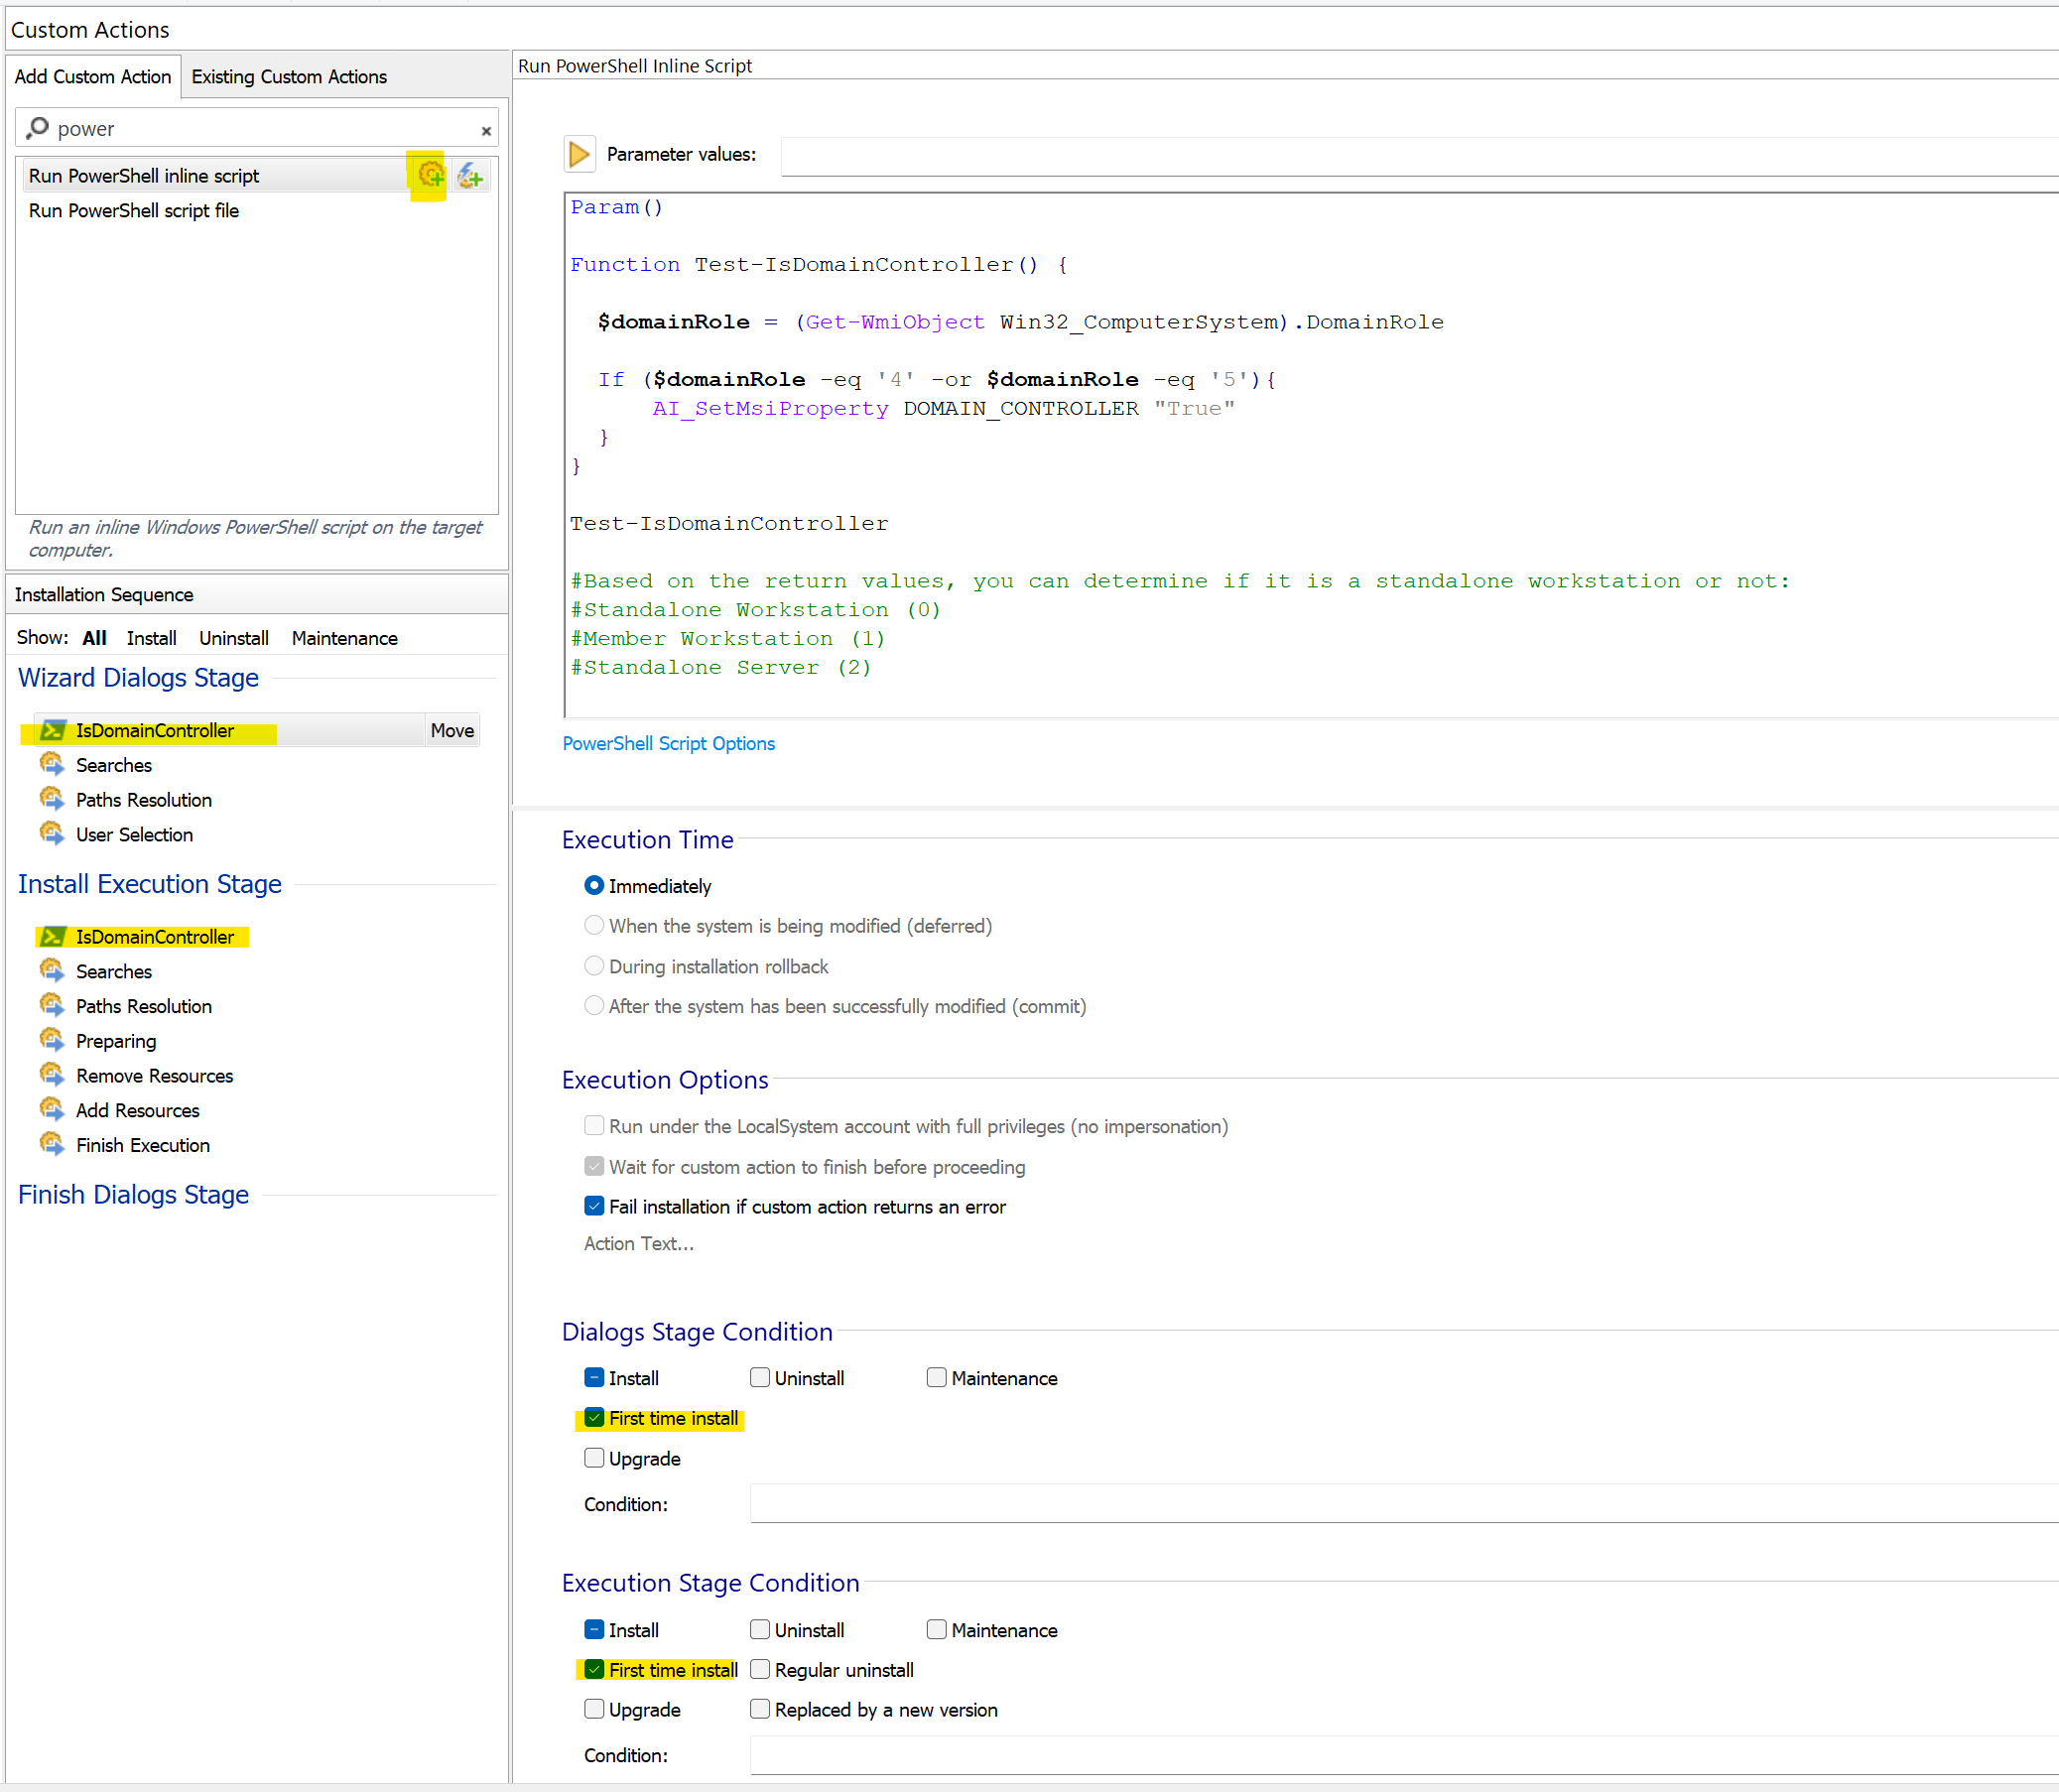
2) Configure the custom action as below:
Sharing Custom Actions - You can also share a custom action between two standard actions, provided one it is located in the Wizards Dialogs Stage and the other in the Install Execution Stage.
Simply drag a custom action from one stage to the other, while pressing the Shift key. This is useful to ensure the custom action gets executed during a silent installation.
Important!
Make sure the custom action is added before the Searches stage from the dialog sequence.
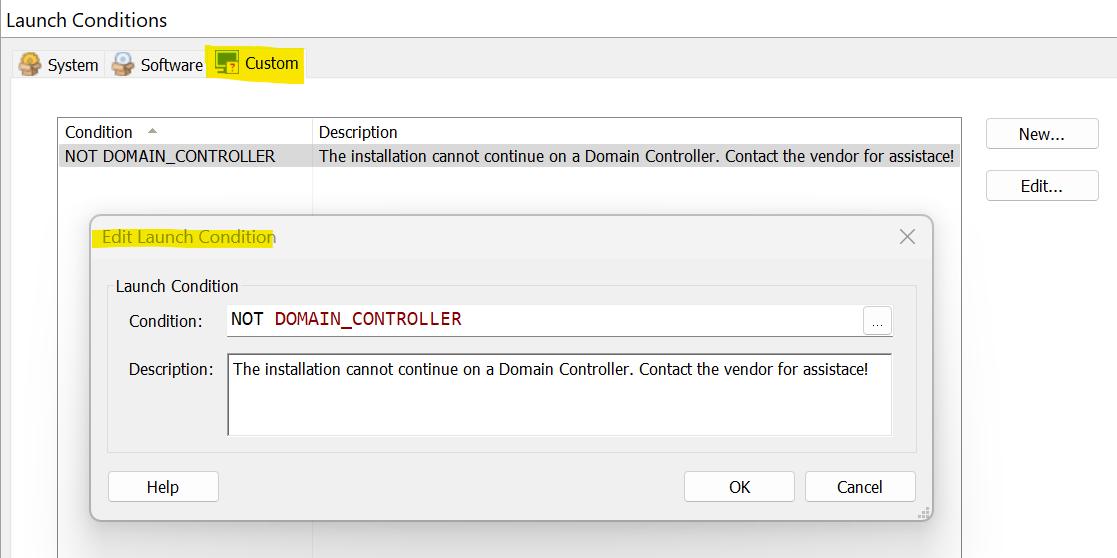
3) Define the Custom LC in Launch Conditions
Moving on to the Custom tab from the Launch Conditions page, we'll define the launch condition. By doing so, we ensure that if the property indicating the presence of a domain controller is set, the installation aborts. If the property is empty, the launch condition remains untriggered, and the installation proceeds as intended.
The sample project is attached to this thread, so if you are interested to take a look directly at my project, you are more than welcome to download the ZIP file.
As we progress, we are eager to hear about any other custom scenarios you have in mind. Your valuable input will shape our future sample projects and further enhance the capabilities of Advanced Installer.
We hope this article proves helpful to you! If you have any questions or need further assistance, please don't hesitate to reach out.
Advanced Installer Team


