Recently we have added support in Advanced Installer for modern WinUI controls . Thus you can develop in a XAML file the code of your own WinUI control and then include such control in one of the setup package dialogs.
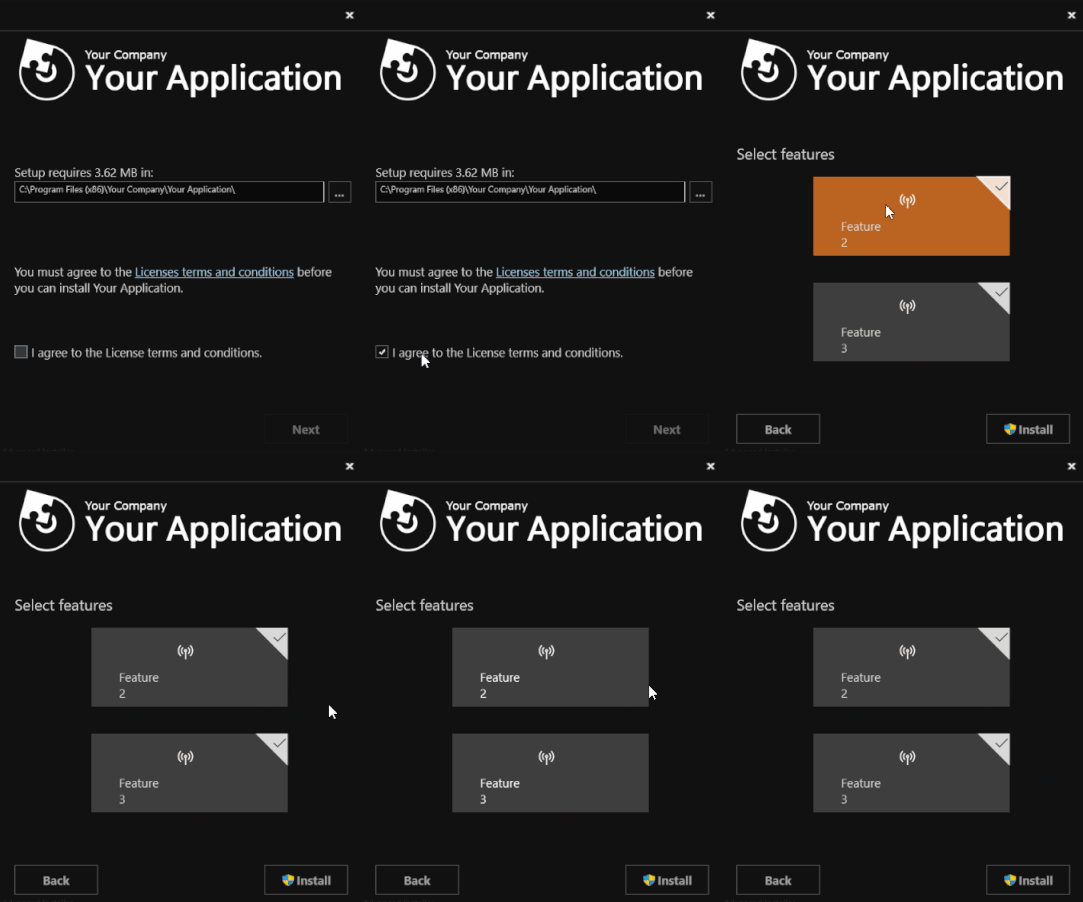
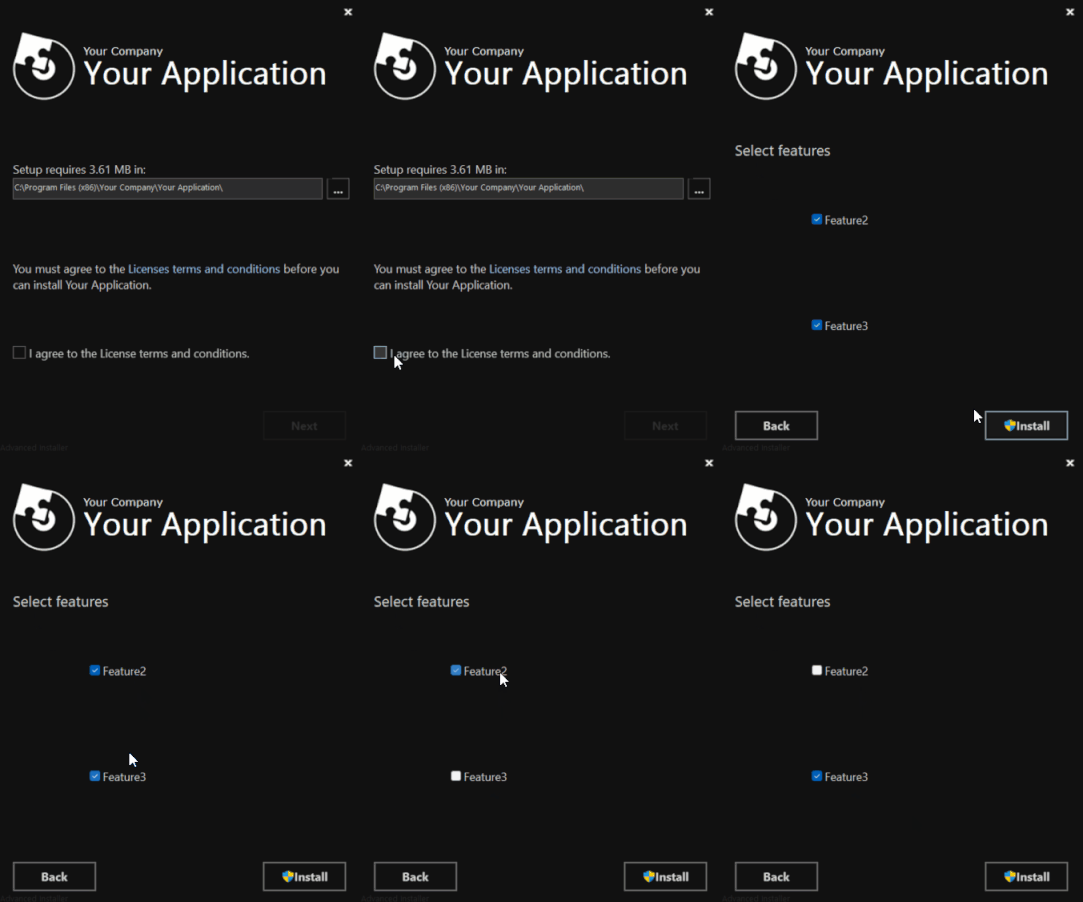
After this tutorial we will achieve the following design:
- After WinUI:
- Before WinUI:
Note: The quality of the above animations is quite low because our forums does not support high attachment size on a single file.
Hereby I will present the workflow to implement WinUI checkbox controls in an installer dialog. Attached you can find a sample.
The sample exposes a feature selection dialog using two checkbox controls developed in a XAML file. Also, an Enterprise or higher license edition of Advanced Installer is required.
Here are the full steps you should proceed with:
1. write in two .xaml files the code of your WinUI checkbox controls
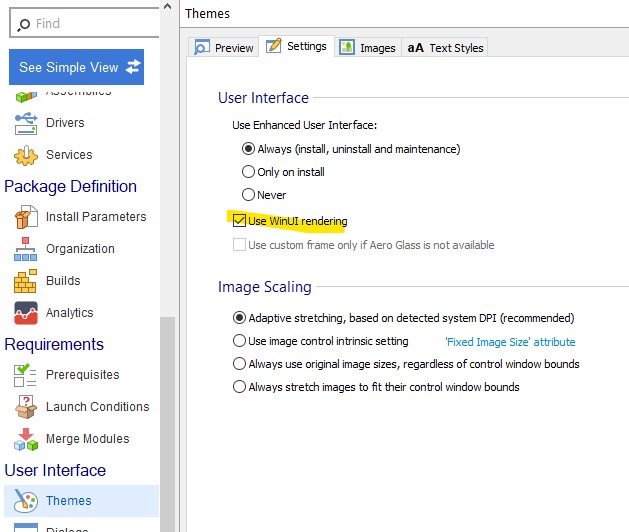
2. open your setup project in Advanced Installer and from "Themes" page select a theme (e.g. Surface); make sue that from "Settings" tab the "Use WinUI rendering" option is set
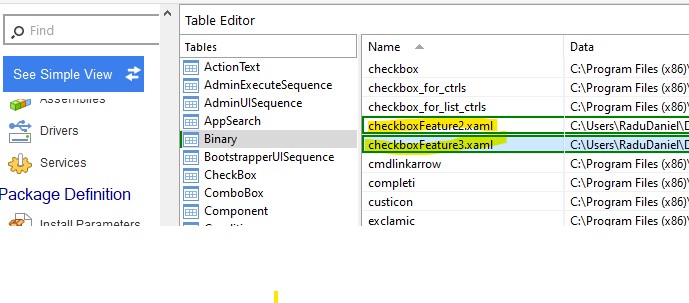
3. go to "Table Editor" page and in "Binary" table add your .XAML file; make sure the id written in the "Name" column include the .xaml extension
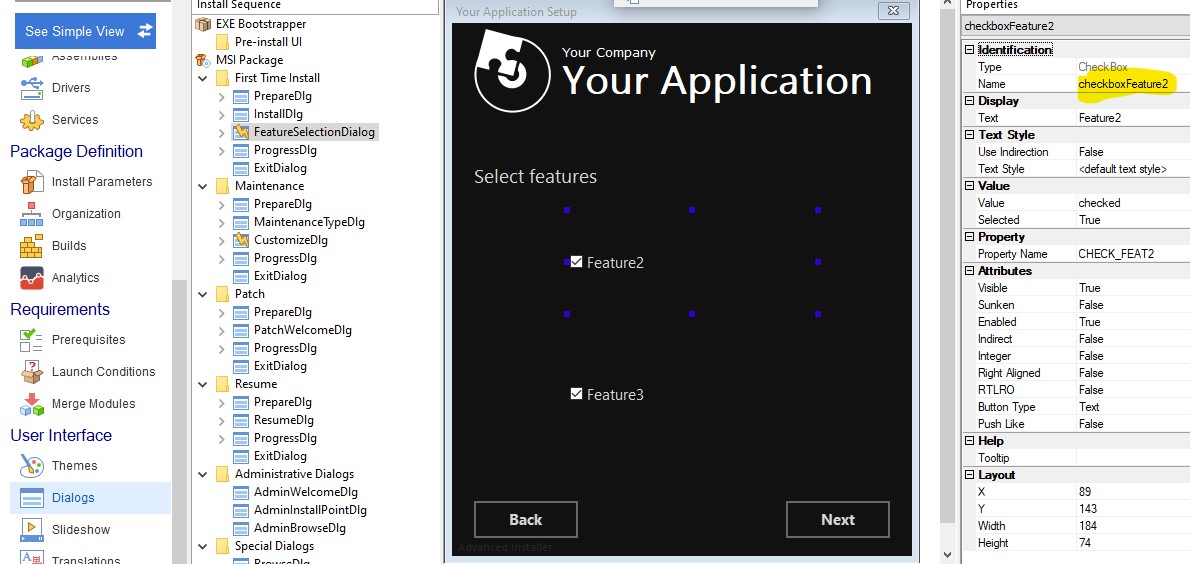
4. go to "Dialogs" page and create a new dialog (i.e. FeatureSelectionDialog); on this dialog add two checkbox controls
5. make sure the checkbox controls use the same name (omitting the .xaml extension) as the name of the .XAML entries from "Binary" table
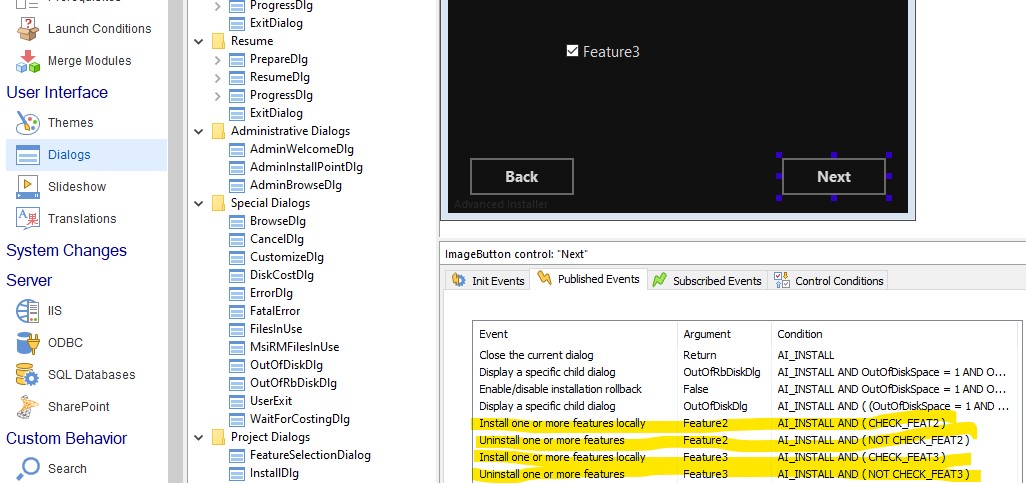
6. add on [Next] button add, in "Published Events" list, install and uninstall feature events to control the features installation
7. build and test your setup package
That was all!
All the best,
Daniel
