Create Patches (MSP)
A patch is an incremental update to an existing installation of your application. You cannot install a patch if the target version (the one you want to update) is missing.
You have two ways to upgrade an MSI, each with its pros and cons.
- You can use a patch (MSP) v1.1. This has a reduced size because it only contains the changes brought to v1.1 of the MSI. However, it requires v1.0 of the MSI to be present on the target machine, and you must follow the rules of creation for MSPs.
- The second option is to use v1.1 MSI. You don’t have to follow strict rules for its creation like with MSPs, you can add an upgrade to the v1.0, and v1.0 doesn’t have to be present on the machine. However, because it’s a standalone install, the size of the MSI is larger than the MSP.
When using the first option to create a patch file between two MSI files -- keep in mind the following aspects:
- The second MSI should not change any components or features, including setting different keypaths, adding files or moving components between features. Exceptions to this are: updated registry values or newer versions of files already present in the components
- If files must be added, create a new top-level feature and its child component(s) to contain the new files.
Note: There is a complete list of rules for you to follow when implementing MSPs here.
With these points out of the way, let’s see how a patch can be created.
Advanced Installer
In order to create a patch with Advanced Installer, you need to have the initial version of the MSI (for example version 1.0) and the new updated MSI (for example version 2.0).
- If Advanced Installer is not currently running, start it by double-clicking on the desktop icon or by selecting it from the Start > All Programs > Advanced Installer menu. When the application starts, you will be presented a dialog where you can choose the type of project you want to create.
- Select the Updates > Patch type and press the Create Project button. The new project is created and you will be able to edit it.
- Save the project by using the Save
toolbar button and choose the file name and the destination folder. This will also be the
folder where your patch package (MSP) will be created.
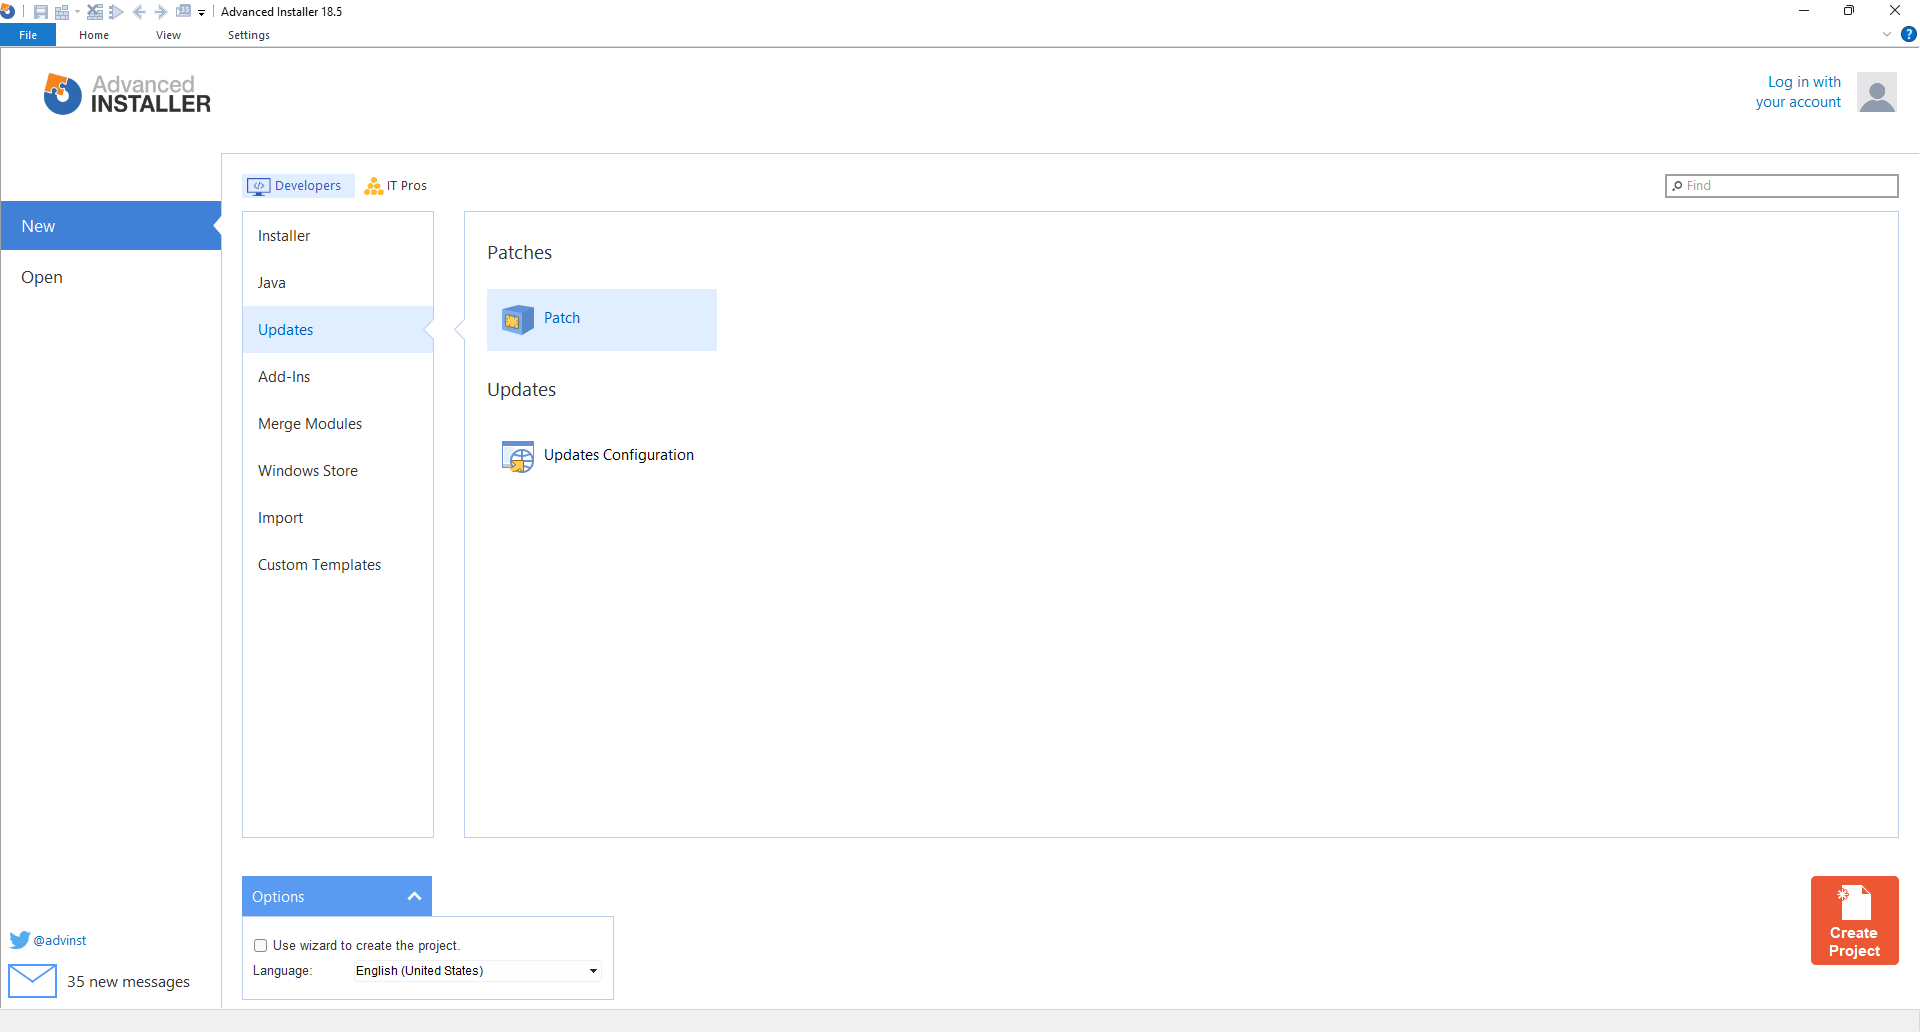
New Patch in Advanced Installer - The most important step in creating an MSP package is creating the Upgraded and Target images.
- Select the Images page by selecting it from the left-side panel.
- Next, click on the New Upgraded
toolbar button, browse to the newest version of the MSI (for example 2.0). A Windows Installer
dialog will briefly pop up while the Administrative Image is being extracted.
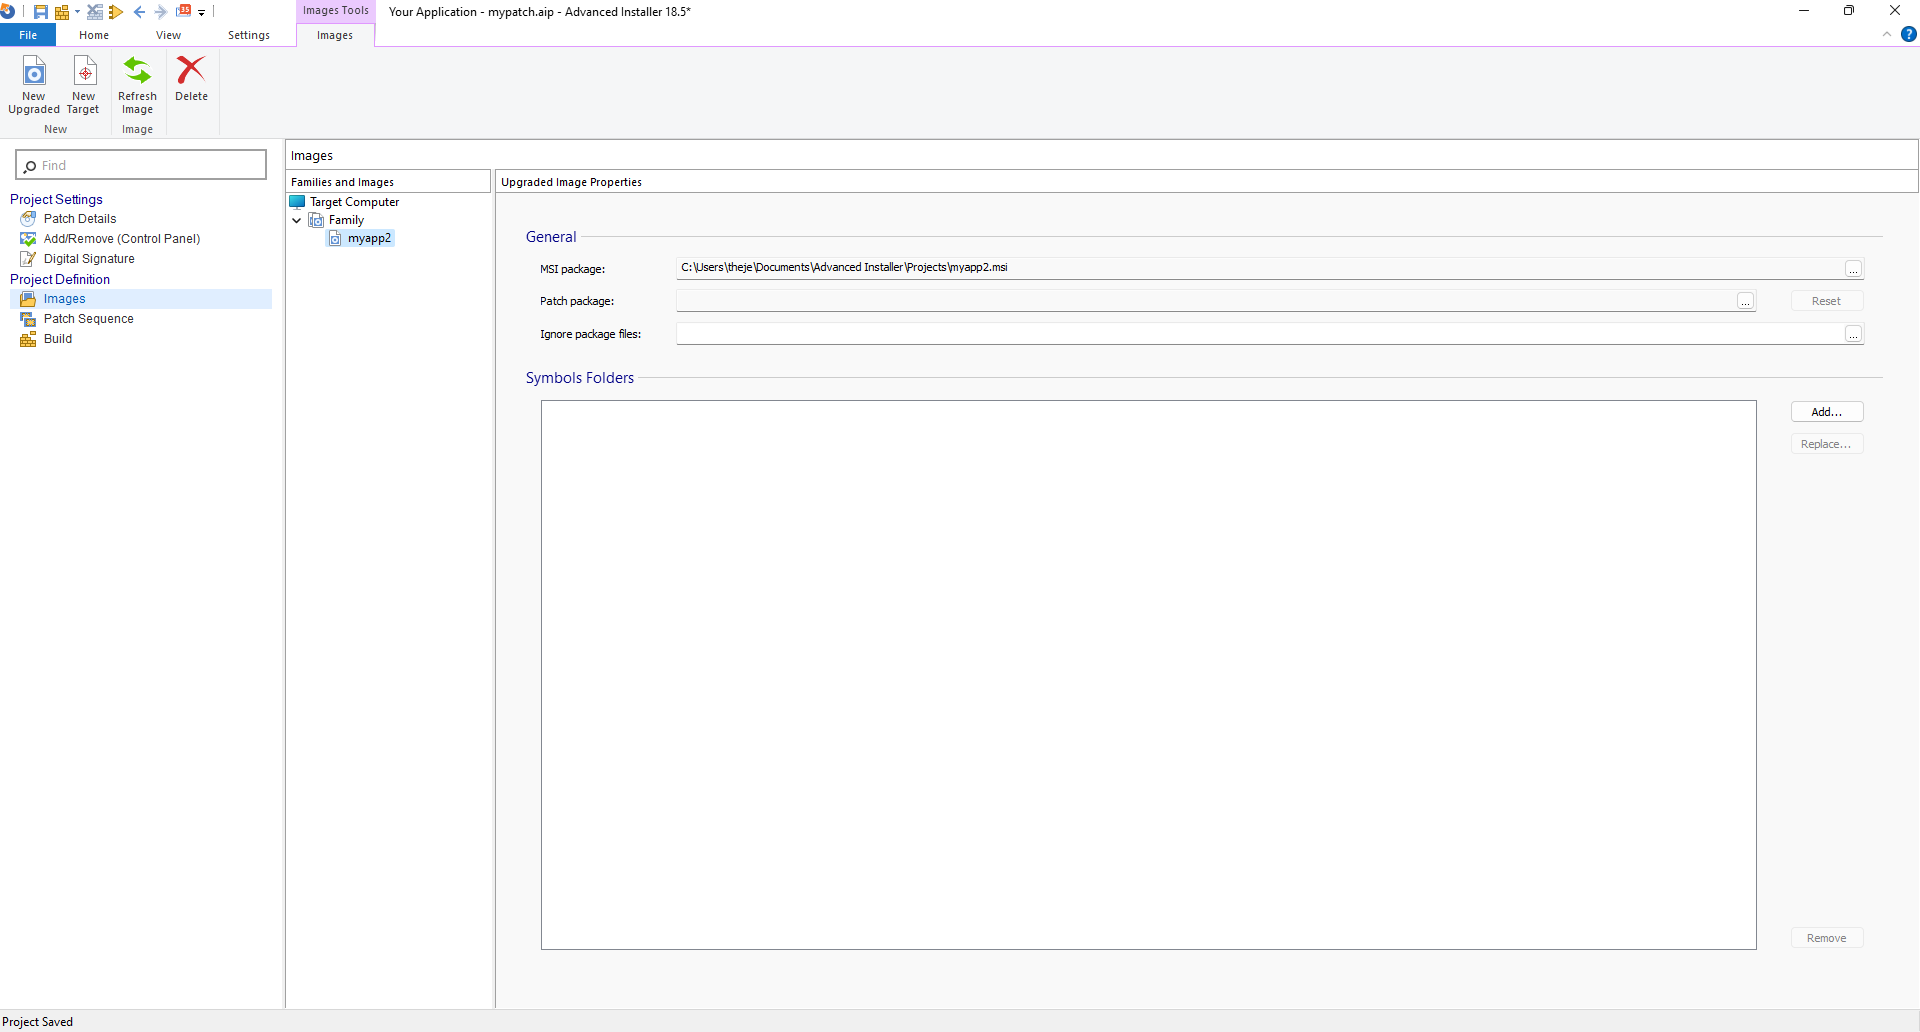
First MSI selection - Next, click on the New Target
toolbar button, and browse to where the initial version of the MSI (for example version 1.0)
is stored
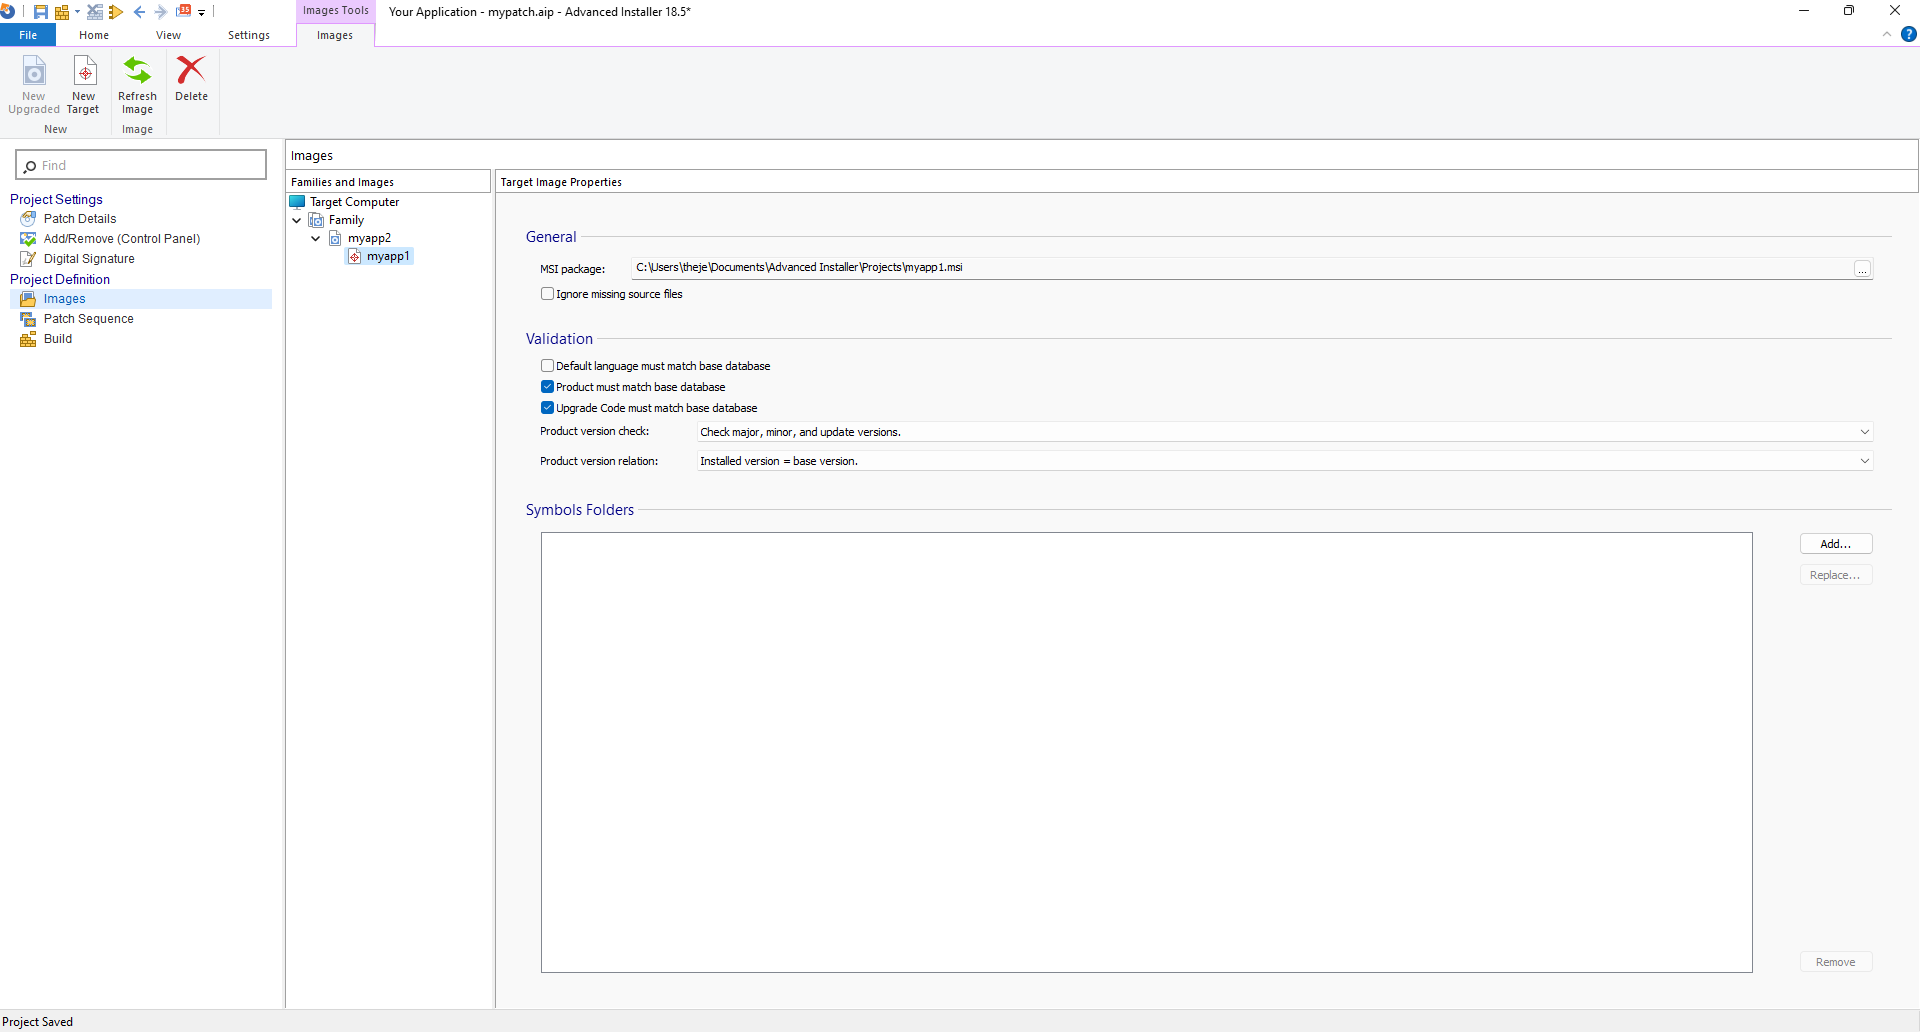
Second MSI Selection - Now that you have created the Upgraded and Target images,
click on the Build toolbar button -- a Build
Project dialog will appear showing you the build evolution.
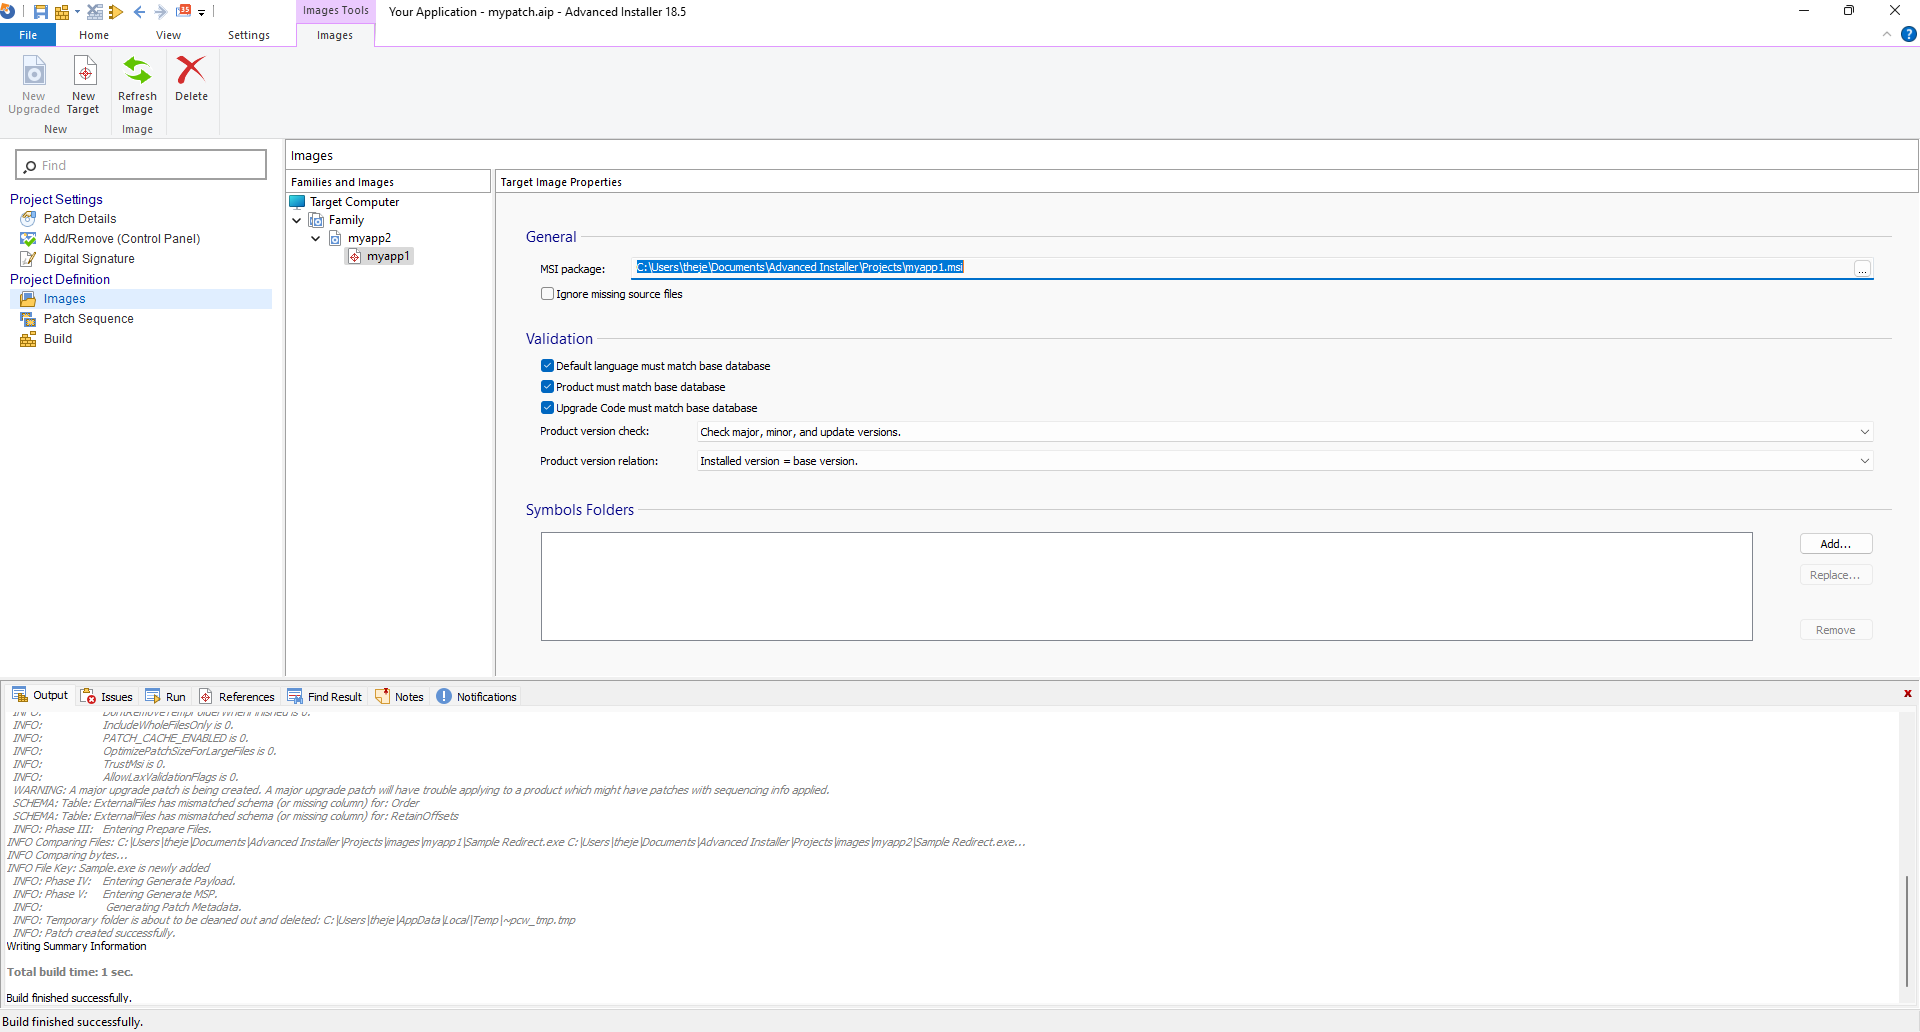
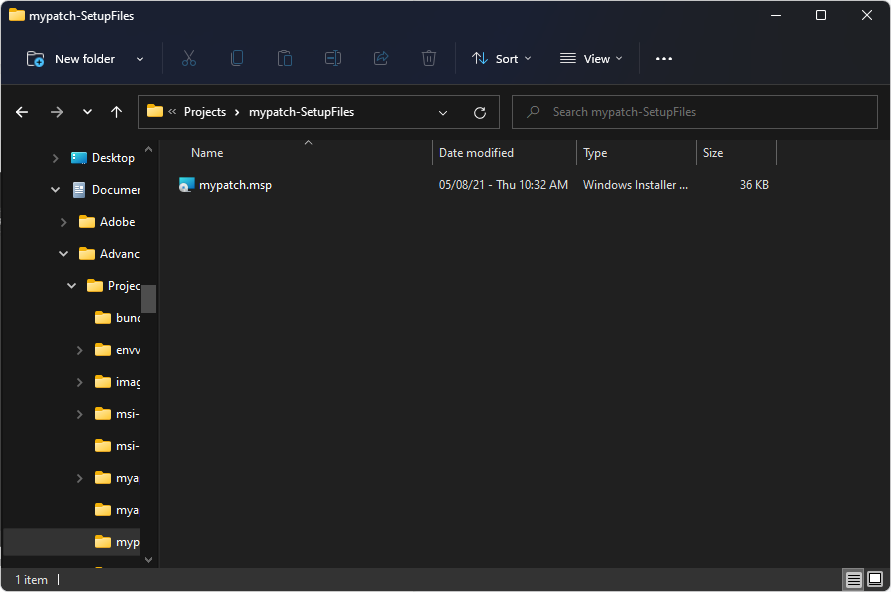
Patch build window - Once the build is complete, click on the Run toolbar button. The setup wizard will appear.
Alternatively, you can browse to the output folder in your previously configured save location.
Keep in mind that there are some Patch Rules that you must be aware of before starting to build a patch installer.
Wise Package Studio
To create a patch with Wise Package Studio, you will need both the previous and new version of the MSI.
Assuming you have the two MSI files, and you followed the rules above when creating the second MSI, here are the steps to create a patch file with Wise Package Studio:
- Open Wise Package Studio.
- Double-click on Patch
Creation.
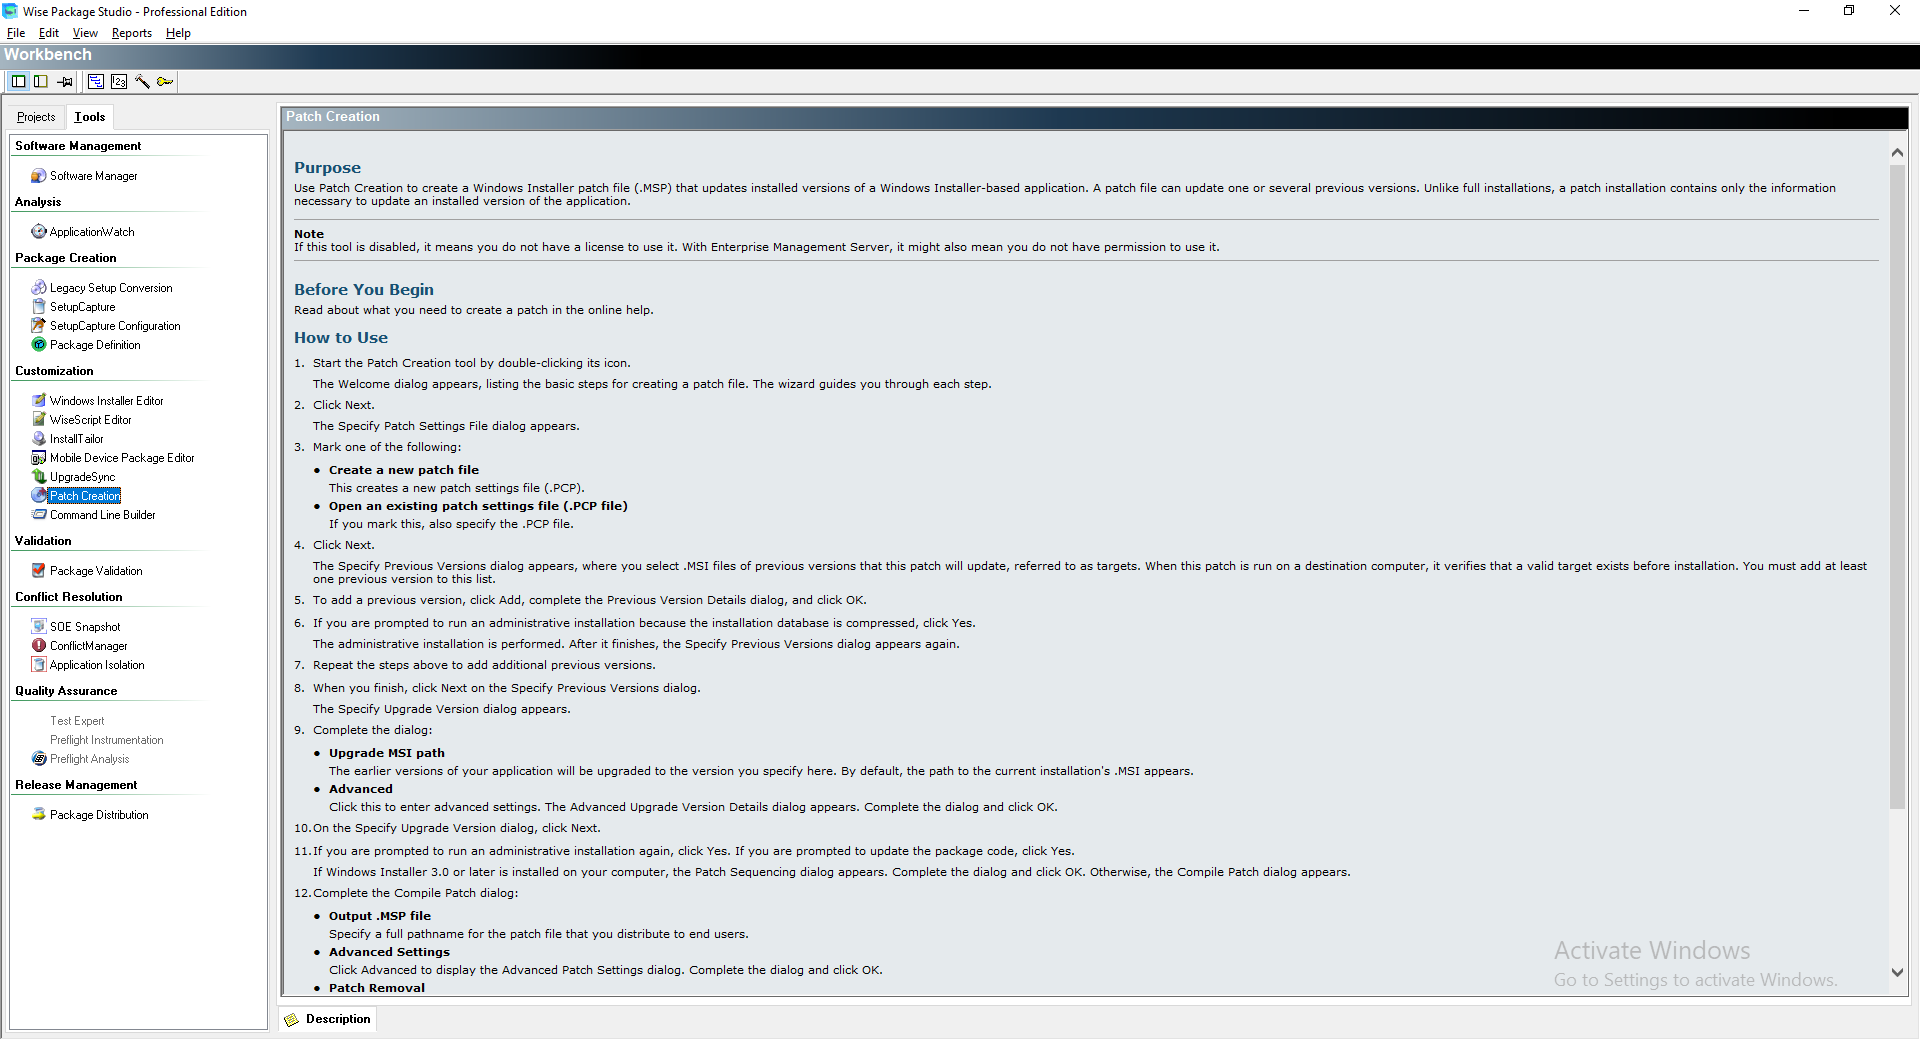
Patch Creator in Wise Package Studio - At the welcome screen, click Next.
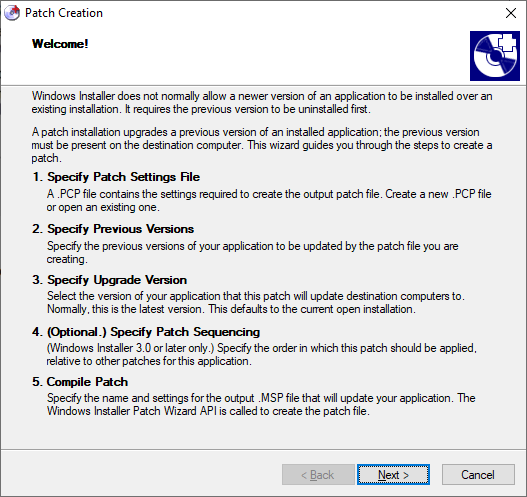
Patch Creation Window - Select Create a patch file and
click Next.
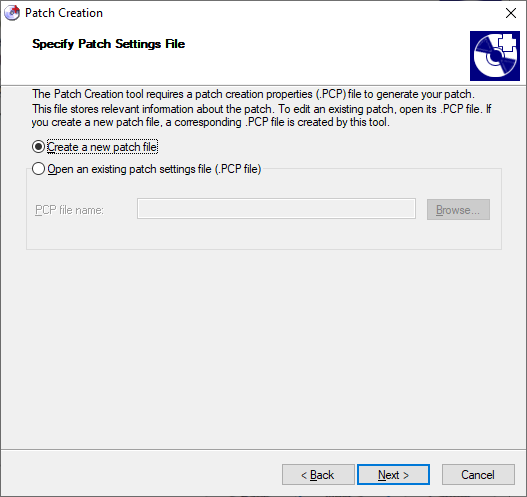
Patch Creation Window - Click Add to select the initial
(previous) MSI.
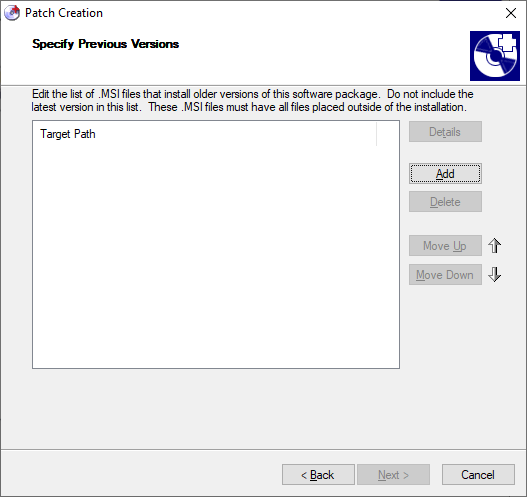
First MSI Selection - In the Previous MSI Path, click on
Browse and select your MSI file. Match Product Code and Match Upgrade Code must
be selected. The Version to check must be set to Check Major, Minor, and Update Version. The Version
Relationship must be set to Base Version must be = Installed
Version. Click OK and then Next.
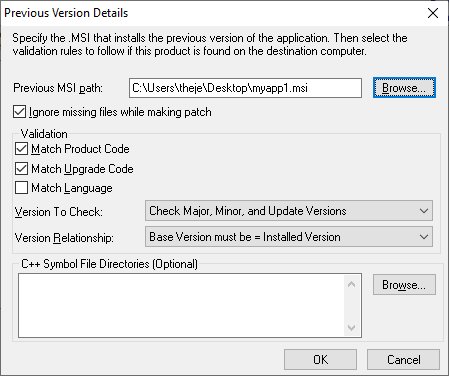
Previous MSI Path - In the next window, click Browse
to select your newer MSI and then click Next.
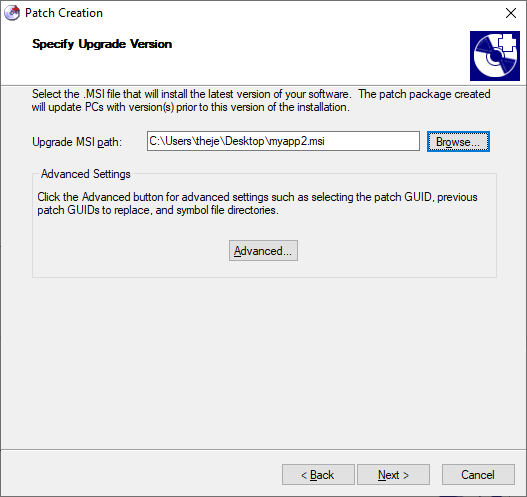
Second MSI Selection - If you have any additional patches, create a sequence of the
installation. The sequence ensures that patches are applied in the correct order no matter the
order in which they are provided to the machine. Click Next.
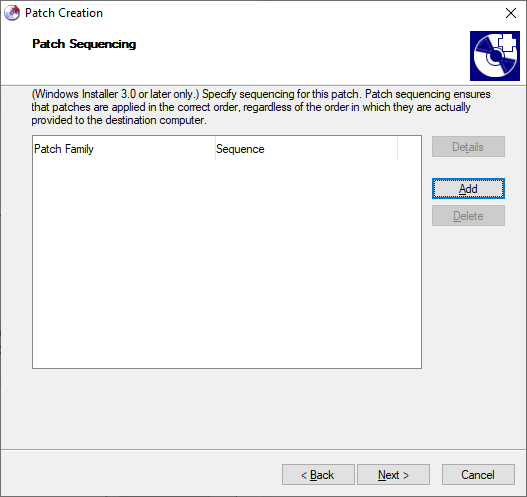
Patch Sequencing Window - In the Output .MSP file field, click Browse and select the location where the patch file will be created. Make sure that File Sequence Start and Disk ID Start are set to 1. Setting the file sequence and disk id to 1 means that Wise Package Studio will perform a comparison between all the files and cabs present in both MSIs. Click Next.
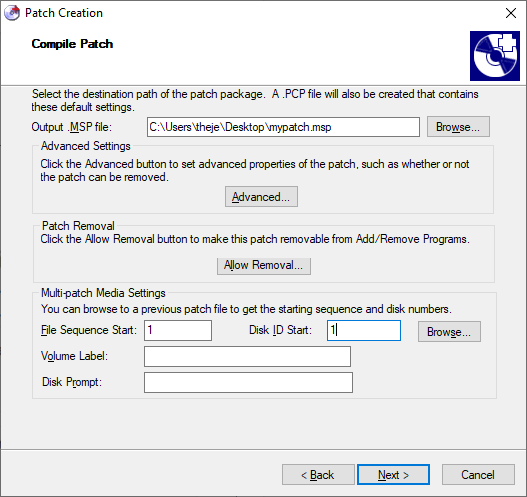
Wise Package Studio will begin the comparison between the two MSIs and output the patch installer to the set location.
