Contents
Helpful tools
ORCA
Orca is a database editor that helps create, edit packages (msi) and run modules. It provides a graphical interface for packet validation and highlighting entries that have errors or warnings.
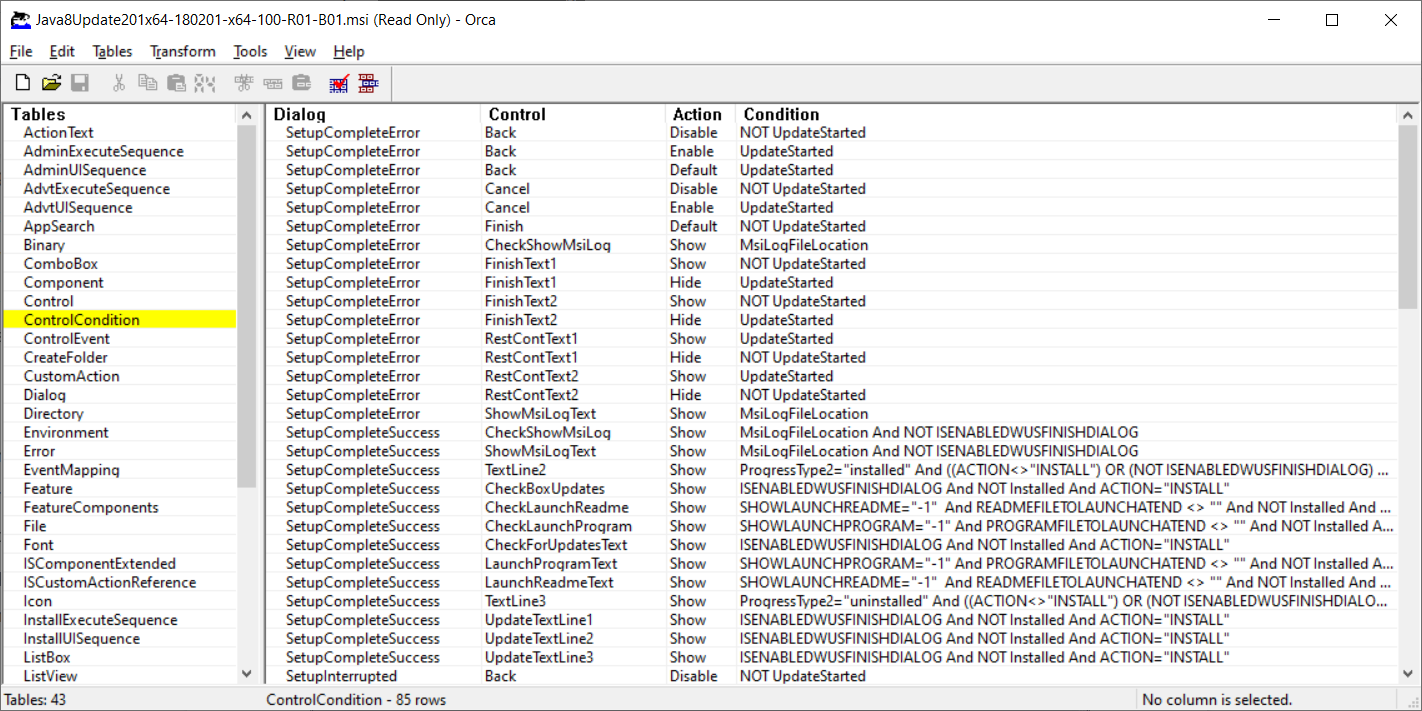
Although as a first impression, it looks like Orca doesn’t allow you to edit/create transform files, it does. You just need to open the MSI first, and from the Transform menu, you can open and create MSTs.
However, Orca lacks a lot of automation and doesn’t have an easy to use GUI, but it might be a suitable tool to have a look over an MSI or MST when in a rush.
Systracer
SysTracer is a utility tool that performs system snapshots and compares them to the output to see what has changed.
The steps to perform a Systrace on the system are:
- Open Systracer
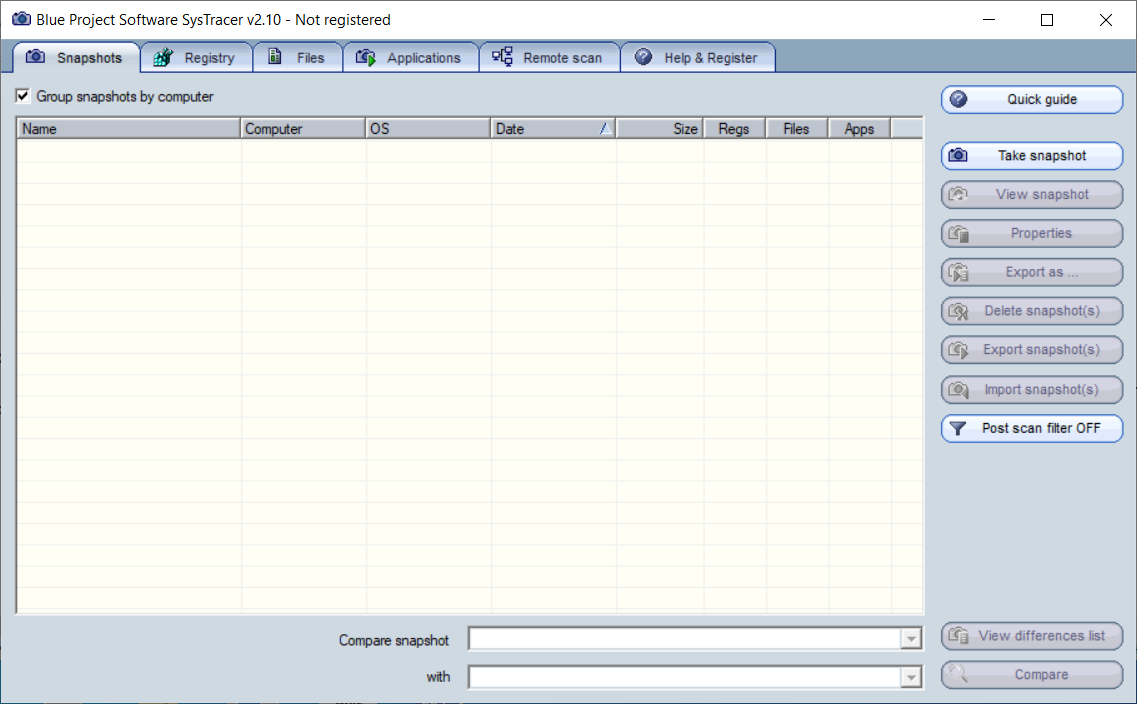
Systracer Main View - Click on Take Snapshot
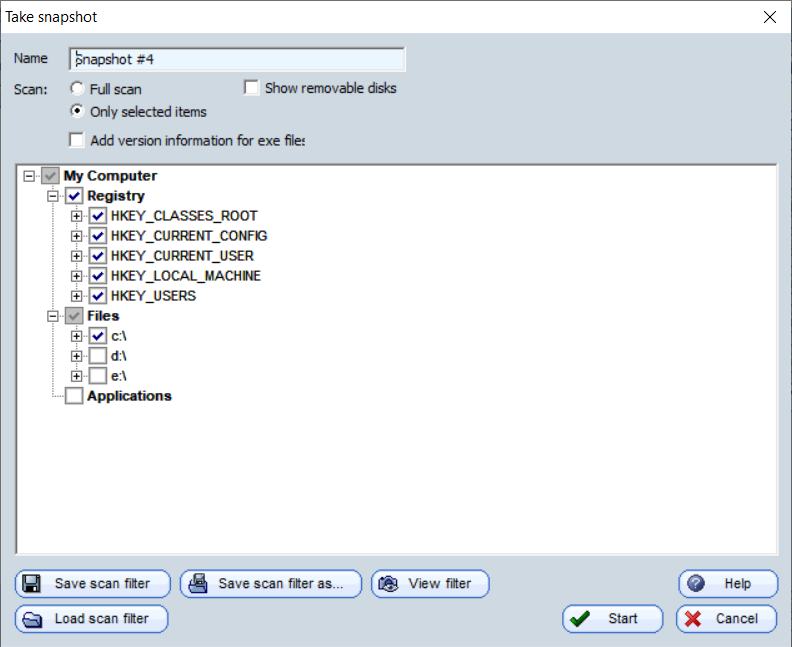
Snapshot Options Window - Chose Full Scan then click Start
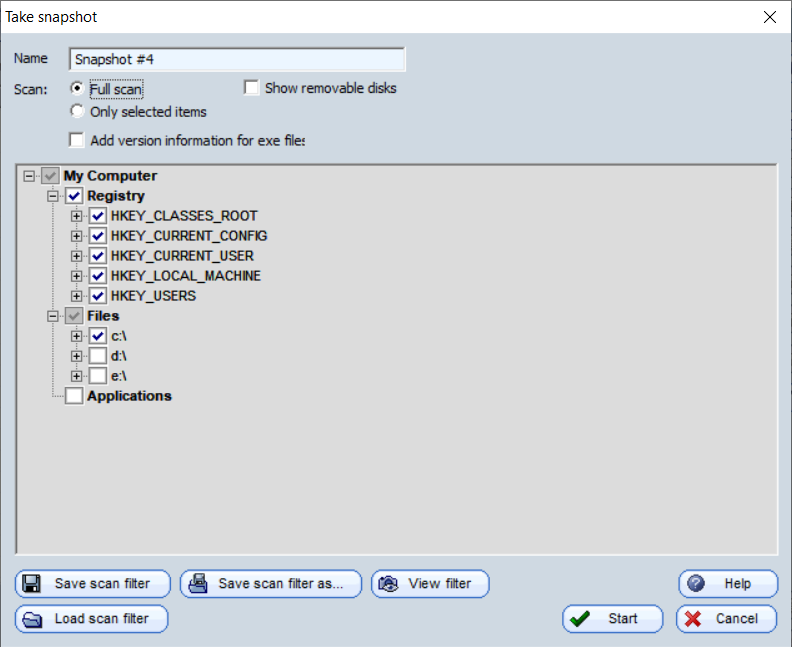
Snapshot Options Window - The first scan of the system starts.
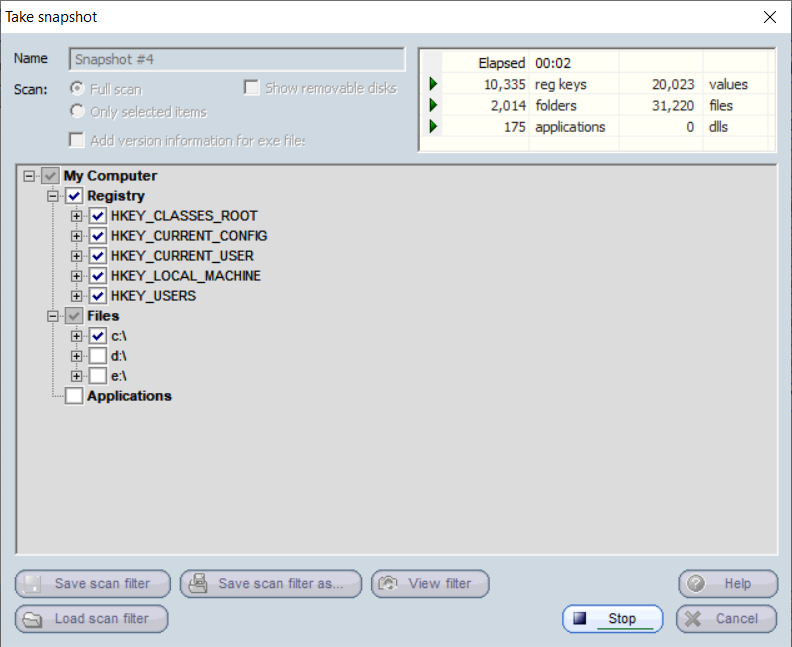
Snapshot in progress - The initial system scan is finished. Now, perform the
changes on the system.
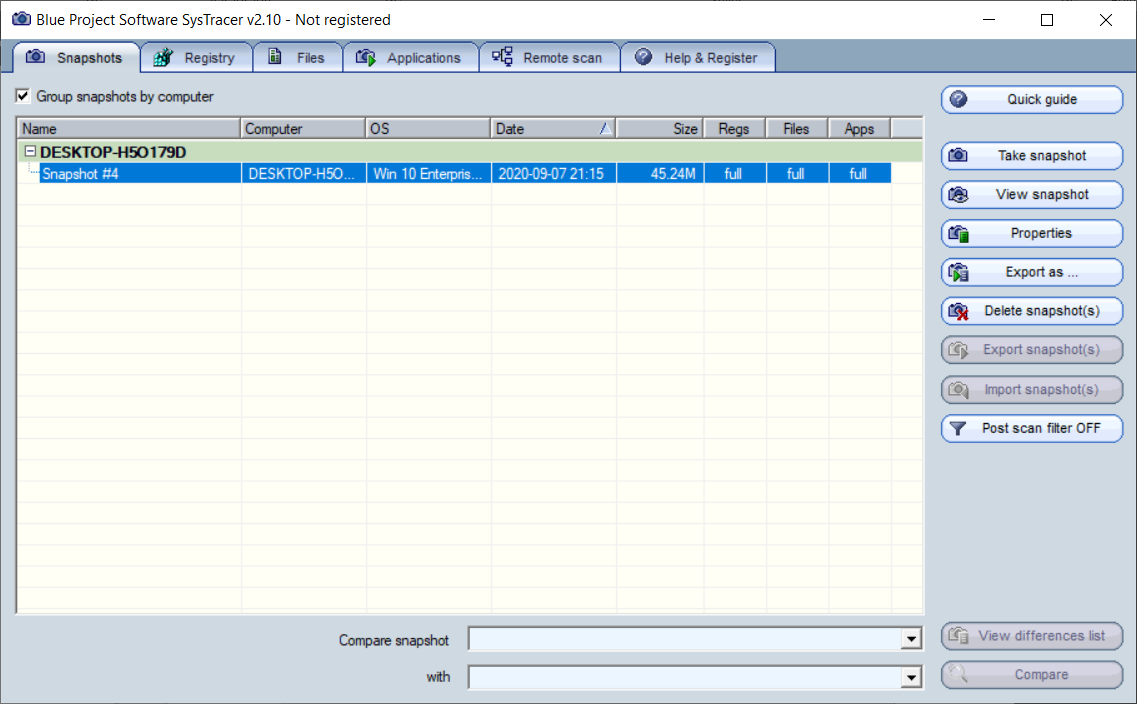
Snapshot completed and visible in the main view - For this example, we changed a few settings for VLC Media
Player.
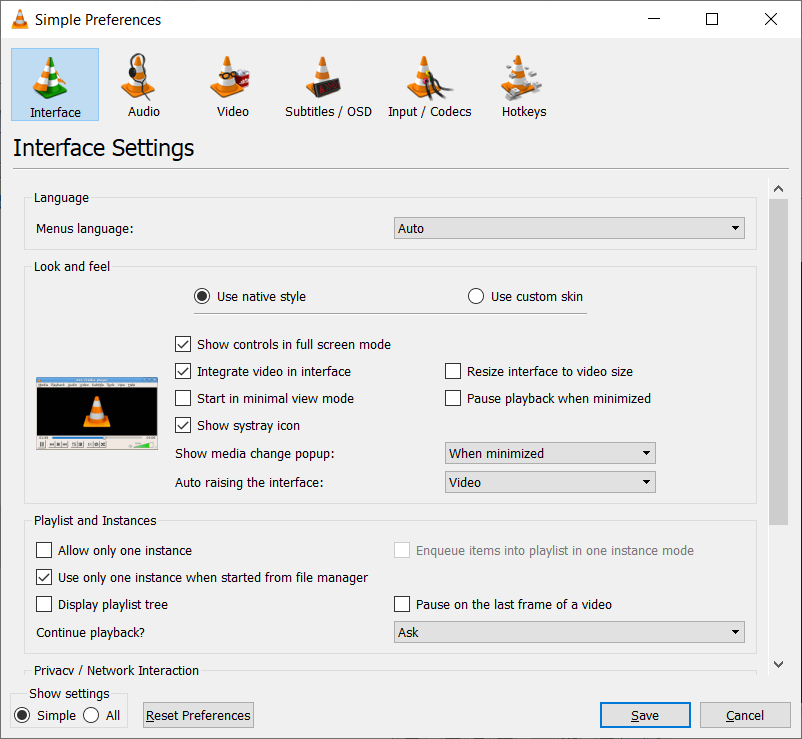
VLC Media Player Options - Open Systracer again, click on Take
Snapshot, select Full Scan and click Start.
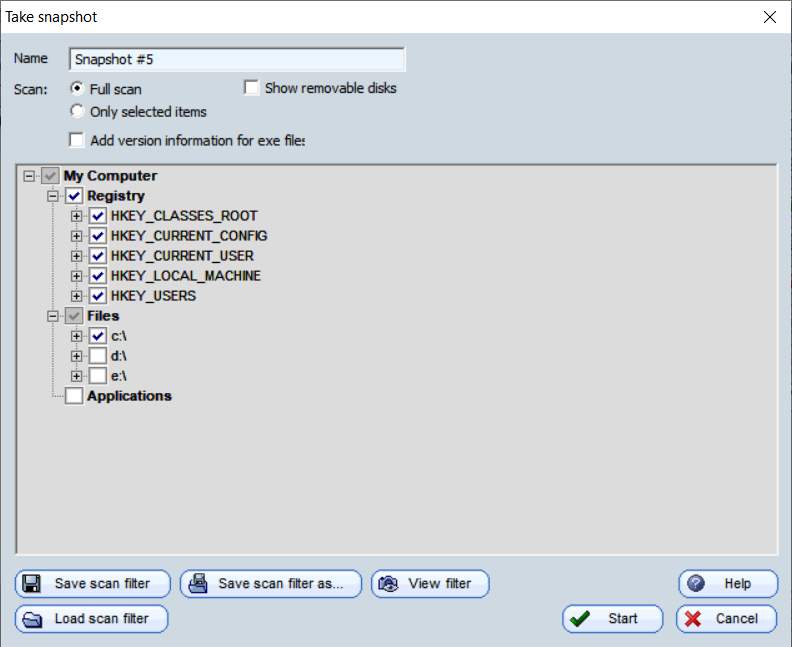
Snapshot Options Window - The second system snapshot will begin.

Snapshot in progress - The second capture is complete. Click OK.
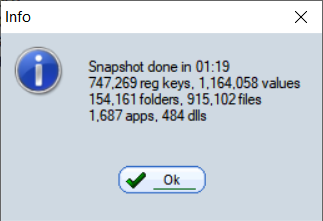
Snapshot finished - Compare the two snapshots by clicking Compare in the bottom right corner.
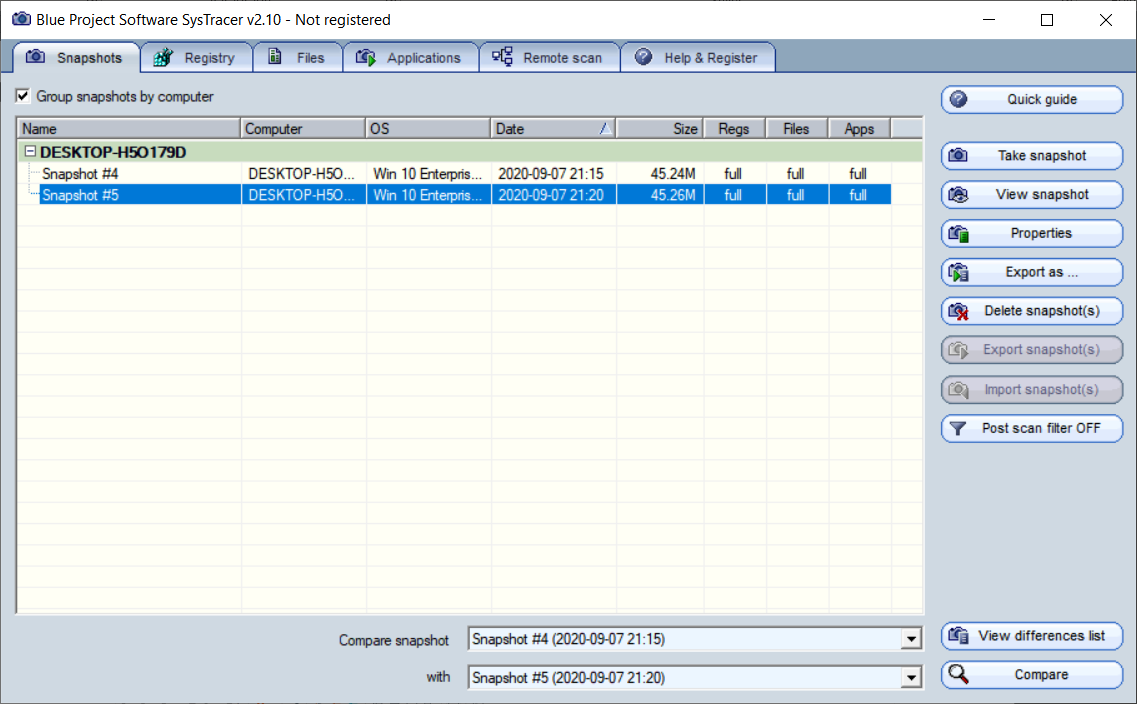
Snapshot finished as visible in the main view - Select Only differences.
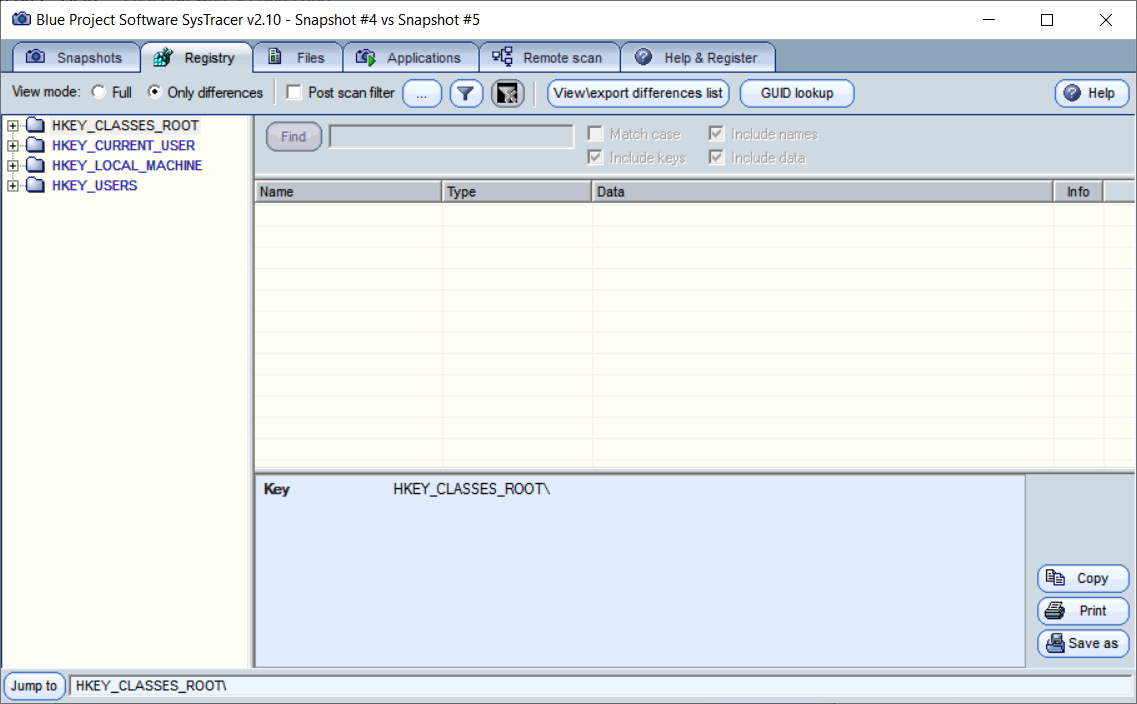
Snapshot Registry compare - Search through the Registry or
Files to find the needed changes. In our example, VLC kept the
settings in a folder from %appdata%\VLC
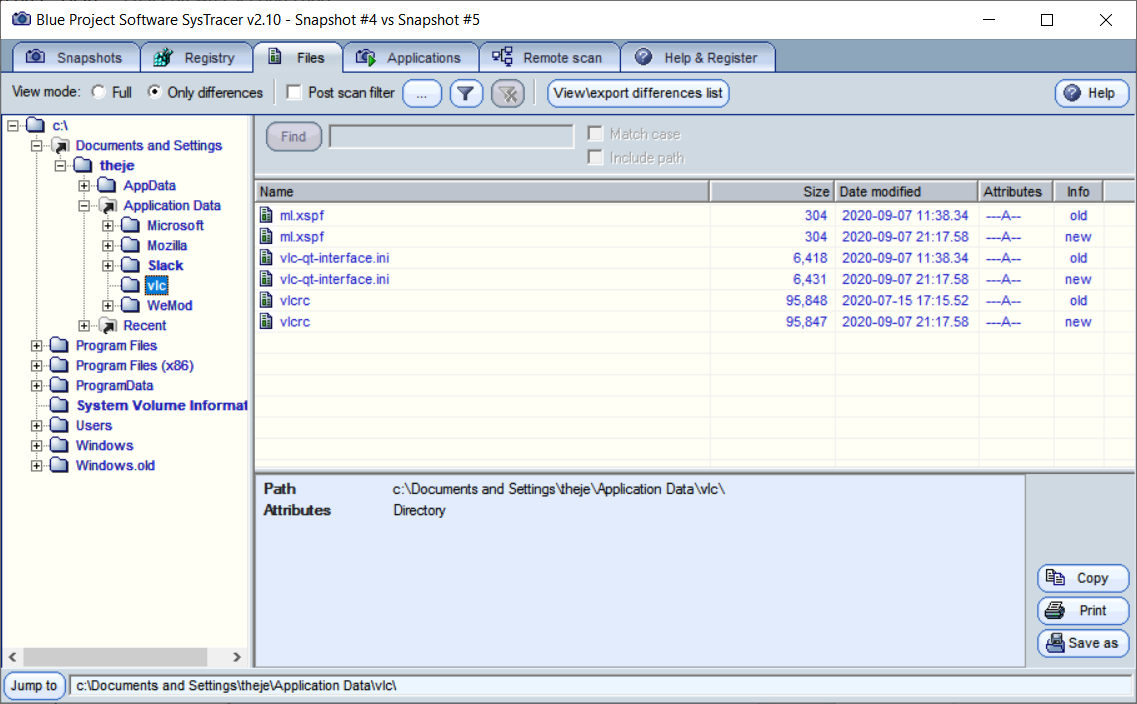
Snapshot Files compare
This is an excellent tool for a software packager and we consider it a “must have” to help find the location of stored settings for all applications.
Process Monitor
Process Monitor is a real-time monitoring tool for Windows systems that displays files, accessed registry and active processes. Additionally, it adds a comprehensive list of enhancements, such as process monitoring, including termination codes, monitoring of files loaded into system memory, improved filters, process details activity, and more.
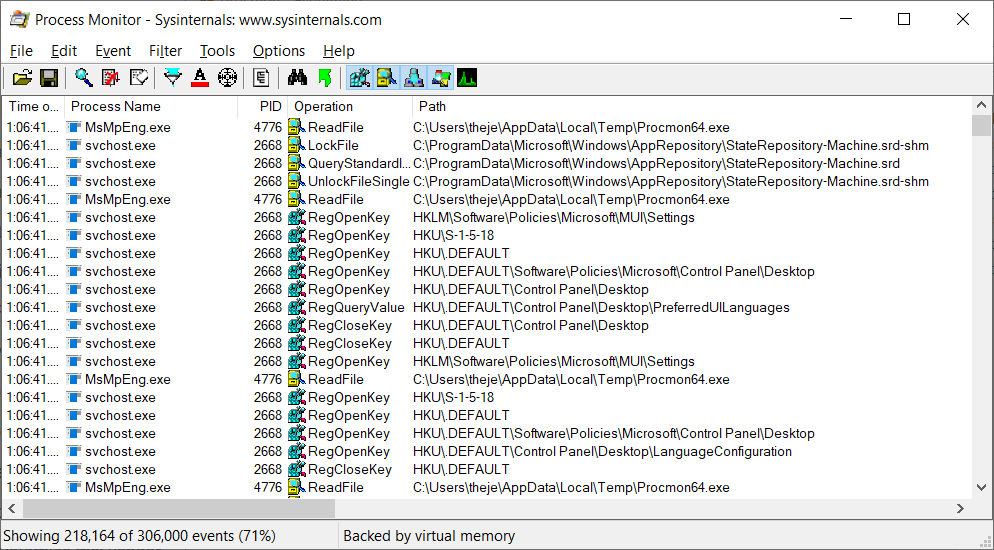
It can be used to debug applications, but also to check installations and see what is actually happening.
To figure out if an EXE installer contains an MSI and what additional changes it performs, execute the following steps:
- Open Process Monitor.
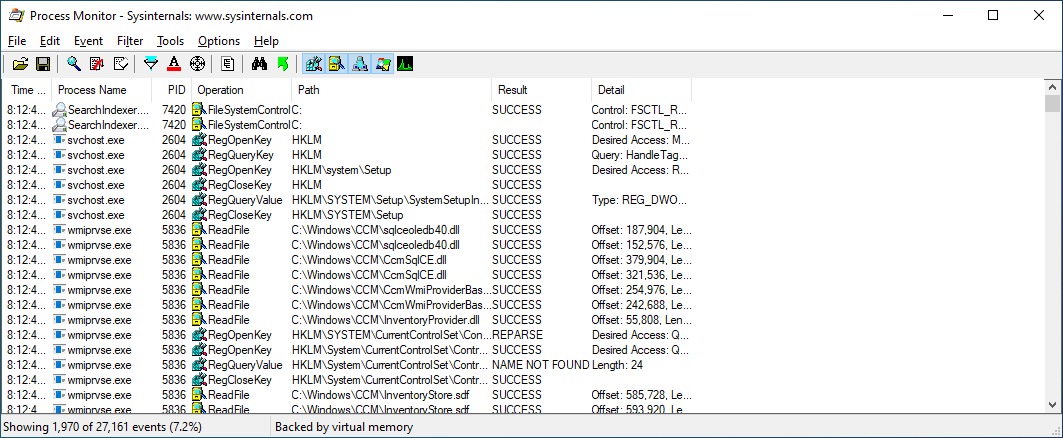
Process Monitor Main View - Disable Capture (CTRL+E) and Clear
(CTRL+X) the list.
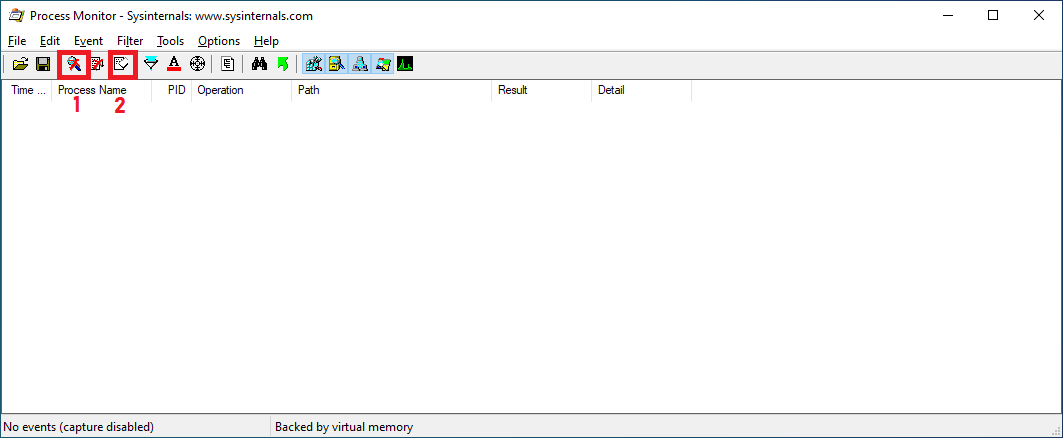
Process Monitor Main View - Navigate to Filter >
Filter.
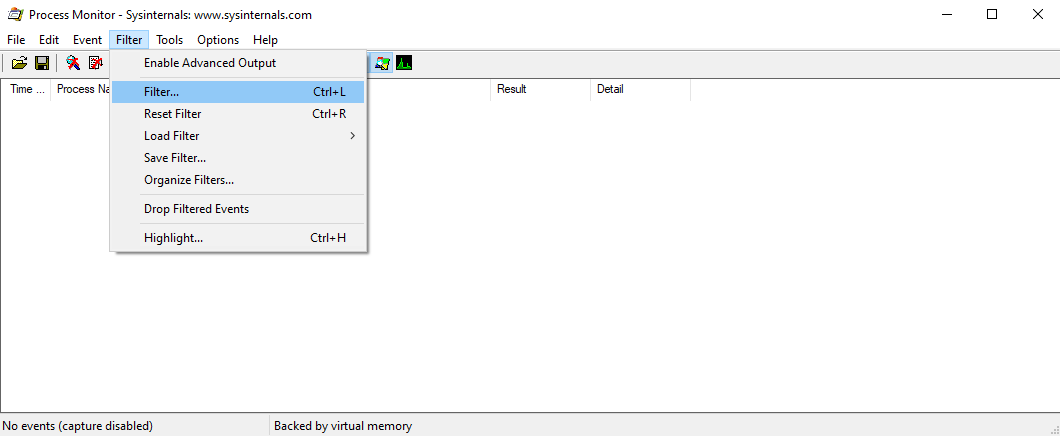
Process Monitor Filters - Under Display entries matching this
condition, select Operation is Process Create.
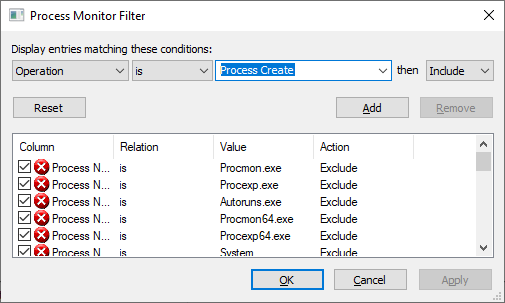
Process Monitor Filter Configuration - Click Add.
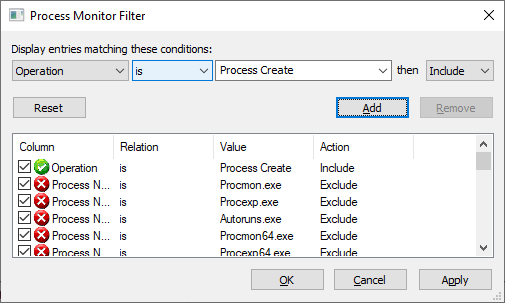
Process Monitor Filter Configuration - Start the Capture (CTRL+E)
again.
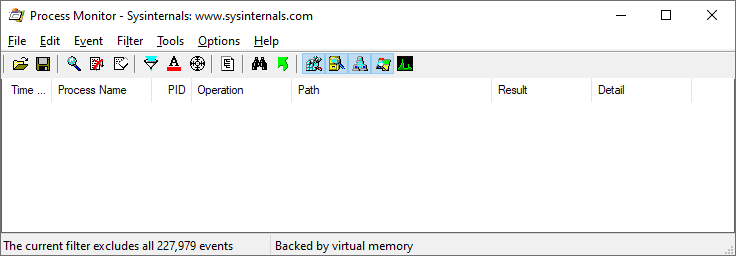
Process Monitor Main View - Start your installation.
We started the installation of VMware Workstation, and the Process Monitor detected that the installer added two redistributables before installing the main package.
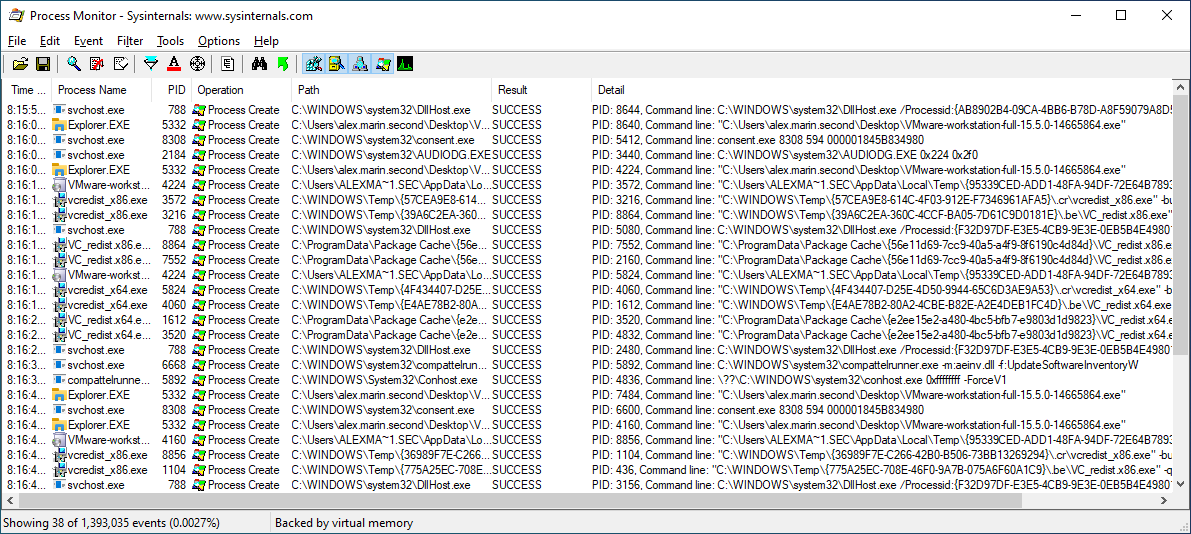
The paths from where the process is executed and the command lines are usually visible, so it makes the inner workings of an installer easy to understand.
Process Explorer
Process Explorer is a utility that manages the processes in the system. It displays information about a process including the icon, running arguments, memory usage statistics, users, rights, etc. When monitoring a particular process, you can list all the dll files it uses. The search option provides the ability to track the process that has resources in use, such as a file, directory, or registry.
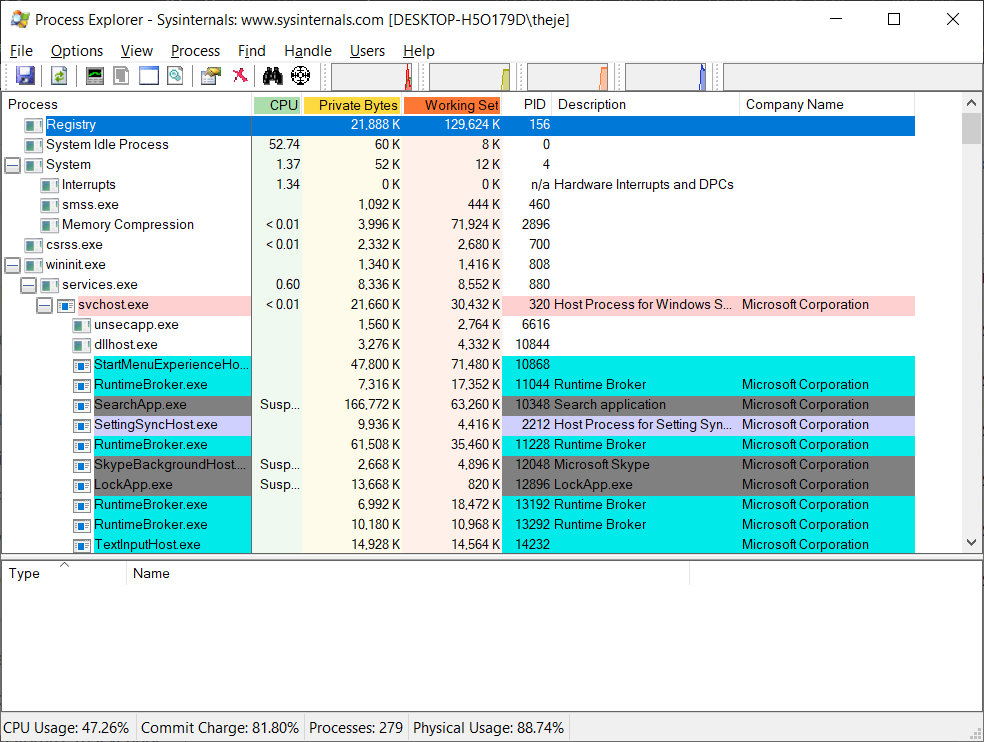
Its work window is divided into two parts. The top displays a list of active processes, and the bottom can display (depending on the settings) the dll files that are loaded into the memory and other information about the active processes.
No installation is required, no administrator rights to run.
Beyond compare
Beyond Compare is a utility for comparing files, directories, FTP site archives, etc. The main purpose of the program is to help analyze the differences in detail.
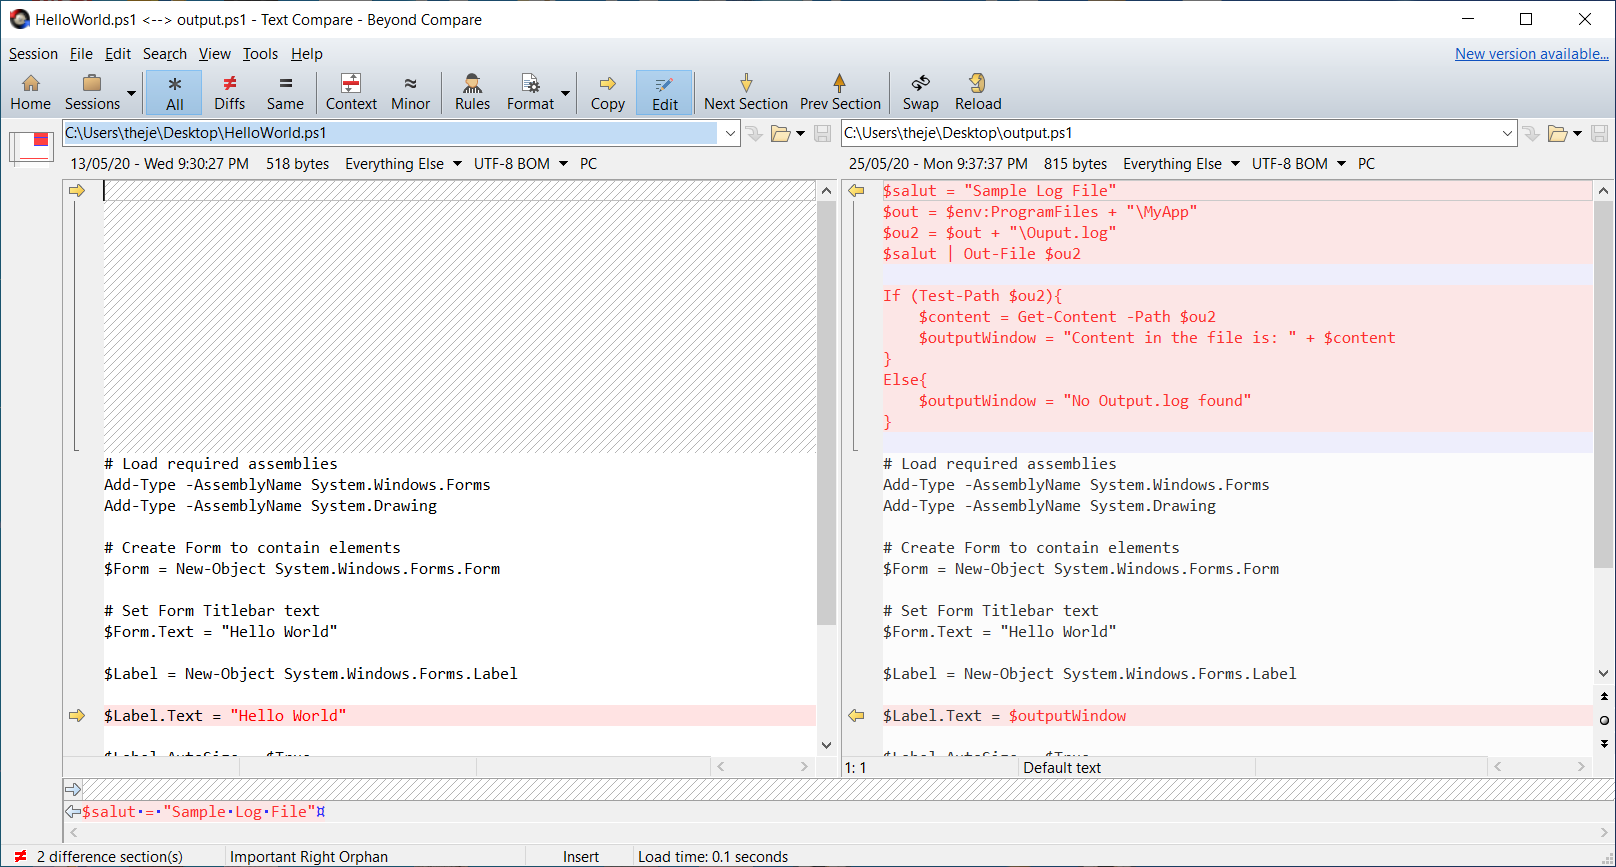
It’s extremely useful when scripts or folder structures must be compared during the packaging process.
For example, if a capture is required for repackaging, it’s recommended to perform a comparison between the original installation directory and the captured directory.
Powershell App Deployment Toolkit
PowerShell App Deployment Toolkit is an open source project composed from a set of functions that allow you to perform common application deployment tasks and interact with the user during a deployment.
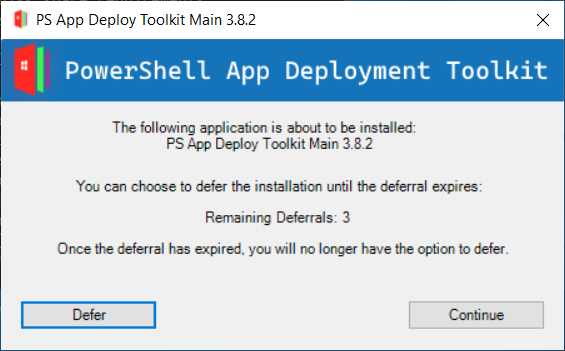
It’s meant to simplify complex installation/uninstallation scripts and improve the installation success rates. With a few simple lines, you can create an installation bundle (suite), or perform additional changes on the system.
Configure PSAppDeployToolkit
Once PSAppDeployToolkit has been downloaded, extract the zip file, navigate to Toolkit\AppDeployToolkit and edit the AppDeployToolkitConfig.xml.
The AppDeployToolkitConfig.xml is the main configuration xml for the script. There, you can choose the default log location, message icon, banner, logging options, installation parameters, languages, and more.
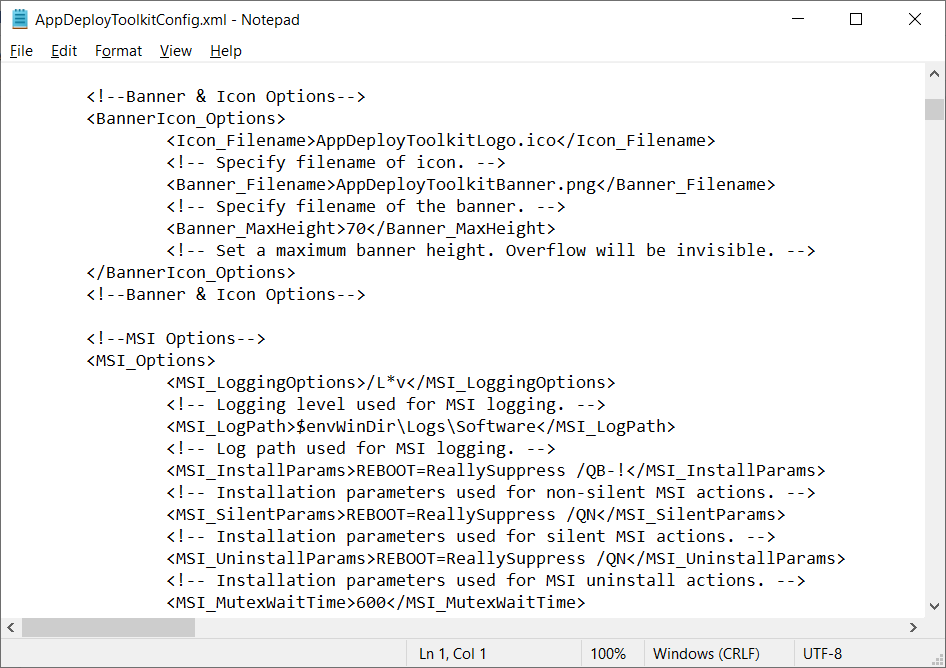
It might seem like a tedious task, but once you configure PSAppDeployToolkit as you need, you can use the AppDeployToolkitConfig.xml for every script created in the future, not having to worry about settings each time you create a new script.
Autocomplete for PSAppDeployToolkit in PowerShell ISE
The next step is not necessary, but it’s a quality of life trick, meant to have autocomplete on PowerShell App Deployment Toolkit in PowerShell ISE.
- First, navigate to “C:\Users\(username)\Documents” and create a new folder called WindowsPowerShell. Inside that folder, create a new folder called Modules.
- Next, if you downloaded and extracted PSAppDeployToolkit,
navigate to the extracted location and copy the AppDeployToolkit folder (found in the Toolkit
folder) in the previously created Modules folder.
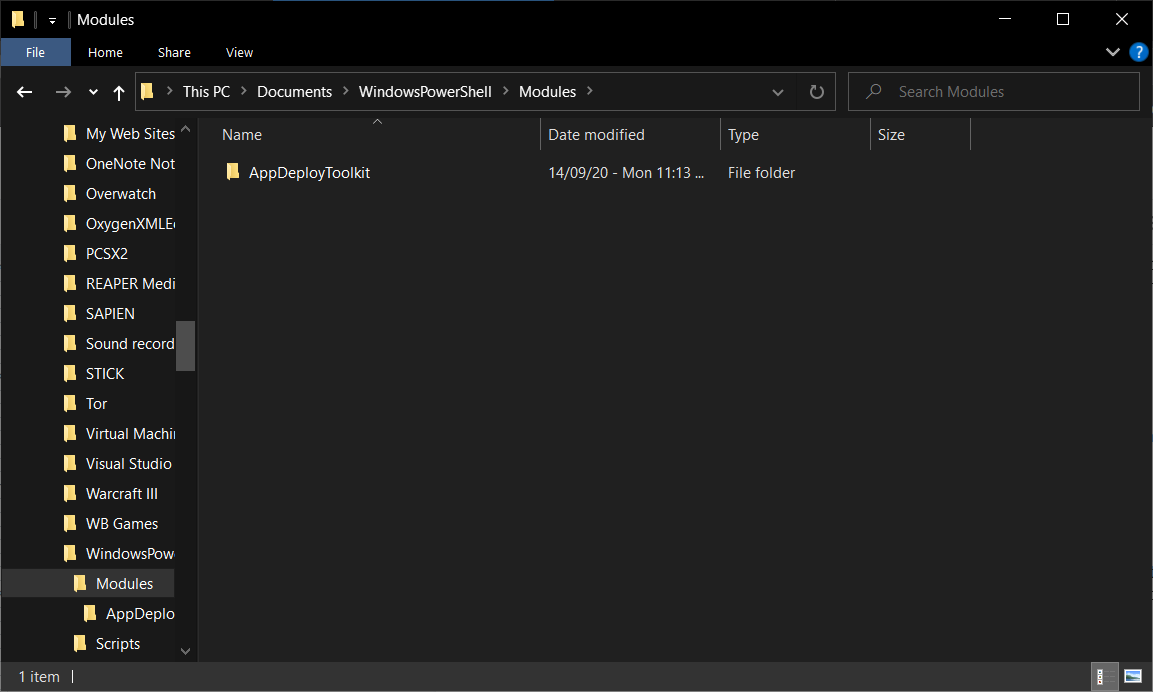
PowerShell Modules - Go into the copied AppDeployToolkit folder and modify the
AppDeployToolkitConfig.xml. Inside the AppDeployToolkitConfig.xml, change the
Toolit_RequireAdmin parameter to False.

PSADT Configuration XML - The last step is to edit the PSAppDeployToolkitMain.ps1 with
PowerShell ISE. Once opened with PowerShell ISE, save it as PSAppDeployToolkit.psm1 inside the
AppDeployToolkit folder.
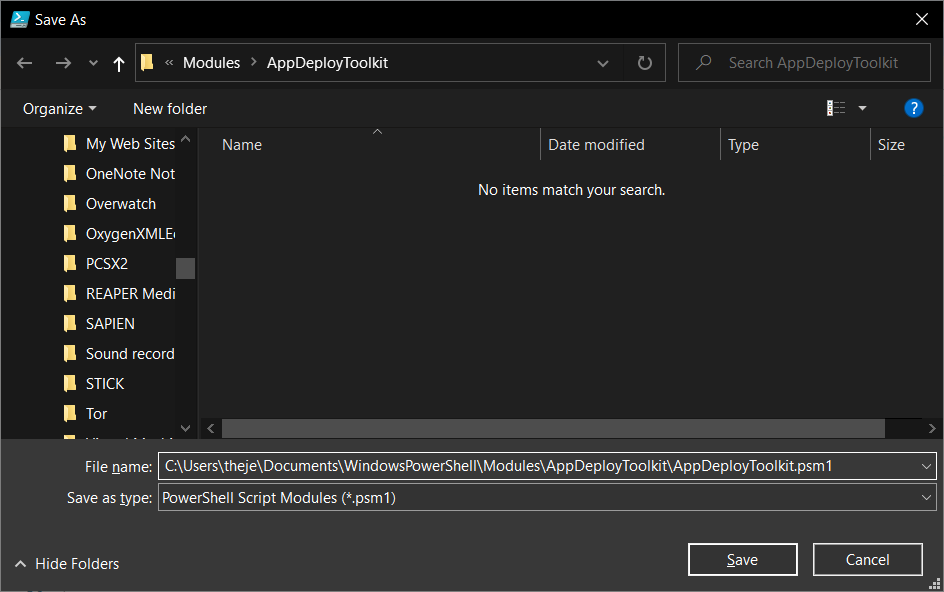
PSM1 Save Location
And that is it, all the commands should appear in the right pane and should auto-complete when writing.
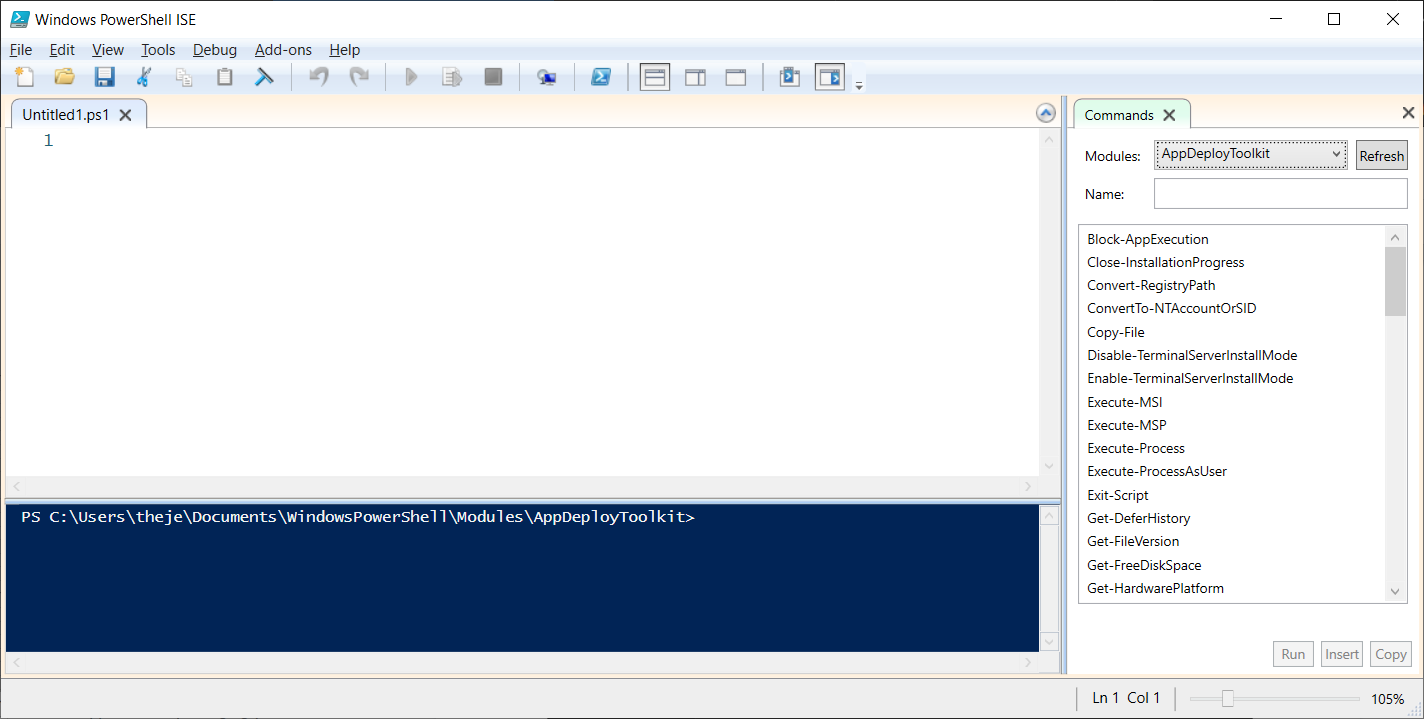
Create scripts
Once finished with the above configurations, you are ready to start creating scripts.
In the extracted location, navigate to the Toolkit folder where you will see a folder called Files.
The Files folder is where you will place all of your installation files, either installers like MSI, MST, MSP, or other configuration files which you can copy later during installation.
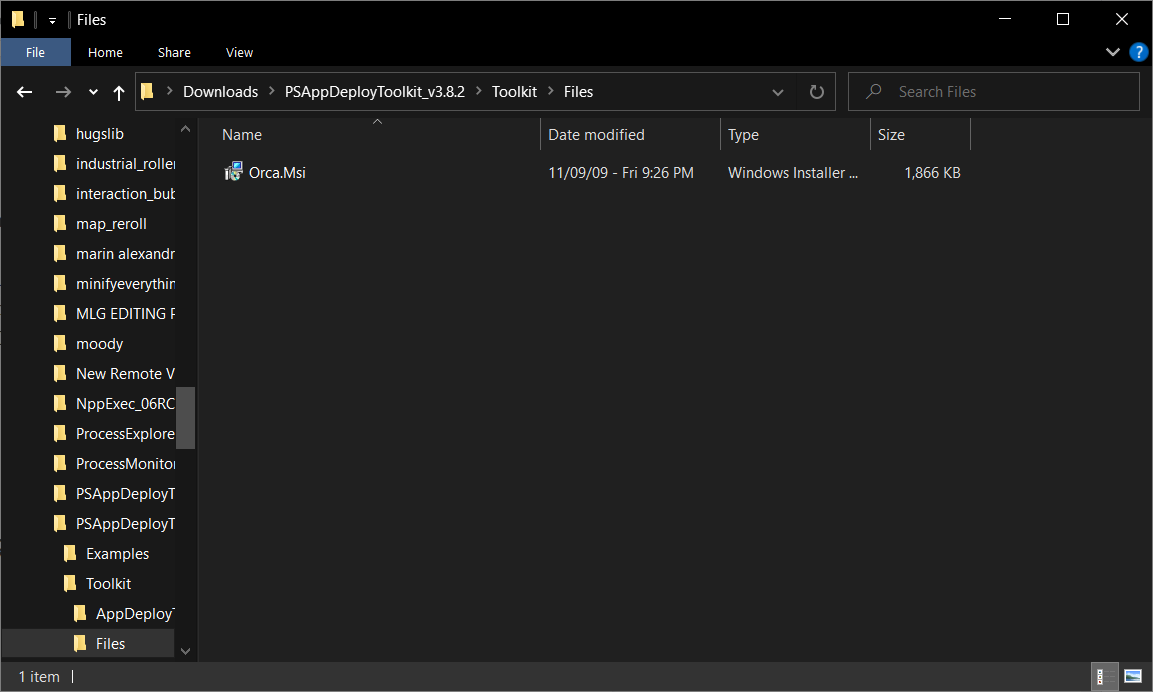
After you copied all the files you need, edit Deploy-Application.ps1 with PowerShell ISE, or another PowerShell editor of your choice.
The first basic lines that must be edited are your Application Vendor, Application Name, Application Version and other basic information about the installation. These variables will appear in the logs, toast notifications or progress box.
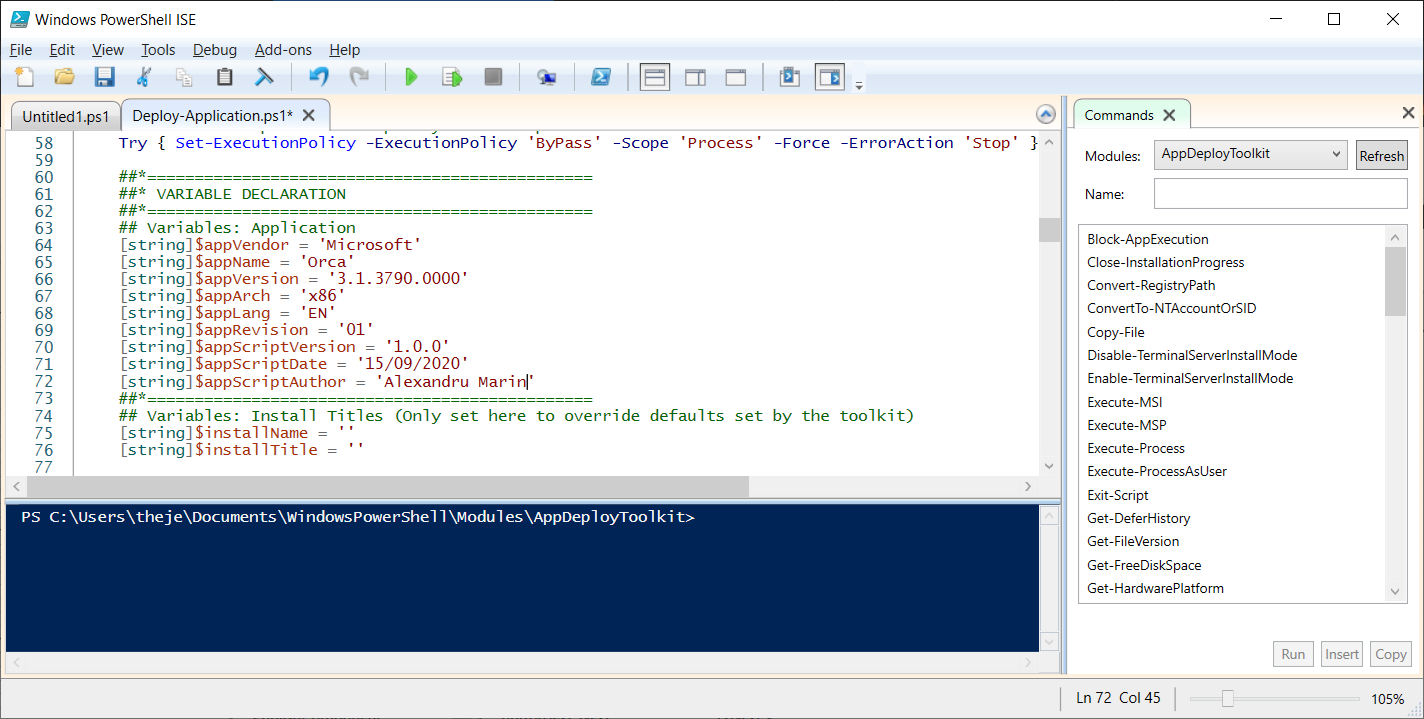
Next, the PSAppDeployToolkit installation logic is composed out of three main actions which contain three sub-actions for each. The main actions are:
- Installation
- Uninstallation
- Repair
The sub-actions are:
- Pre-Installation/Pre-Uninstallation/Pre-Repair
- Installation/Uninstallation/Repair
- Post-Installation/Post-Uninstallation/Post-Repair
Depending on your requirements, edit the sub-actions you need. In this example, we will modify only the Installation and Uninstallation main actions.
In the Pre-Installation action, we removed the message that informs us of closing a certain app or to defer the installation.
In the Installation action, we installed Orca.MSI with the following command:
Execute-MSI -Action Install -Path ‘Orca.Msi’
In the Post-Installation action, we also removed the message that informs us that the installation is complete. In the end, the script looked like this:
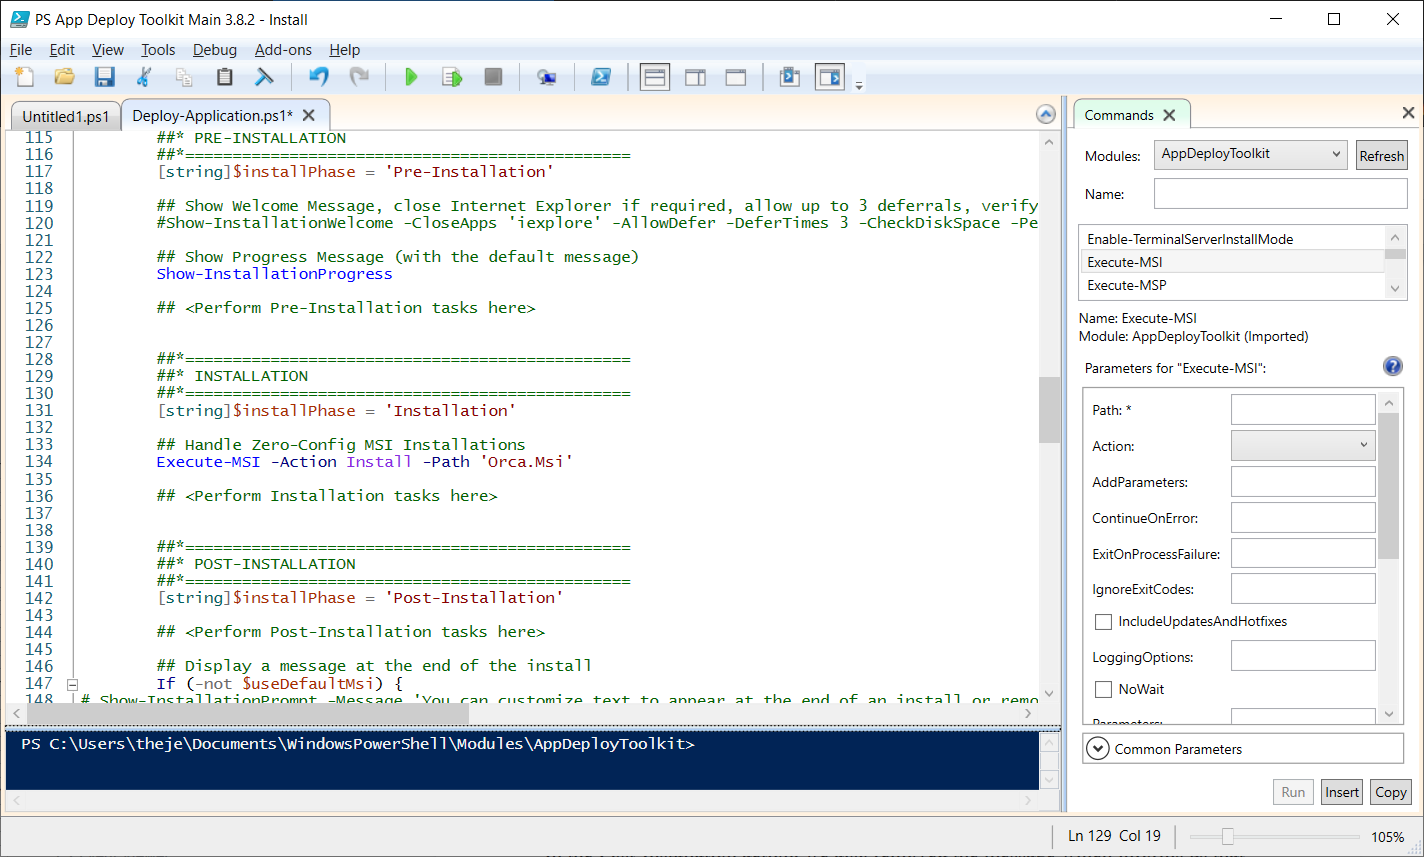
With a line, we have a progress box, an installation sequence and toast notifications for the user. Next, we moved to the Uninstall actions.
In the Pre-Installation section we removed the initial message. Then,in the Uninstallation section, we uninstalled Orca with the following command line:
Execute-MSI -Action Uninstall -Path ‘{85F4CBCB-9BBC-4B50-A7D8-E1106771498D}’
At the end, the Uninstall sequence looks like this:
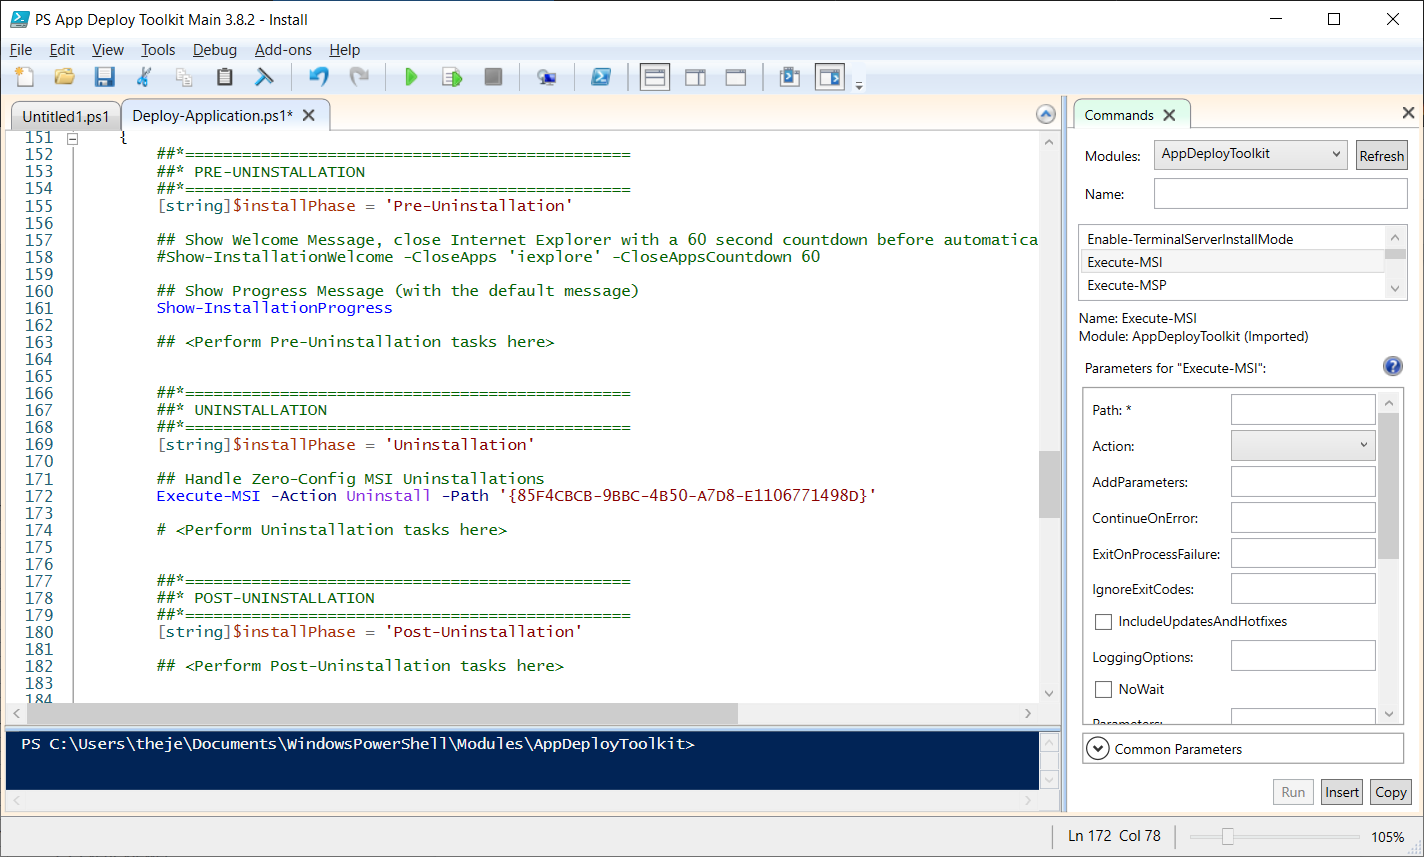
And that is it, the installation script is now done and can be used in the infrastructure.
Execute scripts
You can call the deployapplication.ps1 directly using powershell, and if you prefer, you could also call deployapplication.exe which sets the executionpolicy correctly.
The preferred method is via the powershell script directly. For this, open an administrator command prompt and type the following:
powershell.exe -executionpolicy bypass -file deployapplication.ps1
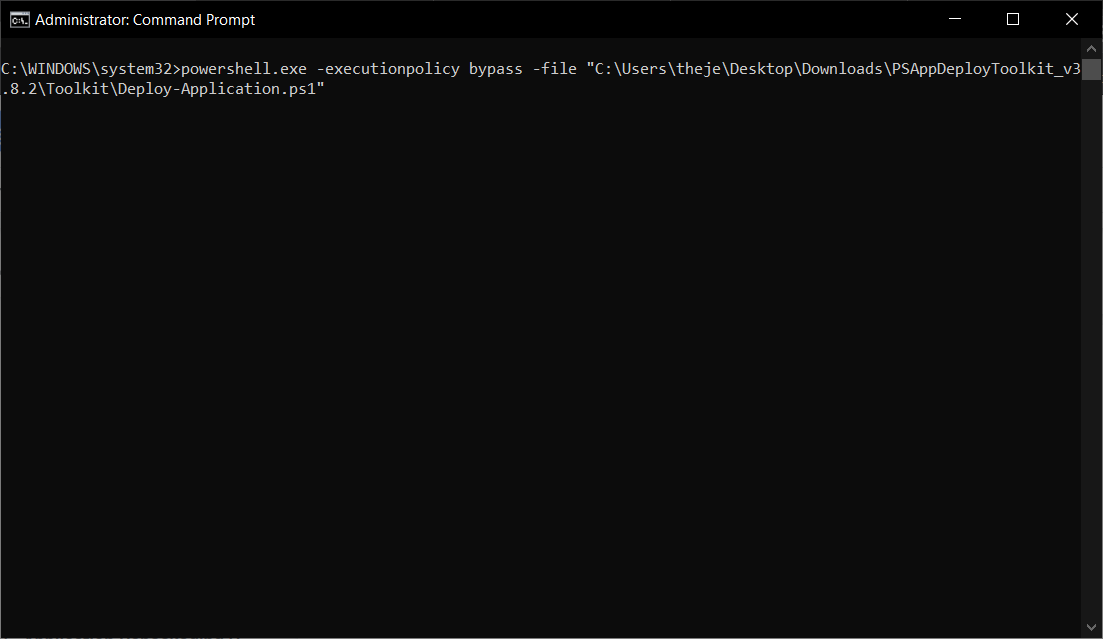
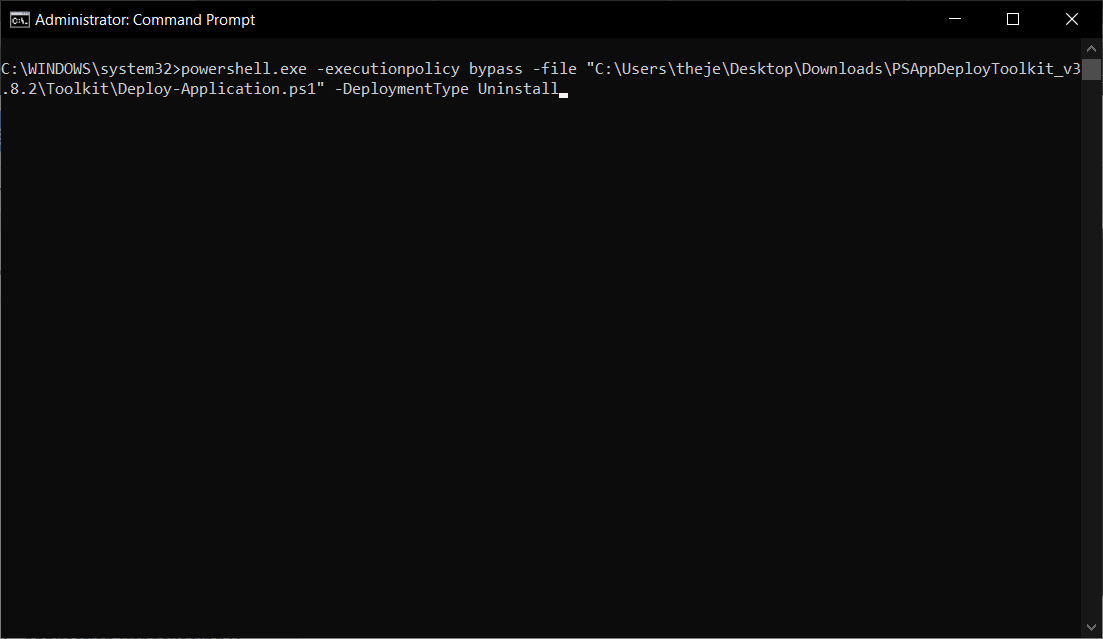
To uninstall the application, we run almost the same command as before, but this time with the parameter -DeploymentType Uninstall:
powershell.exe -executionpolicy bypass -file deployapplication.ps1 -DeploymentType Uninstall
Additional Information
For more information about all the functions, syntax and parameters, navigate to the AppDeployToolkit folder, right-click AppDeployToolkitHelp.ps1 and select Run with PowerShell.
It will bring up the following window:
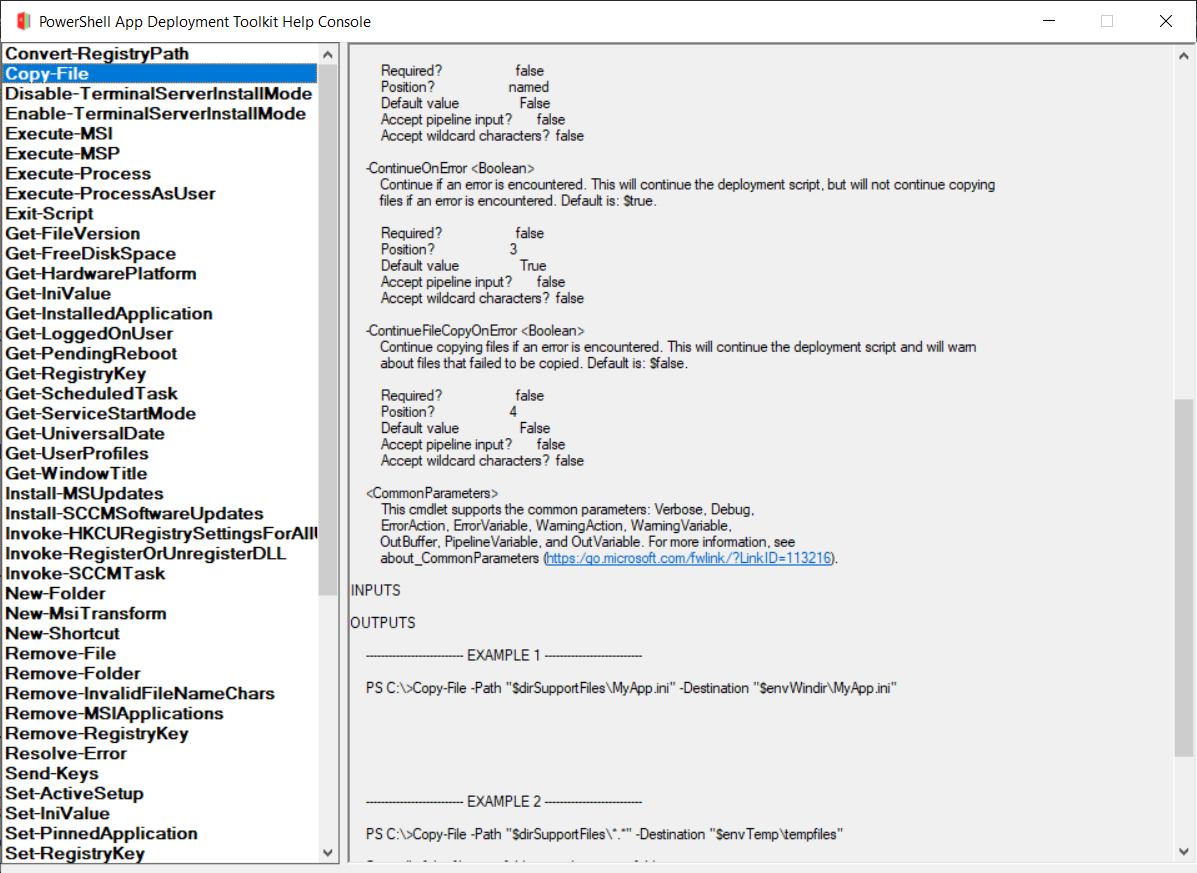
There, you can find all the information you need, and multiple examples for each function.
Advanced Installer offers the possibility to create a chained installation of multiple packages, without needing the support of 3rd party tools.
WMI Explorer
WMI Explorer is a small utility that provides the ability to browse and view WMI namespaces/classes/instances/properties in a single pane of view.
It helps the IT Pro search for the desired classes or instances when he wants to manipulate the WMI.
One example for this use is when you need to design/implement a kill process script in the logic of the installation.
To kill a process, you must use the Win32_Process class, which is present in the ROOT\CIMV2 namespace, to enumerate all the instances. If the name of the process is found in the instance, you can terminate it.
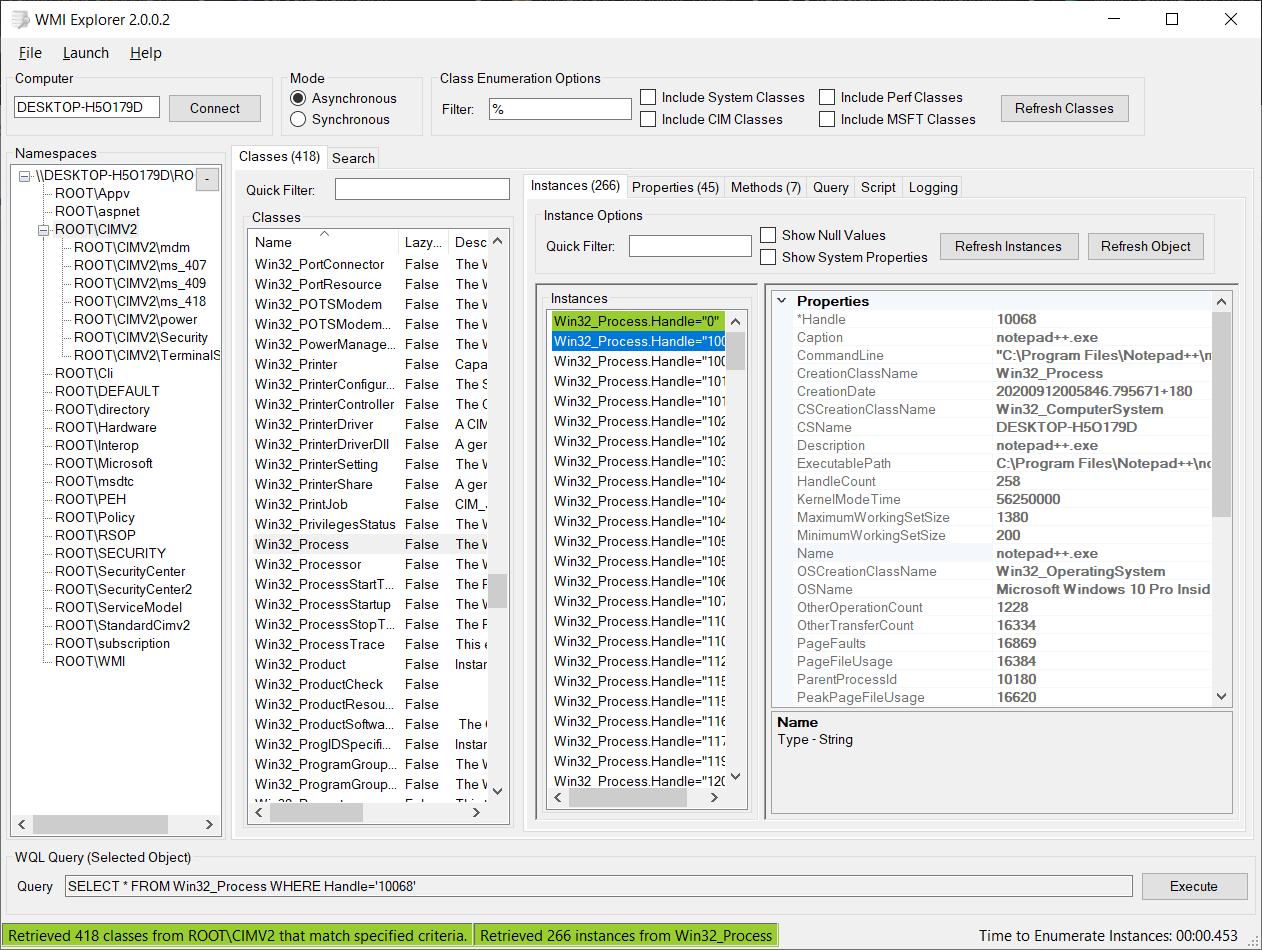
There are dozens of scenarios out there, and if you ever want to quickly find an instance or a class in the WMI, WMI Explorer is the perfect tool.
List features and components for installed MSIs
This is not actually a tool, but rather a script that helps you compare if you performed the right changes to an MSI with a MST.
Let’s say that you have a big vendor MSI with lots of features and components and you apply a transform to it (according to the specifications) that alters features and components (e.g. you remove certain features).
It shouldn’t be an issue. But, how do you test if everything is installed successfully? How do you know if you selected the right features and components that need to be installed?
There are cases where a setup.exe that contains a hidden MSI installs that MSI with a certain INSTALLLEVEL that could remove certain features.
Microsoft offers a VBScript called WiLstPrd.vbs which is present in Windows SDK Components for Windows Installer Developers.
With it, you can list products, properties, features, components and much more.
How can you use it to compare your original MSI with the one that has the changes you added?
It’s easy.
First, install the original MSI on a clean machine with the wanted changes.Copy the WiLstPrd.vbs to a specific location, for example C:\WiLstPrd.vbs.In the same directory, create the following batch file listfeatandcomp.cmd (C:\listfeatandcomp.cmd):
cscript “C:\WiLstPrd.vbs” {11111111-2222-3333-4444-555555555555} f > “C:\features.txt”
cscript “C:\WiLstPrd.vbs” {11111111-2222-3333-4444-555555555555} c > “C:\components.txt”
Replace {11111111-2222-3333-4444-555555555555} with your MSI product code before executing the batch file.
The “f” parameter outputs the features and the “c” parameter outputs the components. For more details, check out the official documentation here.
After you double click the listfeatandcomp.cmd, two txt files will be created in C:\, features.txt and components.txt, each containing the installed and uninstalled features. Now, on a clean machine, install your MSI with self-designed MST and repeat the steps.
After that, with the compare tool of your choice, compare the original
features.txt/components.txt and the modified features.txt/components.txt
You can find
WiLstPrd.vbs here.
Wilogutl
Wilogutl.exe assists on the analysis of log files from a Windows Installer installation, and it displays suggested solutions to errors that are found in a log file.
Non-critical errors are not displayed. Wilogutl.exe can be run in quiet mode or with a user interface (UI). The tool generates reports as text files in both the UI and quiet modes. It works best with verbose Windows Installer log files, but it also works with non-verbose logs.
This tool is only available in the Windows SDK Components for Windows Installer Developers.