Enable auto-updates for your MSIX packages without publishing your apps in the Microsoft Store
If you want to upload an MSIX to the Microsoft Store, you might be overwhelmed by the process, or not know where to start. This article makes each step clear – you’ll have your app up and running in no time at all.
The Microsoft Store gives you the possibility to publish your application, attract users, and manage your updates.Most importantly, it allows you to keep your app up to date automatically. But what if you want to sideload an MSIX and keep the same update functionality?
Microsoft introduced the option to sideload applications directly from remote sources with Windows Version 1709. It allows you to sideload your applications from a website through the use of .appinstaller files. These types of files offer you the possibility to install a main package, optional packages, and dependencies.
For each package mentioned in an .appinstaller file, you can specify a source parameter, which can be your website URL or an UNC (Universal Naming Convention) path. For example, this can be a local share in your organization’s infrastructure.
For more details about .appinstaller files you can access the official Microsoft website here.
Creating .appinstaller files with Advanced installer
To implement the auto-update functionality to your MSIX:
- Navigate to Builds in your project
- Click on your MSIX build(Build_MSIX_APPX)
- In Configuration tab scroll down to AppInstaller
- Paste the URL where your .appinstaller and MSIX are located. In this scenario we are using a test subdomain called http://msixupdates.advancedinstaller.com .Here you must specify your own URL.
- Specify the desired Frequency check. In this case, we
went with 0 which means that every time the application is started, it
will check on our server to see if an update is available.
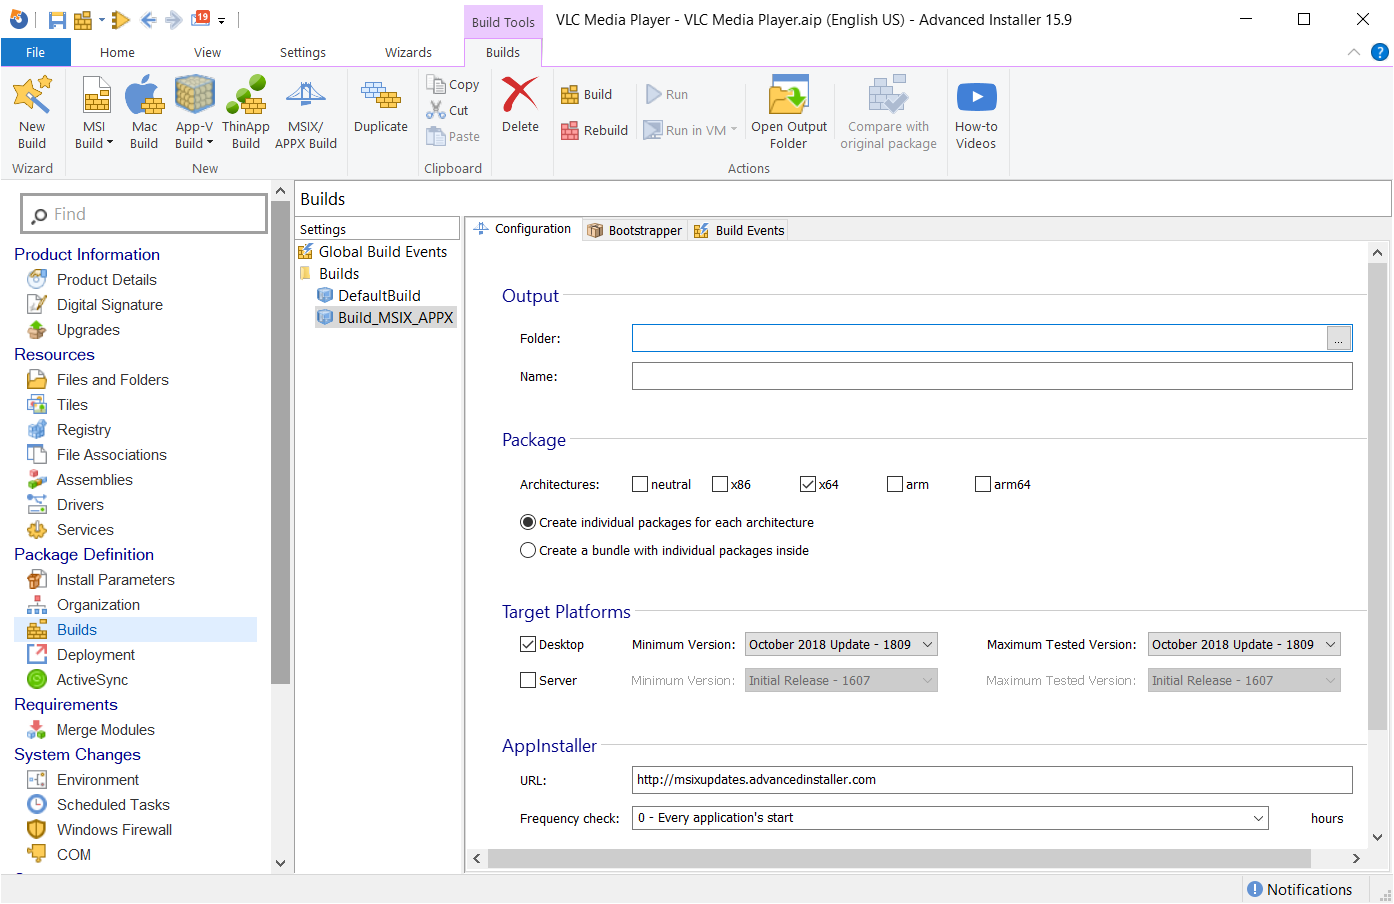
- Click Build in the top-left corner.
It couldn’t be easier; Advanced Installer automatically creates your .appinstaller file according to the project.
<?xml version="1.0" encoding="UTF-8" standalone="yes"?>
<AppInstaller Uri="http://msixupdates.advancedinstaller.com/YourApplication.appinstaller"
Version="3.0.6.0" xmlns="http://schemas.microsoft.com/appx/appinstaller/2017/2">
<MainPackage Name="YourCompany.YourApplication" Version="1.0.0.0"
Publisher="CN=Test01D4C655D68139E0"
Uri="http://msixupdates.advancedinstaller.com/YourApplication.msix"
ProcessorArchitecture="x64"/>
<UpdateSettings>
<OnLaunch HoursBetweenUpdateChecks="0"/>
</UpdateSettings>
</AppInstaller>
If you open the .appinstaller file with any text editor you can see what’s already been configured. This helps you keep track of your process.
The AppInstaller Uri is the URL for the .appinstaller file and the .appinstaller Version. This installs a main package “YourCompany.YourApplication” with the version 1.0.0.0, and has the URI (URL) for the MSIX file. You can also see in the UpdateSettings that HoursBetweenUpdateChecks it’s defined with 0.
In the project folder, you now have your MSIX and an .appinstaller file. Upload both files at the specified URL. You can then either navigate to your URL and click on the .appinstaller file or double click it from the Project folder. It will automatically check to see which version is available on the specified URL.
Whenever you have another update for your application, repeat the same steps above and copy both the MSIX file and .appinstaller file to the specified URL.
![]() The auto-update functionality is available only when you
install the application using the .appinstaller file, not when
installing the MSIX directly.
The auto-update functionality is available only when you
install the application using the .appinstaller file, not when
installing the MSIX directly.
By following these simple steps, you can ensure that your app is running at peak functionality, and you will never miss an update. Your users will thank you!
Subscribe to Our Newsletter
Sign up for free and be the first to receive the latest news, videos, exclusive How-Tos, and guides from Advanced Installer.