How to Use PowerShell App Deployment Toolkit for Wrapper Handling
In the previous article discussing "Repackaging vs. Wrapping", we touched upon the concept of working with wrappers in the world of software packaging and deployment.
Over the years, IT professionals have used different technologies to perform additional system configurations before or after software installation. Back in the day, batch scripts were the most common wrapping technology. Although they provided a simple syntax for modifying system configurations, they had limitations and lacked essential functionalities like scripting languages.
After some time, the industry transitioned to VBScript as the preferred wrapping technology. This transition was somehow expected because VBScripts were also recognized natively by MSI technology. We only had to use them alongside the actual MSI, rather than integrating them directly.
Although VBScript is still used to this day by many large companies, there was no standardized framework available that fully met the requirements of IT Professionals.
Since PowerShell became more popular and offered many cmdlets – it made it possible for an open-source project to surface. The PowerShell App Deployment Toolkit (PSADT) changed the way we currently handle wrappers, and in this article, we'll guide you through how to use it.
As PowerShell gained popularity and introduced numerous cmdlets, it paved the way for an open-source project to emerge. The PowerShell App Deployment Toolkit (PSADT) changed the way we currently handle wrappers.In this article, we will provide you with a step-by-step guide on how to use PowerShell App Deployment Toolkit (PSADT).
What is the PowerShell App Deployment Toolkit?
The PowerShell App Deployment Toolkit (PSADT) is an open-source project that provides a framework and set of tools for deploying software applications using PowerShell scripting.
It offers a standardized approach to application deployment and helps automate various tasks related to software installation, configuration, and management.
The toolkit includes functions, cmdlets, and templates that facilitate the deployment process, allowing IT professionals to customize and streamline application installations in a consistent manner across different systems and environments.
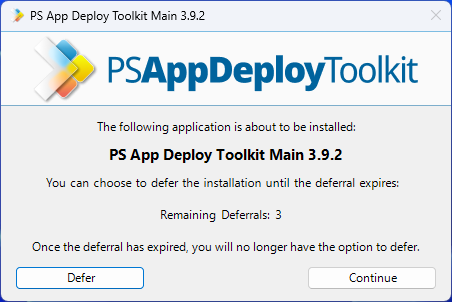
The PSADT is designed to simplify the creation of complex installation and uninstallation scripts, ultimately enhancing the success rates of software installations. With just a few lines of code, you can create installation bundles or suites, as well as make additional system modifications.
Let's consider registry key manipulation in PowerShell. While PowerShell provides simple cmdlets for modifying registry keys, there are a few considerations to keep in mind:
- Does the path to the registry key exist?
- Do we need to create a new registry key?
- Do we need to set a registry key?
The reason for asking these questions is to help you to develop your script. If the path to a certain registry keydoesn’t exist, you’ll need to create it. So, it's important to test and handle this situation in your script.
$RegistryPath = 'HKCU:\Software\MySoftware\Scripts'
$Name         = 'Version'
$Value        = '2'
# Create the key if it does not exist
If (-NOT (Test-Path $RegistryPath)) {
  New-Item -Path $RegistryPath -Force | Out-Null
}After we create the registry path, we need to determine whether the registry already exists or if we need to create a new one. Depending on the answer, you have two options:
1. If the registry already exists, you can use the Set-Item cmdlet to set a certain registry value. For example:
Set-Item -Path HKCU:\Software\MySoftware\Scripts\Version -Value “2”
2. If the registry does not exist and needs to be created, you can utilize the New-Item cmdlet to create the new registry item along with its value. For example:
New-Item -Path HKCU:\Software\MySoftware\Scripts\Version -Value “2”
You can simplify the steps mentioned above by using the -Force parameter, but this can make your script more complex with additional functions. This is where the PowerShell App Deployment Toolkit comes in. It provides custom cmdlets that make your script much simpler.
For creating or setting a registry key, you can leverage the Set-RegistryKey custom cmdlet provided by PSADT. Simply specify the exact location of the registry key, and PSADT will handle the rest of the process for you.
How to Configure PSAppDeployToolkit?
Although ignored, but crucial, are the simple configurations within scripts, such as logging options, installation parameters, languages, and log location. Configuring these individually for each command can be time-consuming for IT professionals who are used to this practice.
PSADT has greatly simplified things for IT professionals by introducing the AppDeployToolkitConfig.xml file. With this file, you can declare all necessary configurations in one place, eliminating the need to repeatedly set them in your main script file. By utilizing this file, you can manage these configurations and focus on writing your code without the hassle of constant configuration adjustments.
- Once PSAppDeployToolkit has been downloaded,
- Extract the zip file,
- Navigate to Toolkit\AppDeployToolkit
- Edit the AppDeployToolkitConfig.xml.
The AppDeployToolkitConfig.xml file contains configurable options referenced by the AppDeployToolkitMain.ps1 script, such as MSI switches and User Interface messages, which are customizable and localized in several languages.
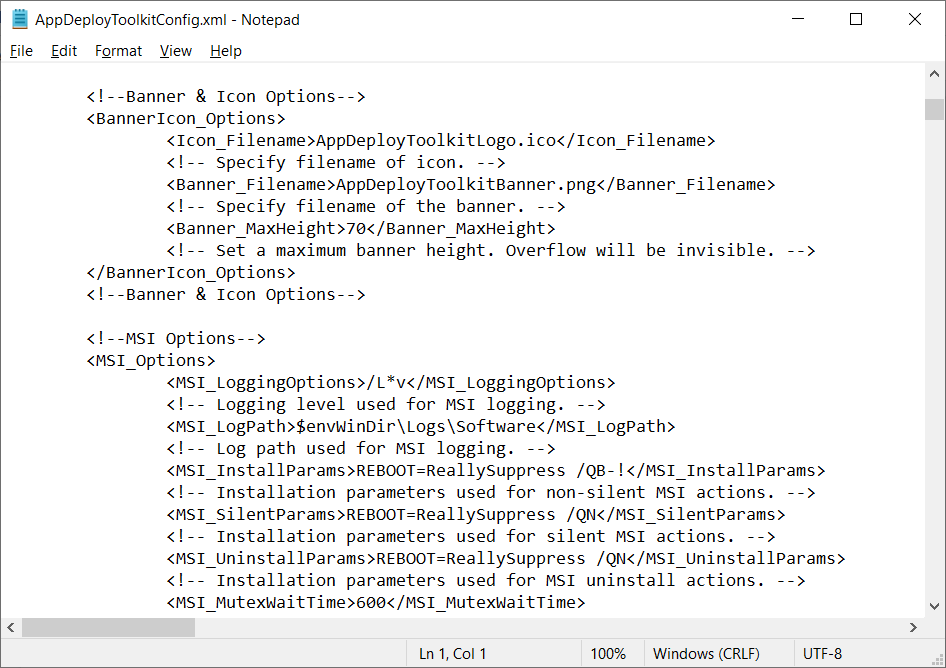
The AppDeployToolkitConfig.xml file is split into different sections:
- Toolkit options: Configure general toolkit options such as required administrative rights, temp path to store temporary toolkit files, default reg path, logs compress, etc.
- Banner, Logo & Icon Options: Configure the UI banner, logos and icons.
- MSI Options: Configure options for MSI installations such as logging options, log path, install parameters, etc.
- UI Options: Configure general UI options such as balloon notifications, general timeout of the script, exit codes, etc.
- UI Messages: PSADT comes with many standard languages included by default. In this section, you can edit the current languages available within PSADT or add your own.
Once you configure PSAppDeployToolkit as needed, you can use the AppDeployToolkitConfig.xml for every script created in the future, not having to worry about settings each time you create a new script.
How to Enable Autocomplete for PSAppDeployToolkit in PowerShell ISE
PowerShell ISE is probably the most used host application for PowerShell. It provides a comprehensive GUI environment where you can execute commands, write, test, and debug scripts. PowerShell ISE also offers multiline editing, tabs, syntax coloring, and more.
For the PowerShell ISE users, you can add the autocomplete on the PowerShell App Deployment Toolkit. To do this, follow these steps:
1. Navigate to "C:\Users\(username)\Documents" and create a new folder called WindowsPowerShell.
2. Inside that folder, create a new folder called Modules.
3. Navigate to the extracted PSADT location and copy the AppDeployToolkit folder (found in the Toolkit folder) in the previously created Modules folder.
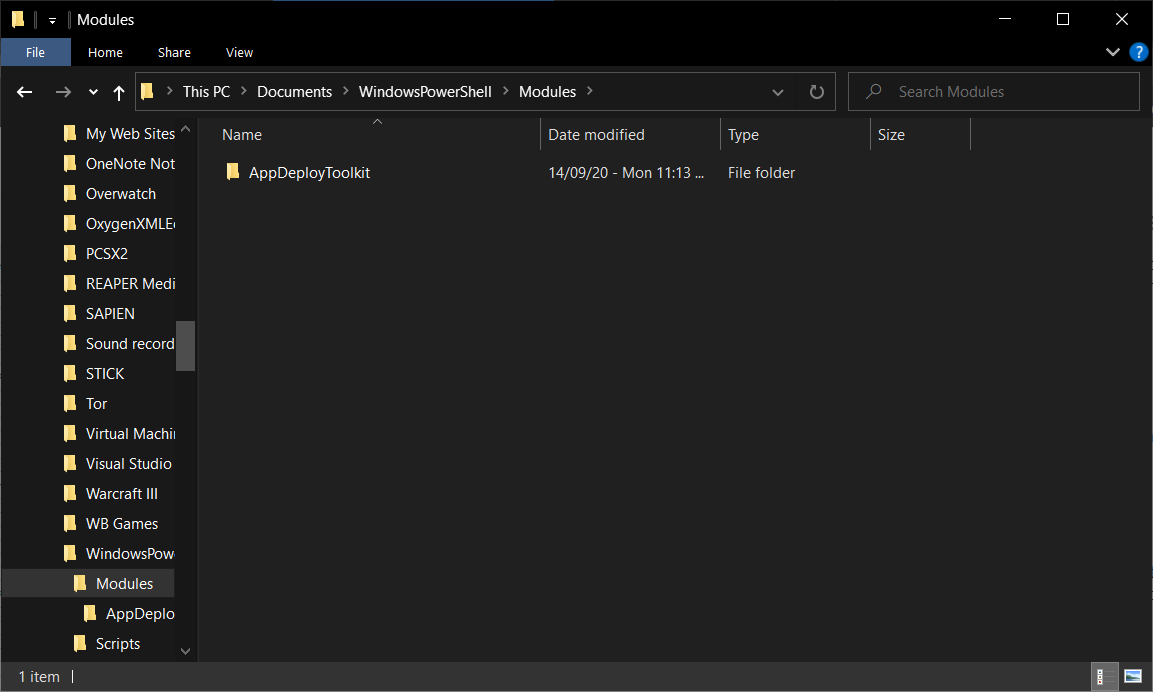
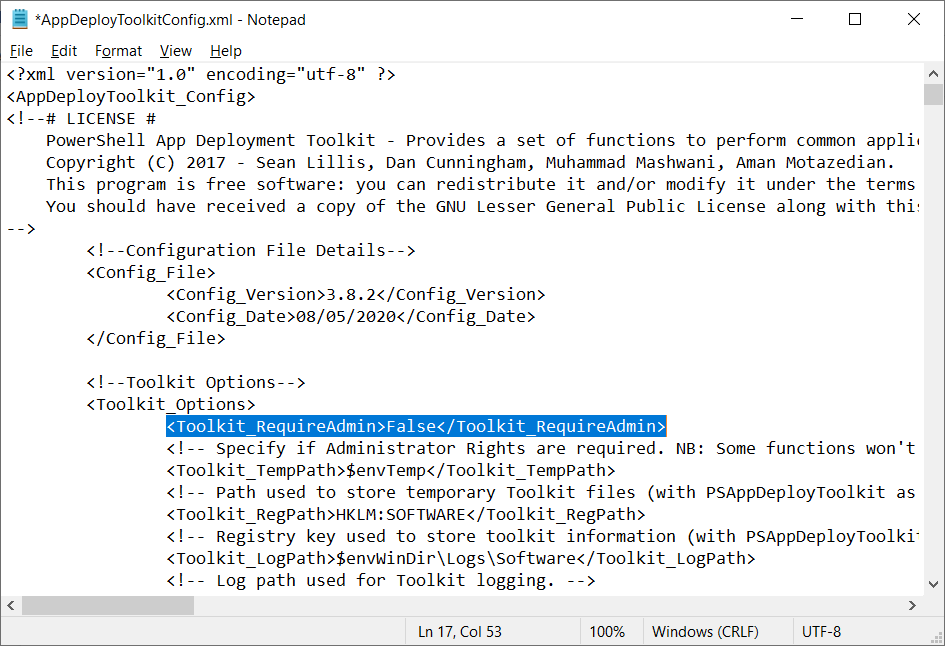
4. Go into the copied AppDeployToolkit folder and modify the AppDeployToolkitConfig.xml by changing the Toolit_RequireAdmin parameter to False.
5. Edit the PSAppDeployToolkitMain.ps1 with PowerShell ISE.
6. Once opened with PowerShell ISE, save it as PSAppDeployToolkit.psm1 inside the AppDeployToolkit folder.
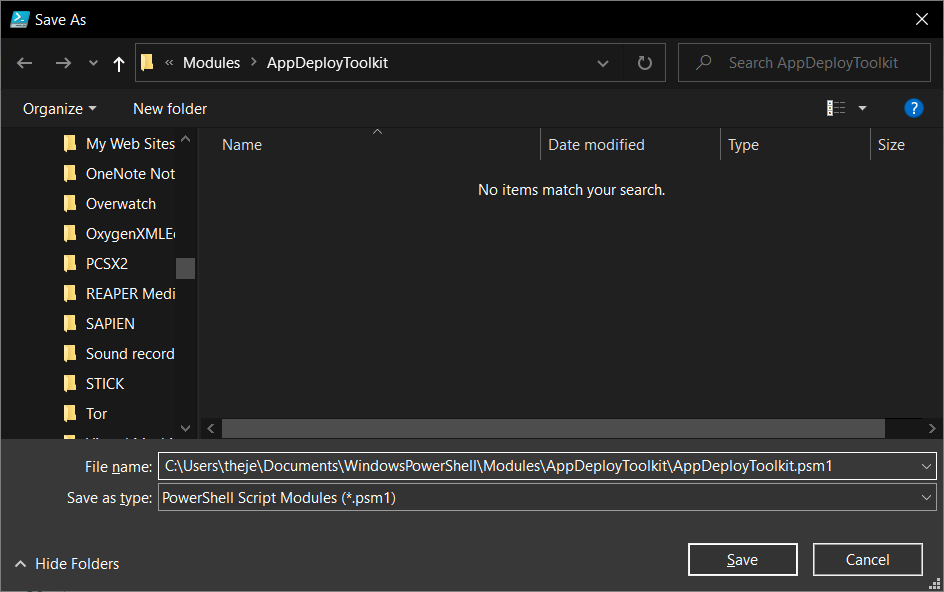
And that is it, all the commands should appear in the right pane and should auto-complete when writing.
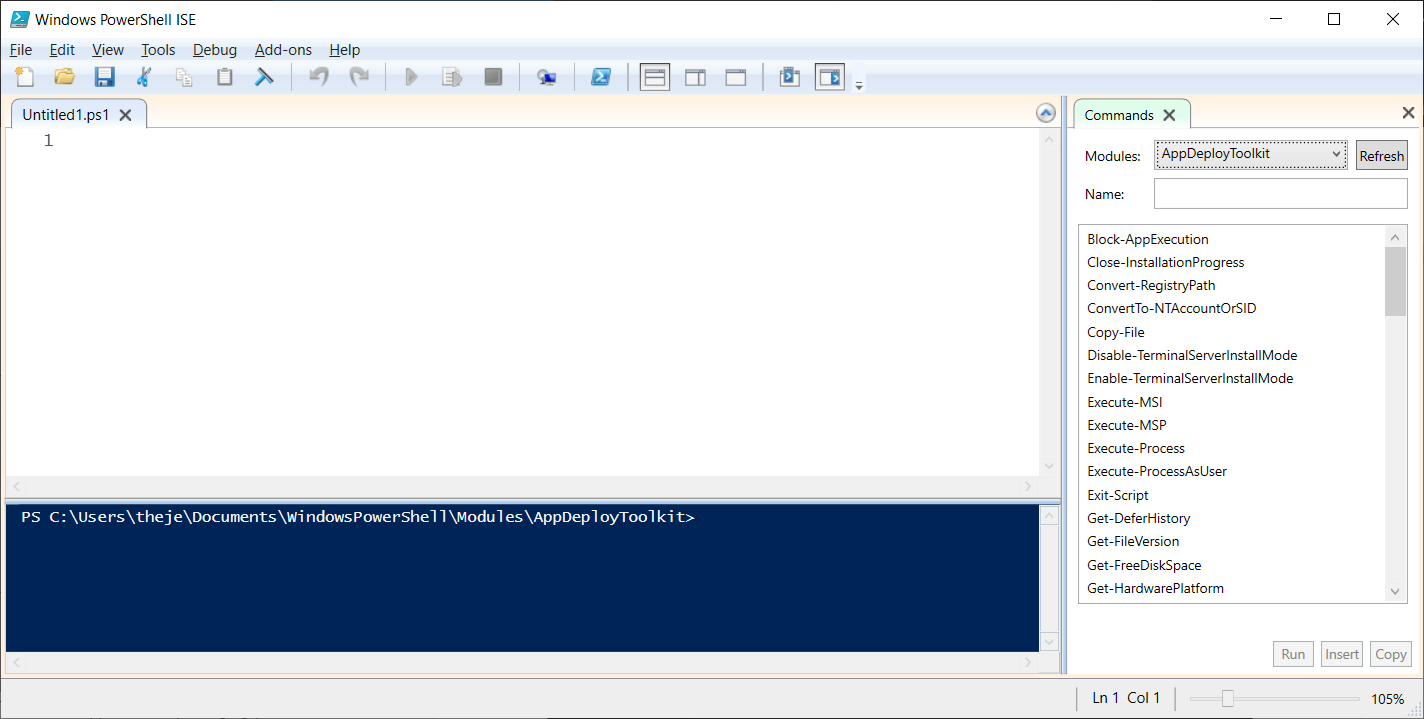
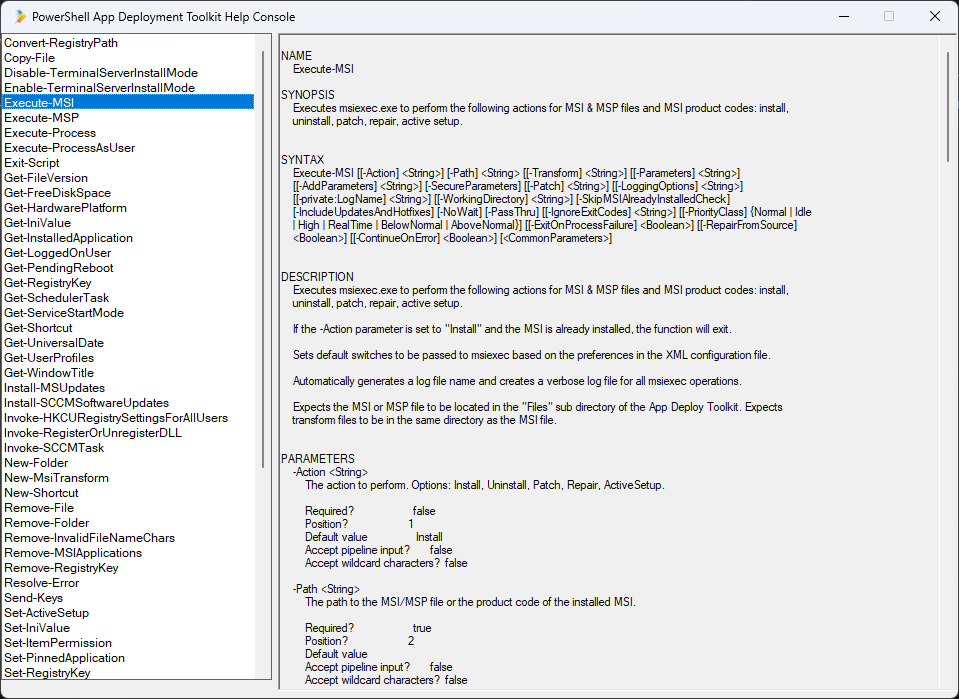
If you don’t use PowerShell ISE or don’t want to perform the above steps, there are alternative options available. You can check the PSADT functions online, or you can use the AppDeployToolkitHelp.ps1 which shows you all the available functions with examples.
To access the AppDeployToolkitHelp.ps1 file, navigate to the AppDeployToolkit folder and simply right-click on it. Then, select "Run with PowerShell" from the context menu. This action will open a window displaying all the functions included in PSADT:
Exploring the PSADT Framework: A Closer Look at Its Structure
The PSADT structure is straightforward. In the root of the toolkit, you will find the following files:
- Deploy-Application.ps1
- Deploy-Application.exe
- Deploy-Application.exe.config
As we will have a look later on in the article, these are the files that you can execute to get the installation started. The Deploy-Application.ps1 is the main PowerShell script that needs to be modified with the logical installation/uninstallation steps.
Next, the Files folder is where you will place all of your installation files, either installers like MSI, MST, MSP, or other configuration files which you can copy later during installation.
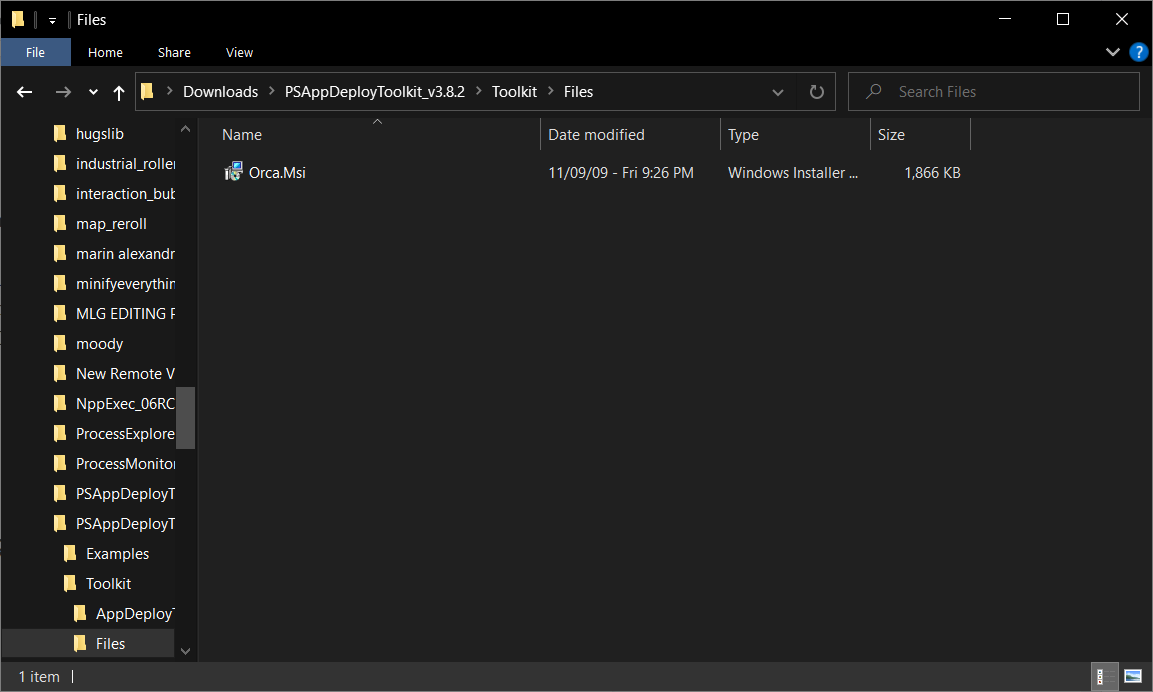
The AppDeployTookit contains the configuration files mentioned above, but also the icons, banner, and main functions file.
If you want to extend the functionality of PSADT with additional functions, you can either edit AppDeployToolkitMain.ps1 or create a new ps1 file and include it in the Deploy-Application.ps1.
The last folder present is the SupportFiles where you can include any necessary additions which will be used in the main script. Technically, you can also run the installation of a certain file directly from the SupportFiles folder by using the $dirSupportFiles variable.
How to Edit the Main Script: Deploy-Application.ps1
Now that we know about the PSADT structure, let’s assume we copied an MSI in the Files folder that we want to install. After that, let’s open up Deploy-Application.ps1 with the Windows PowerShell ISE editor and start adding the necessary lines.
The first basic lines that must be edited are your Application Vendor, Application Name, Application Version, and other information about the installation. These variables will appear in the logs, toast notifications, or progress box.
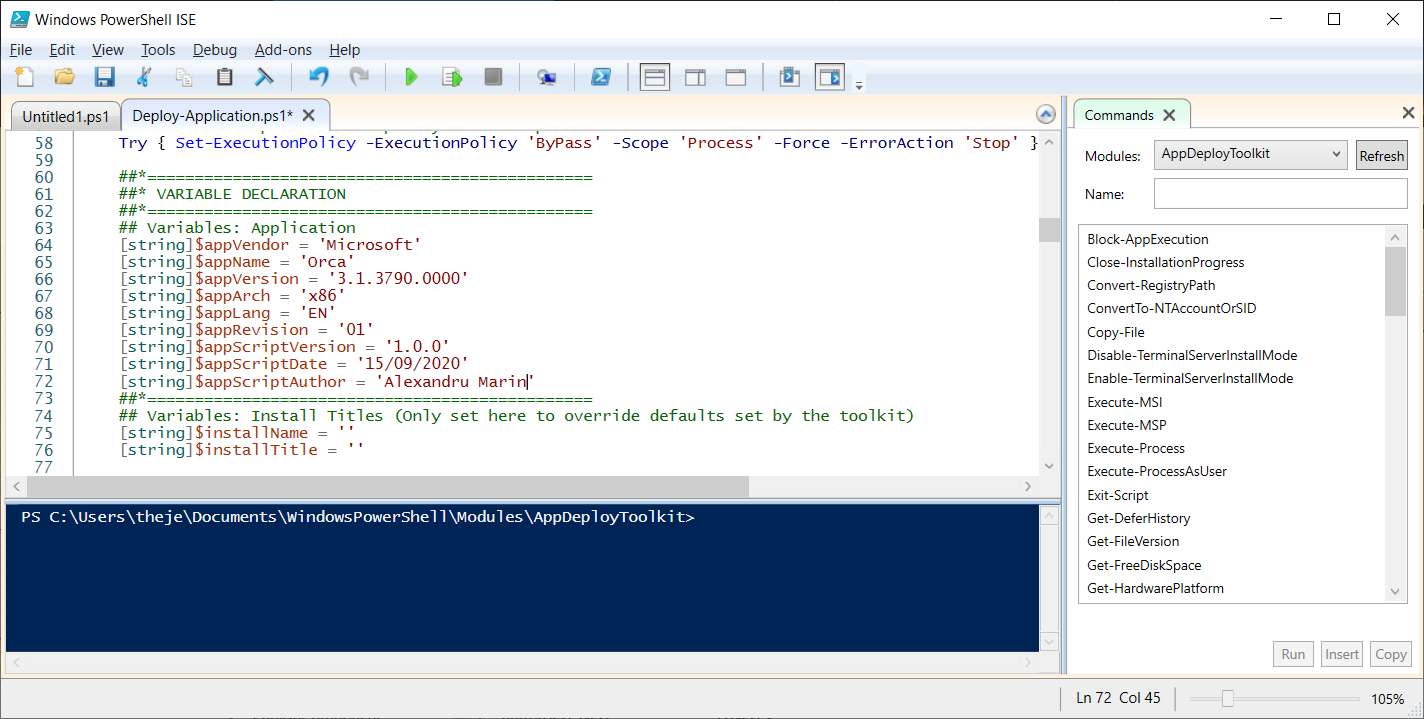
Next, the PSAppDeployToolkit installation logic is composed of three main actions which contain three sub-actions for each.
The main actions are:
1. Installation
2. Uninstallation
3. Repair
The sub-actions are:
1. Pre-Installation/Pre-Uninstallation/Pre-Repair
2. Installation/Uninstallation/Repair
3. Post-Installation/Post-Uninstallation/Post-Repair
Depending on your requirements, edit the sub-actions you need.
In this example, we will modify only the Installation and Uninstallation main actions.
Let’s start with the Installation Actions.
In the Pre-Installation action, we removed the message that informs us of closing a certain app or to defer the installation.
In the Installation action, we installed Orca.MSI with the following command:
Execute-MSI -Action Install -Path 'Orca.Msi'
In the Post-Installation action, we also removed the message that informs us that the installation is complete. In the end, the script looked like this:
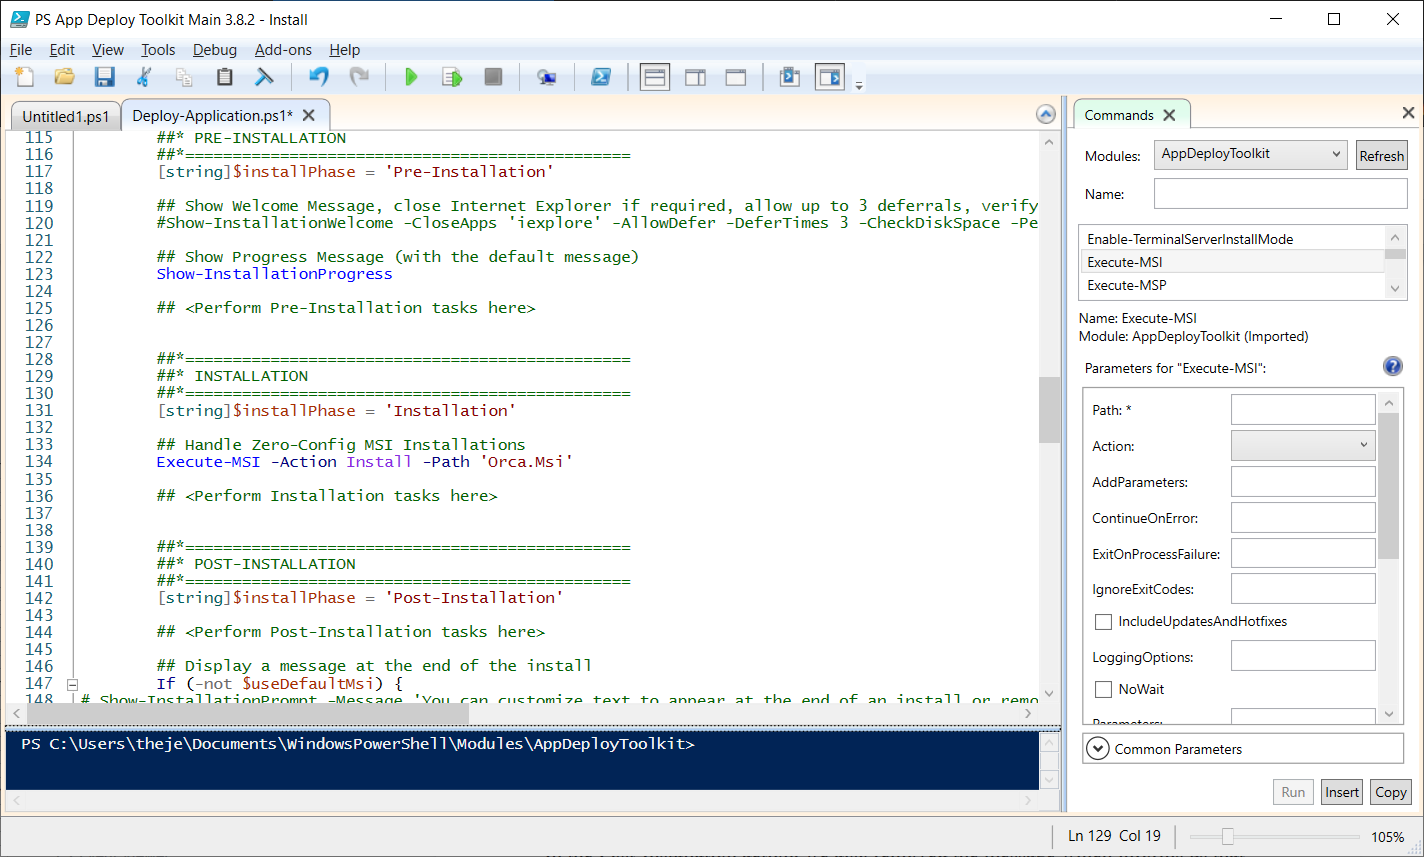
With a line, we have a progress box, an installation sequence, and toast notifications for the user.
Next, we moved to the Uninstall Actions.
In the Pre-Installation section, we removed the initial message. Then, in the Uninstallation section, we uninstalled Orca with the following command line:
Execute-MSI -Action Uninstall -Path '{85F4CBCB-9BBC-4B50-A7D8-E1106771498D}'In the end, the Uninstall sequence looks like this:
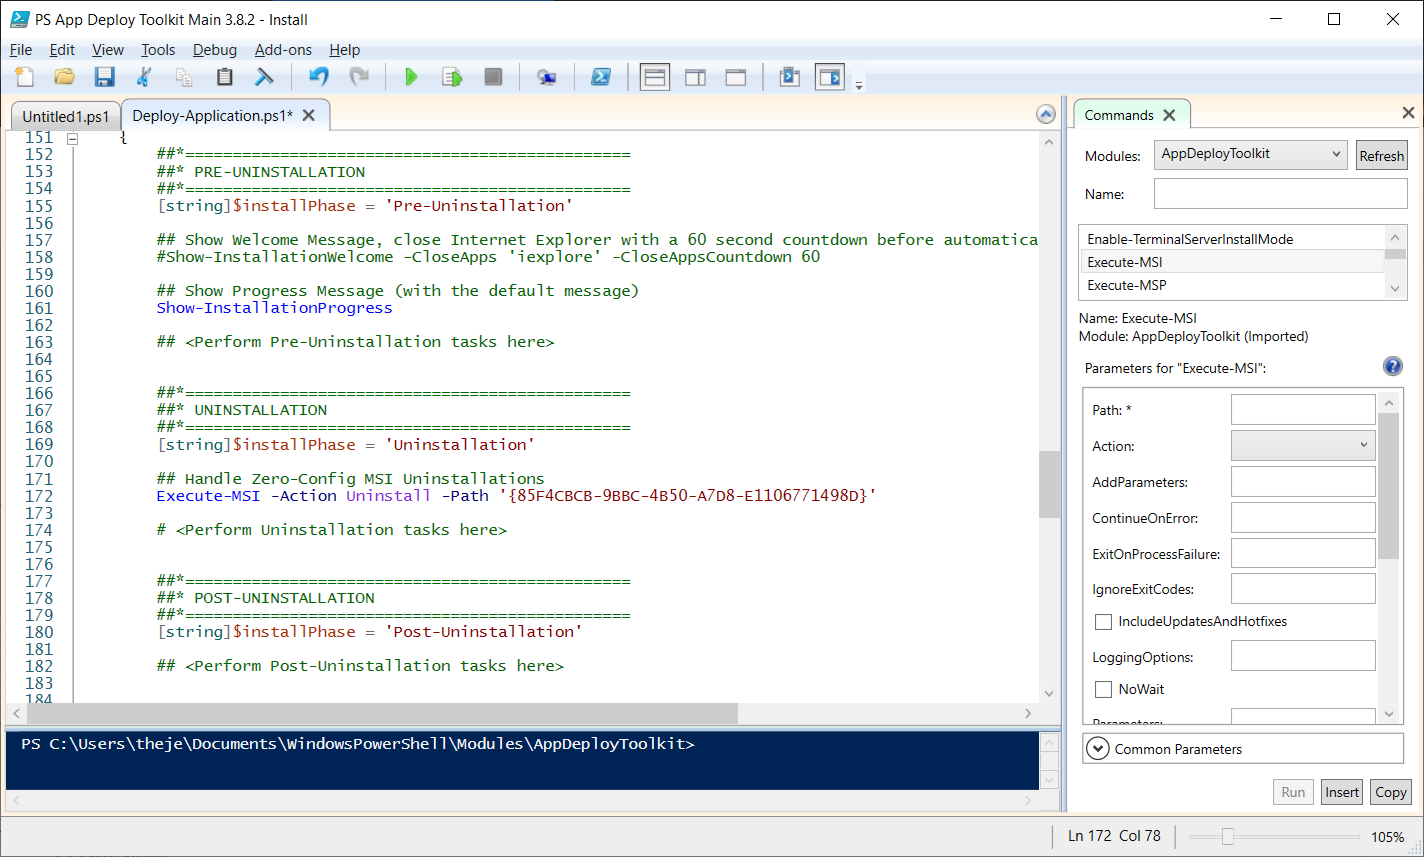
And that’s it! The installation script is now done and can be used in the infrastructure.
How to Execute Scripts Using PSADT?
To initiate the installation of your application using PSADT, there are several options available, as mentioned earlier. You can choose to directly call the deployapplication.ps1 script using PowerShell, or alternatively, you can execute deployapplication.exe, which ensures that the execution policy is set correctly.
The recommended approach is to use the PowerShell script directly. To do so, follow these steps:
1. Open an administrator command prompt.
2. Type the following command:
powershell.exe -executionpolicy bypass -file deployapplication.ps1
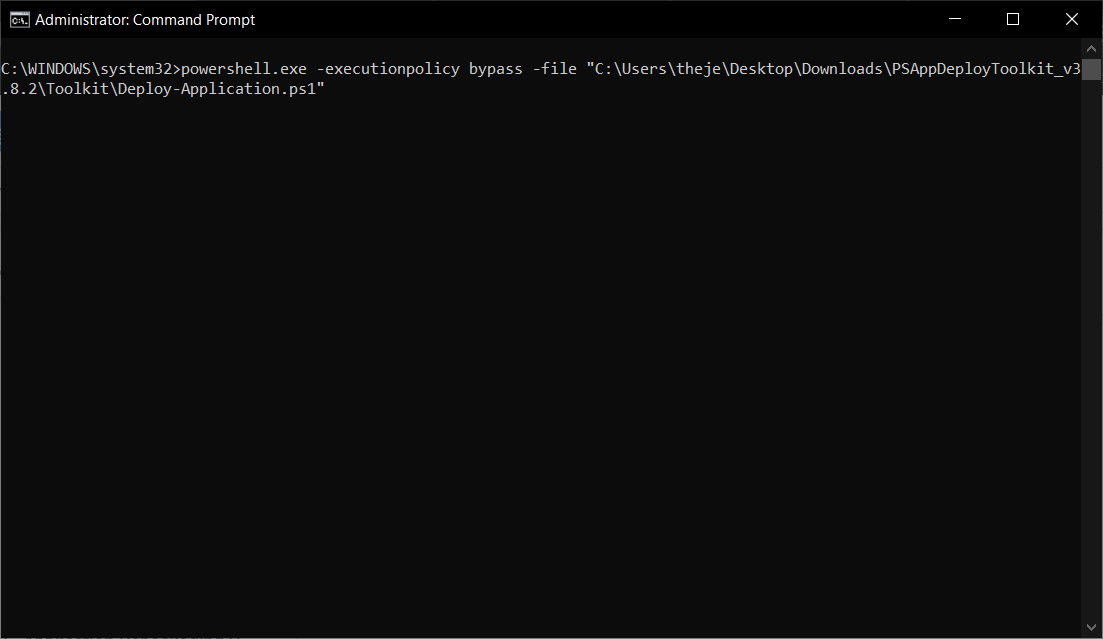
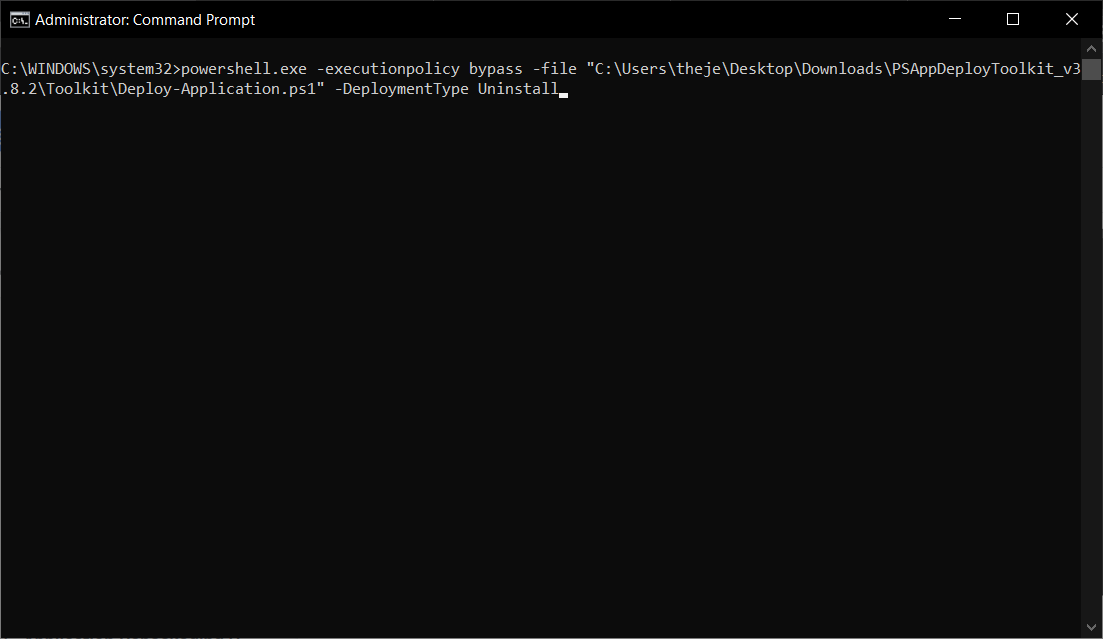
To uninstall the application, we run almost the same command as before, but this time with the parameter -DeploymentType Uninstall:
powershell.exe -executionpolicy bypass -file deployapplication.ps1 -DeploymentType Uninstall
Conclusion
As you can see, it is pretty simple to handle wrappers using the PowerShell App Deployment Toolkit (PSADT).
We hope you found this article useful. Let us know if you have more questions.
