How to create components in Advanced Installer. And why you should not bother with it.
As a standard, Advanced Installer automatically creates the components when generating the product package. The automatic process respects a strict set of Windows Installer rules, together with a series of best practices we have gathered from our customers during the years.
The GUI based packaging tool ensures a rapid, reliable, clean build of the product package without the need for in-depth knowledge and double-checks.
Of course, Advanced Installer includes the possibility to create components and we will go through every step of the process in this article.
MSI Components and Features
Windows Installer organizes a product in features and components. A feature contains all the components needed when installing a product. This makes components the smallest piece in a Windows Installer project.
A component can contain files, registry, COM, services, environment variables, and so on.
First, we need to have a look over the Organization Page. Here, you have an overview of what is present inside your Windows Installer project.
When right-clicking on Product, you see the option to create a new feature, as it’s described in our Organization Page tutorial.
Users familiar with other packaging tools would expect to find an
option to create a component right in this view. As stated at the
beginning of this article, Advanced Installer has an automated
process to create components without any human interaction in
order to ensure the package gets fast, clean, reliable creation.
The automatic creation of the components helps both the novice packager to build a Windows Installer package with minimal knowledge and senior it pros to rapidly build reliable packages without minding any possible corruptions in the MSI organization.
Let’s see how you can move your files and registry on a particular component in Advanced Installer.
Move files to components
1. Move a file automatically created for a
specific component to another one
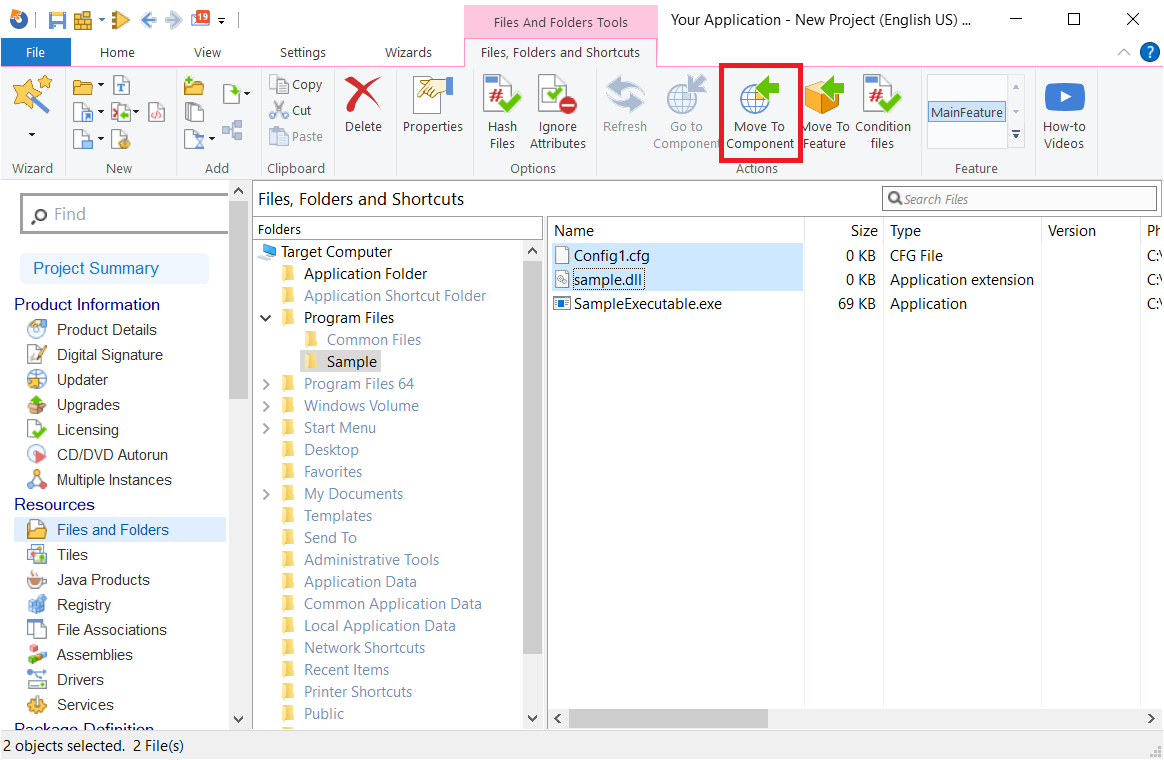
1.1 Navigate to the Files and Folders page
1.2 Select one or multiple files you
wish to change the component for.
In the top pane, click Move to
Component.

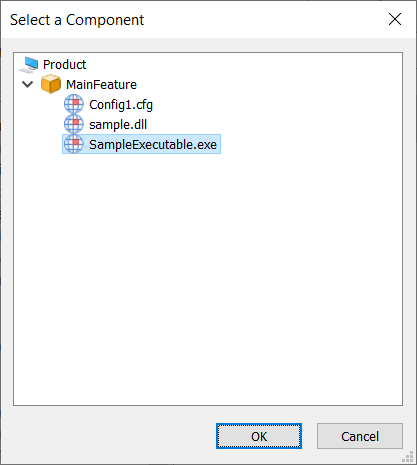
1.3 In the additional dialog, select the desired component in which you want to move the files.

In our example, when we navigate to the Organization Page, after moving them, the components for the Config1.cfg and sample.dll are automatically deleted, and only the component for SampleExecutable.exe remains. This component now contains all the files in our project.
Advanced Installer automatically deletes the empty components
to ensure a clean package build.
2. Move a file to a new component
2.1 Navigate to the Organization page.
2.2 Open the component which contains the chosen file.
2.3 Right-click the file, and select Move to New Component.
2.4 Advanced Installer automatically creates a new component and places the file in it.
Move registry to components
As a Windows Installer rule, each registry must be placed on a separate component. This is done so that the self-healing mechanism runs if any of the registries placed in the package are missing.
Likewise files, you can move the registry on a specific component:
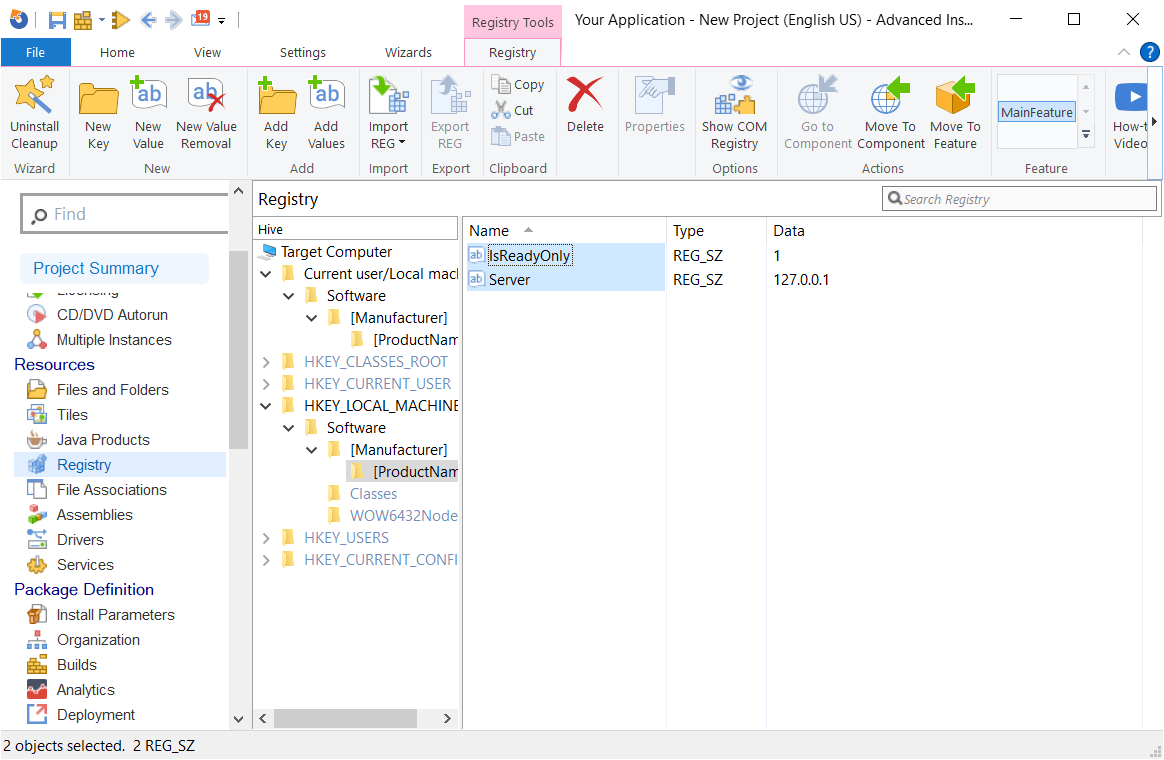
1. Navigate to the Registry Page.
2. Select the registry entries you wish to move.
3. On the top bar click on Move To Component.
4. An additional dialog appears and you have to choose the component where you want to move your registry.

Move a registry to a new component:
1. Navigate to the Organization page.
2. Open the component which contains the desired registry, right-click it, and select Move to New Component.
3. Advanced Installer automatically creates a new component and places the chosen registry into it.
Video Tutorial
Conclusion
In order to build great Windows Installer packages according to rules and best practices, Advanced Installer handles how the components are created.
Of course, Advanced Installer will not limit your experience by not allowing MSI structure interference, but keep in mind that if there are ICE (Internal Consistency Evaluator) errors during validation, you can first try our automatic issues fixer before manually trying to solve them.
Subscribe to Our Newsletter
Sign up for free and be the first to receive the latest news, videos, exclusive How-Tos, and guides from Advanced Installer.