How to upgrade your C# application built with Visual Studio
Keeping your application upgraded is key for maintaining its functions and security. Regularly checking for and installing new versions ensures that your app works at its best.
You can even automate these upgrades. By doing so, your app always runs the most recent version, which will have all the latest improvements and bug fixes.
Here's a straightforward guide to using Advanced Installer to upgrade a C# application.
Add the Advanced Installer extension for Visual Studio
Before we start, add the Advanced Installer extension for Visual Studio. This step enables you to manage your C# application directly within Visual Studio. You can find Advanced Installer on the Visual Studio Marketplace or on our website.
To install it from Visual Studio, follow the next steps:
1. Go to Extensions → Manage Extensions → Online Section → Visual Studio Marketplace.
2. Search for Advanced Installer for Visual Studio extension.
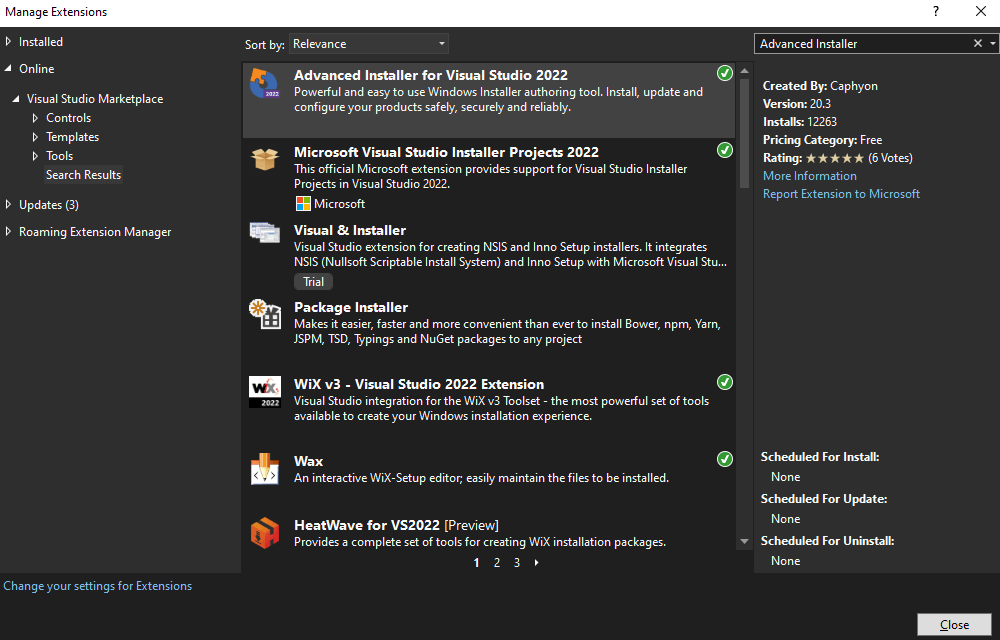
3. Press the Install button. Be aware that the installation will start after you close the IDE.
4. After the installation is complete, restart Visual Studio.
Add the setup project
For this tutorial, we created a simple Windows Forms App (.NET Framework) project and added some controls to the form. Let’s consider the one below as being version 1.0.0.
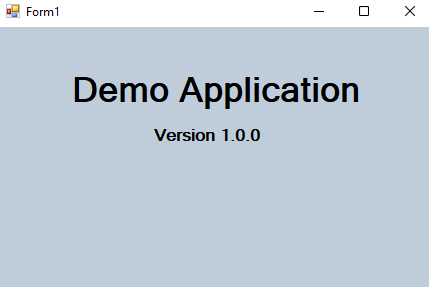
To add a setup project for your application, follow the next steps:
1. Right-click on the solution → Add → New Project.
2. Search for Advanced Installer Project.
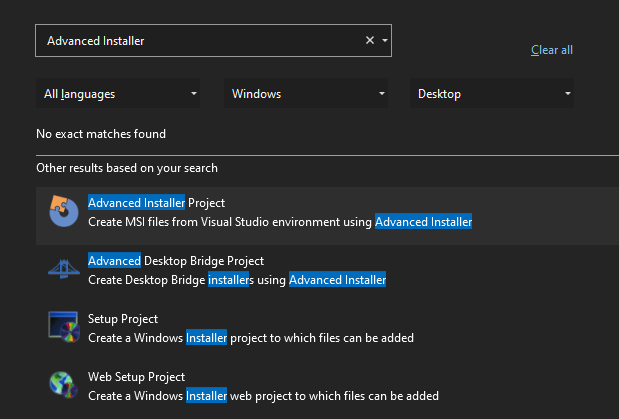
3. Set a name (we named it MyAppSetup) and press the Create button. Then, you should see it in the solution explorer.
Open and edit the setup project in Advanced Installer
Once the setup project is created, open the .aip so you can manage some features directly from Visual Studio. For example, we can easily add the project output:
1. Go to the Files and Folders tab.
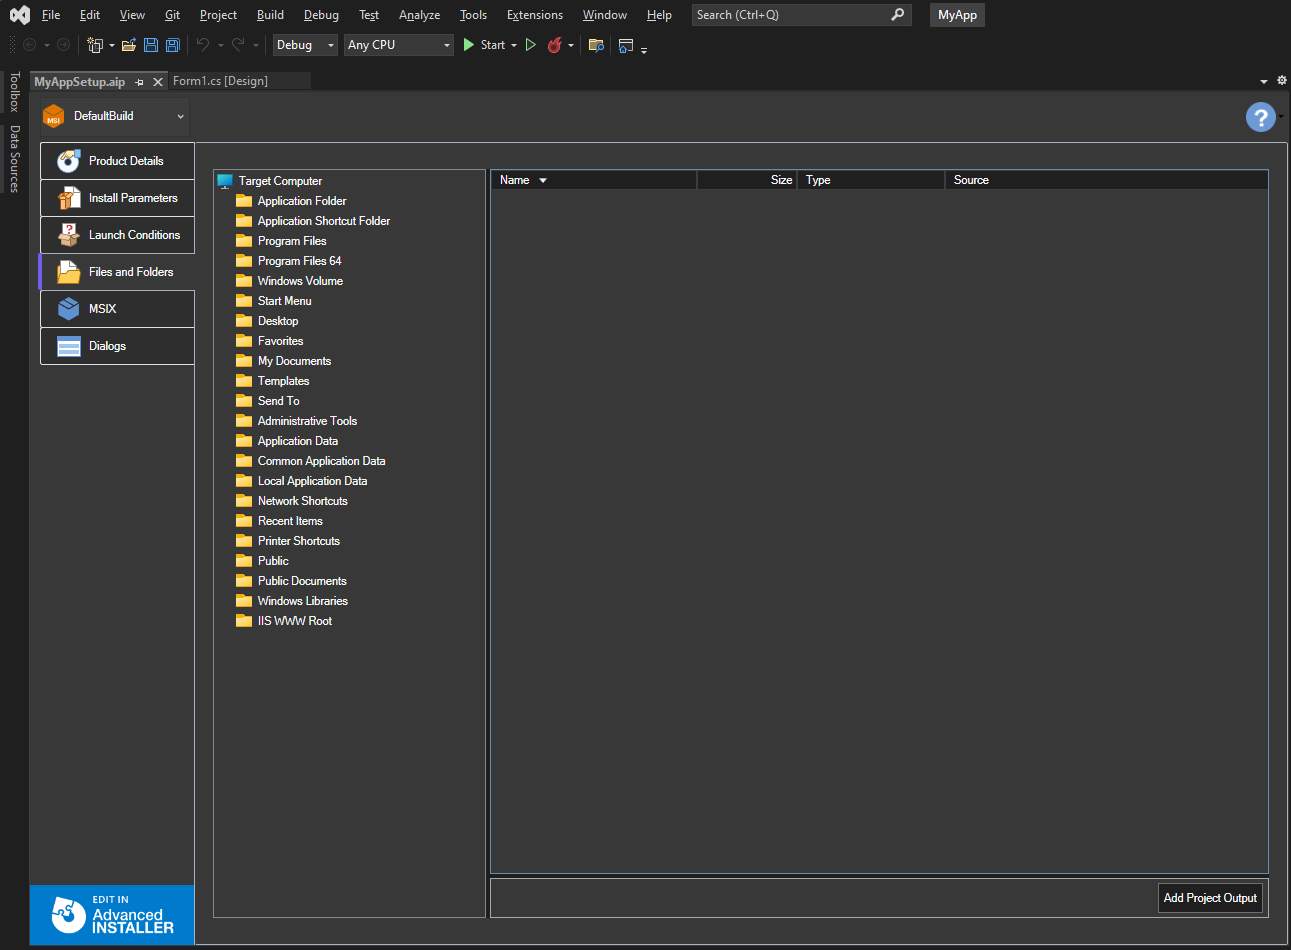
2. Click on the bottom right Add Project Output button.
3. Select the project from the opened dialog. You will find the project files under Application Folder.
In the setup project viewer, we can also edit the product details, add launch conditions, or set install parameters. However, to access the full list of features, you need to open the setup project in Advanced Installer. To do this, just click the bottom left Edit in Advanced Installer button.
Configure the Updater
Now, we have to add the auto-update functionality to our setup project with the Advanced Updater. The Advanced Updater is an executable tool whose roles are to check for updates, download and install them.
To enable the updates capability, follow the next steps:
1. Open the setup project in Advanced Installer.
2. Go to the Updater view and check Check for updates using Advanced Installer. Once checked, the updater.exe file will be added to your application directory.
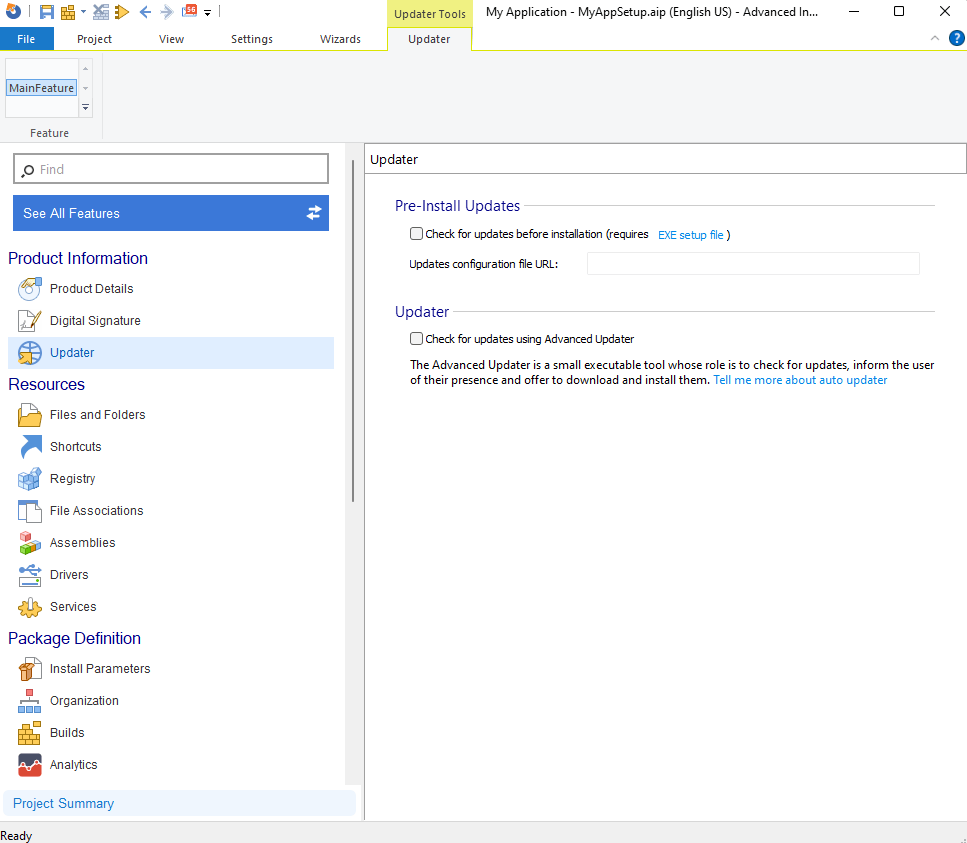
3. Provide the URL for the update configuration file. You can use Dropbox to store the updates, as we do in this example. So for now you just need to reserve the location by creating the Update.txt file on Dropbox. Later, you will replace it with the configuration file of the update 2.0.0.

Once the updater is enabled, there are multiple ways to check for updates. Here are the options:
1. Manually - the user will have to check if new updates are available:
- In the Updater view, go to the Updater Execution section and choose the Manual option.
- Create a desktop shortcut for the updater to allow the user to check for updates more easily.
- Go to the Application Folder in Advanced Installer.
- Right-click on the update.exe → New Shortcut To → Installed file.
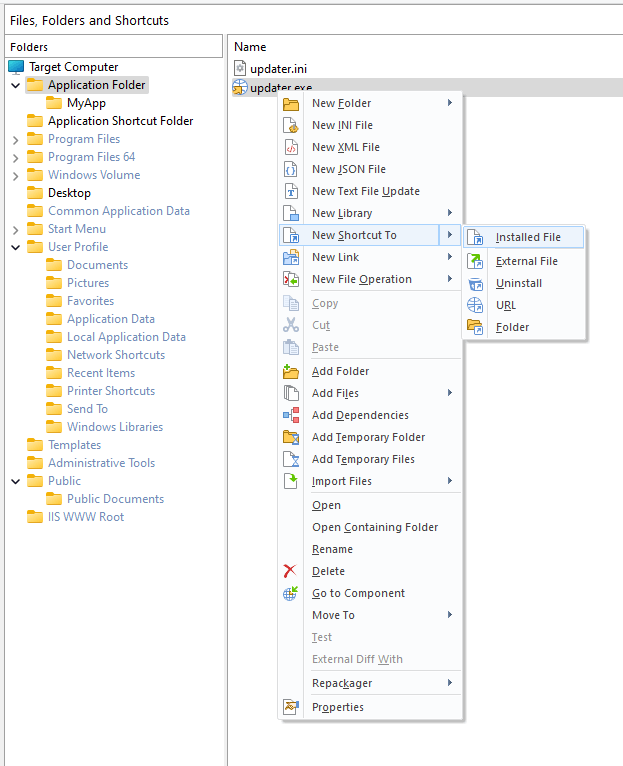
- In the opened dialog, set a name and the desktop location for the updater shortcut.
- Optionally, you can display a toast notification when an update is available once the application is launched. This is a free support from Advanced Installer and you can enable it by specifying the following command line to the Updater.exe: /justcheck -restartapp "[#MyApp.exe]". You can check this article for more information.

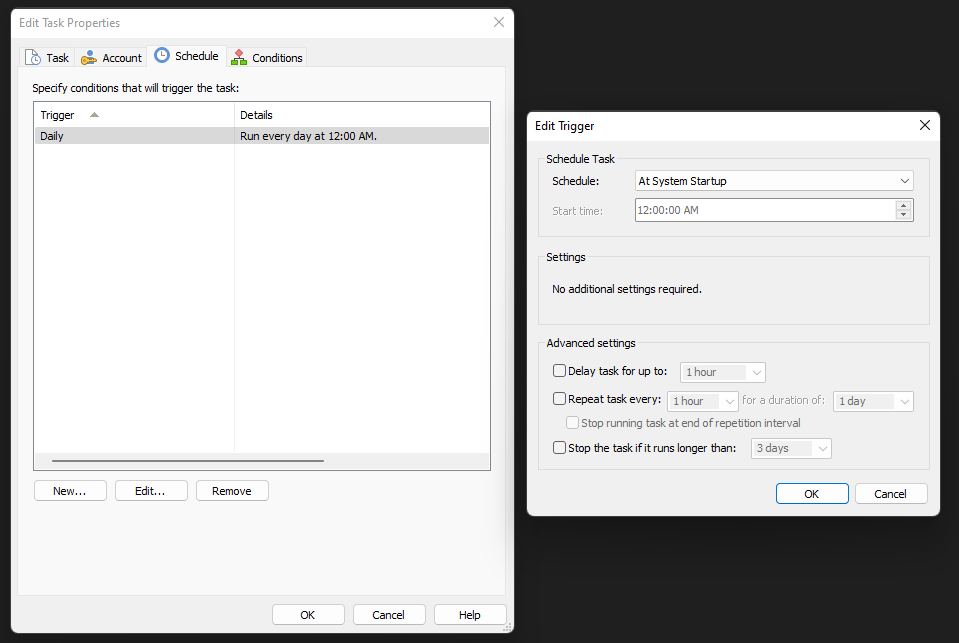
2. Automatically - through a scheduled task. This option is available in Advanced Installer starting with the Enterprise edition. Follow the next steps for this option:
- In the Updater view, go to the Updater Execution section and choose the Automatic option.
- In the opened dialog, edit the task properties according to your needs. For example, you can configure it to check for updates At System Startup. Just go to the Schedule tab and create a new condition for the task.
3. The last option, which gives you more control over the update process, is to programmatically integrate the Updater with your application.
Check this article for more information on How to programmatically integrate the Updater with applications written in various languages?
Install the application
Once version 1.0.0 of the application is ready and its updater is configured, build the setup project. Go to the setup project directory - SetupFiles and run the MSI to install the application.
Update the application
Now, let’s suppose we want to make some changes to our application. For this new version, we’ve added some new controls and now the application looks like the one below.
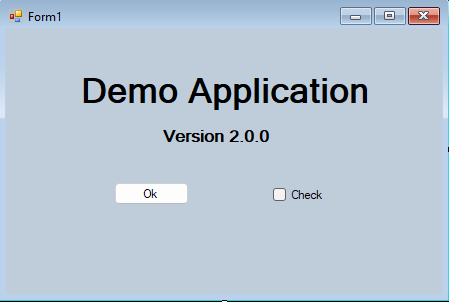
Consider this version 2.0.0 of the application. Increase the product version to 2.0.0 either from Visual Studio or from Advanced Installer. Build the .aip to get the MSI for version 2.0.0 we will need in the next step. Let’s name it MyAppSetup2.
Deploy the update
Now, let’s provide the updates to the users:
1. Open a new Advanced Installer project.
2. Choose Updates → Updates Configuration → press the Create New Project button.
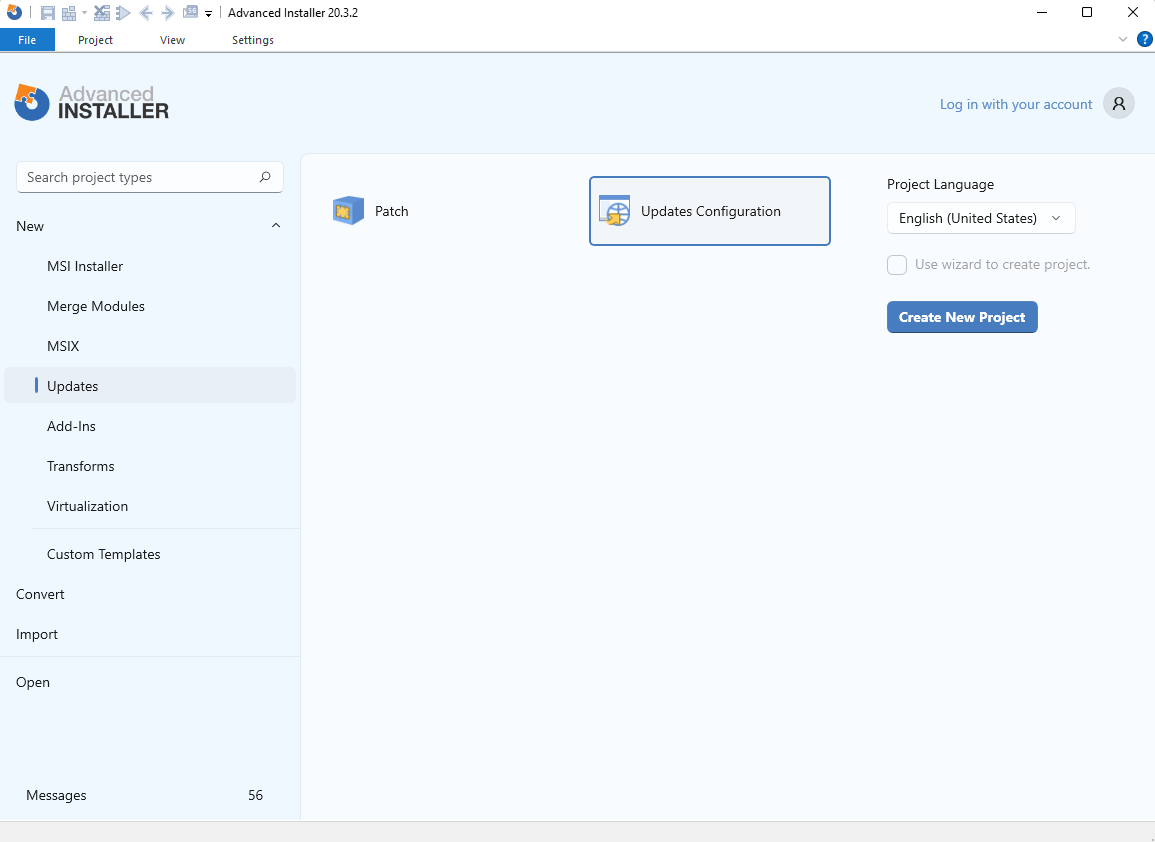
3. Use the New Update toolbar button to create a new update and select the MSI corresponding to version 2.0.0, namely MyAppSetup2.
4. Upload the MSI to Dropbox and then provide the installer download URL.
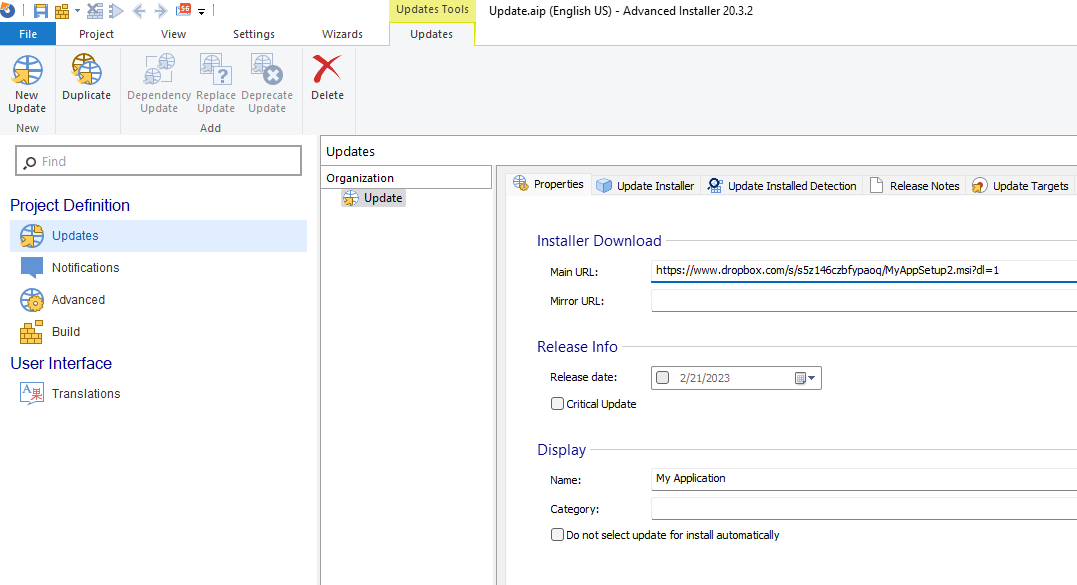
5. Build the project to get the INI file. Name it Update.txt and upload it to Dropbox together with the MSI of version 2.0.0.
6. Now, the update is available for the user!
Conclusions
Software upgrades are essential for the ongoing improvement and security of your applications. Advanced Installer simplifies this process, providing a convenient way to manage and distribute upgrades.
Upgrade your applications using Advanced Installer today! For further information, check out our tutorial.
