Using Billboards
The following article uses options that are available starting
with the Enterprise edition and project
type.
The following tutorial will guide you step by step in creating your first package with billboards.
1. Add a Billboard Host to your dialog
Billboards are used in installation packages as a way to advertise your application's features (in text and images) during setup. Billboards are most typically associated with progress actions during a lengthy operation.
The Billboard host control displays one or more billboards but is itself invisible. It behaves like any other dialog control and acts as a placeholder for the displayed billboards. The billboards, which act as "views" for the billboard host control, are associated with an install action (standard or custom) and are conditioned by the install state of a feature. Each billboard can have one or more controls associated with it.
As billboards most common use is to display images or text during a long operation and the billboard host control is automatically subscribed to the SetProgress event, we have chosen the ProgressDlg dialog as the target for the billboards.
![]() Switch to the Dialogs page and select the
“ProgressDlg” dialog in the tree.
Switch to the Dialogs page and select the
“ProgressDlg” dialog in the tree.
![]() Use the
> toolbar
button to select the “Billboard Host” control and place
it on the dialog.
Use the
> toolbar
button to select the “Billboard Host” control and place
it on the dialog.
There must exist at least one billboard for your billboard host, so
a billboard is automatically created for you and associated with the
“InstallFiles” standard action.
2. Add controls to billboard
Now it is time to add some controls to your billboard. These can be texts, scrollable texts, images, icons, group boxes, lines.
Add controls to your billboard the same way you add them to a dialog. Place them directly on the surface of the host.
Arrange them as follows:

![]() Build and run the project.
Build and run the project.
If your installation takes little time, the billboards will only
be visible briefly.
3. Add more billboards
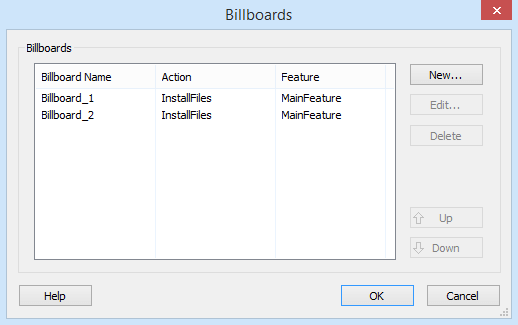
If you would like more than one billboard to advertise your installation select the “Edit Billboards...” option from the context menu of the Billboard Host control. The Billboards Dialog will be displayed allowing you to create and edit more billboards.
Add a second billboard and configure it as shown below:

Initially all new billboards are without controls.
You can change the active billboard (the billboard that you want to edit) by selecting it in the Properties Pane, in the “Billboards” field.
Both in the Billboards Dialog and
in the “Billboards” field combo the billboards are
displayed in the same order they will be shown at run-time.
Add more controls to your new billboard in the same way as before.
4. Run your MSI with billboards
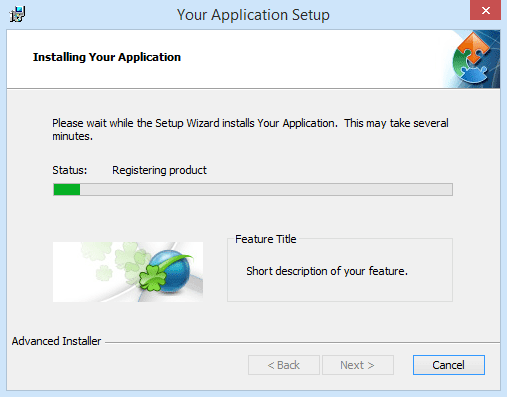
![]() Build and run the project and notice
the results. During installation the billboards will look like
this:
Build and run the project and notice
the results. During installation the billboards will look like
this:
