Publish the Advanced Installer packages as builds artifacts in Azure DevOps
This tutorial will guide you to access the installation packages created by Visual Studio build tasks in Azure DevOps by publishing them as build artifacts
Assuming you have an Azure (DevOps) Pipeline containing an Advanced Installer Tool Installer task and a Visual Studio Build (see this tutorial: Configure Azure DevOps build environment for your VS solution including an Advanced Installer setup project), in order to publish the Builds artifacts follow the steps:
1. Add the Copy Files task
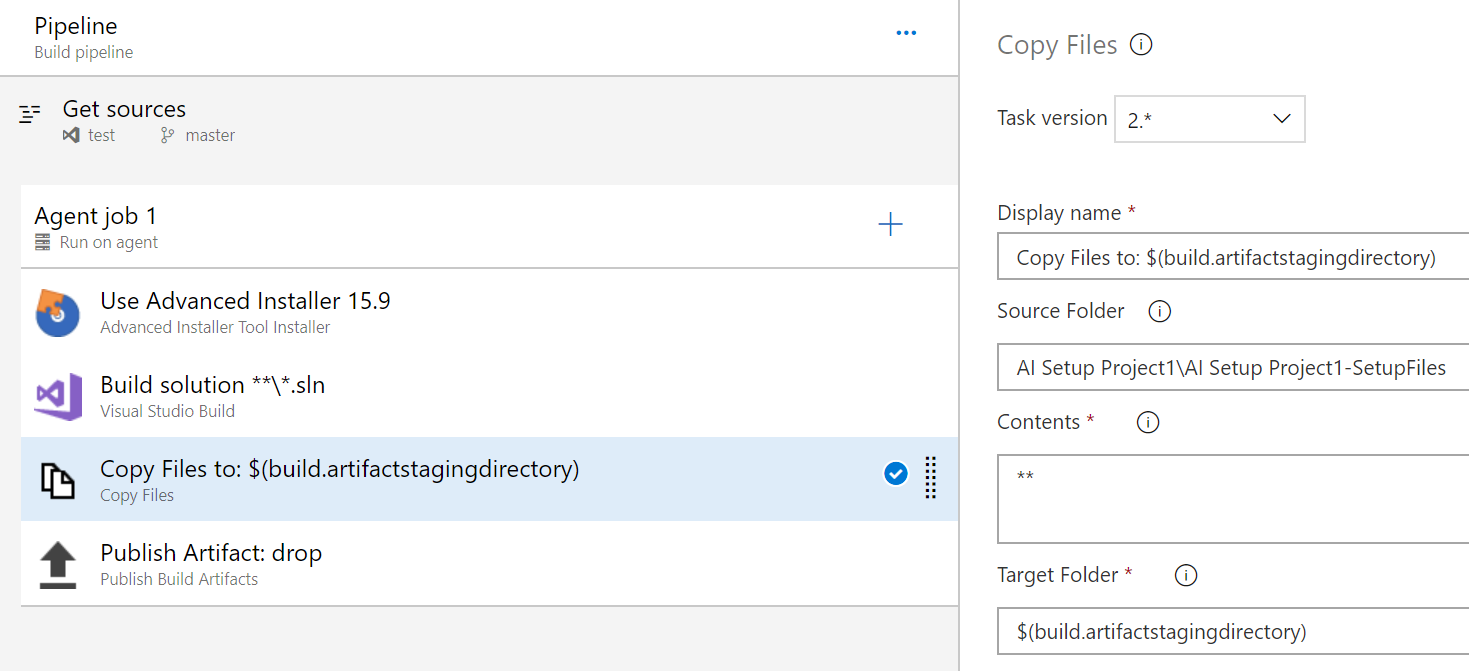
From "Tasks" tab add the “Copy Files” task by clicking on the + sign next to the “Agent Job” . Drag and drop the “Copy Files” task under “Visual Studio Build” task.

2. Add the Publish Build Artifacts task
From Tasks tab add the Publish Build Artifact task by clicking on the + sign next to the “Agent Job”. Drag and drop this new task after the “Copy Files” task in the Pipeline order.

3. Configure the Copy Files task
Go to Copy Files task. The location where the installation package will be created by the build task should be entered in the “Source folder” field
By default, this location is relative to the location of the
.AIP project. The build will be placed next to the .AIP, in a
subfolder named using the .AIP project name and “-SetupFiles” suffix.
For example if the .aip project name is “Your Application”, the folder
containing the package will be named “Your Application-SetupFiles”
Press the […] button next to the “Source Folder” field and pick the folder from your repository containing the .AIP project file
Append “\AI Setup Project1-SetupFiles” to the above folder
Copy the path from “Path to publish” field from the “Publish Build Artifacts” task in the “Target folder” field of the “Copy files” task.

