Enhancing Software Security: A Guide to Secure Install Properties with Advanced Installer
In today's world, where digital security is crucial, installing new software on your computer should be straightforward and secure.
Advanced Installer helps IT Professionals make this process smooth, introducing an essential feature known as "secure install property." This guide explains these properties, their importance, and how to use them effectively.
What is a Secure Install Property?
A secure install property acts as a digital guard during software installation. It makes sure the software only communicates with authorized places, like specific servers.
This feature is like a locked door in the digital world, offering protection and security against redirection, even by technically skilled individuals.
There are three main reasons why secure install properties are important:
- Safety First: It protects against harmful interference during installation
- Reliability: It ensures the software is set up correctly and doesn't break or risk your security.
- Consistency: Everyone who installs the software enjoys a secure and uniform experience.
Simplifying Security with Advanced Installer
Advanced Installer makes setting up secure properties straightforward. It protects specific installer properties from unintended modifications, including those attempted via command line overrides.
Are you new to Advanced Installer? Whether you're an IT professional or a developer, Advanced Installer streamlines the process of creating reliable and secure software packages.Get Started with Advanced Installer through our 30-day full feature trial.
How to Set Up a Secure Property in Advanced Installer
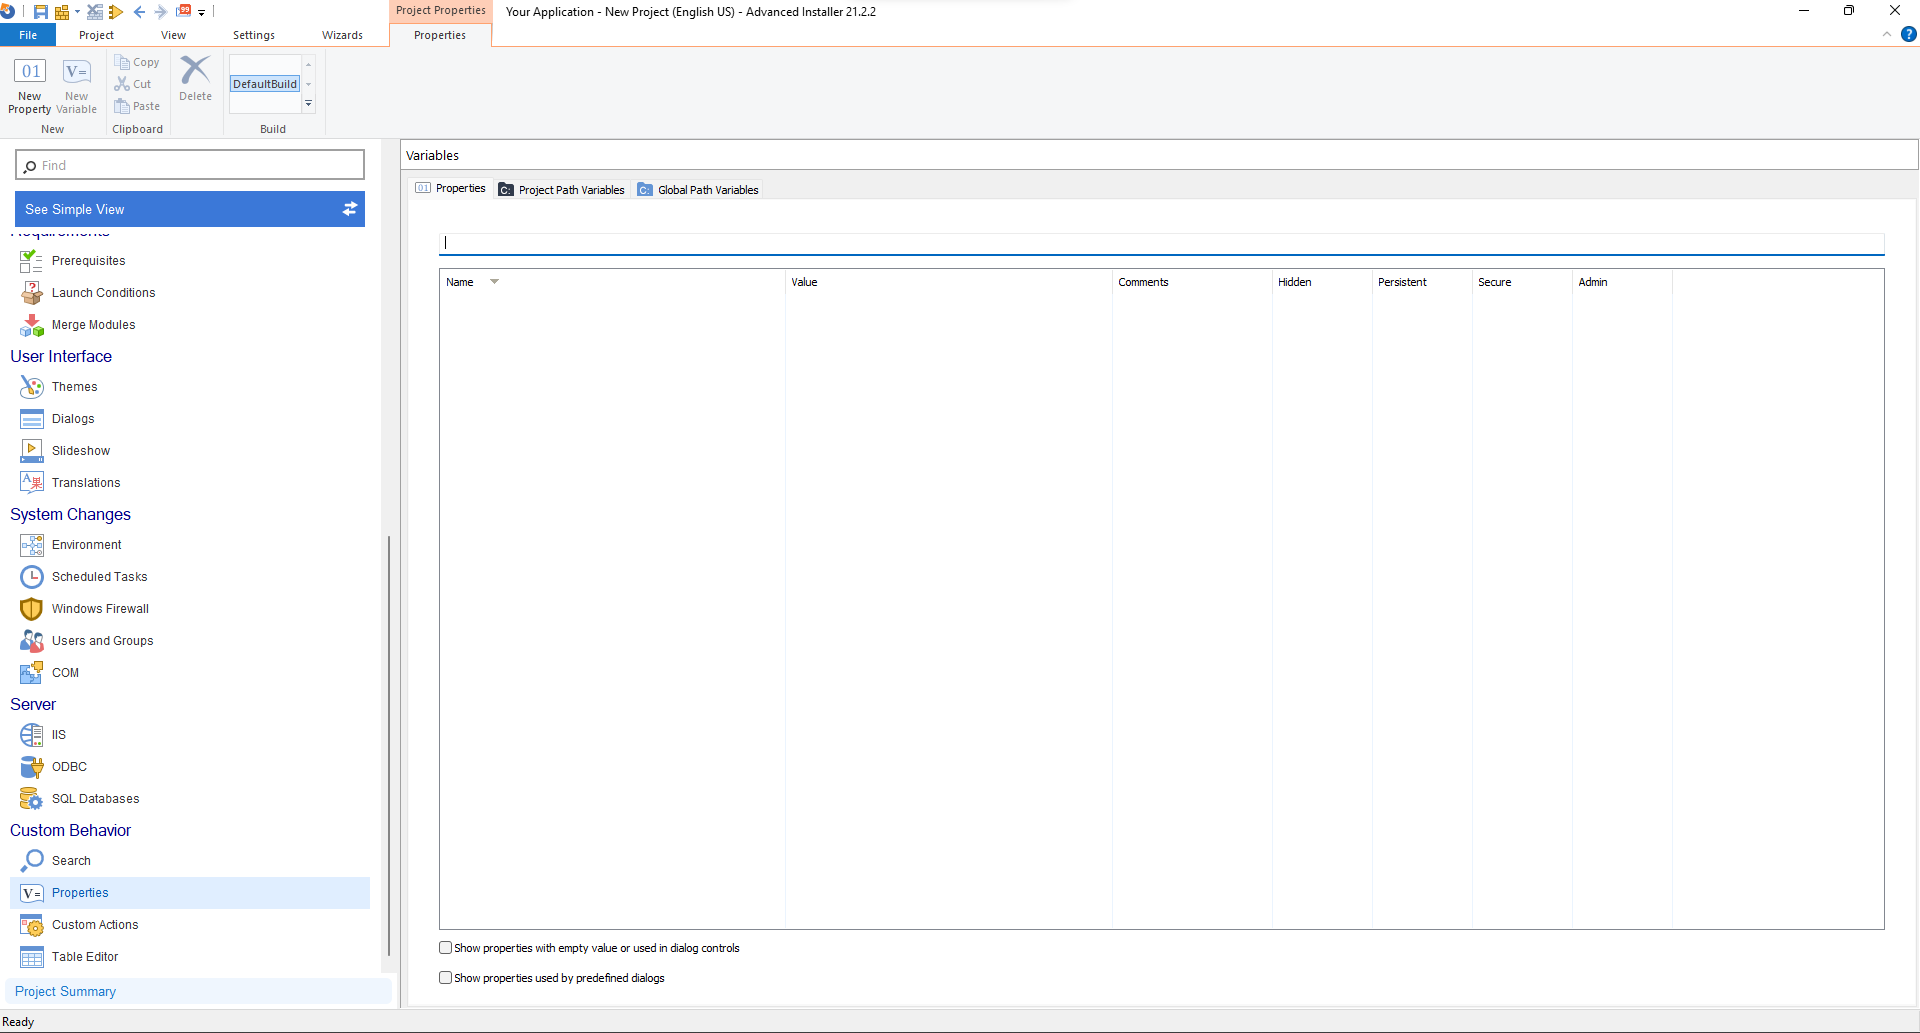
1. Go to Custom Behavior -> Properties
Open your Advanced Installer project and find the "Custom Behavior -> Properties" section from the left pane menu. Once you click on it, you’ll see a list of all the properties you've defined for your project.
2. Select or Create a Property
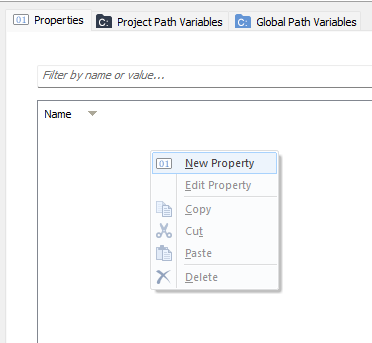
Look for the property you want to secure or add a new one by right-clicking and choosing "New Property."
3. Mark the Property as Secure
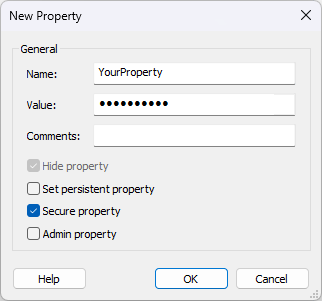
Search for the property you need to secure from the list of properties. Then, right-click on that property and choose the "Secure" option. Doing this sets the property as secure. This means it its settings are not easily changed during the installation, especially from the command line.
4. Save Your Project
Once you've marked the necessary properties as secure, remember to save your project to keep the changes.
5. Build and Test
After you've saved your changes, build your installer package. Then, install the MSI via the command line while defining a newer value for the secure property. Based on your setup, the installer will either not accept this new value or cause the installation to fail, ensuring the integrity of the secure property.
Practical Use Case: Ensuring Data Privacy and Integrity
“We have a configuration file used alongside our .exe file that gives the user of our installer the ability to specify the environment variables of our product to be installed. We persist all the variables from the configuration file to a registry key but we don't want everything stored in plain text. We need persistence of variables because we need to implement the possibility of a reinstall and upgrade of our product.
One important thing to note is that our custom actions are mostly Launch File (which are used to run .bat files) or Run PowerShell Inline Script (that are often used to run either .bat or .ps1 files after some needed preprocessing on our part) types of custom actions”.
For the above scenario, a practical solution involves using a pair of two properties to handle a single value.
- The first property, let's name it “SECURE_PROP1”, will be registered as secure in the system registry.
- The second one, “PLAINTEXT_PROP1”, will be used in custom actions without the secure setting.
To implement the properties during installation, follow these steps:
1. Go to the “Properties” page within your project.
2. Add two new properties:
- PLAINTEXT_PROP1 which does not have “Secure property” checked.
- SECURE_PROP1 with “Secure, Persistent and Hidden property” checked.

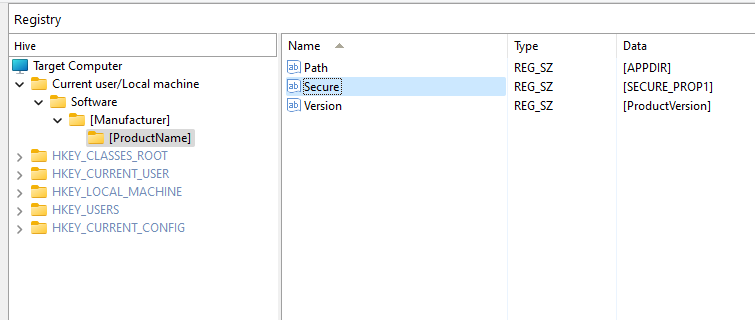
3. In the “Registry” page, use the “SECURE_PROP1” property.
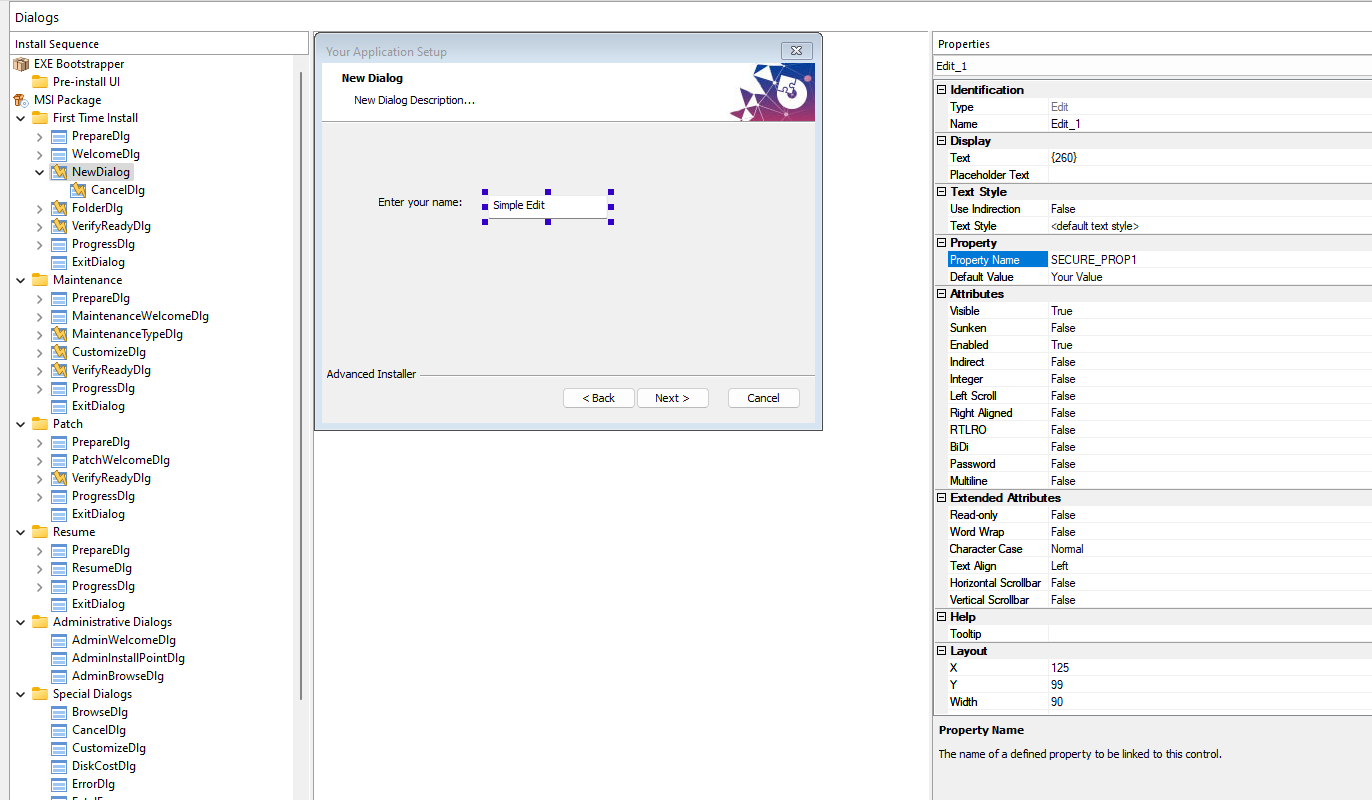
4. From the “Dialogs” page, also use the “SECURE_PROP1” as shown below:
5. Now comes the tricky part. To decrypt your property, you need to use two specific functions from the 'SecureProp.dll': getLength and getRevealed.
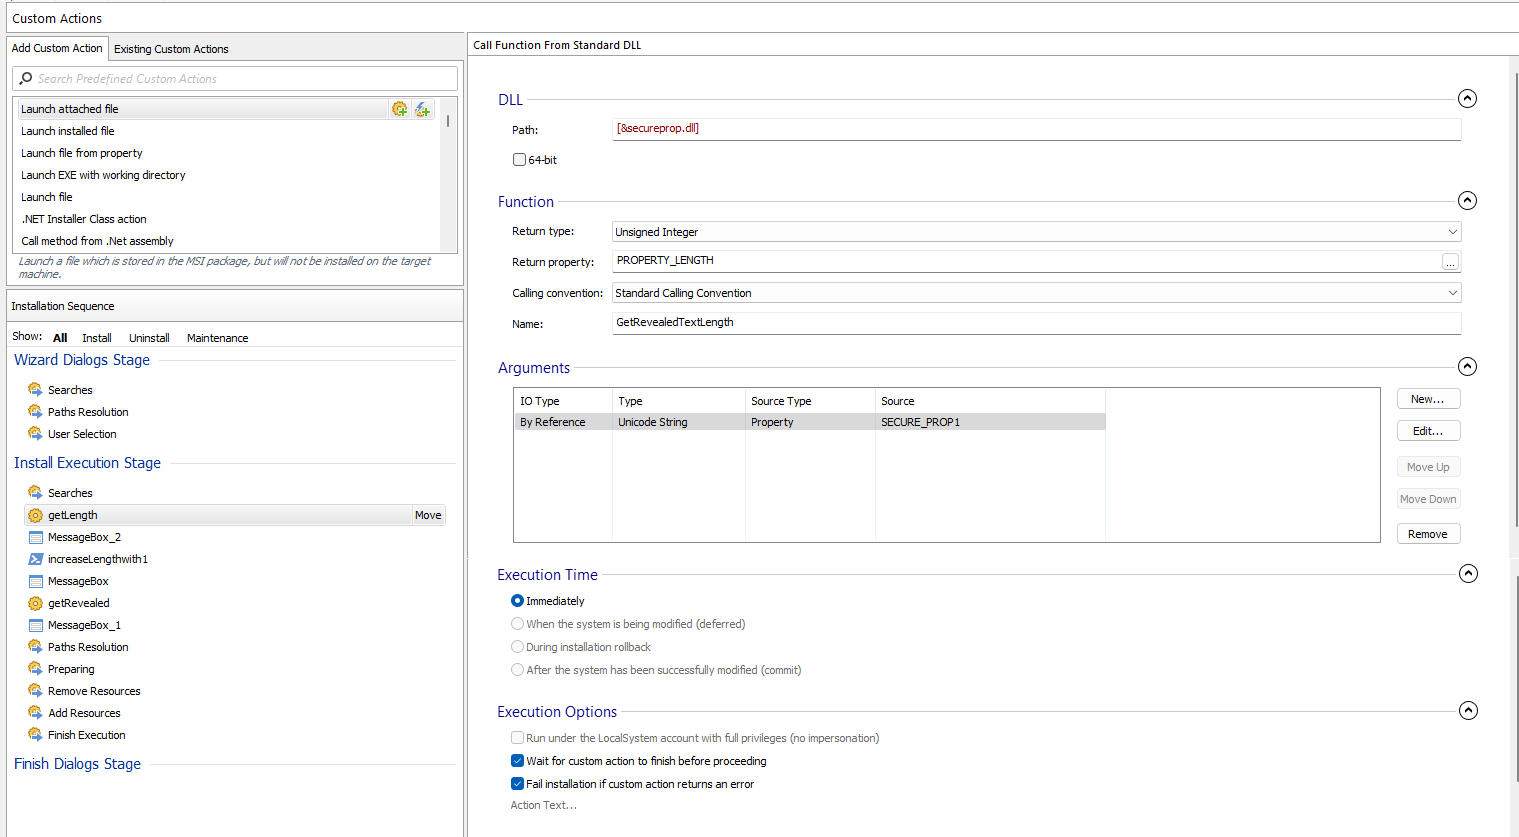
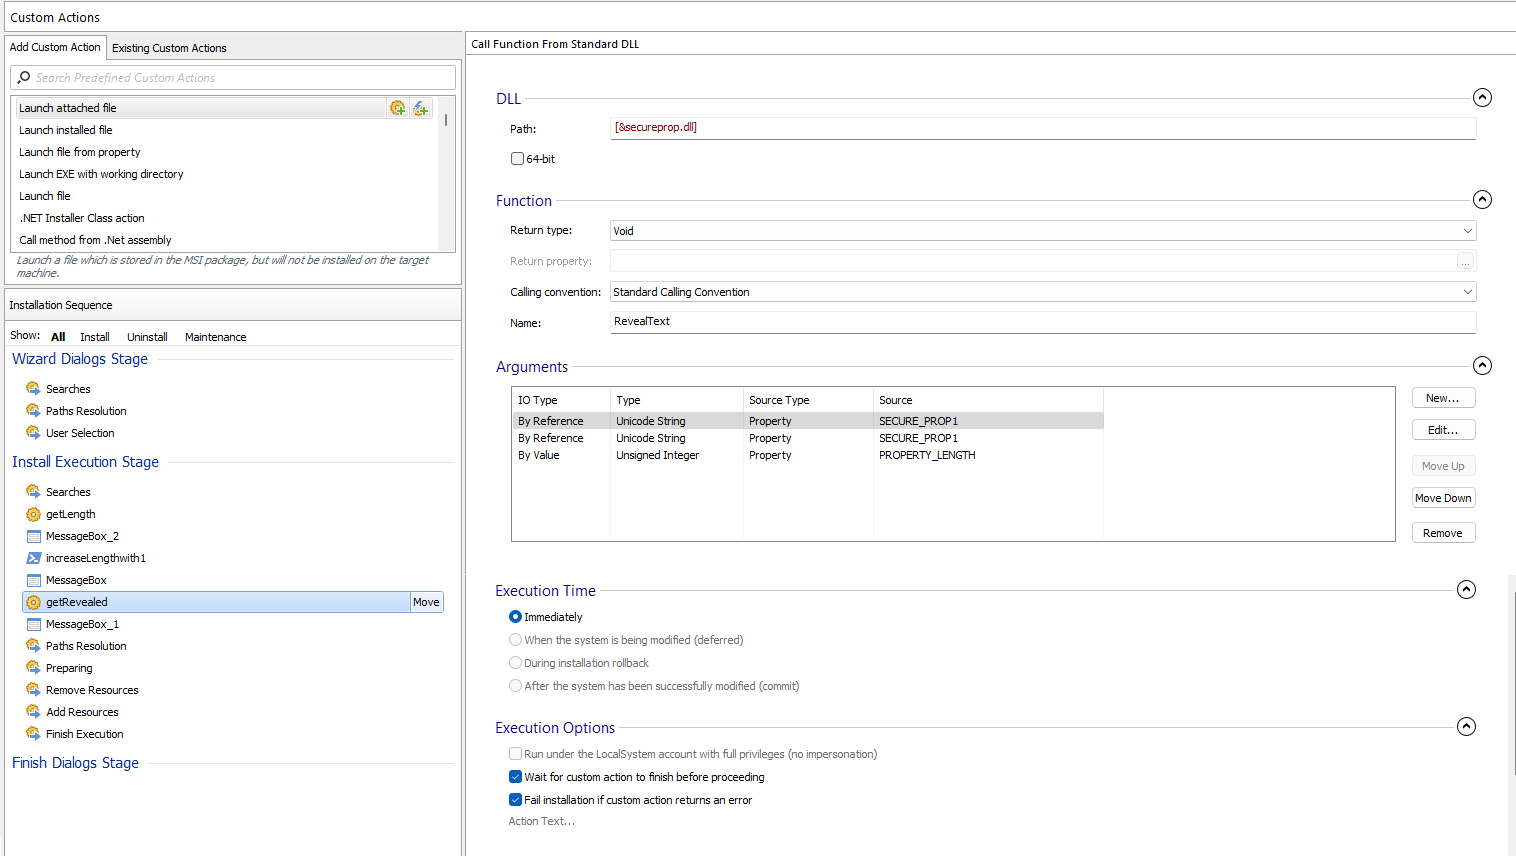
The first function, 'getLength', determines the length of your text. However, you need to add 1 to this length. This is because the next function 'getRevealed', which shows your text, is developed to also take into consideration the null character that is present at the end of the string. If you don't add this extra unit, the revealed text will be missing its last character (for instance, for a property having its value: "YourValue" --> the "RevealText" function will return "YourValu", without the "e").
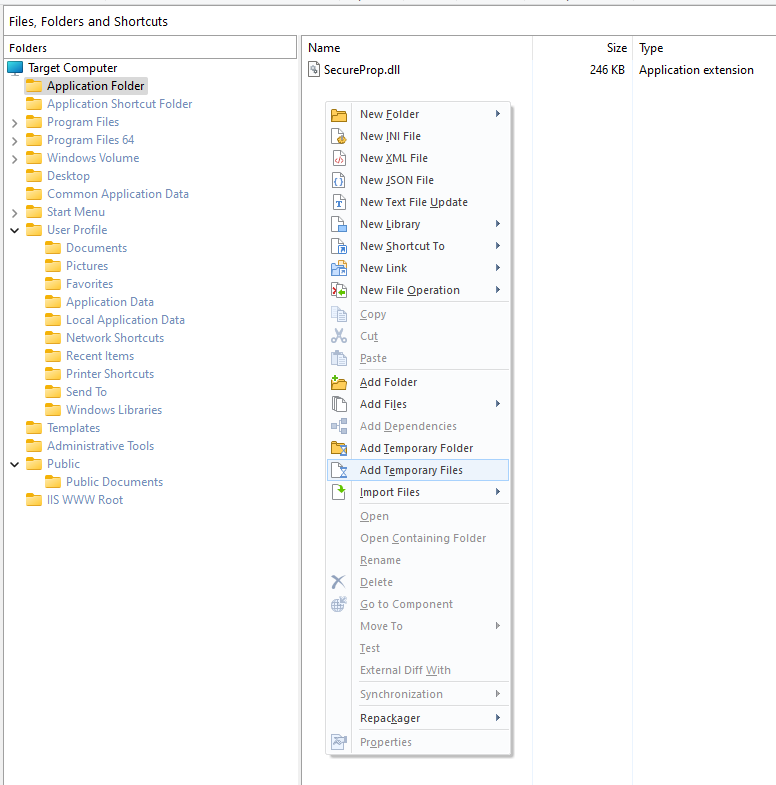
6. From the "Files and Folders" page, add "SecureProp.dll" as a temporary file by pressing the "Add temporary files" button from the toolbar. You can find the SecureProp.dll at the following location:
C:\Program Files (x86)\Caphyon\Advanced Installer 18.5\custact\x86
7. Schedule the Custom Actions after the "Install Execution Stage" → "Searches" action group and configure them as seen below.
8. Call function from standard DLL: getLength, getRevealed.
9. PowerShellScriptInline: increaseLengthwith1.
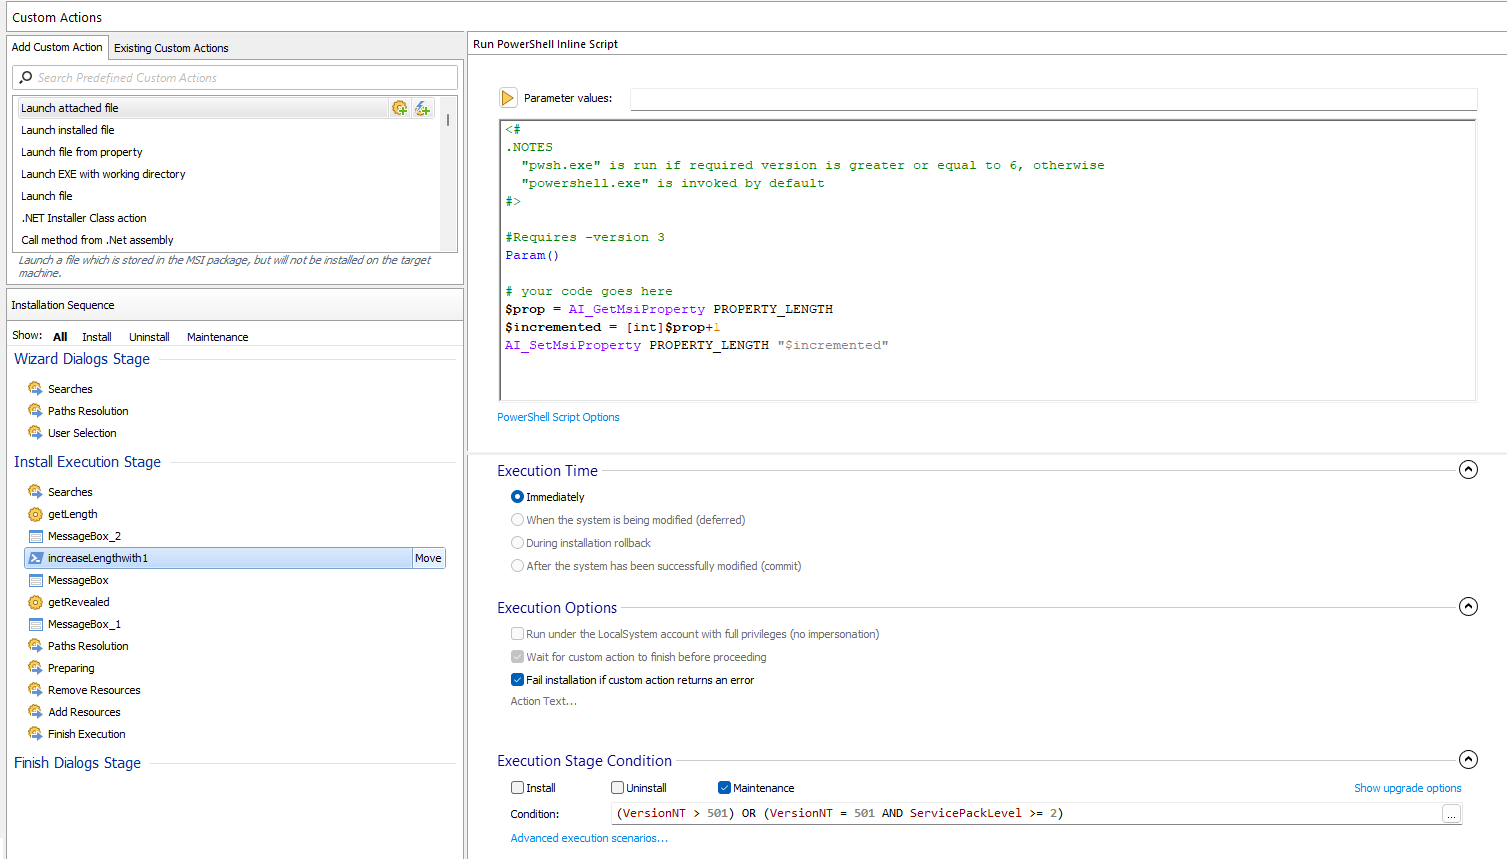
10. Set the execution stage condition to “Maintenance” and with the below condition:
(VersionNT > 501) OR (VersionNT = 501 AND ServicePackLevel >= 2)
11. For testing and debugging, you can add “MessageBox” custom actions.


Conclusion
Secure install properties are key to software security, providing strong protection against unauthorized access and changes.
Advanced Installer makes this easy, allowing developers to focus on creating excellent software with the confidence of security. By following this guide, you can ensure that your software installations are not just efficient but also secure.
