How To: Replace a file in an existing installer
The method to replace an existing configuration file varies depending on the application installer's format. For example, whether it's a vendor MSI from an Independent Software Vendor (ISV) or an EXE.
If you need to replace a file in an existing installer -- this article will help you get through all the process and options you can choose from for your specific installer.
Replacing your installer in MSI vs EXE format
Since the process to change your installer can vary depending on the format you're working with, let's review the most common ones: MSI and EXE.
MSI format
If the vendor installer comes in the MSI format already, then you can create a transform file (MST) for it and get the file replaced within the MST. The MST, along with the new file included, will be used as a parameter for the install command line.
The transform file can be used to customize an installation without modifying the original MSI.
It is against Repackaging
Best Practices to repackage MSI installers, unless you want to
convert them to another packaging format, like App-V or MSIX.
To create the transform, follow the steps listed in the Create and edit an MST file article.
EXE format
If the vendor installer comes in an EXE format, then repackaging is the way to go. For EXE installers, you have the following options that we will discuss later in this article:
- Replacing the file as a post-install configuration operation during the repackaging process.
- Replacing the file on the captured files directly on the disk (following the repackaged files hierarchy).
- Importing and removing the file manually from the Repackager project.
- Changing the source path used in the generated Advanced Installer project with the path to the updated file.
The Advanced Installer Features page
presents a broader view of the features Advanced Installer offers,
including the capability support for creating an MSI from scratch using
the Repackager, and the possibility to edit existing MSIs (via MST or
not).
Now that we know the differences between MSI and EXE when replacing a file in an installer, we can go into the how-to.
How to replace a file in an MSI installer?
If you're working with an MSI package, you can use Advanced Installer to create and edit MST files, and here's a step-by-step guide on how to do so.
Let's say you need to replace a file already included in the MSI installer (e.g. config file) with a custom one.
We recommend creating a transform (starting from the original MSI) and using that along with the original MSI to install the software in all the machines where the package will be deployed.
1. Open Advanced Installer.
2. Select the IT Pros tab and choose the MST project type - > New Transform template

3. Click on the [Create Project] button.
4. Choose the MSI file that you need to edit.
5. Once the MSI loads, start making the changes that you will need to be stored in the MST file.
6. Next, locate the file that you want to replace. Go in the Files and Folders view where the application resources are listed.
7. Once you’ve located the file, remove it from the project.
8. After that, drag-and-drop the new file to add it to the project.
In our scenario, we’ll replace the license.rtf located in the installation folder APPDIR.
Make sure the Physical Source is correctly updated and pointing to the new file from the disk:

Now that you have generated the transform file, it’s time to test it.
Click on the [Save] toolbar button to prompt the “Build Project” dialog to see the build evolution of the installer.
When adding new files to the MSI, a cab file will be created. You need to copy all of them to the machine to apply the transform.
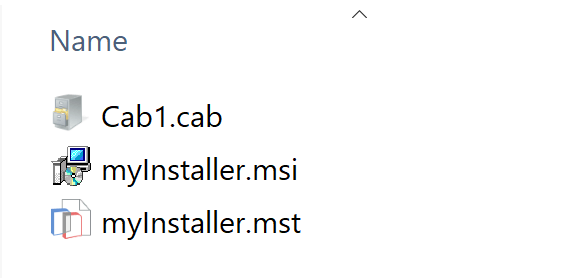
Once copied, use the command below to apply the transform:
msiexec.exe /i myInstaller.msi TRANSFORMS=myInstaller.mst

How to Replace a file in an EXE installer?
When working with an EXE package, there's one step you have to take before replacing a file: you will need to repackage it. So, make sure to repackage your EXE before going further.
Repackaging allows you to create Advanced Installer project files
from the capture of the existing installations. You can review our Repackager article to get started with the
repackaging operation.
As mentioned earlier, you can use any of these four options to replace a file in your EXE installer:
1. Replacing the file as a post-install configuration operation during the repackaging process.
During the repackaging operation, the Repackager will ask to confirm if you want to proceed by clicking on the Enter key after installing the software. Basically, the initial and subsequent scans are both completed.
Now you can make changes to the software and capture those changes within the package (e.g. add/remove/update files/registry keys).
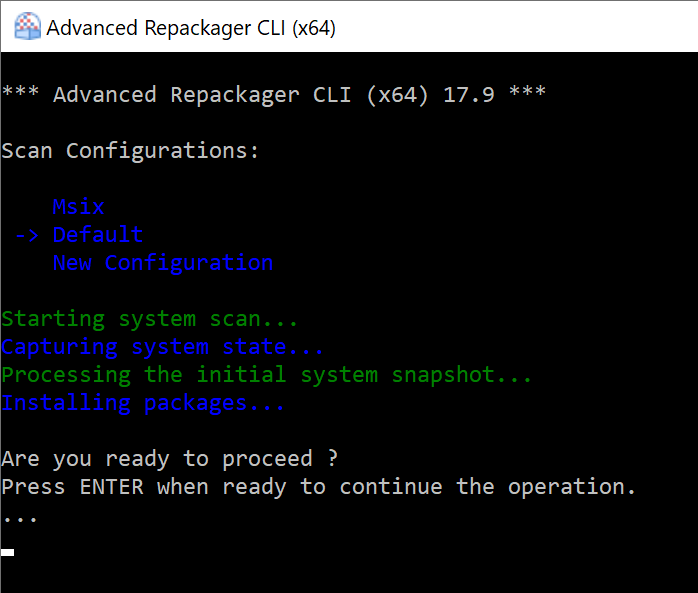
After making all the changes that you want to be included in the MSI, press Enter to continue the repackaging process.
2. Replacing the file on the captured files directly on the disk (following the repackaged files hierarchy).
After the repackaging process is done, the files of the application are copied on the host machine. You can browse directly on that path and overwrite the captured file with the new one:
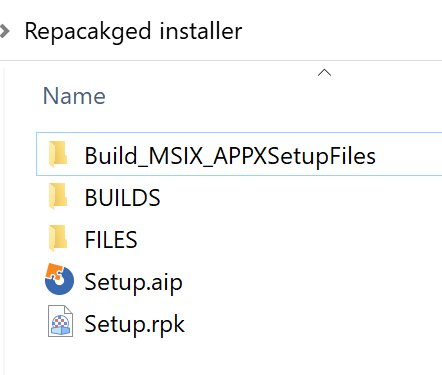
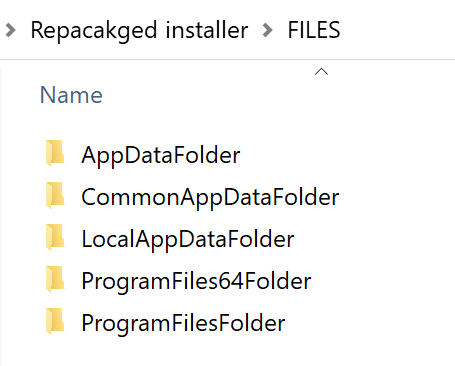
Locate the Files folder that was created in the same directory where the .rpp file was saved. The Files folder contains all of the files captured by the repackager. There, you can overwrite the file that needs to be replaced. As a result, the next time the MSI installer gets built, it will reference the new file.
3. Importing and removing the file manually from the Repackager project.
After the repackaging operation is over, you can load the .rpp file into Advanced Installer to have full access to the application resources:

Locate the Files and Folders view and search for the file that you want to replace. Remove it using the Delete option and add the new file using drag and drop.
After that, build the project. The resulting MSI installer will include the new file.
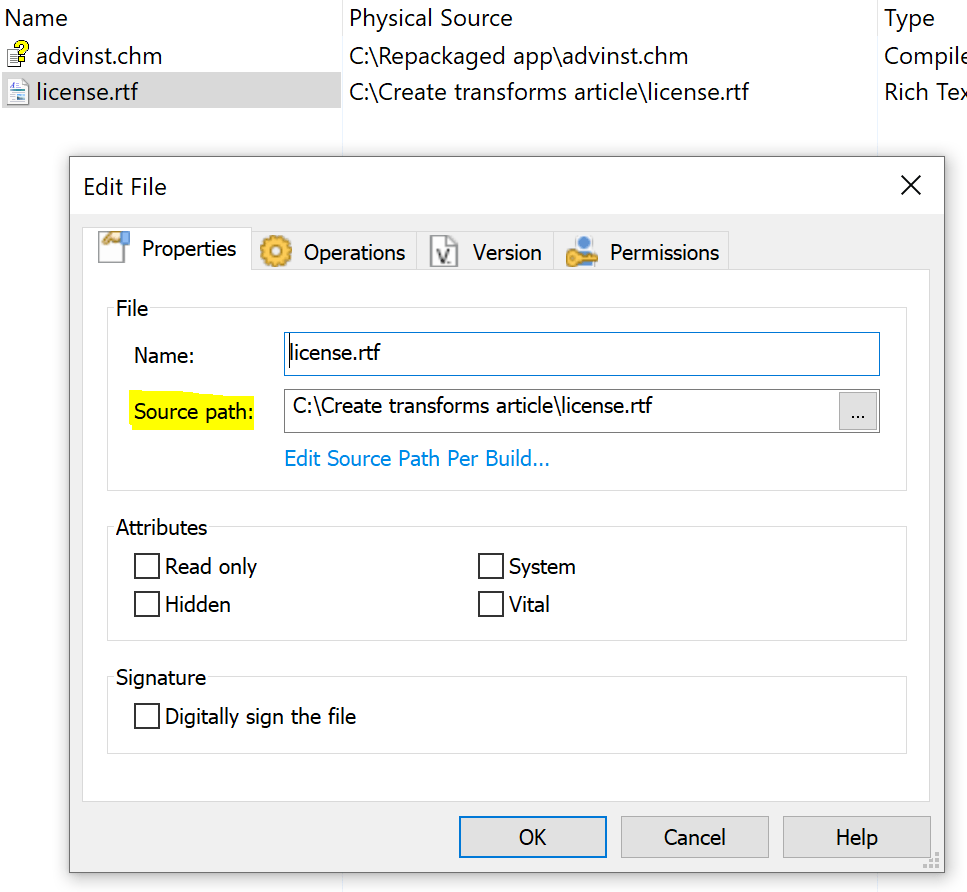
4. Changing the source path used in the generated Advanced Installer project with the path to the updated file.
Once your EXE is repackaged, you can load the .rpp file in Advanced Installer to have full access to application resources:

After that, locate the Files and Folders view and search for the file that you want to replace.
Instead of removing the file from the package and adding the new one as in Option 3, you can just select the file that you want to update and change its source path so that it can point to the new file, as pictured below:
Bonus: Which option is more suitable for your case?
When you have a vendor MSI, the approach is clear – create a transform for it and make your changes within that transform file.
For EXE installers, it depends on whether or not you need to know where the new configuration is stored.
If you don't need to know where the configuration is stored, then the quickest way is with Option 1.
If you need to know where the configuration file is stored or if you already repackaged the EXE installer and have access to the Advanced Installer project file, go with the most familiar option for you (between Option 2, 3, and 4).
The result will be the same regardless of the option you choose.
Conclusion
In conclusion, the difference between replacing a file in MSI vs. EXE is that in EXE, you will have to add the extra step of repackaging. But, with Advanced Installer, this process is simple and quick. Then, it comes down to what works best for your particular case.
We hope you found this article helpful. Let us know your preferred method when replacing a file in an installer.
Contributor: Horatiu Vladasel
Subscribe to Our Newsletter
Sign up for free and be the first to receive the latest news, videos, exclusive How-Tos, and guides from Advanced Installer.