How to easily Read INI Files with PowerShell commands
With the rise of configuration files in various applications, understanding the ins and outs of INI files can elevate your productivity as a developer or software enthusiast. Despite their roots in the 16-bit Microsoft Windows platforms, INI files remain a crucial part of application configurations.
But, when it comes to handling INI files with PowerShell things can be a bit tricky. PowerShell, even though it's a great tool, doesn't have ready-made commands to work with these files. But don't worry, we're here to help!
In this article, we'll show you how you can use PowerShell to read INI files and turn their content into a format that's easy to use.
How to read INI files with PowerShell
You can read INI files with PowerShell using the Get-Content cmdlet:
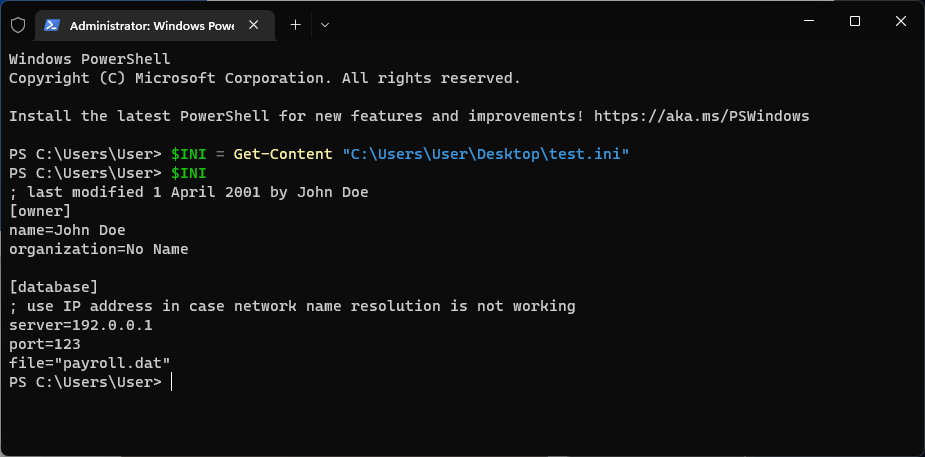
However, there is a difference between reading the file content and transforming the file content into a usable format under a hash table. Let's go into that.
Converting INI files into PowerShell hash tables
Microsoft offers a PowerShell cmdlet, ConvertFrom-StringData, which converts a string with key-value pairs into a hash table.
But it's not a one-size-fits-all solution. If we use the following PowerShell script on the test.ini file that we have above, we will get:
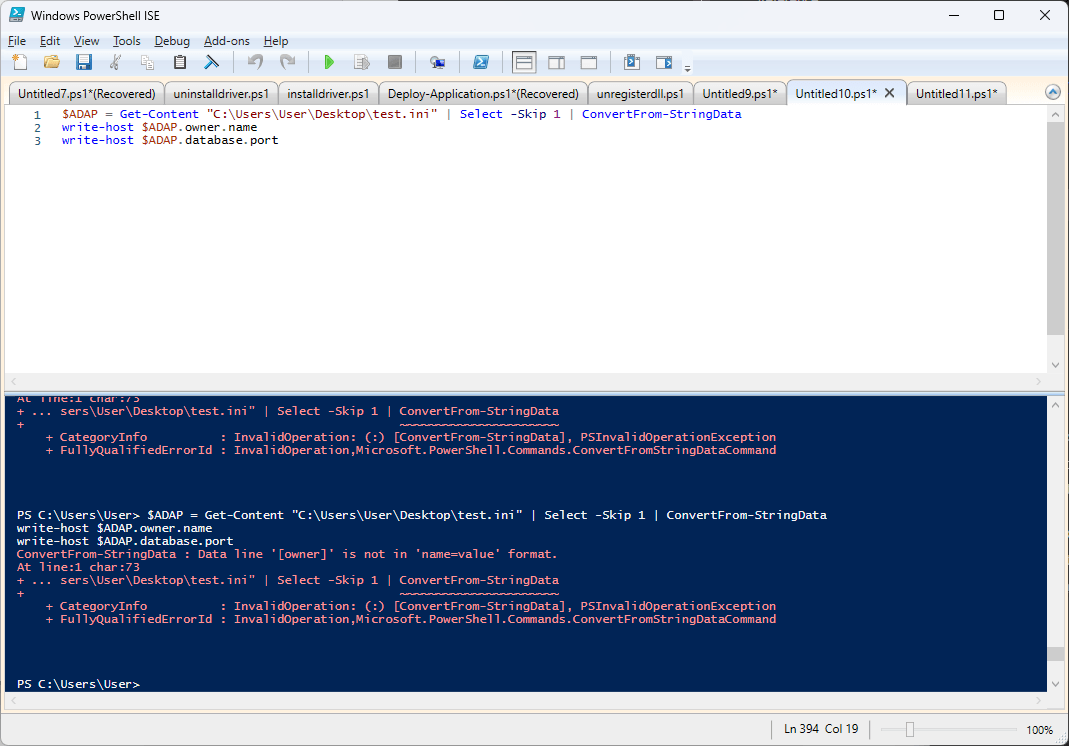
The sections return an error!
The cmdlet doesn’t capture the INI file structure accurately, as it expects a name=value format.
It ignores any characters where the # character is the first non-whitespace character, making it unsuitable for files with sections and comments or when there are duplicate element names in different sections.
For simpler INI files with no sections or comments, this will work perfectly:
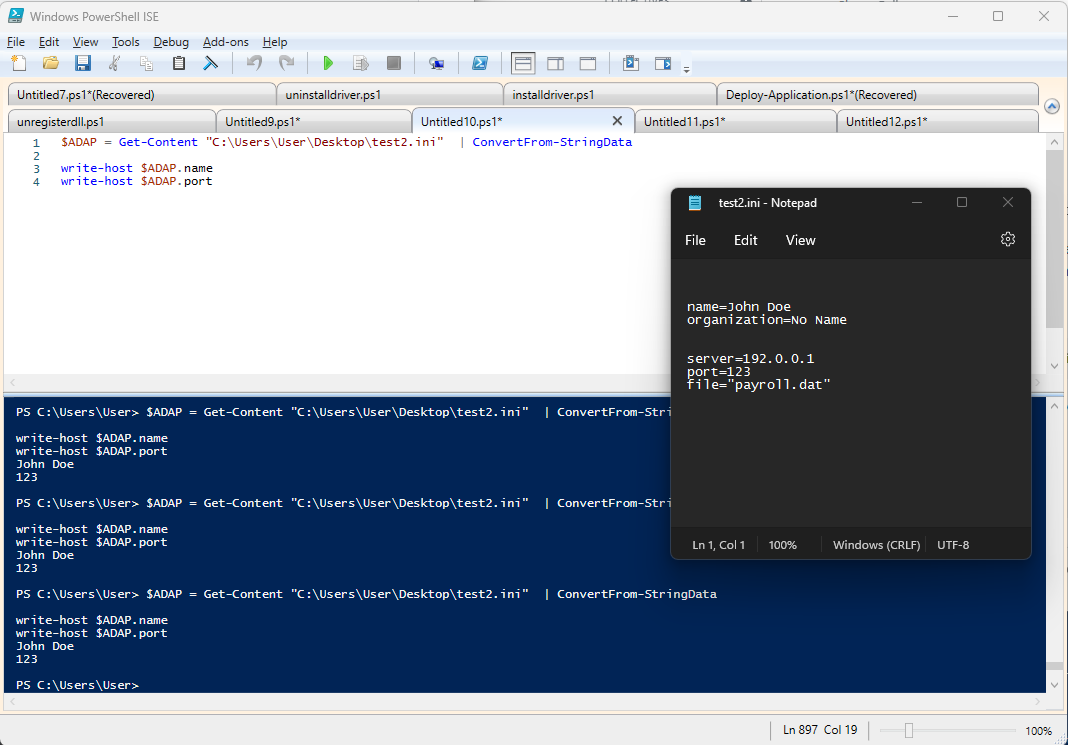
But if your INI file is more complex, we've got you covered.
Inspired by a script developed by Doctor Scripto in the Microsoft devblogs, we present an improved method for reading all types of INI files. We leverage regular expressions (regex) to determine whether a line is a comment, section, or key.
Here's the magical function:
function Get-IniContent ($filePath)
{
	$ini = @{}
	switch -regex -file $FilePath
	{
    	“^\[(.+)\]” # Section
    	{
        	$section = $matches[1]
        	$ini[$section] = @{}
        	$CommentCount = 0
    	}
    	“^(;.*)$” # Comment
    	{
        	$value = $matches[1]
        	$CommentCount = $CommentCount + 1
        	$name = “Comment” + $CommentCount
        	$ini[$section][$name] = $value
    	}
    	“(.+?)\s*=(.*)” # Key
    	{
        	$name,$value = $matches[1..2]
        	$ini[$section][$name] = $value
    	}
	}
	return $ini
}To call this function, store the output in a variable and then call the elements in the hash table as shown:
function Get-IniContent ($filePath)
{
	$ini = @{}
	switch -regex -file $FilePath
	{
    	“^\[(.+)\]” # Section
    	{
        	$section = $matches[1]
        	$ini[$section] = @{}
        	$CommentCount = 0
    	}
    	“^(;.*)$” # Comment
    	{
        	$value = $matches[1]
        	$CommentCount = $CommentCount + 1
        	$name = “Comment” + $CommentCount
        	$ini[$section][$name] = $value
    	}
    	“(.+?)\s*=(.*)” # Key
    	{
        	$name,$value = $matches[1..2]
        	$ini[$section][$name] = $value
    	}
	}
	return $ini
}
$test = Get-IniContent "C:\Users\User\Desktop\test.ini"
write-host $test.owner.name
write-host $test.database.port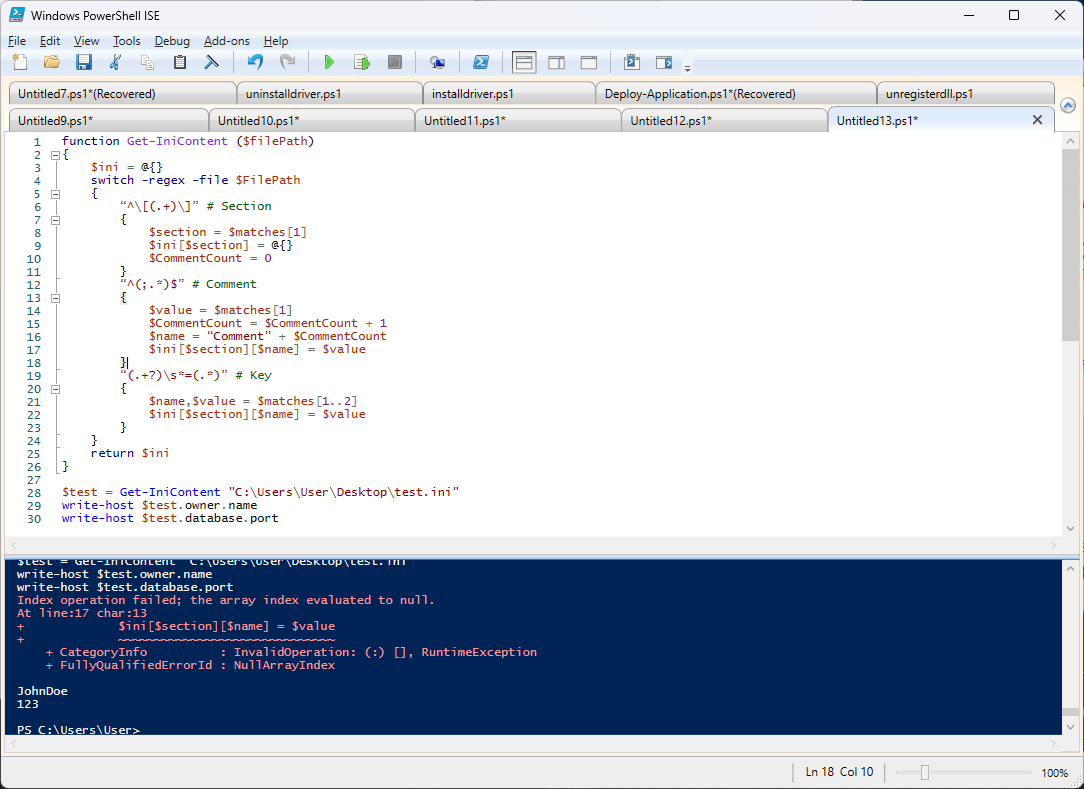
How to Read INI files with MSI
Microsoft’s built-in INI table for the MSI databases provides an alternative way to manage INI files.
And, with tools like Advanced Installer, reading and modifying INI files becomes even easier.
Here’s how you can use Advanced Installer to import the test INI file that we used to try our PowerShell scripts:
- Open Advanced Installer
- Create a project
- Navigate to the Files and Folders page.
- From the Add section in the top menu, select Import Files > Import INI (Advanced) and select the INI file.
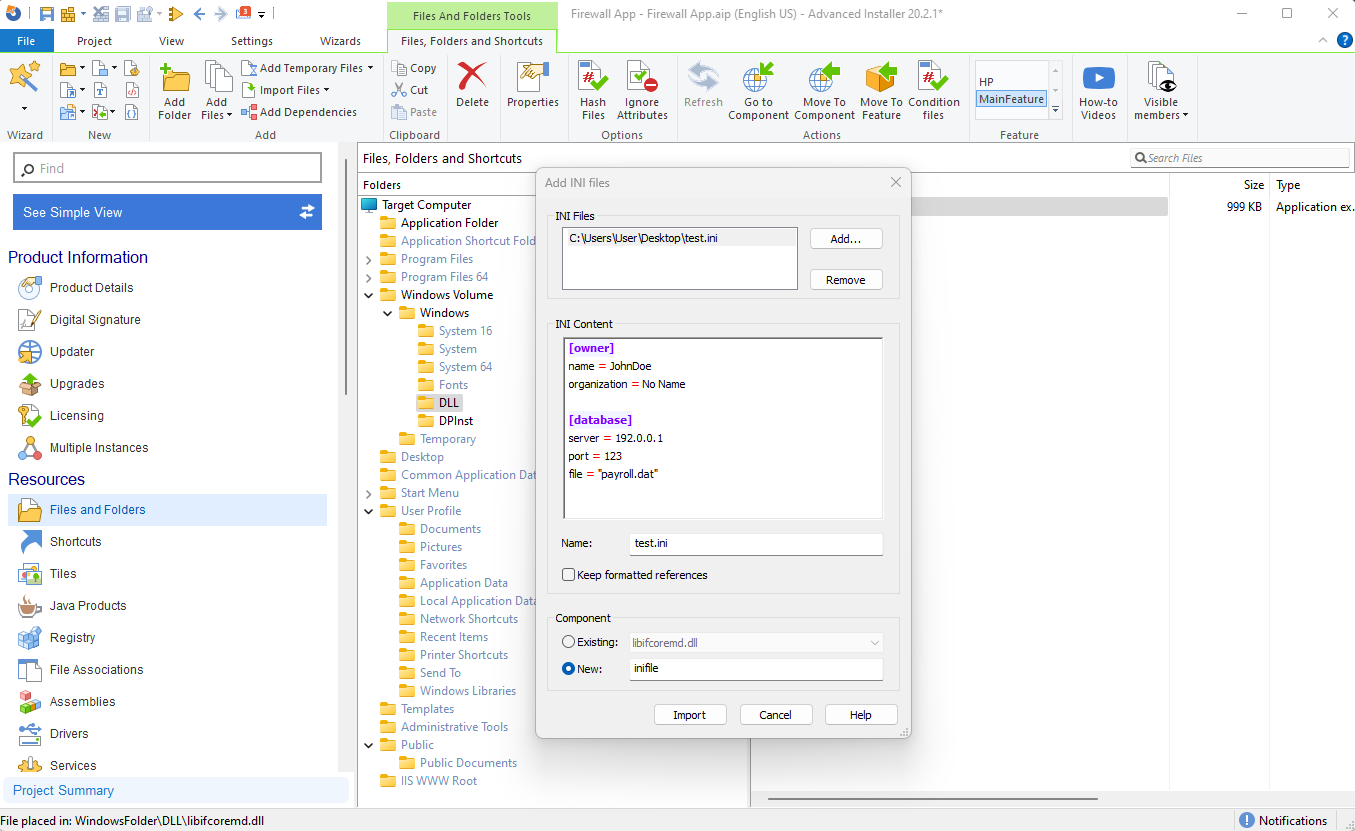
As you can see, Advanced Installer reads the INI file and adds it to the INIFile table. From here, you can easily manipulate the INIFile table by using:
- dehardcoding,
- Properties,
- Custom Actions.
Excited about your new INI file skills? Try Advanced Installer's 30-day free trial now and put them into play!
Conclusion
Even though INI files have been with us for a long time, they present certain hurdles when it comes to reading and modifying them with PowerShell. But as we've demonstrated, there are handy workarounds that make the process less stressful and more efficient. We hope this guide offers a valuable resource in your journey of mastering INI files with PowerShell.
Ensure to bookmark this page for future reference, and do not hesitate to leave a comment if you have any queries or suggestions.
Remember, learning is a journey. So, keep exploring, and stay tuned for more insightful articles.
