How do I sideload an APPX package using an MSI?
The following article uses options that are available starting
with the Professional edition and project
type.
In this article, you will learn how to sideload an APPX package on Windows 10 using an MSI. The process consists of creating three custom actions which will configure the target system and allow install/uninstall operations for your APPX.
Adding your APPX
Include your APPX package as a resource in the Files and Folders page. Make sure the package is signed with a trusted certificate that was previously imported on the machine you want to deploy.
Enabling sideload
We need to enable sideloading so that your APPX can be deployed.
1. Go to the Custom Actions page.
2. Create a “Run PowerShell inline script” custom action.
3. Enable “64-bit script” to allow the PowerShell code to run on a 64-bit machine.
If you want to target both 64-bit and 32-bit, you will need to create
two custom actions; one for each system type. Make sure you also set
“Execution Stage Condition” for both custom actions to check the system
type before running.
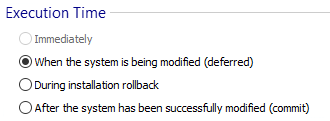
4. Set the Execution Time to “When the system if being modified(deferred)".

5. Set the Execution Options to “Run under the LocalSystem account with full privileges(no impersonation)”

6. Leave enabled only the “Install” option in the Execution Stage Condition.

7. Add the following command to your custom action:
reg add "HKEY_LOCAL_MACHINE\SOFTWARE\Microsoft\Windows\CurrentVersion\AppModelUnlock" /t REG_DWORD /f /v "AllowAllTrustedApps" /d "1"
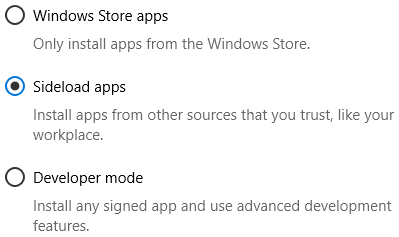
The result of running this custom action can be seen in “For developers settings” on Windows 10.

Installing the APPX
- Create an “Install AppX package” custom action and place it after the sideload custom action.
- Access the contextual menu by writing the '[' character in the "AppX Path" text field.
- Choose "File...".
- Select your APPX.
Uninstalling the APPX
- Create an “Uninstall AppX package” custom action and place it after the install custom action.
- Press "Extract from package...".
- Select your APPX; this will populate the "Package' section.