How to preserve application settings using XML files
When you design an installer using Advanced Installer you may want to take input from the user in order to configure the application more according to their needs.
You can do that in many ways such as saving the information in the registry or using the Advanced Installer support for saving the user input in XML/JSON/INI files.
Alternatively, for more specific cases, you can use a custom action to take the input from the user and save it in which way you may prefer.
This method is also the most powerful one, giving you more liberty to manipulate the data.
This article will show you how to save the user input, back it up and restore it when you roll out a major upgrade, using a custom action.
1. Preparing the dialog
This step’s goal is creating the dialog in which the user will enter his data. Let’s say that you want the user to enter their email address and their phone number.
Create a new Enterprise or Architect project, then go to the Dialogs page and create a new dialog. Then, add the edit boxes in which the user will type their email address and phone number
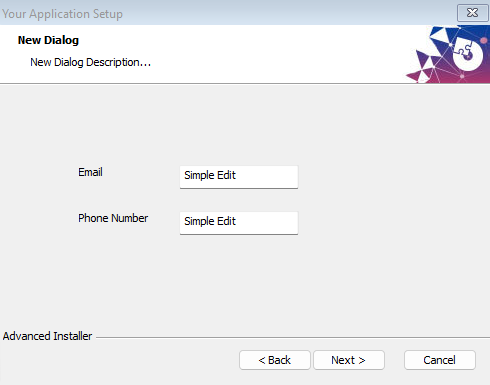
Now, you have to associate the edit boxes to the properties in which you will store the values given by the user
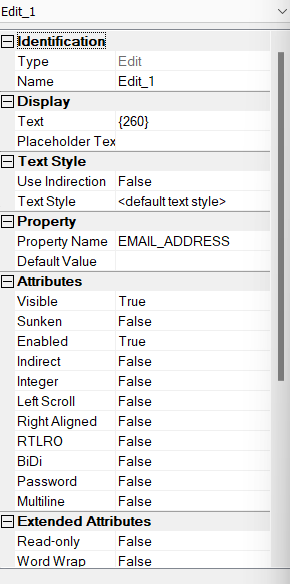
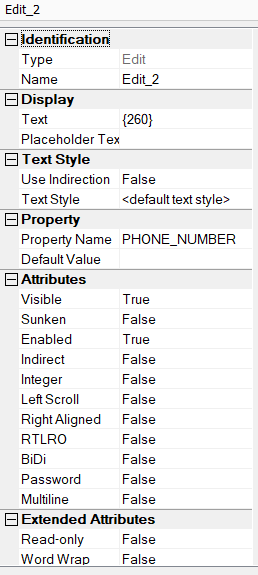
2. Creating the XML file
Go to the Files and Folders page and create a new [|ProductName] folder in the Windows Volume directory. This folder will be located in the partition in which the Windows is installed and it will have the same name as the product.
In this folder, create a new XML file and give it a structure.
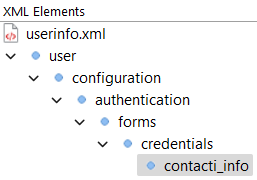
In the “contact_info” element, go to the Attributes tab and add two new attributes, one for each of the properties you want to store.

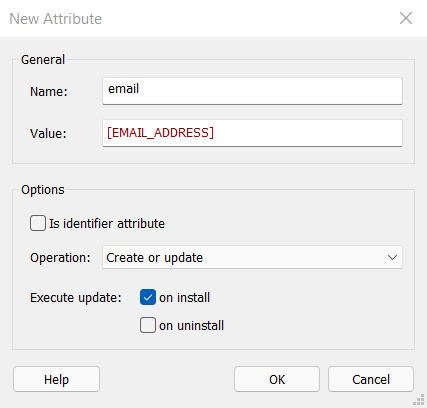
Build the MSI and install the application.
3. Creating the XML search
Now that you have installed a version of the application there is now a folder in the Windows Volume, therefore there is an XML file you can search into. Go to the Search page and create a new XML search.
In the File Path section, use the [WindowsVolume] and [ProductName] properties followed by “\” and your XML file name.

In the Locators section you have to replicate the structure of your XML file.
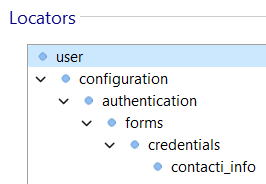
At the “contact_info” element, add two XML locators, one for each of the values you’re searching for.
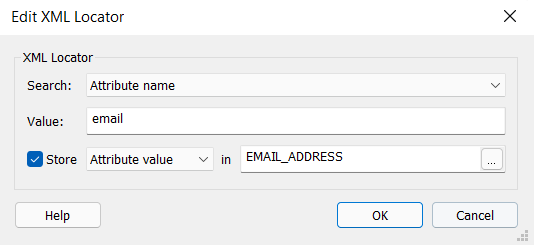
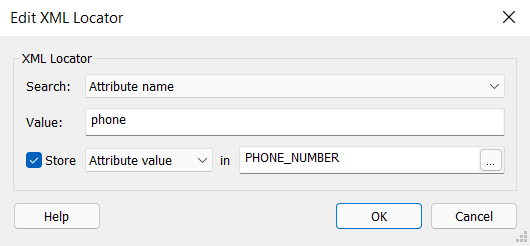

Now build the second version of your application, and you will see the previous values of the properties, pre-populating the fields associated with them.