How to preserve application settings using a custom action
When you design an installer using Advanced Installer you may want to take input from the user in order to configure the application more according to their needs.
You can do that in many ways such as saving the information in the registry or using the Advanced Installer support for saving the user input in XML/JSON/INI files.
Alternatively, for more specific cases, you can use a custom action to take the input from the user and save it in whatever way you may prefer.
This method is also the most powerful one, giving you more liberty to manipulate the data.
This article will show you how to save the user input, back it up and restore it when you roll out a major upgrade, using a custom action.
1. Preparing the dialog
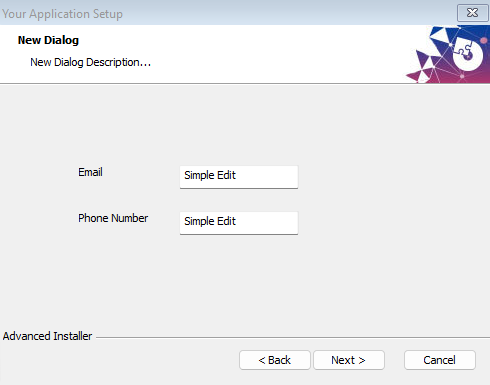
This step’s goal is to create the dialog in which the user will enter his data. Let’s say that you want the user to enter their email address and their phone number.
Go to the Dialogs page and create a new dialog. Then, add the edit boxes in which the user will type their email address and phone number:

Now, you have to associate the edit boxes to the properties in which you will store the values given by the user:

Also, you want to change the Text field from the Display tab in order to pre-populate the fields with the existing information if there is such. You can do that by simply typing the property name, between square brackets, in the Text field.
2. Creating the Custom Action
This step’s goal is coding the custom action which will be run during the installation. Open Visual Studio and create a new Custom Action project.
You will use two Custom Actions from the same DLL file: one which will save your user input into a .txt file, also managing the preservation of existing user input (CopyCont) and another one which will get the user input from the previous installation of the file (GetCont).
3. The CopyCont method
Firstly, you need to pass the property values into two string variables.

Then, you have to define the location of the “contacts.txt” file and the backup file. Let’s say, you want to save these files in the Documents folder.

Now, you have to handle the case in which there is already a “contacts.txt” file in the Documents folder. If that’s the case, you have to create the backup file, copy the contents from the original file into it and delete it afterward, as shown below.

The next step is to create (or recreate) the “contacts.txt” file. After you created the file, you have to write in it the email address and phone number given by the user when the installer is running

4. Preserving application info
Let’s suppose that your application has the user preferences saved in the same file that you’re using for storing the contact information. You want to make sure that you’re not losing these settings during the backup and restore operation. You can do that by simply saving the contents of the file into a string array and then parsing it with an iterator from the line below the phone number.

5. The GetCont method
Firstly, you need to pass the property values into two string variables.

Then, if there is a “contacts.txt” file you have to save its contents into a string array as previously done and then assign the property values to the first two elements of the array.

Build the custom action and return to Advanced Installer.
6. Configuring the custom action in the installer
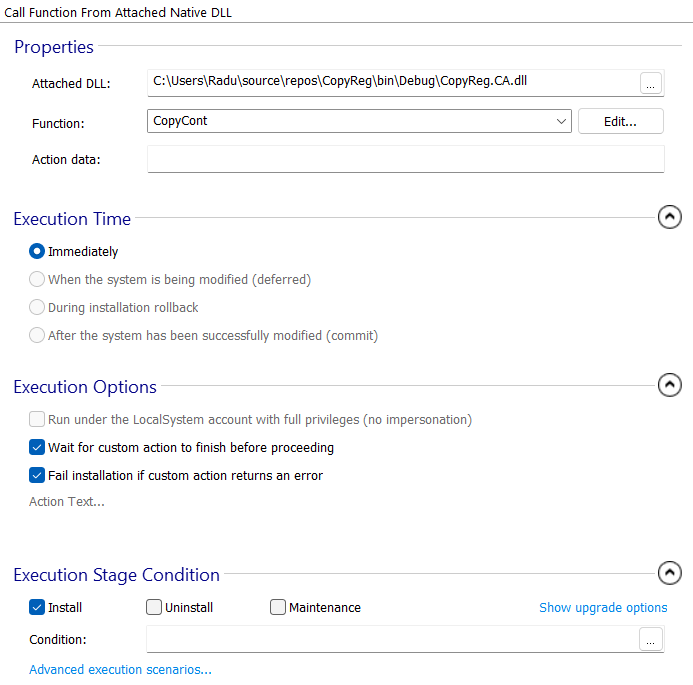
Go to the Custom Actions Page in Advanced Installer. There you have to add a new custom action which will be called from an attached native DLL.
When you are prompted to select the DLL from which the custom action will be run, go to the build folder of your Visual Studio project and select the DLL file ending in “CA”.

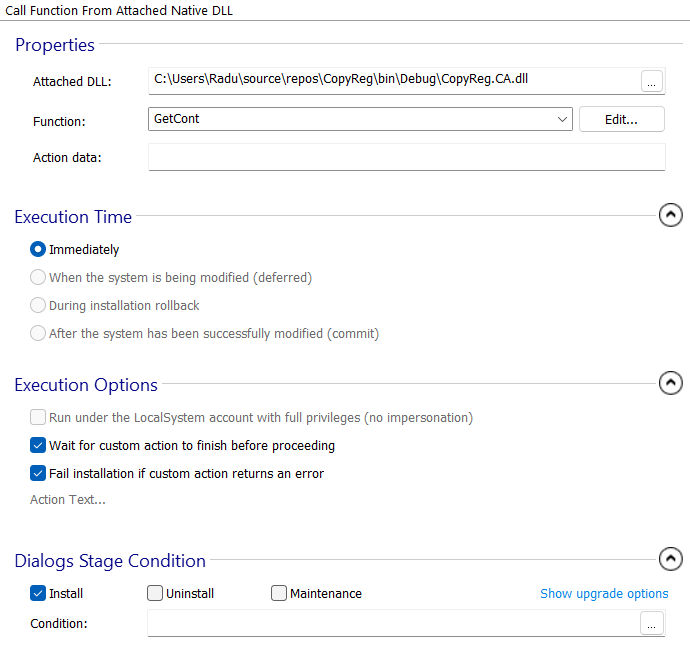
You have to select the function which will be called by the custom action and also in the Execution Stage Condition uncheck the Uninstall and Maintenance checkboxes because you don’t need these methods to be called when you uninstall or repair your application.

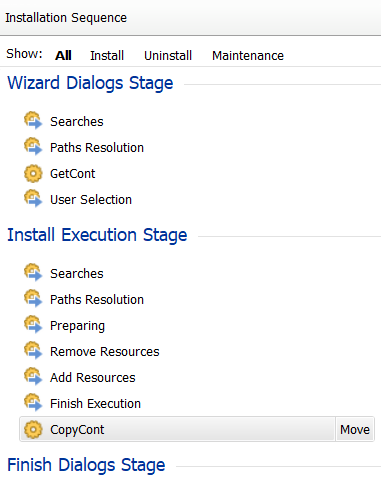
In the Installation Sequence tab you have to make sure that GetCont will be called before the User Selection step in the Wizard Dialogs Stage and the CopyCont method will be called after the Finish Execution step in the Install Execution Stage.
