How to to run powershell script to return and populate a CheckList?
This article will guide you step by step on how to run a powershell script to return and populate a CheckList.
As Developers and IT Pros, we often have to extend the capabilities of an installer. We can use a custom action type to retrieve specific values to populate a CheckList.
Windows PowerShell is a tool built into Windows that allows users to write and run commands and scripts. It's designed to be object-oriented and is part of the .NET framework.
By using small chunks of code called cmdlets, PowerShell can automate tasks, manage configurations, and simplify various administrative functions within the Windows operating system.
One way to populate a CheckList with data from a custom script is by using Powershell scripts. But, that’s not the only way.
Let’s see how you can do this!
How to populate a CheckList with data from a custom script?
For this example, we run a PowerShell script to retrieve a list of all the drives on a target machine. Then, the same script will use that data to populate a CheckList -- in our case, the list of drives.
If you are more familiar with VBScript, JavaScript, C# or C++, you can use any of these
programming languages to write your script. The logic will be the same.
The same logic
applies if you need to populate a ComboBox or a ListBox instead of a CheckList.
Here is our PowerShell script that retrieves the list of drives on the target machine:
      # Block for declaring the script parameters.
Param()

# Gets the drives by their root property and saves them into a variable
Add-Type -AssemblyName PresentationFramework
$drives = Get-PSDrive -PSProvider FileSystem | Select Root

# The result is an array of elements. We will have to browse it and create a string composed of the array elements,
# separated by a pipe character ("|")
# For instance, on my machine, the $new variable looks like this: A:\|C:\|D:\|
for($i = 0; $i -lt $drives.Count; $i++){
$temp = -join ($drives[$i].Root,'|')
$new += $temp

# Replace the "\" from our path with "\\". It is needed to escape the "\" character with another "\",
# otherwise the "PopulateListBox" custom action will ignore it (this is a limitation of the "PopulateListBox" Custom Action)
$final = $new.Replace("\","\\")

# The AI_LISTBOX_DATA must be in the following format: CHECKLIST_1_PROP|Value 1|Value 2| Value 3|...
$conc = -join("CHECKLIST_1_PROP|",$final.Substring(0,$final.Length-2))
How to retrieve the list of drives using Custom Action?
Based on the above PowerShell script, all we have to do is set a property (in our case, AI_LISTBOX_DATA) to the list of drives. We do this by adding the below line at the end of our PowerShell script.
Here, we set the AI_LISTBOX_DATA property to the list of drives:
AI_SetMsiProperty AI_LISTBOX_DATA $conc
Now, let’s add the updated PowerShell script as a “PowerShellScriptInLine” Custom Action without sequence. The Custom Action should be set as the one in the image below:

Create the “Populate ListBox” using Custom Action
To populate the CheckList, use the predefined “PopulateListBox” Custom Action in Advanced Installer.
The Custom Action setting should look like this:

How to execute the Custom Actions?
After you configure both Custom Actions, it is time to execute them. We deliberately added both of them as Custom Actions without sequence so that we can trigger them as Dialog events.
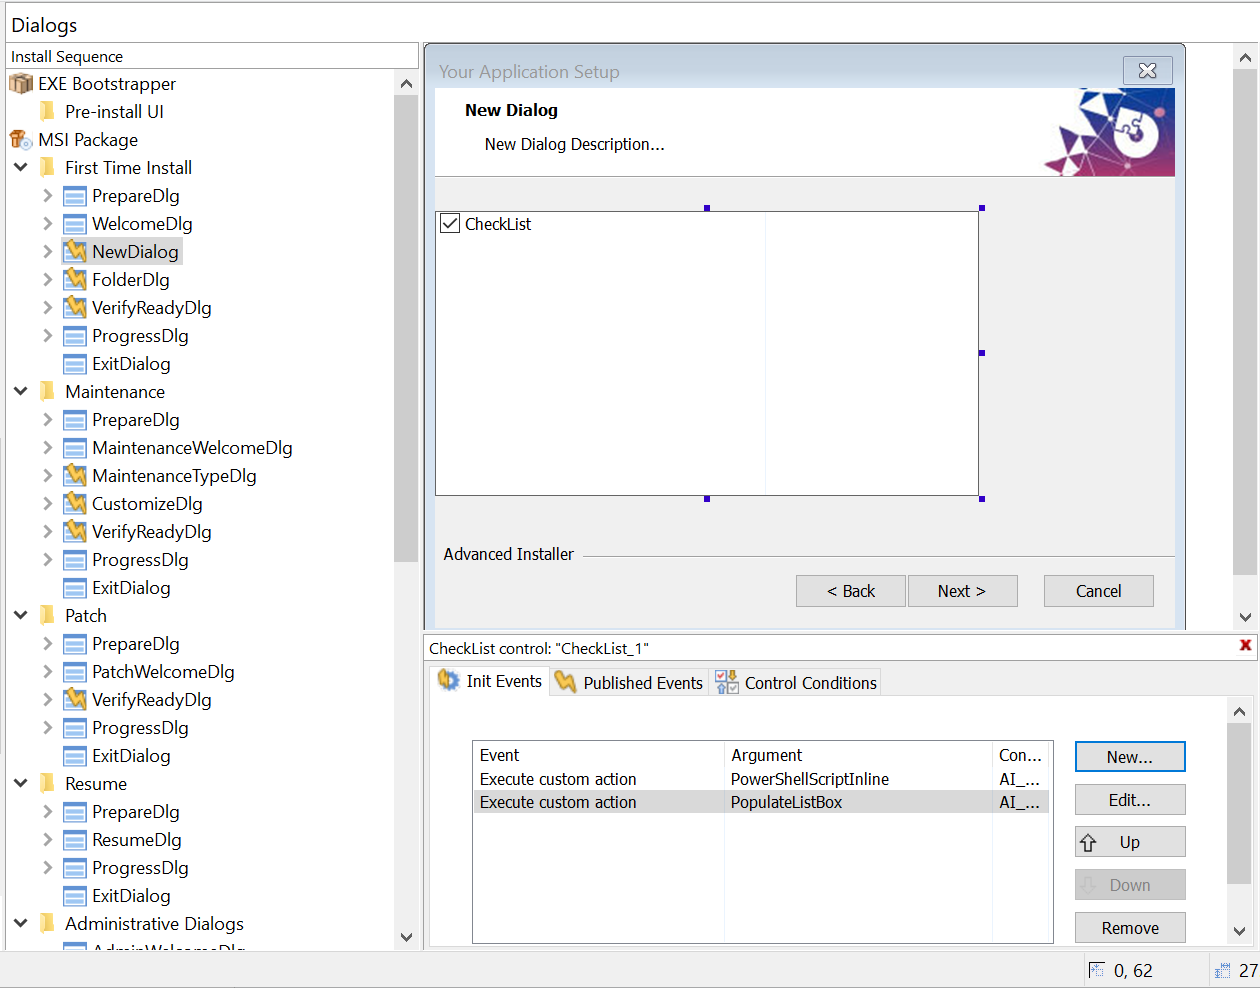
Now, we will execute them when our custom Dialog is initialized, so we need to add the two Custom Actions as “Ini Events”.
To do this, follow these steps:
- Go to the Dialogs Page page
- Select the custom “CheckListDlg”
- Add the following two events:

That’s it! The two custom actions will get triggered when the custom CheckList dialog is initialized.
Keep in mind that you can use a similar approach if you need to populate a ComboBox.
You only have to: - Replace the ListBox control with a ComboBox control - Use AI_COMBOBOX_DATA
property instead of AI_LISTBOX_DATA - Use PopulateComboBox custom action instead of
PopulateListBox
We hope you found this how-to article useful. Let us know if you have any questions and what articles you would like to see in the future.
For more information between these two controls, you can check the following article:
Working with Windows Installer ComboBox and
ListBox controls