How to deploy a PHP website (or application) to IIS Windows Server
The following article uses options that are available starting with the Professional edition and project type.
This tutorial will present the required steps to deploy a PHP website to IIS using Advanced Installer. Internet Information Services, or IIS for short, is a web server that can host websites and web applications that use Microsoft technologies.
1. Adding the PHP and the website resource files
When publishing your PHP application on a Windows Server, we first need to create the installation package. The first step here is to add the website resources to the Files and Folders page.
Because the content of this folder might change during the development process certain files must be included or excluded in the Advanced Installer project, making it difficult to track these changes. You can automate this step by using the folder synchronization feature from Advanced Installer. Aditional information about how synchronized folders work is available in the Working with Synchronized Folders article.
Thus, in the Application Folder view from the Files and
Folders page, you can create a regular folder. You
can synchronize this folder with the content of the directory where website resources are
located. Repeat this step to add the PHP resources files to the installation
package.
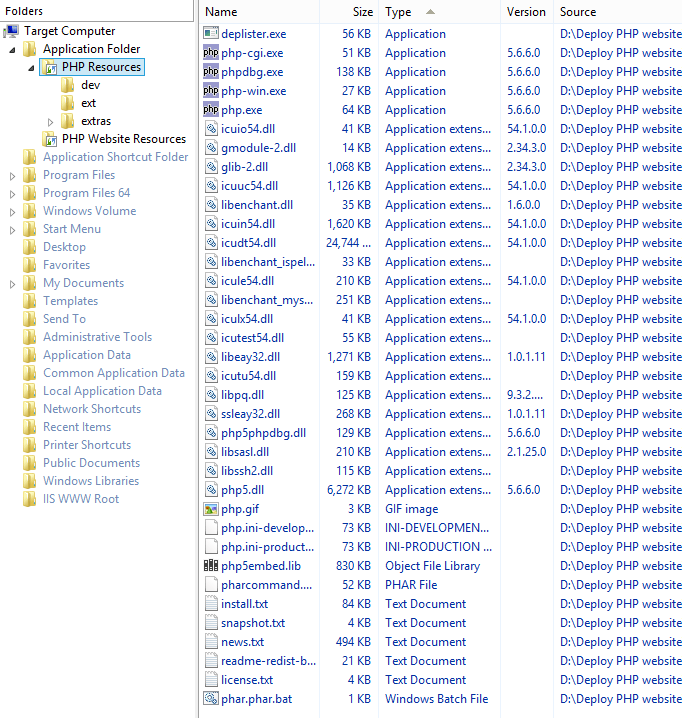
After this step, your project's Files and Folders view should look as
follows: 
2. Create the Application Pool
It's good practice to make sure that your websites will run under their application pool; using the Default App Pool might prevent websites from running as expected. To create an application pool for the website you can use the toolbar button from the IIS view.
3. Create the website in the IIS page
Since the content of the website has been added to the project, it is time to
create the website. In the IIS view, you can create a new website
using the toolbar button. When prompted, please select the
previously created folder from the Application Folder view as the website's
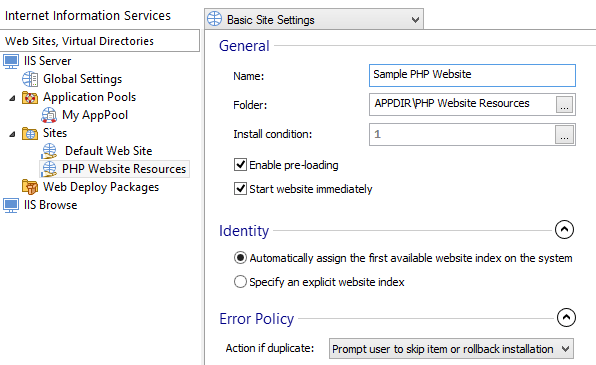
physical folder. The website should look like this: 
In the Application Mappings tab of the website, you need to use php-cgi.exe ( from the PHP Resources folder ) and select the FastCGI module for handling .php requests. Additional settings for the FastCGI application can be configured for the Global Settings IIS tree node using the Application properties dialog from the FastCGI Settings tab.
Next, we need to enable the Use installed application pool option from the Application Pool tab and select the previously created pool.
Another necessary step to get everything working is to add the index.php document in the Default Document tab of the website. Just create a new document using the button and name it index.php.
4. Enabling the required IIS Windows Features
Starting with Windows Vista, IIS comes out of the box as a set of optional Windows Features.
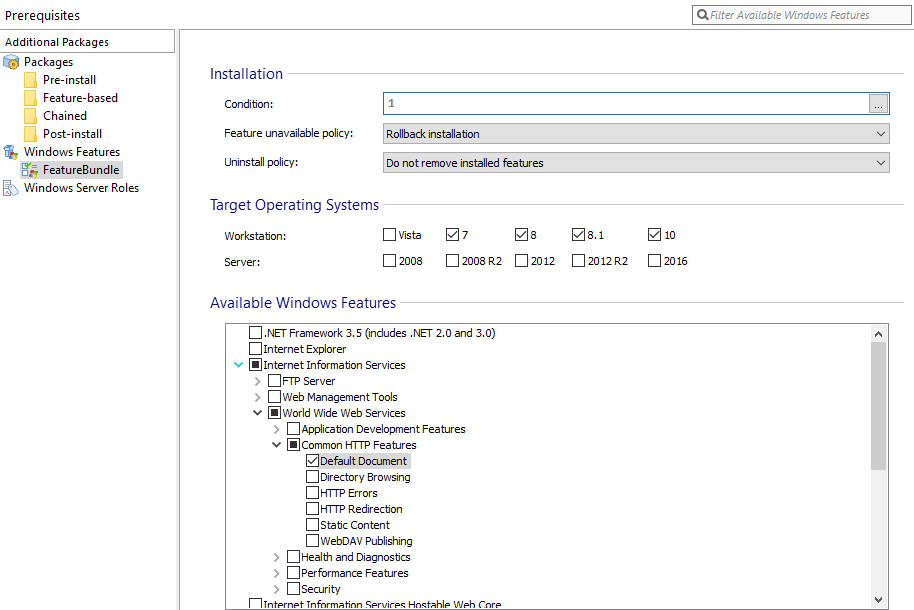
All we have to do is enable the IIS features using a Windows Feature Bundle. To do this, we simply use the from the Prerequisites view of Advanced Installer. We can select the Target Operating Systems for the windows feature, according to our scenario.
For our particular scenario, we will select only the Default Document
feature. Please use the right top filter to search for the Default Document Windows Feature:
When a new website is created in the Advanced Installer project, an IIS launch condition is
automatically enabled in the Software tab
from the Launch Condition page. Since we made sure that
IIS is enabled on the target machine, via Windows Features, it is safe to remove the
software launch condition.
5. Launch the website at the end of the installation process
If your scenario requires launching the website in a browser at the end of the
installation process, you can use the predefined Open URL custom action as a custom action with a
sequence. Congratulations, you now have your PHP website hosted to the IIS
server! 
7. Related Content
In pretty much the same manner, you can deploy an ASP.NET website to IIS.