How to convert COM registration from MSI to MSIX?
Switching COM registration between MSIX and MSI can be a critical task in software deployment.
This guide will show you how to register a Win32 COM.DLL in an MSIX package, having previously done so in an MSI, and vice versa.
The Scenario
Let’s say you have an Advanced Installer project where you registered a Win32 COM.DLL for an MSI:
- Through the COM Registration tables support from Windows Installer.
- Or using the predefined options from the Files and Folders page → Registration Tab
Now, you want to register that same COM in an MSIX package, here’s your step-by-step guide to make it happen.
Step 1: Add MSIX Build in Advanced Installer
- Open Advanced Installer and go to the Builds page.
- Add a new MSIX/APPX build.
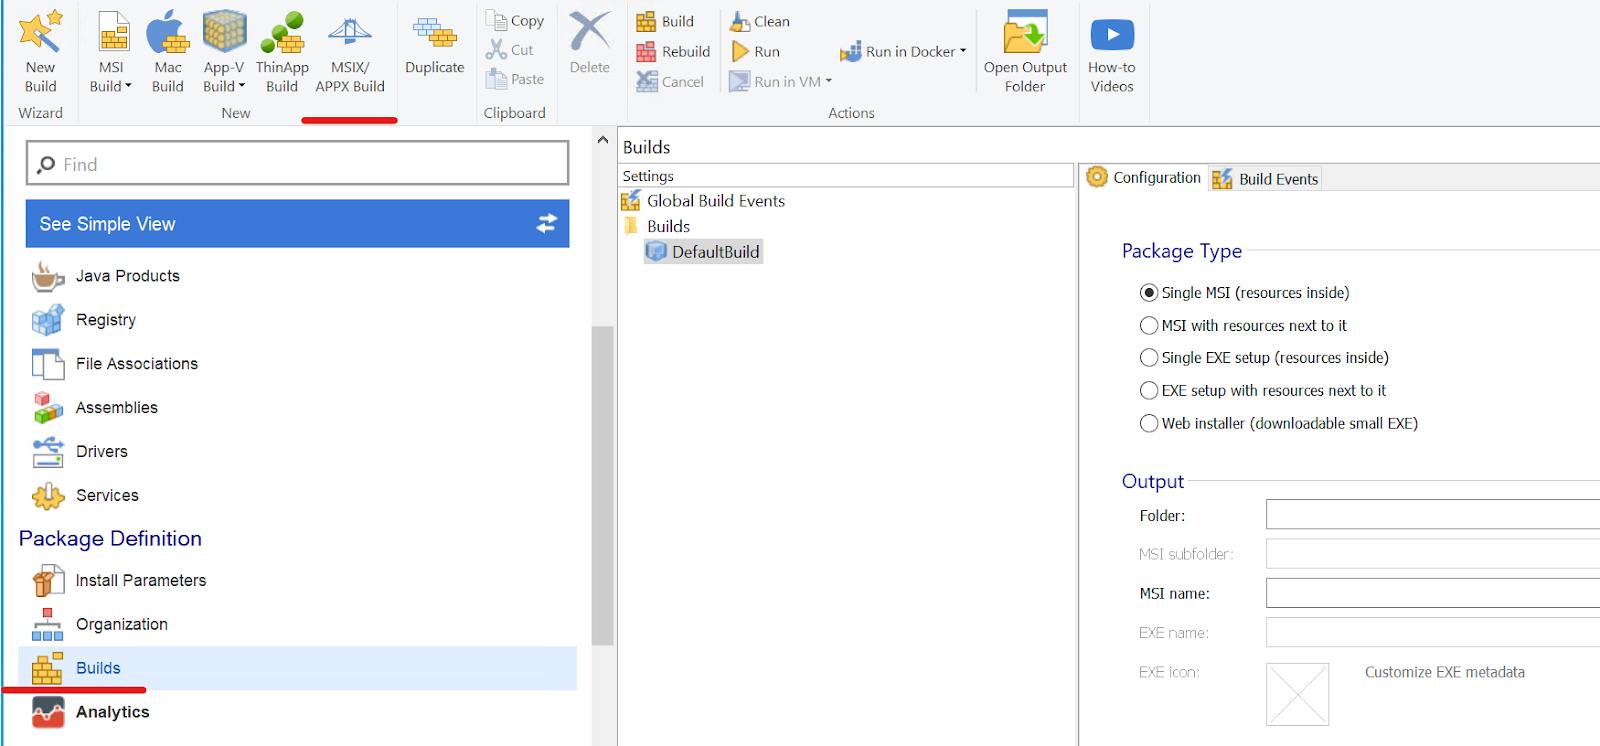
This action ensures that during the build time, Advanced Installer will automatically convert the COM Registration from MSI to MSIX.
Step 2: Preview with a Sample Project
For this sample project, I have the following files:
- The native COM.DLL file which has the function of multiplying two numbers.
- It also has an executable (EXE) that calls that function and then outputs the result in the command line.
- Of course, for this to work, the COM .DLL should be registered.
Step 3: Break Down the Task
To make this process simpler, I would recommend breaking this big task into two smaller tasks:
- Creating the MSI first and testing if the registration works
- Adding the MSIX build and testing that afterwards
How to Create and Test the MSI
- 1. Let’s start this by opening Advanced Installer and creating a new project (e.g. Enterprise).
- 2. In the newly created project, we will need to add the required files - i.e. the COM .DLL and the executable.

The rest of the files are DLLs required by the executable - we will pretty much ignore those.
- 3. Register the .DLL file in Advanced Installer. As previously mentioned, we can do so by right clicking on the .DLL file → Properties → Registration tab → check Auto register file (DLL, OCX, etc.) → Extract registration info from native library.

- 4. After clicking OK, we should receive a notification informing us the information was successfully extracted from the COM.DLL.

If the Notifications tab is not visible to you, you can enable it by
clicking the Notifications hyperlink from the bottom-right corner.
To check this ourselves, we can proceed in two ways:
- By going to the COMpage. There, you can see information such as the COM class, its Interface and its Type Library.
- By going to the Registry page. By default, the COM registries are not displayed in the Registry page.
If you want to display them, please click on the Show COM Registry button from the toolbar
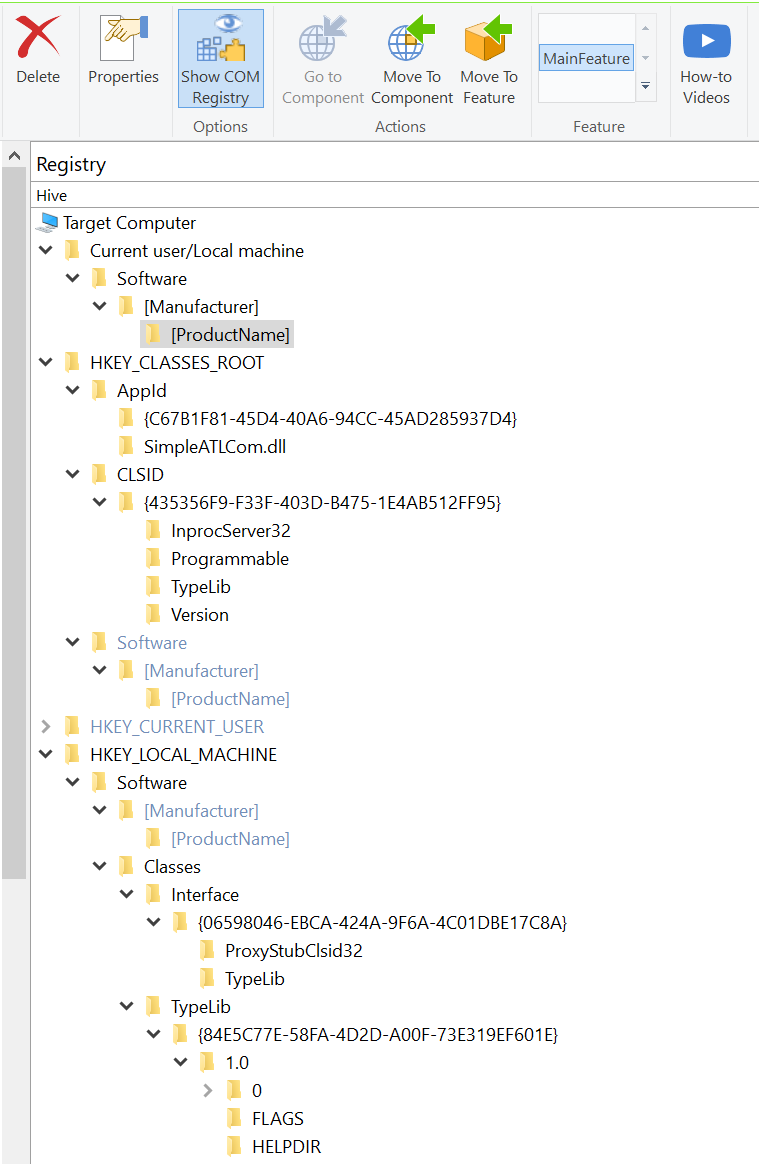
To make sure the COM registration is successful, we need to check that the .RGS file
(from the COM project) contains the right information.
RGS stands for Registry Script and it is a script used by ATL (Active Template Library) C++ projects (such as ours), Microsoft Visual Studio and other software development or deployment programs (such as Advanced Installer). It contains the code that will register the software on Windows OS.
The script should have information about the COM .DLL such as the CLSID and the AppID. For my project, it looks something like this:
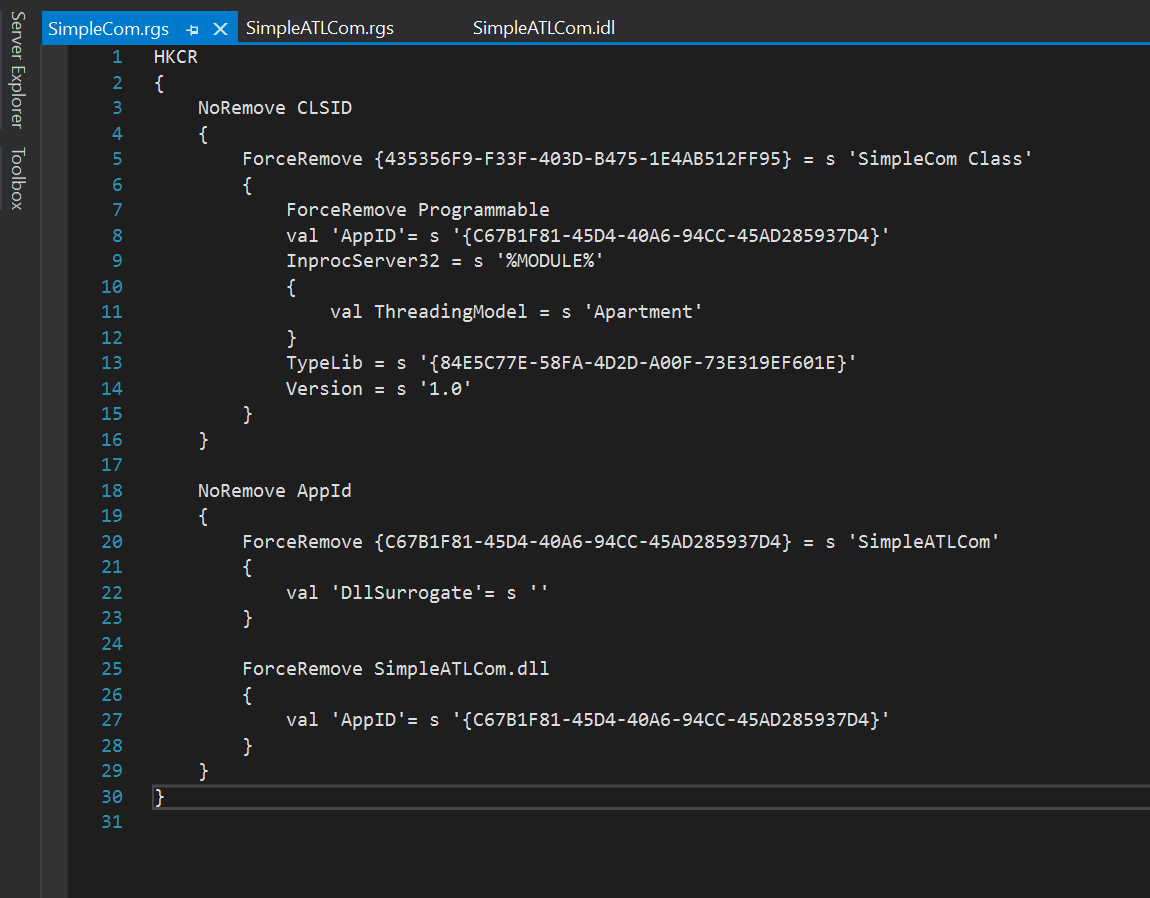
- 5. Both the GUIDS used above are declared in the project (the following two screenshots and information are optional):
- The AppID is defined in the dllmain.h file:

- sWhile the CLSID is defined in the .IDL file (the file that contains the Interface and Type Library definitions)

Now, let’s build the project and test the resulting MSI:
Open a command prompt → go to EXE’s location → launch it.

As you can see, it looks like everything worked as expected - the DLL was successfully registered and the executable could load its function.
How to Add MSIX build and Test the Resulted Setup
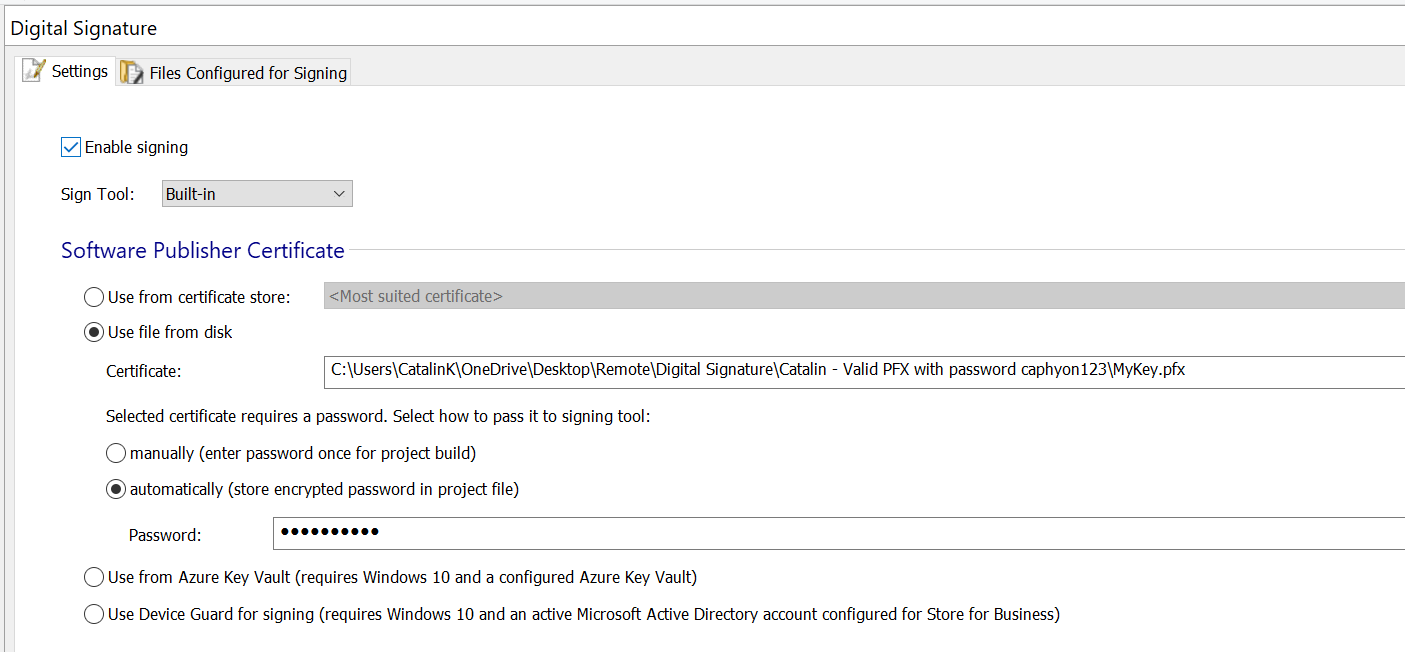
In this case, be aware that you can only install a signed MSIX package.
Let's make sure your package is signed:
- 1. Go to the Digital Signature page → Enable Signing → in my case, I will use the “Use file from disk” option → point to your certificate file.
For this, I will be using a test certificate.
- 2. Add the MSIX build – go to the Builds page and click on the MSIX/APPX Build button from the toolbar.
MSIX packages are installed in the following location: %ProgramFiles%\WindowsApps. This is a system location that is not accessible by default from within Windows Explorer.
Dive deeper into the world of MSIX packaging with our MSIX Introduction: A comprehensive 24-chapter guide, a treasure trove of knowledge for
mastering MSIX!
- 3. Launch our executable from the command line with AppAlias.
To add AppAlias for your application: Go to Universal Windows section → Declarations tab → right click on your executable → Add Application Declaration → App Alias

What is AppAlias: Advanced Installer offers the possibility to add an
AppAlias to your executable. This will allow you to launch your application distributed
through MSIX by simply opening command line/PowerShell and typing its alias.
- 4. Done. The conversion is automatically done by Advanced Installer.
You can test everything by extracting the resources from the MSIX file and checking the AppxManifest.xml file.
It should contain the “comServer” node, as explained in the following article: Windows UWP applications | Microsoft Learn.
Click “Rebuild all” and test the MSIX package.
After installing the MSIX package, to test whether this is working or not, open a command prompt and use the executable alias.
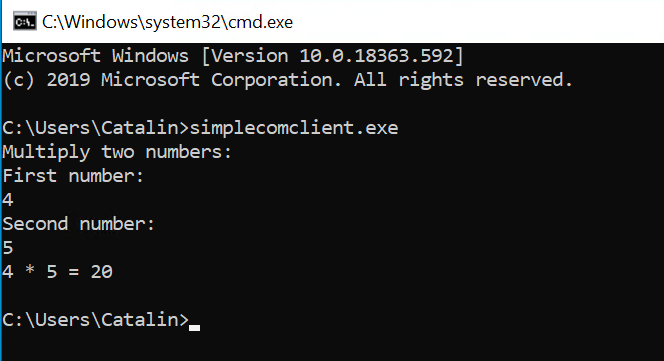
Now you know how to easily convert your COM registration from MSI to MSIX and viceversa. Don't forget the digital signature!
I hope you will find this useful!