Technical Guide: Per-machine deployment of MSIX in SCCM
On a recent post, we explored how MSIX deployments are done via SCCM, covering the scenario when a per-user installation is needed.
But, in cases when an application is needed for all the users, the best to approach it is through a per-machine installation.
SCCM (now renamed to MEMCM by Microsoft) offers native support to address this deployment case, in alternative you can use PowerShell cmdlets to provision and remove MSIX packages per machine.
Before we start with analyzing the options, don’t forget that all targeted machines must have MSIX compatible Windows 10 versions. That means that versions lower than 1809 do not support MSIX deployments.
All MSIX packages must be digitally signed. When an app is published to the Microsoft Store, it gets automatically signed and everybody can use it. In other scenarios, you need a self-signing certificate to sign the MSIX packages to further deploy it for all the users in the infrastructure.
Let's go through all the options for per-machine MSIX in SCCM:
SCCM native option for deployment
This would be my number one choice because it is the native and most simple option to deploy the msix package per machine.
To learn more about the Advanced Installer built-in support for SCCM and how you can automate your deployment process directly from its GUI, check this page.
In the SCCM console, navigate to Software Library Workspace > Application Management > Applications
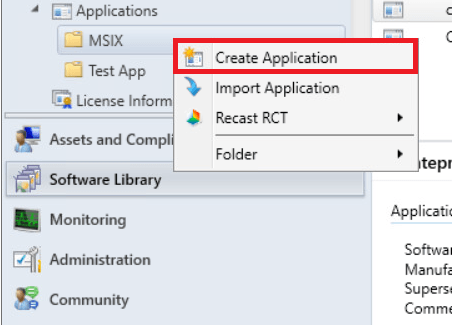
Right Click on the Applications node or subfolder and then on Create Application. The Create Application Wizard page will appear.
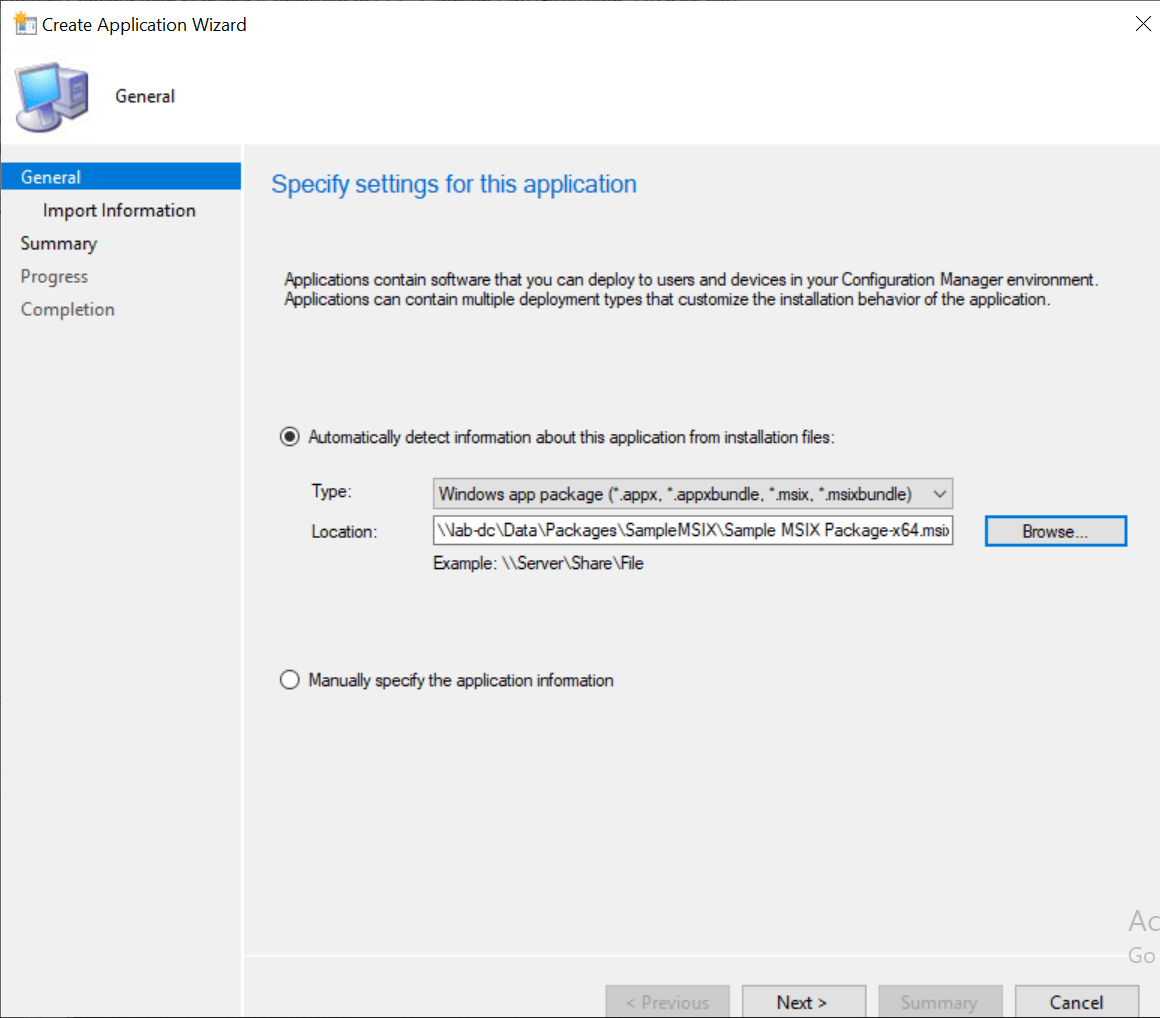
On the Specify settings for the application window in the General tab:
- Select "Automatically detect information about the application from installation files"
- For “Type”, select Windows App packages (*.appx, *.appxbundle, *.msix, *.msixbundle)
- For “Location” click the Browse button to provide the source location of the MSIX package, which should be an UNC path.
- Click Next.
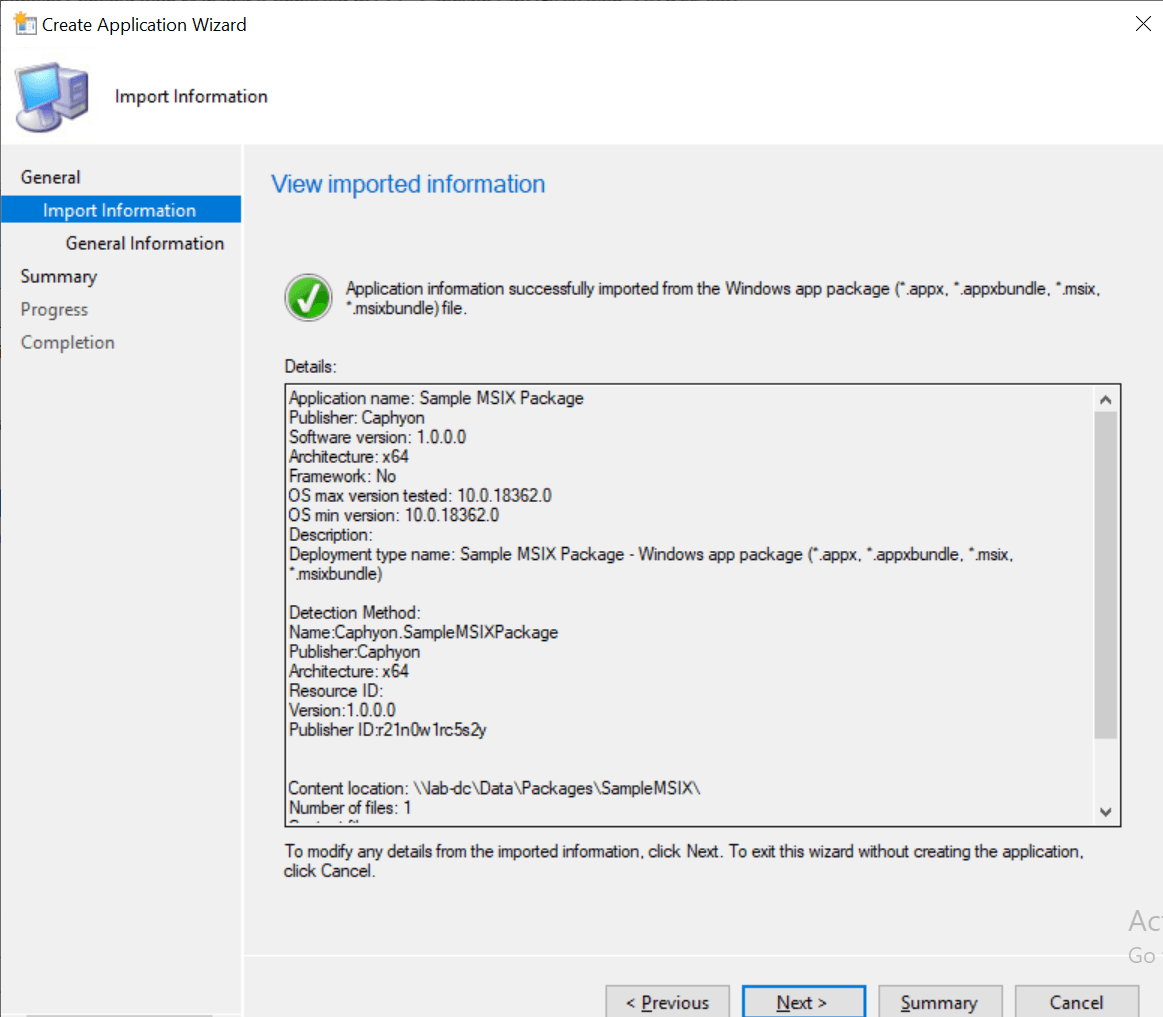
On View Imported Information, click Next.
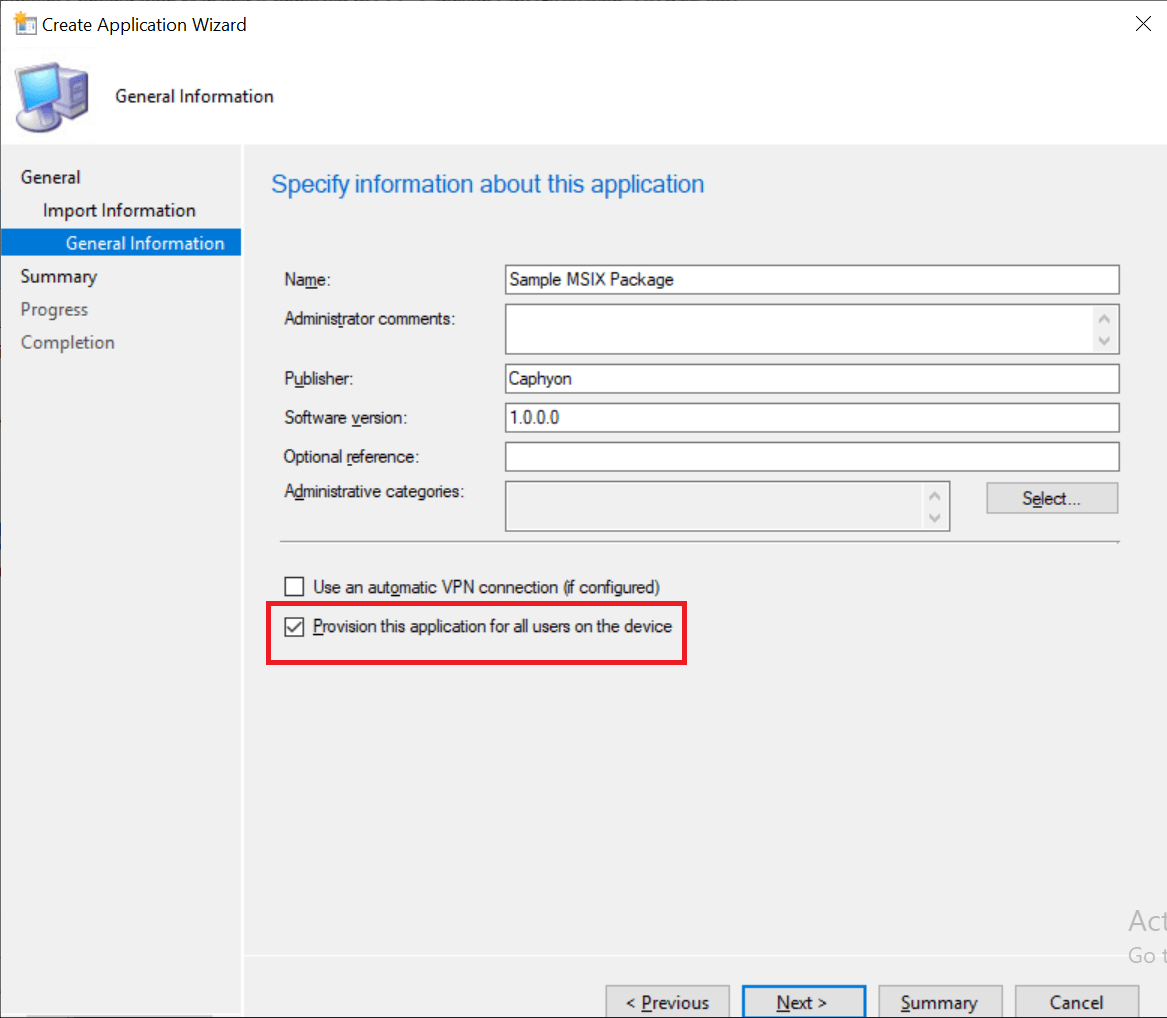
When you reach the Specify information about this application window, you will see that SCCM already detected all the information needed. You can modify or add information if you want.
Check Provision this application for all users on the device.
Then, click Next on all upcoming windows until you reach the end of the wizard.
Now, you can distribute and deploy the application to the clients in the infrastructure.
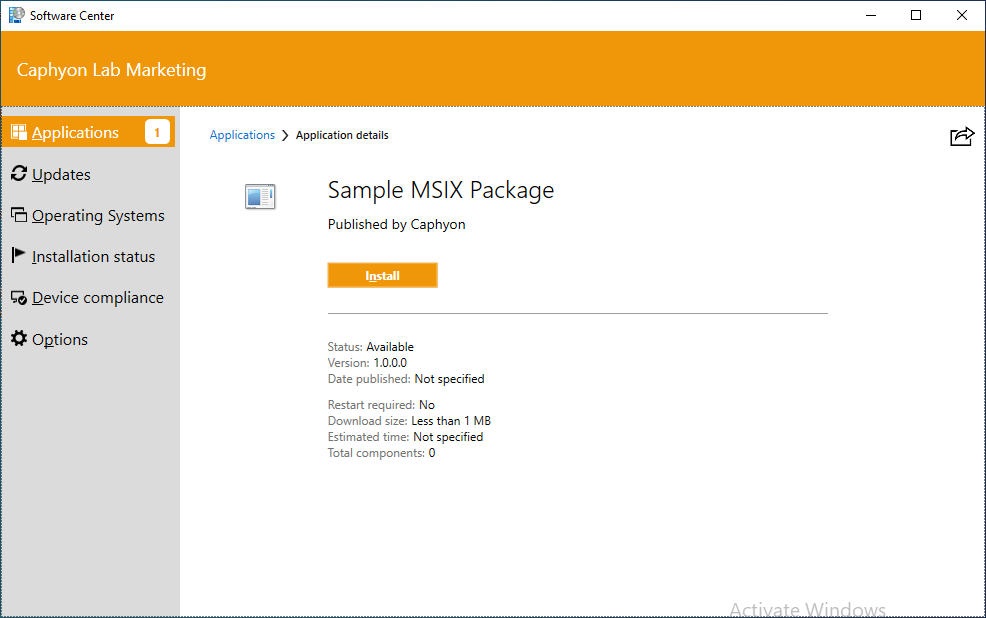
When the application is available in the Software Center, click on Install to provision the app for all users.
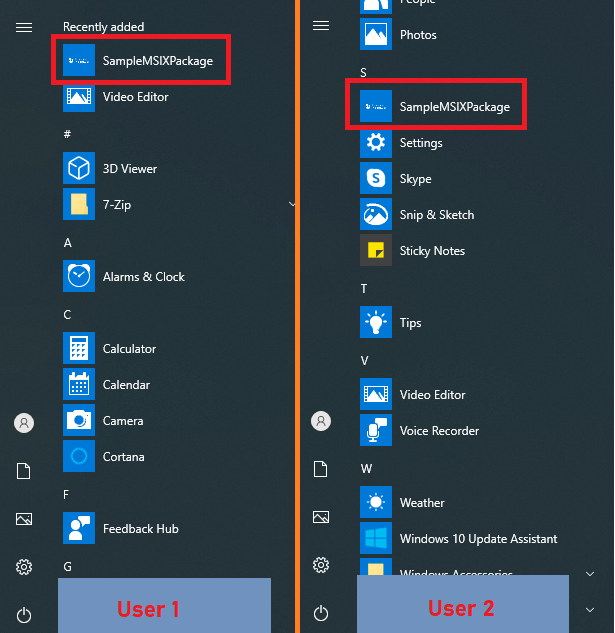
Once users log in, the application is automatically published for them.
As you can see, the installation is pretty seamless. But, uninstalling the app is a different story, let me tell you why.
Since the uninstallation process is not per-machine based, clicking the Uninstall button in the Software Center will not trigger the uninstallation of the application on the user's machine. So that means that the users will need to perform the uninstallation themselves.
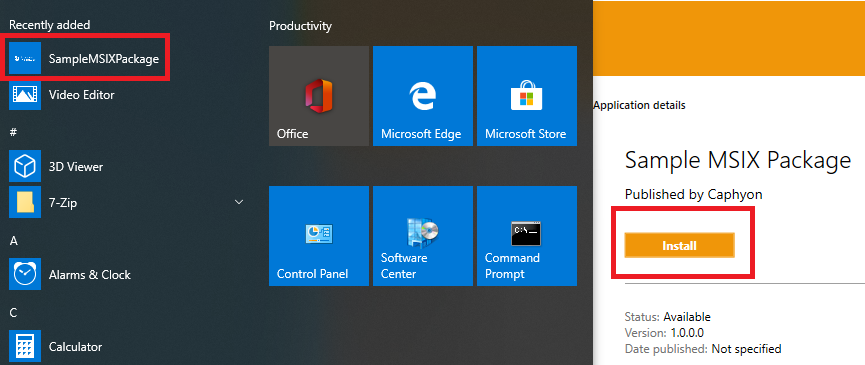
When a user manually uninstalls the application from the Start Menu
and later tries to install it again from the Software Center - the
application will not be published on this particular machine. This is
due to the fact that the deployment is per-machine and MSIX will not
publish the application again to the user since it recognizes it as
already published on the machine
To be able to reinstall the application on this particular user's machine, you'd need to go back to the Software Center, and make a new deployment for users, but without checking the "Provision this application for all users" option.
Alternative options for SCCM native deployment
The Applications Model
As previously mentioned, there is an alternative option to provision an MSIX per-machine using a set of PowerShell cmdlets.
First, in SCCM you need to have a detection method to see if an application was successfully installed or not.
Unlike MSI, there are no options (at the moment), like ProductCode, to detect the presence of an MSIX on a machine with SCCM when creating custom deployments. Alternatively, you can use a registry key or a file as a detection method.
Hence, we can create a Powershell script that installs the MSIX package per-machine to allow the SCCM to perform the detection for a file from the application.
$scriptDir = Split-Path -Path $MyInvocation.MyCommand.Definition -Parent
$InstallLoc = $scriptDir + "\Sample MSIX Package-x64.msix"
$install = Add-AppProvisionedPackage -online -packagepath $InstallLoc -SkipLicense
The first two lines are variable declarations that contain the package path. The third line is the actual provisioning of the package per-machine.
The uninstallation script must also be made to uninstall the msix from all users.
$Uninstall = Remove-AppPackage -AllUsers -package "Caphyon.SampleMSIXPackage_1.0.0.0_x64__r21n0w1rc5s2y"
This option is much simpler because all it needs is to execute the uninstall command line.
You can always use a registry as a detection method and the results will be the same. It all depends on your preference.
Once you have the scripts and the msix package, you can create the new application in SCCM. Here's how:
Navigate to Software Library Workspace > Application Management > Applications

Right Click on the Applications node or subfolder and click Create Application. The Create Application Wizard page will appear.
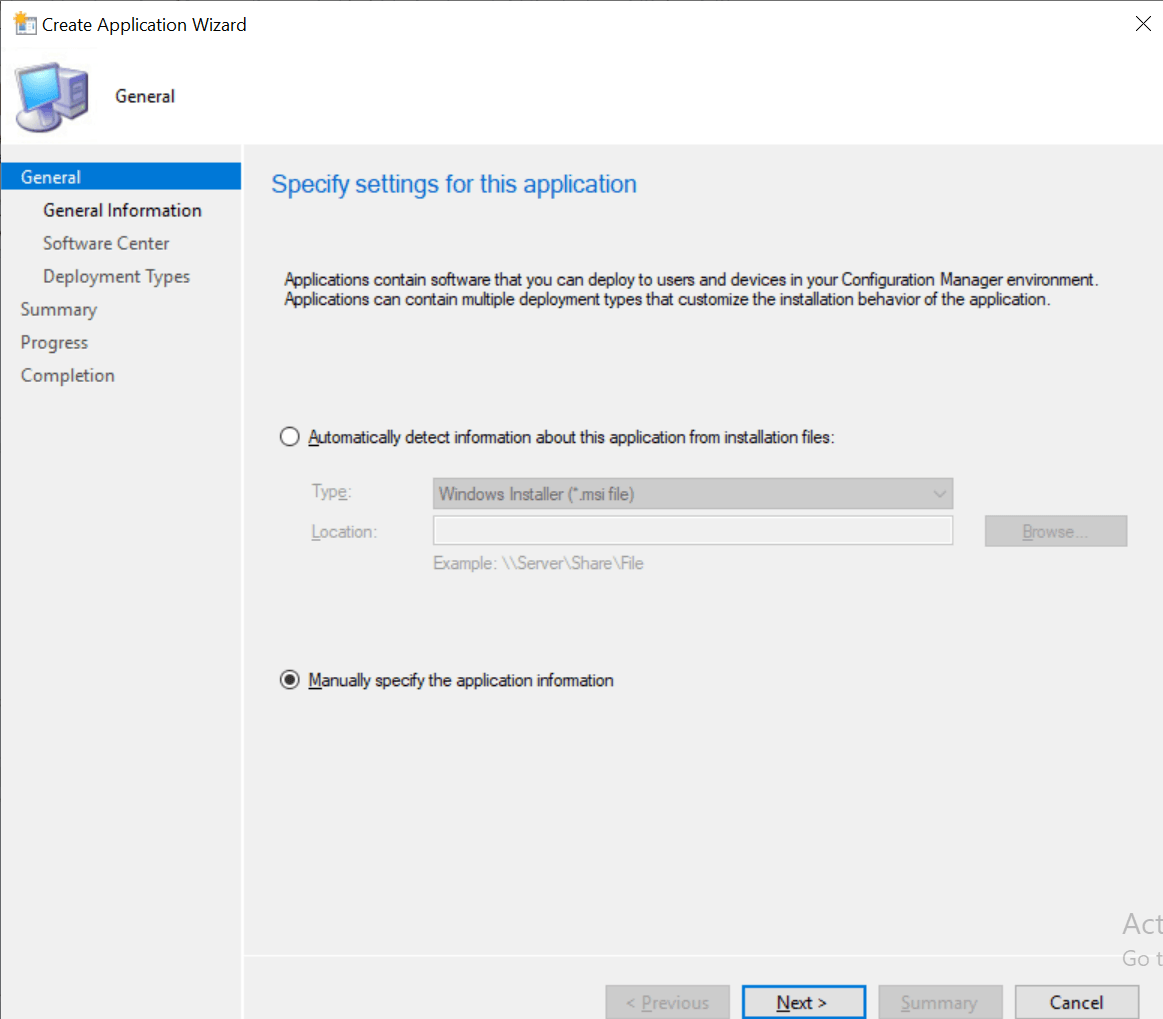
On the Specify settings for this application window, select Manually specify the application information and click Next.
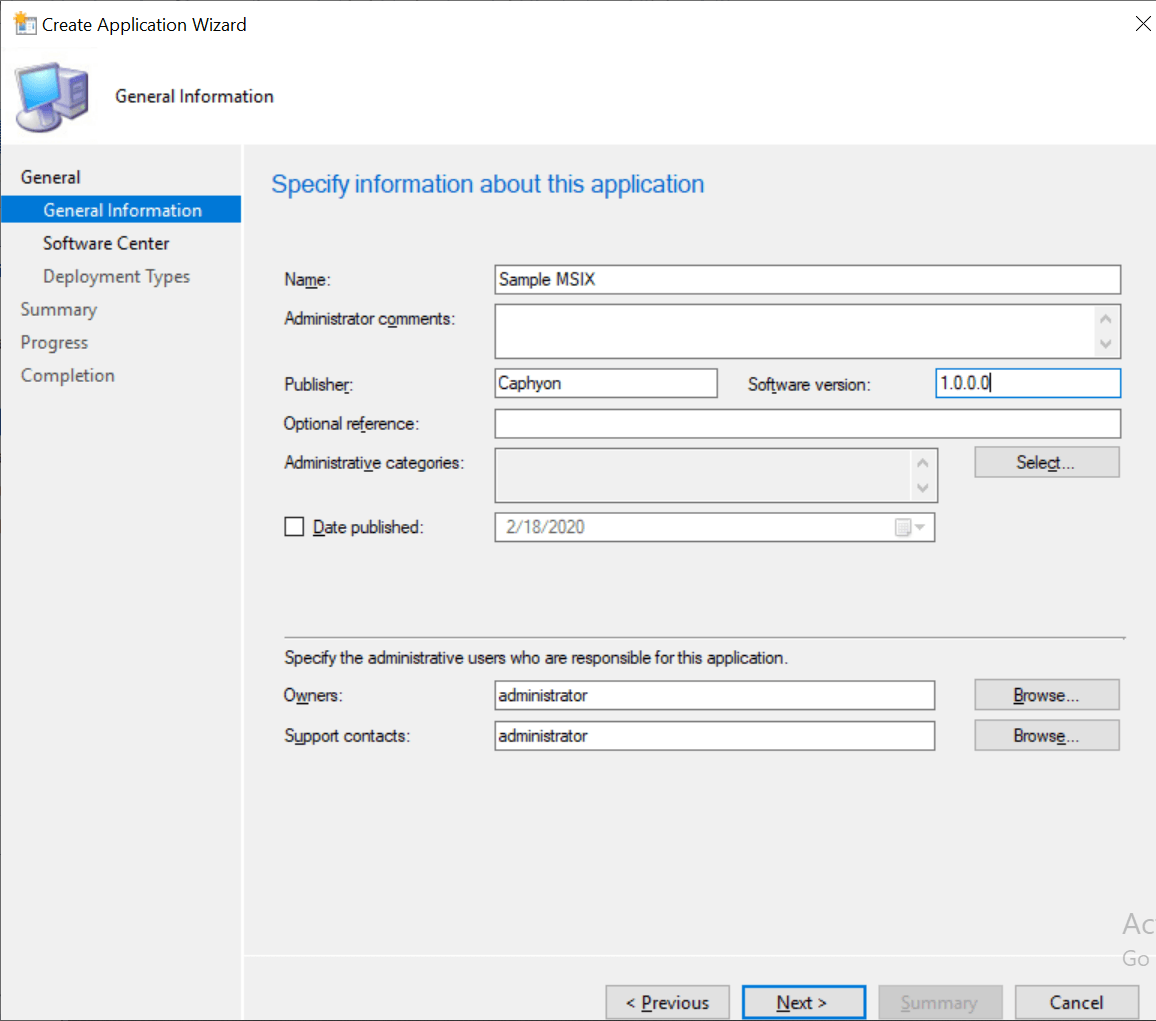
Type the Name, Publisher, Software Version and other details, and then click Next.
The "Name" field represents the application name in SCCM and not the
actual display name in the Software Center.
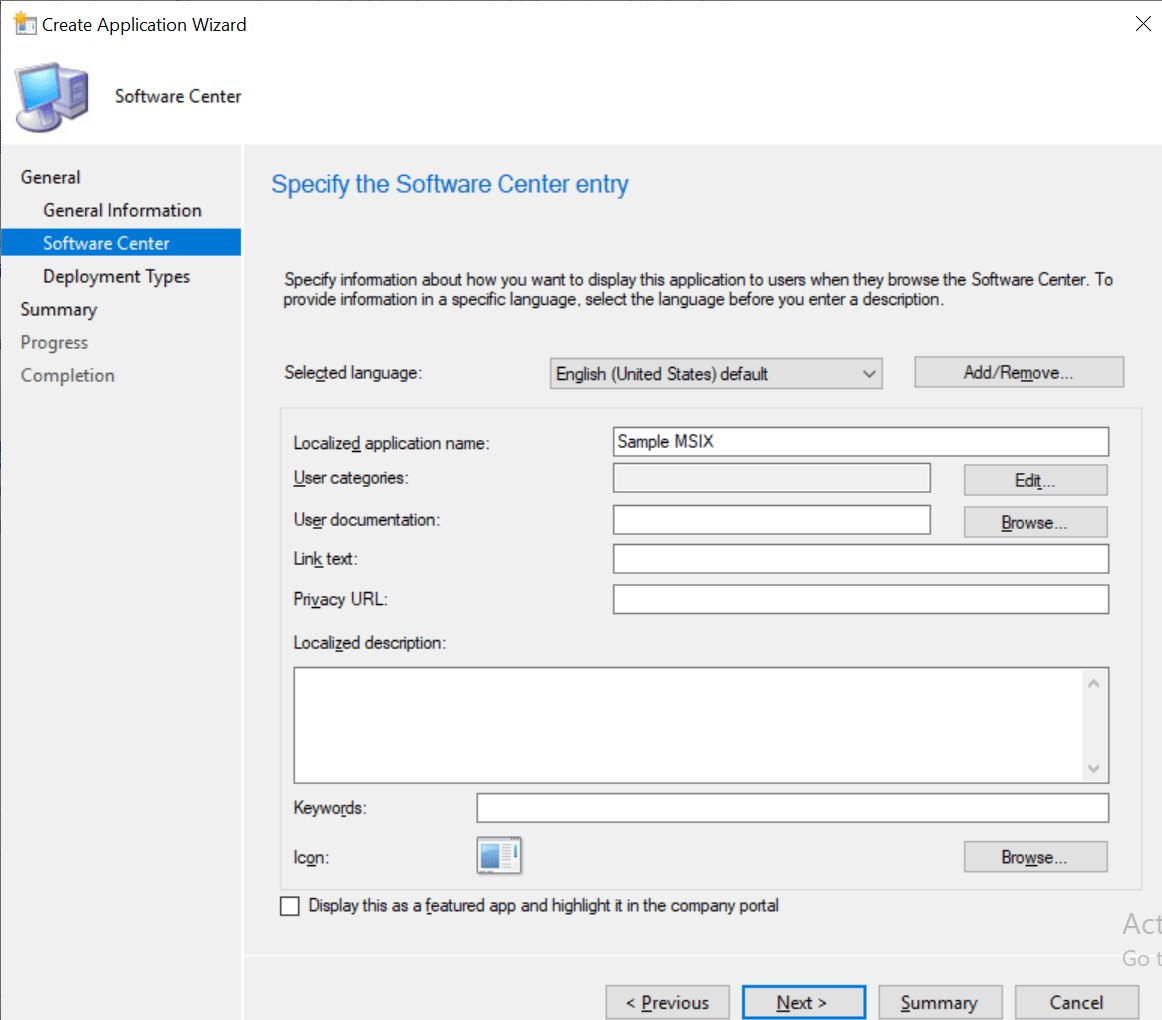
In the next window, the Localized application name refers to the name of the application that appears for the users in the Software Center. Add more details on Specify the Software Center entry and press Next.
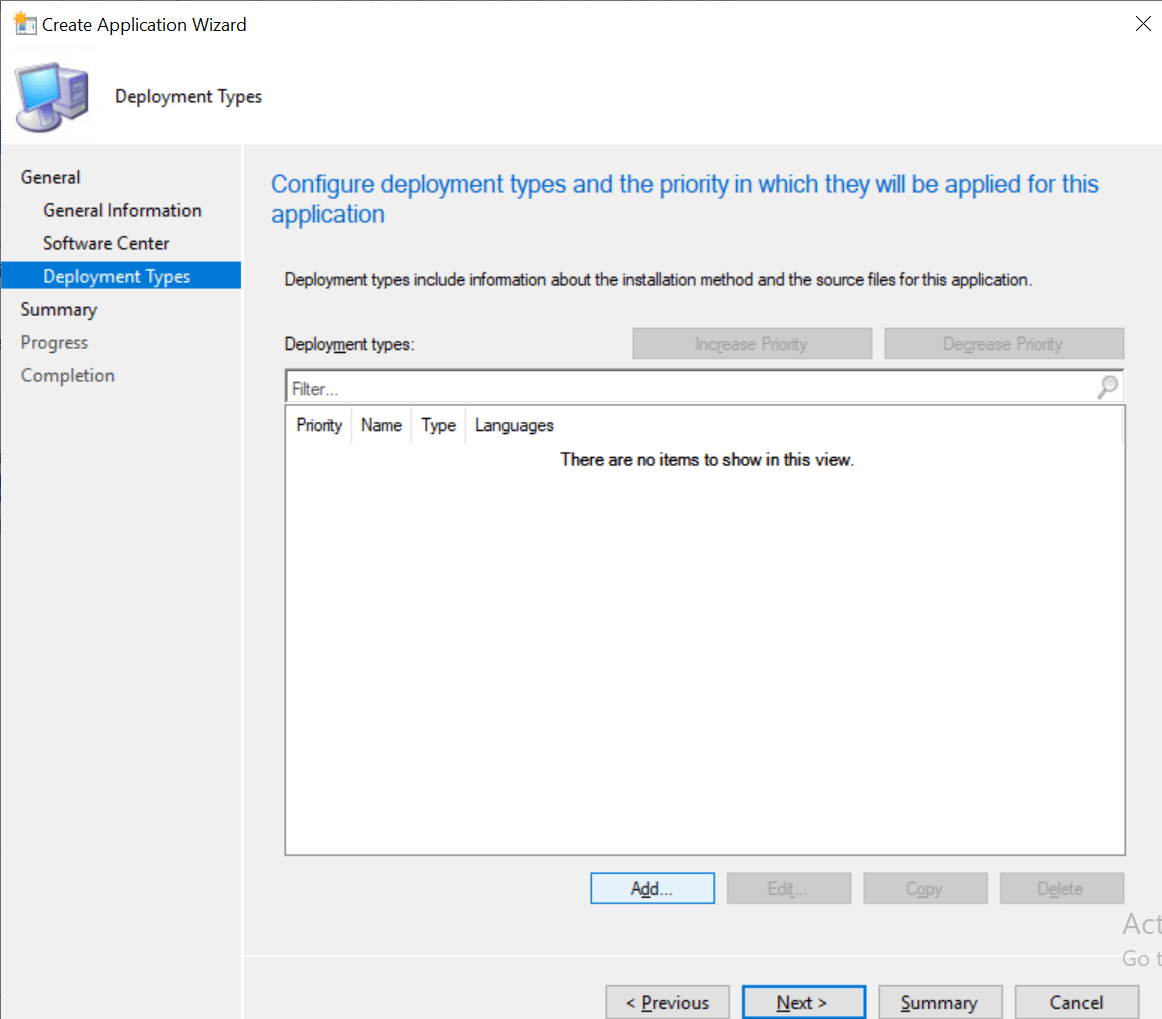
The previous step will take you to the Configure deployment types and the priority in which they will be applied for this application window. Once there, click Add... on Deployment Types.
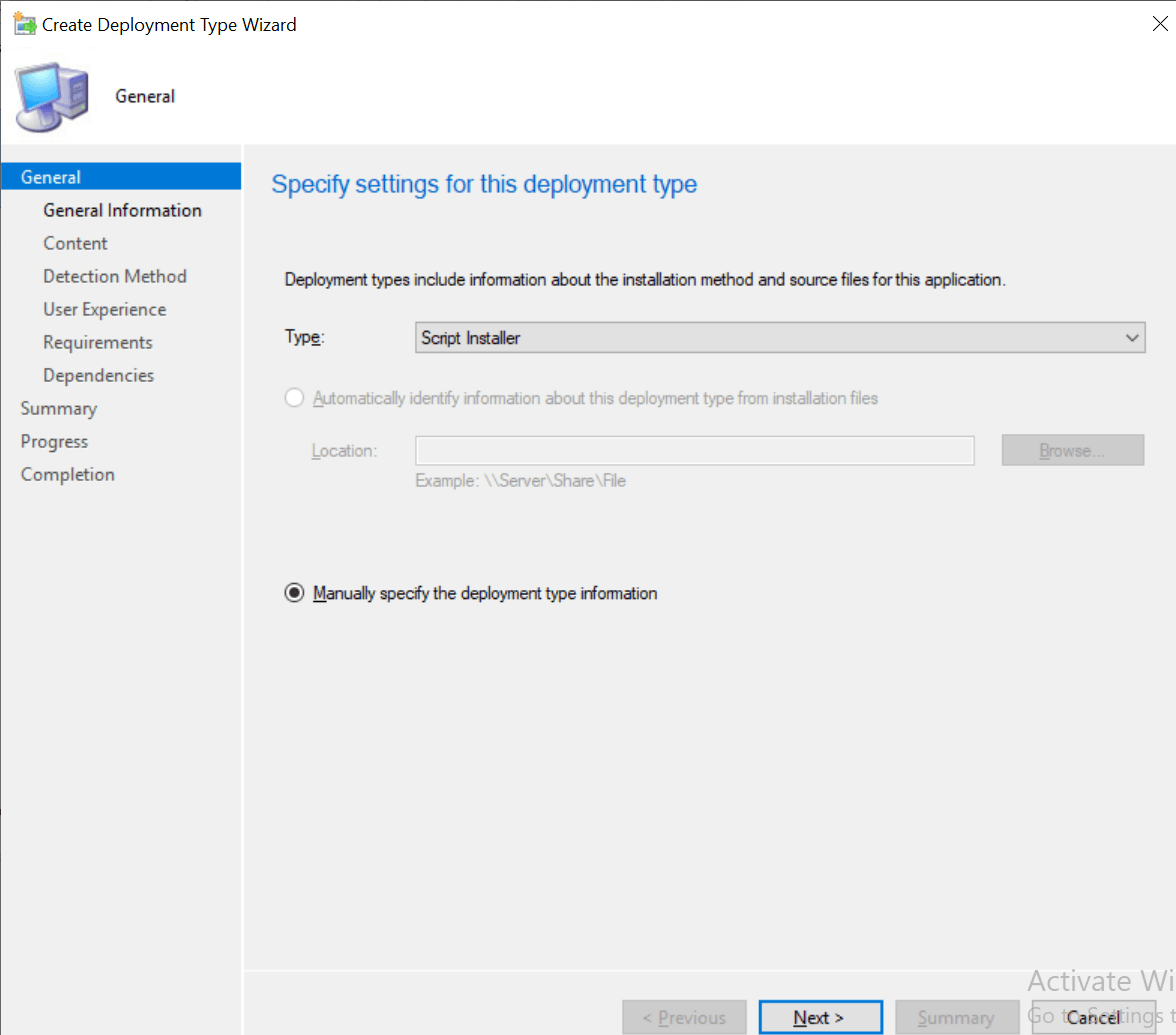
On the Specify settings for this deployment type window, head to Type and select Script Installer from the dropdown list. Then, click Next.
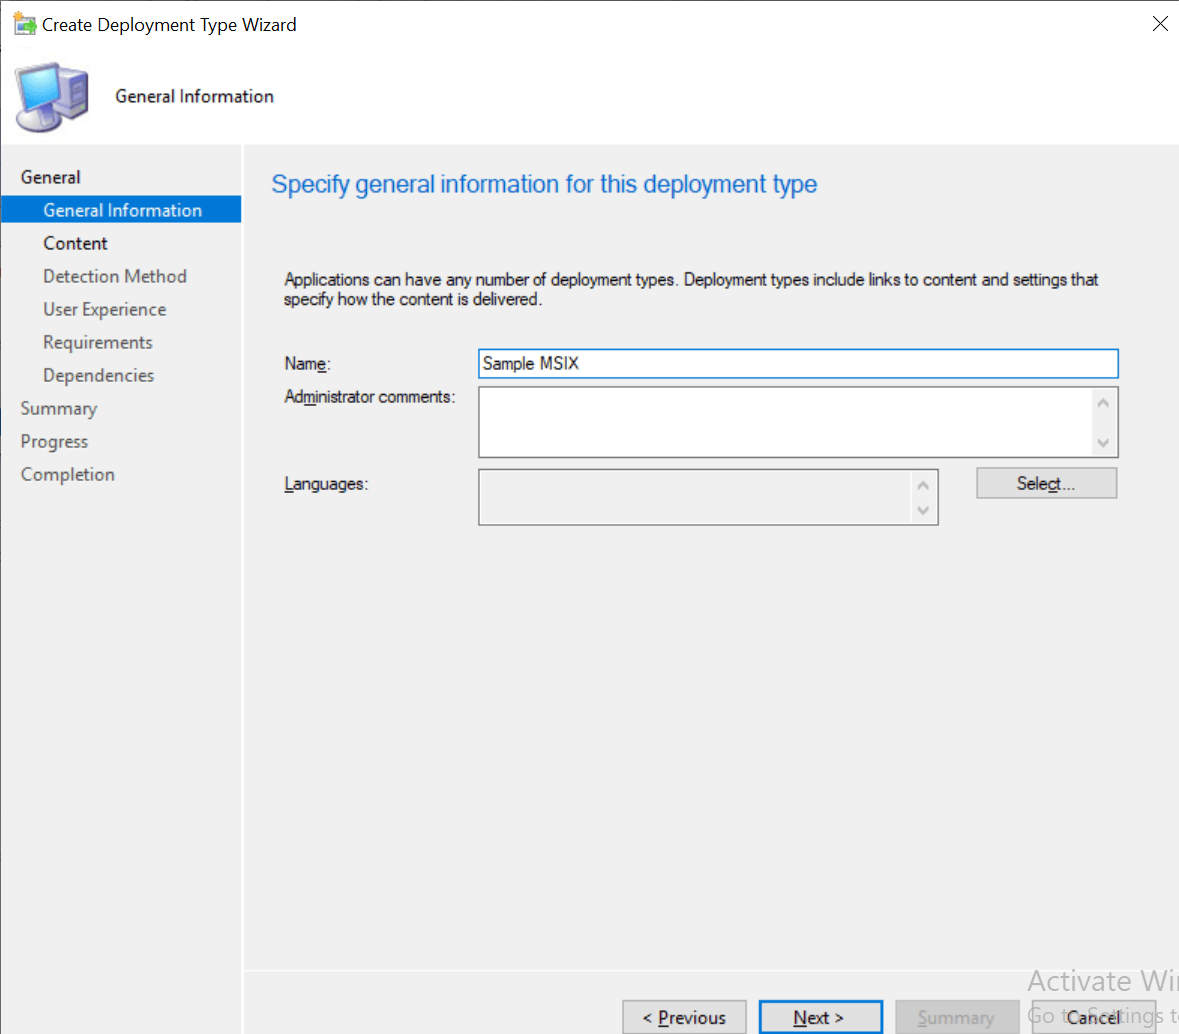
Following that step, write a name for the deployment - in this case we used "Sample MSIX", then click on Next.
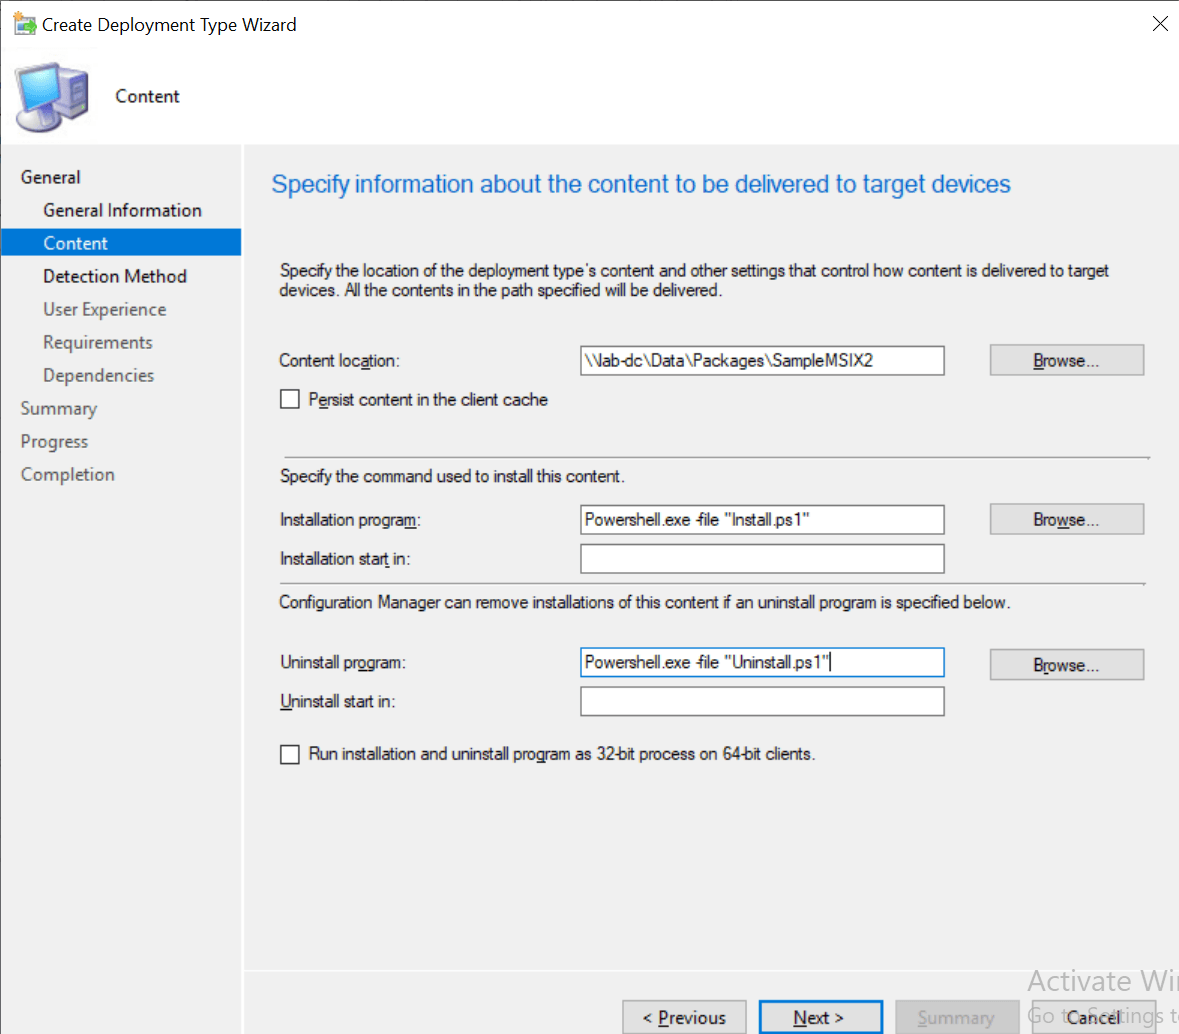
Now, you will reach the Specify information about the content to be delivered to target devices window. Once there, for Content Location click the Browse button to get the source location of the installer package, which should be a UNC path.
For Installation program type
Powershell.exe -file “Install.ps1”
For Uninstall program type
Powershell.exe -file “Uninstall.ps1”
If the execution policy is restricted in your infrastructure, you
have to add -executionpolicy bypass to
the command lines
Click Next.
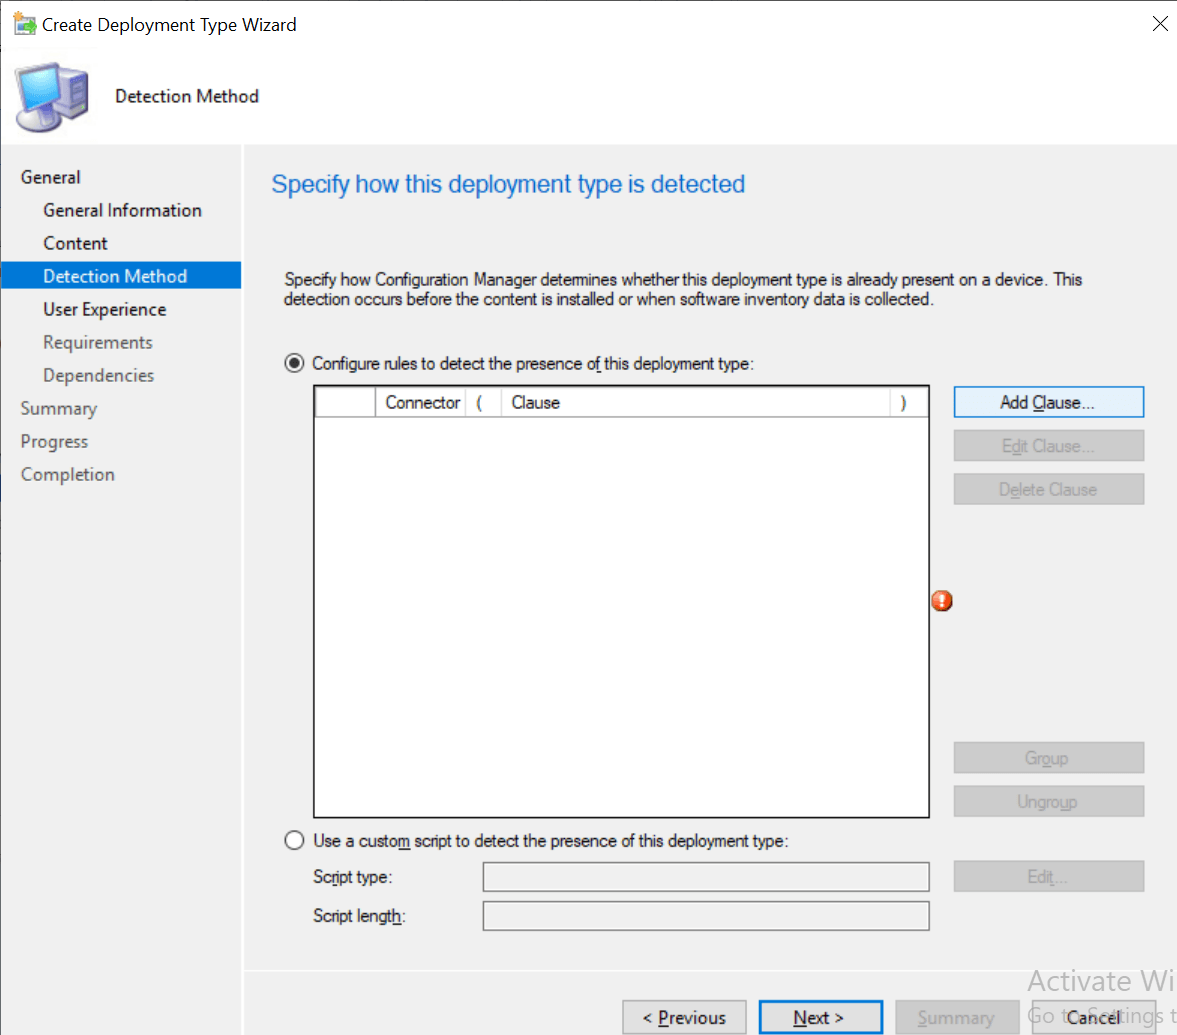
On Specify how this deployment type is detected, click Add Clause.
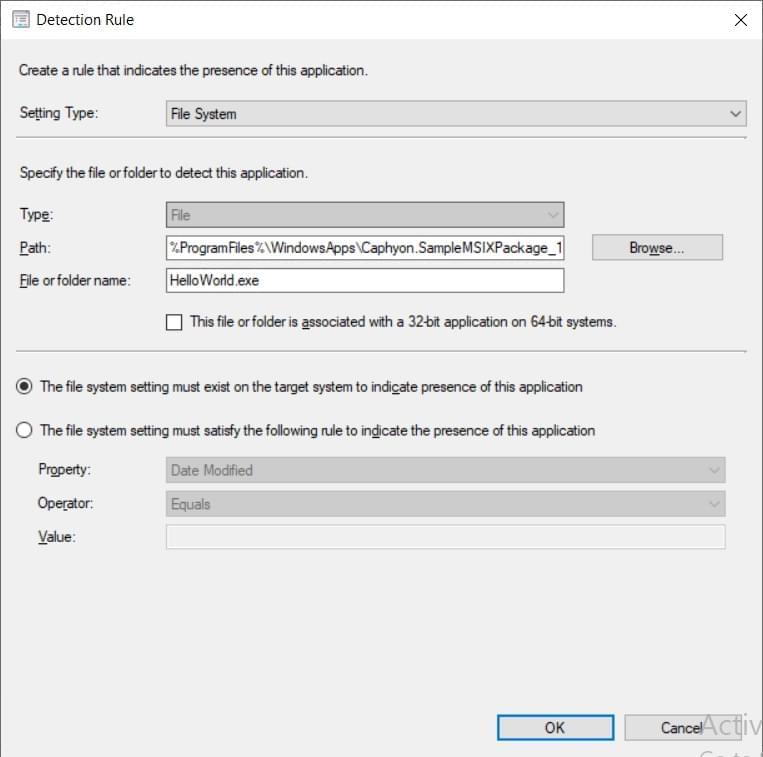
On Detection Rule, we added a file present in our package. Then, click OK.
Click Next.
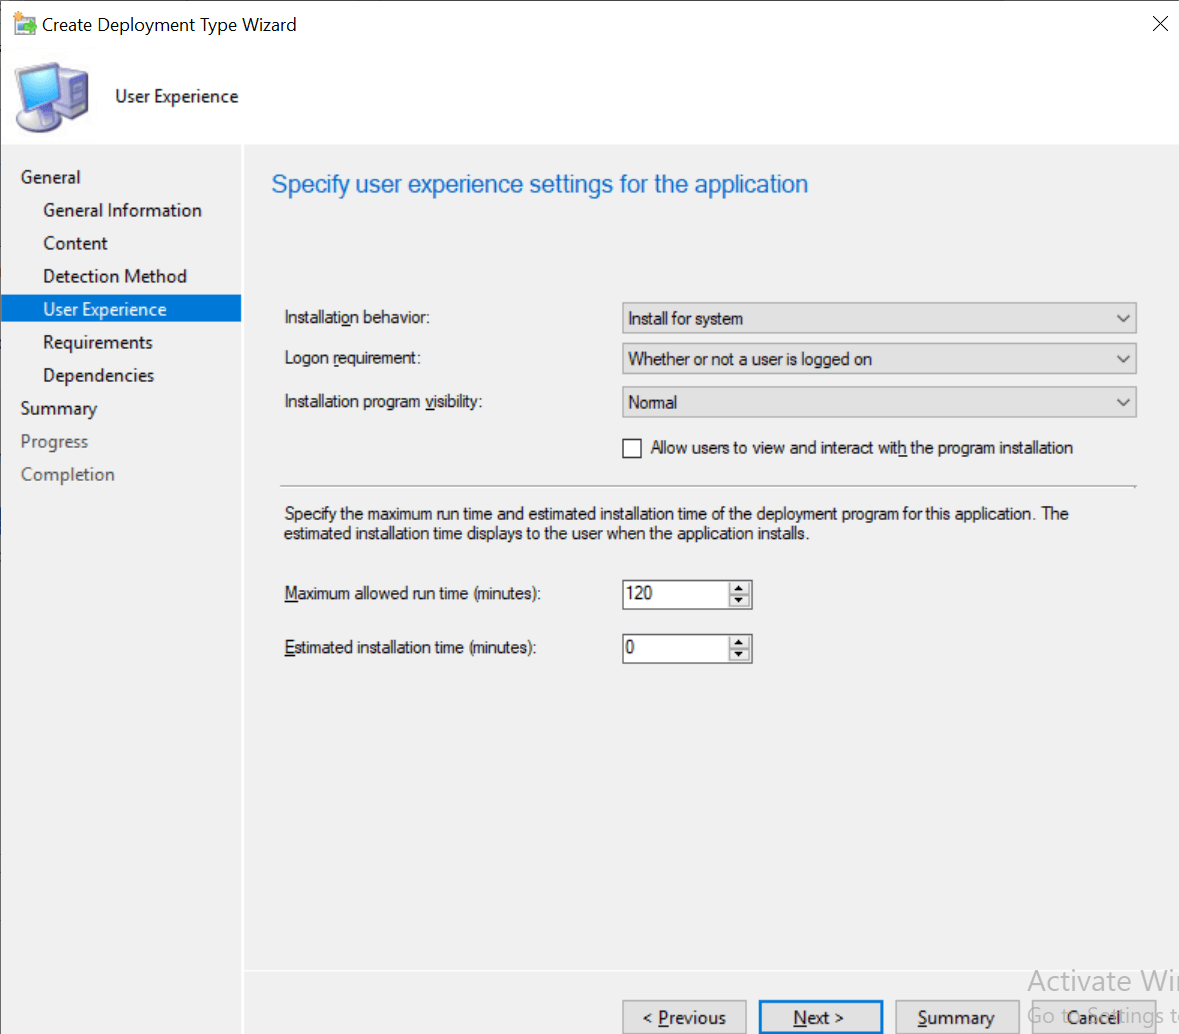
Now in Specify user experience settings for the application, select Install for system from the Installation behavior dropdown, and Logon requirement must be Whether or not a user is logged on.
Click Next until completion, then click Finish.
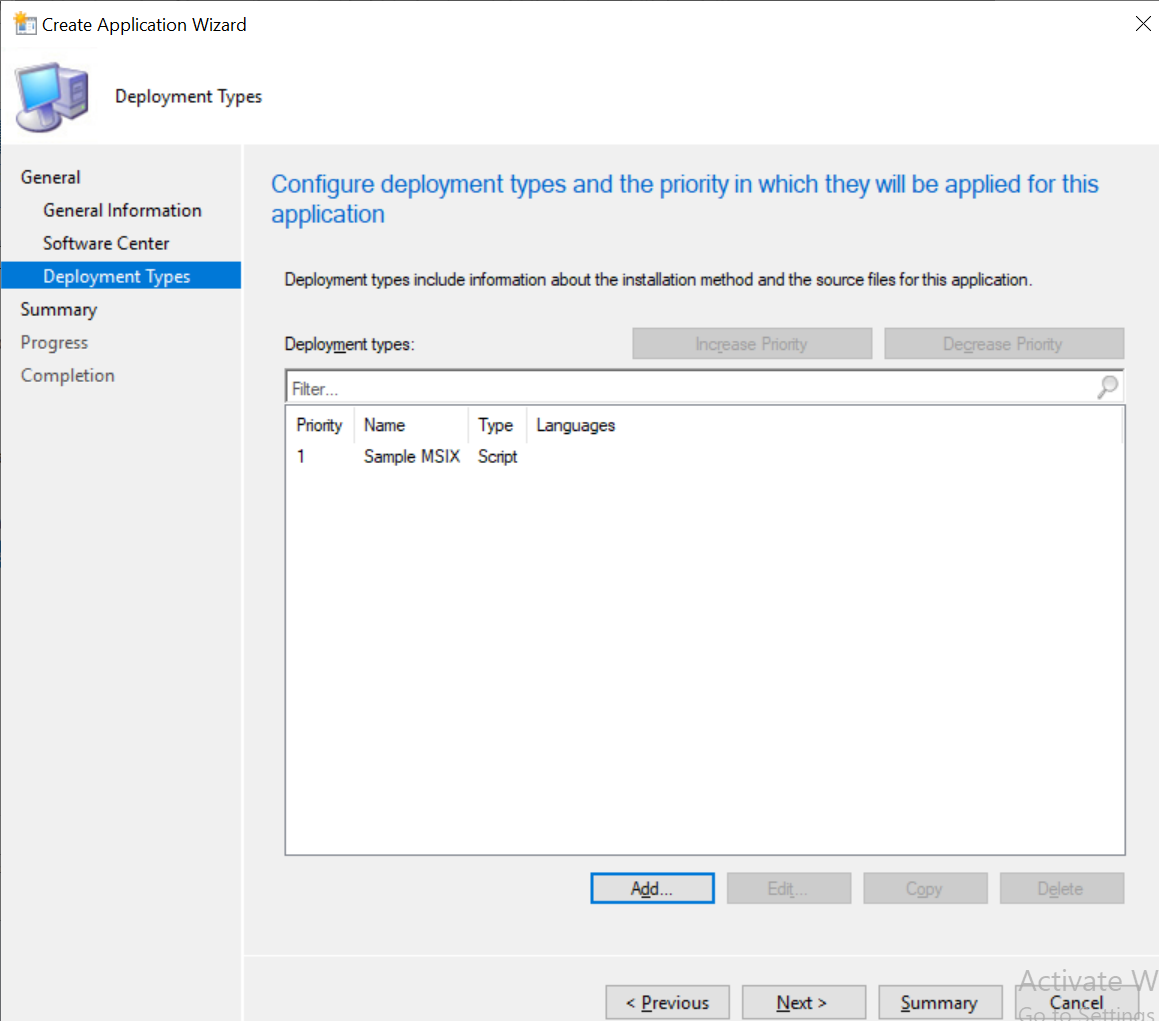
Click Next for the upcoming windows until you reach the end of the wizard.
Now, the application is ready to be distributed and deployed to the clients in the infrastructure.
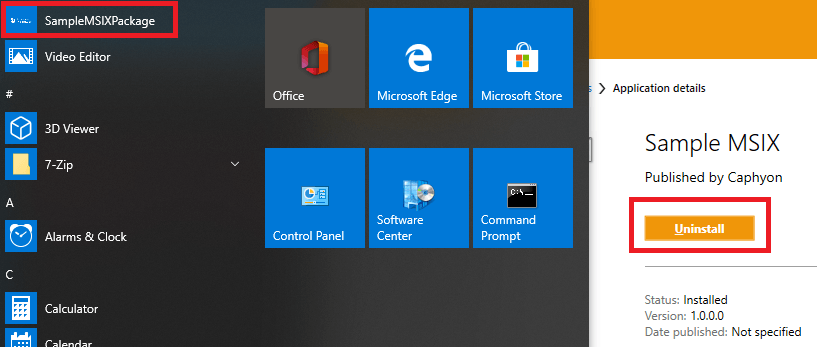
Once we install it via the Software Center, the application appears on all users' machines.
Unlike the native way of deploying MSIX applications that SCCM offers, when a user clicks uninstall with this method of deployment in the Software Center, the application is deleted for all the users.
However, there is an issue regarding this type of deployment. If a user manually uninstalls the application from the Start Menu, the Software Center will still detect it as installed because we are using a file present in the installation directory as a detection method.
When a user clicks uninstall from the Start Menu to a per-machine provisioned MSIX, the application is only unpublished from the user's profile, but it’s not removed from the machine.
When an MSIX application is provisioned per-machine, if a user uninstalls it, provisioning again the same MSIX will not reinstall the application for the user. It’s the way MSIX works.
The Software Center also offers the possibility to have a custom detection method in the form of scripts. You can technically create a simple script like:
$exists = Get-AppPackage -name “Caphyon.SampleMSIXPackage”
If ($exists){
Write-host “Installed”
}
Keep in mind that this detection method will not work for this scenario, because we set the "Installation behavior" to "Install for system".
So SCCM runs this detection script from a system account, not the user, and the script returns that the application is still installed. This behaviour is expected, because the user only uninstalled the application on his end and doesn’t have a way to know if the application is provisioned for everybody.
There are two ways to get the application back on the user's side, either by uninstalling it for all users and installing it again, or by creating a separate application in the native way that will target the affected user.
Take into consideration that there's an impact on the reporting, because the application appears as installed due to the detection method, so you can't know which users have it and which don't.
To extract a report with MSIX applications installed on the users' machines, you would have to use the SCCM pre-built in report “All Windows Apps”, or use the SMS_G_System_WINDOWS8_APPLICATION WMI class.
The Packages Model
With the same method for provisioning an MSIX per-machine, using a set of PowerShell cmdlets, you can try the packages model from SCCM.
The main advantage of using the Packages model is that it doesn’t require any extra detection method, like the Applications model does, which makes the PowerShell script even easier.
The only thing to note is that it requires two programs to be created, one for installation and one for uninstallation. While it’s not the end of the world, it does make things a bit more complicated for the end user who looks in Software Center and has to search for the install or uninstall programs.
The same issue applies when a user clicks uninstall from the Start Menu to a per-machine provisioned MSIX. The application is only unpublished from the user's profile, but it’s not removed from the machine.
To reinstall the application on a user's machine, you need a separate program that installs the application per-user.
For the moment, let’s only focus on the installation program.
Create a simple PowerShell script:
$scriptDir = Split-Path -Path $MyInvocation.MyCommand.Definition -Parent
$InstallLoc = $scriptDir + "\createprocessasuser-x64.msix"
Add-AppProvisionedPackage -online -packagepath $InstallLoc -SkipLicense
Next, follow these steps in SCCM to create a package and a program.
Navigate to the Software Library Workspace > Application Management > Packages Right-click Packages and select Create Package.
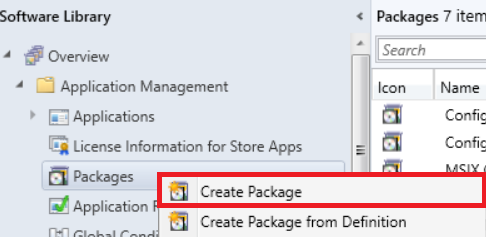
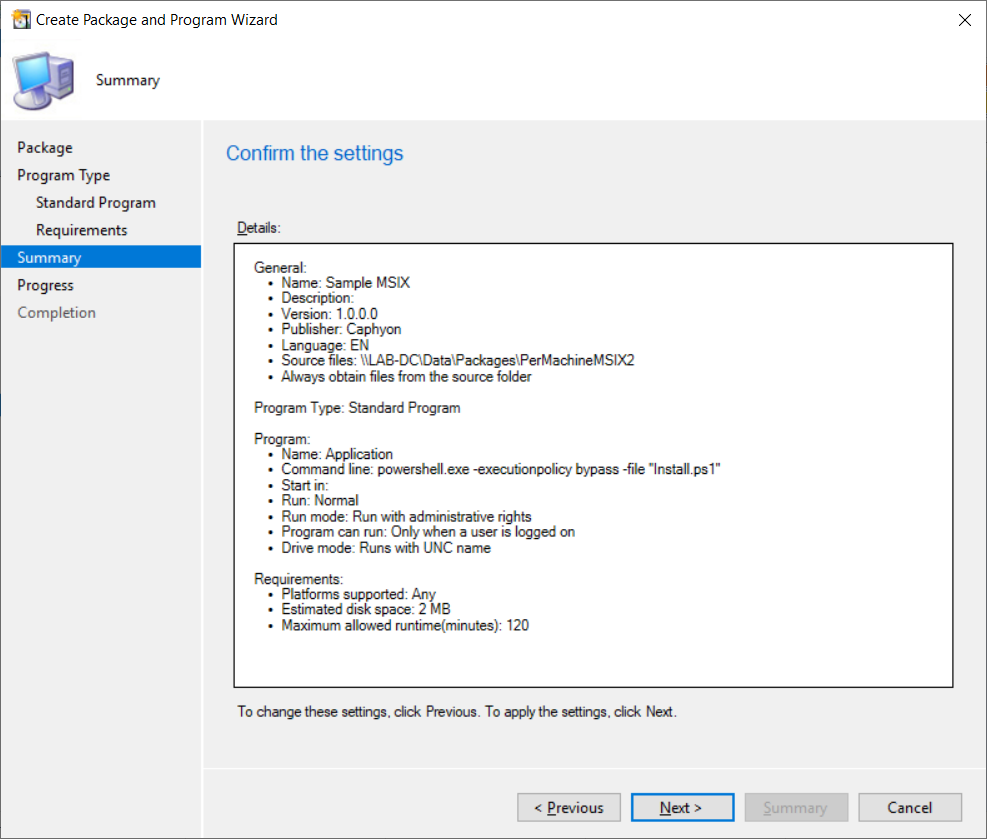
In the Create Package and Program Wizard, type the Name of the package, Description, Manufacturer, Version and Language.

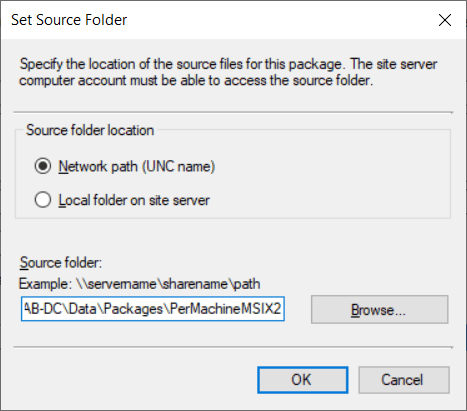
Check This package contains source files and click Browse. In the window popup, Browse to the location of the MSIX package.
Click OK and Next.
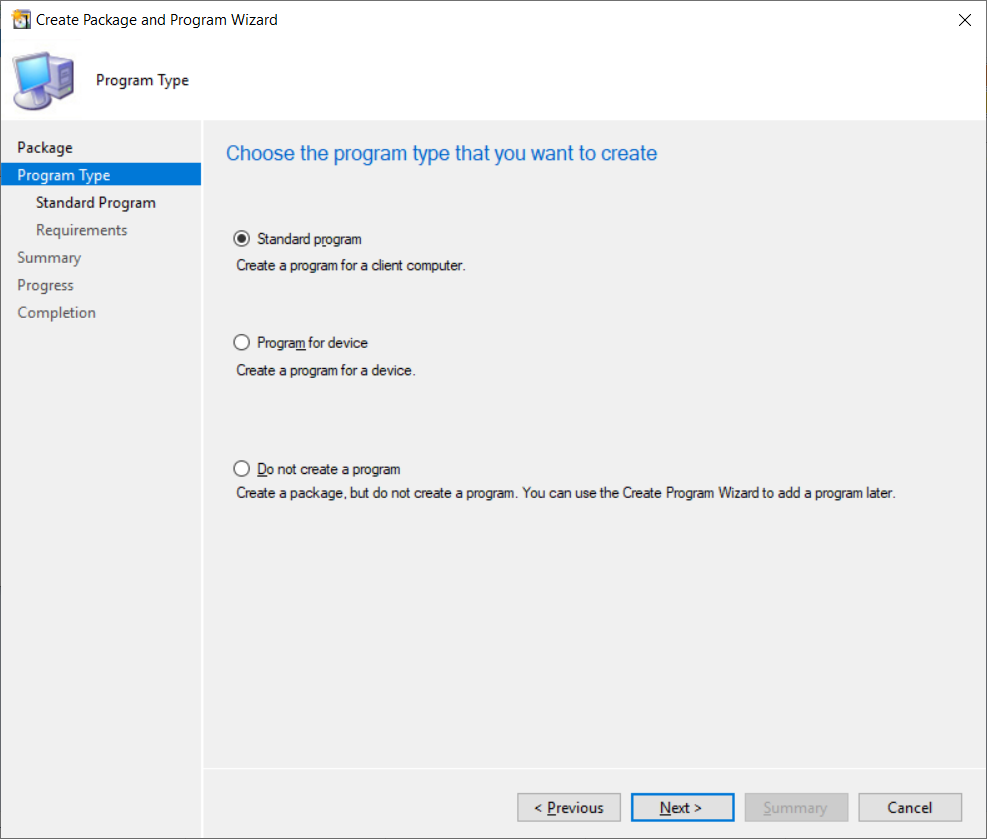
Select Standard Program and click Next.
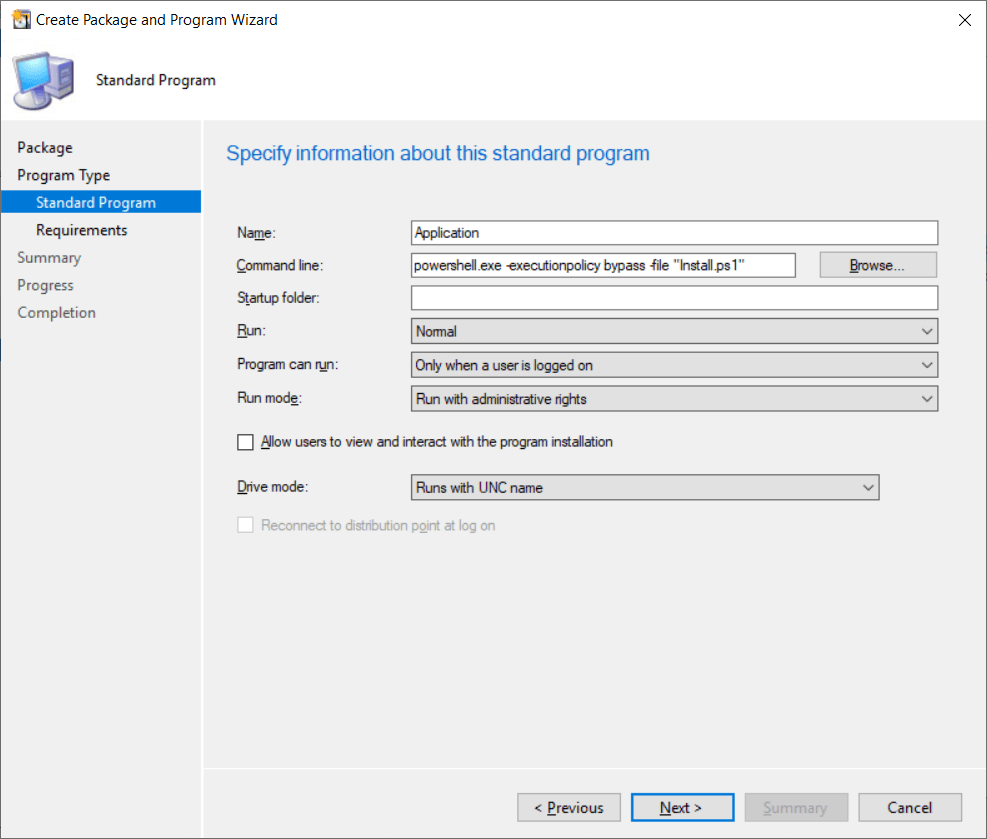
In this step, you will configure the details of the program to deploy. I suggest you include a keyword in the name, such as "Installation", to make it easier for the users to find and recognize it.
Next, type the following Command line:
Powershell.exe -executionpolicy bypass -file “Install.ps1”
Configure Run as Normal, set the option Program can run to Whether or not a user is logged in, and set Run mode to Run with administrative rights.
Leave everything else as it is and click Next.
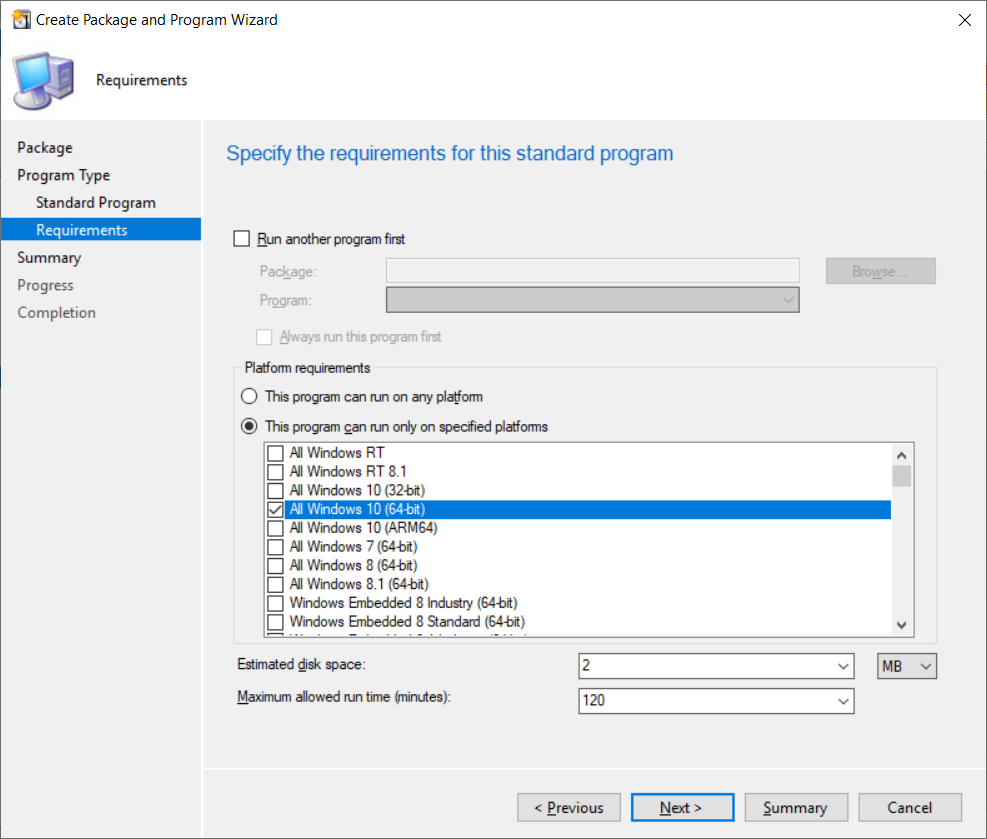
Check This program can only run on specified platforms and select Windows 10 only.
If you know what kind of MSIX package this is, you can configure it to run only on Windows 10 (64-bit) clients like presented below.
Click Next.
Click Next.
Click Close.
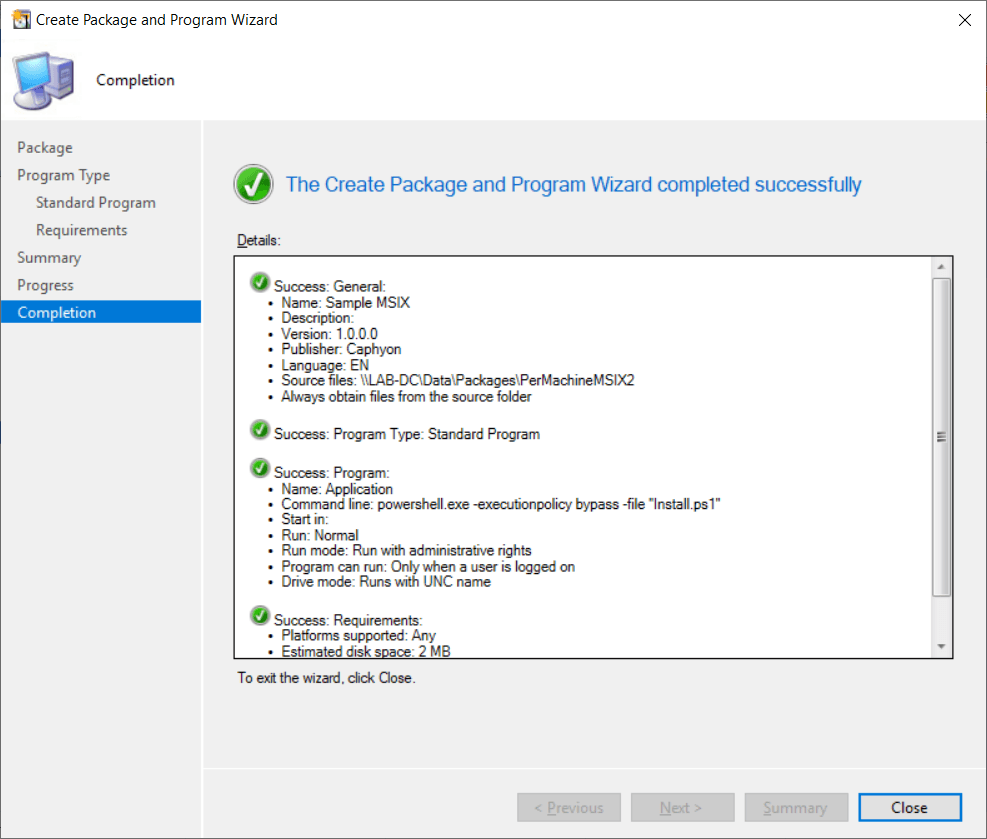
Once the package and program have been created, distribute the content on the distribution points and deploy the package to the clients.
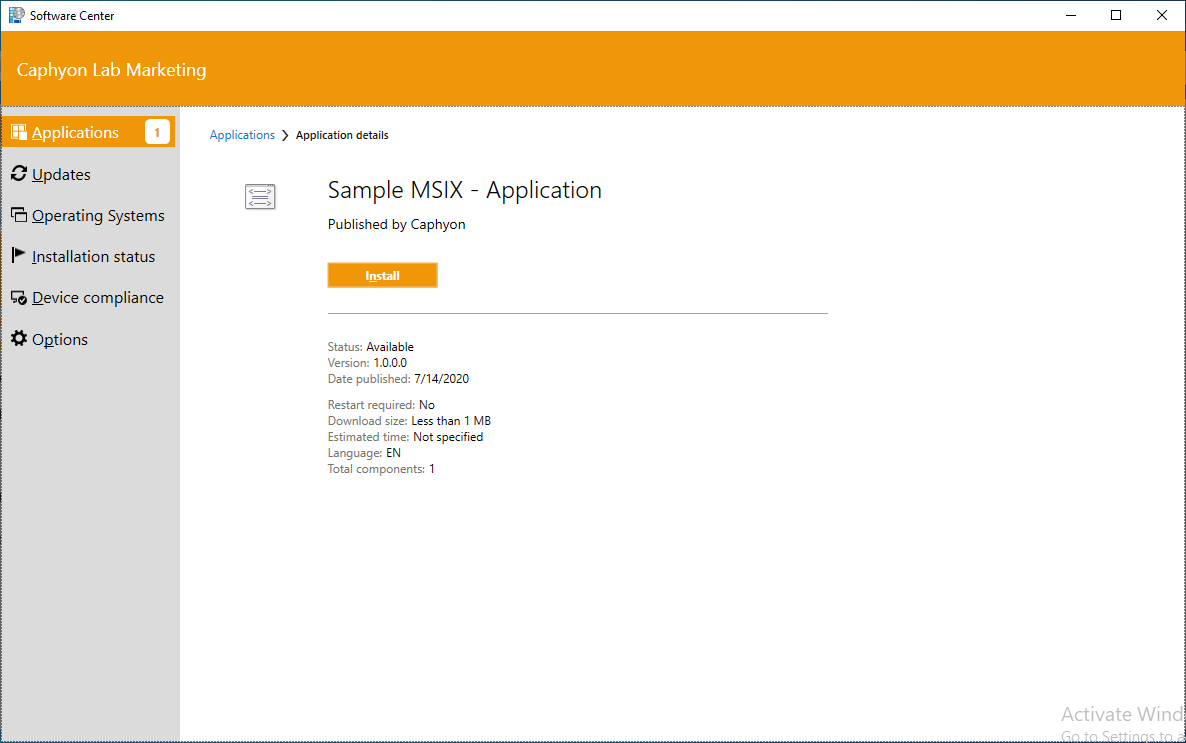
When the user navigates to the Software Center, he will find the package there. Notice how the Packages model does not let you choose icons, unlike the Applications model.
Once the user clicks Install, the package will be downloaded and the program will run.
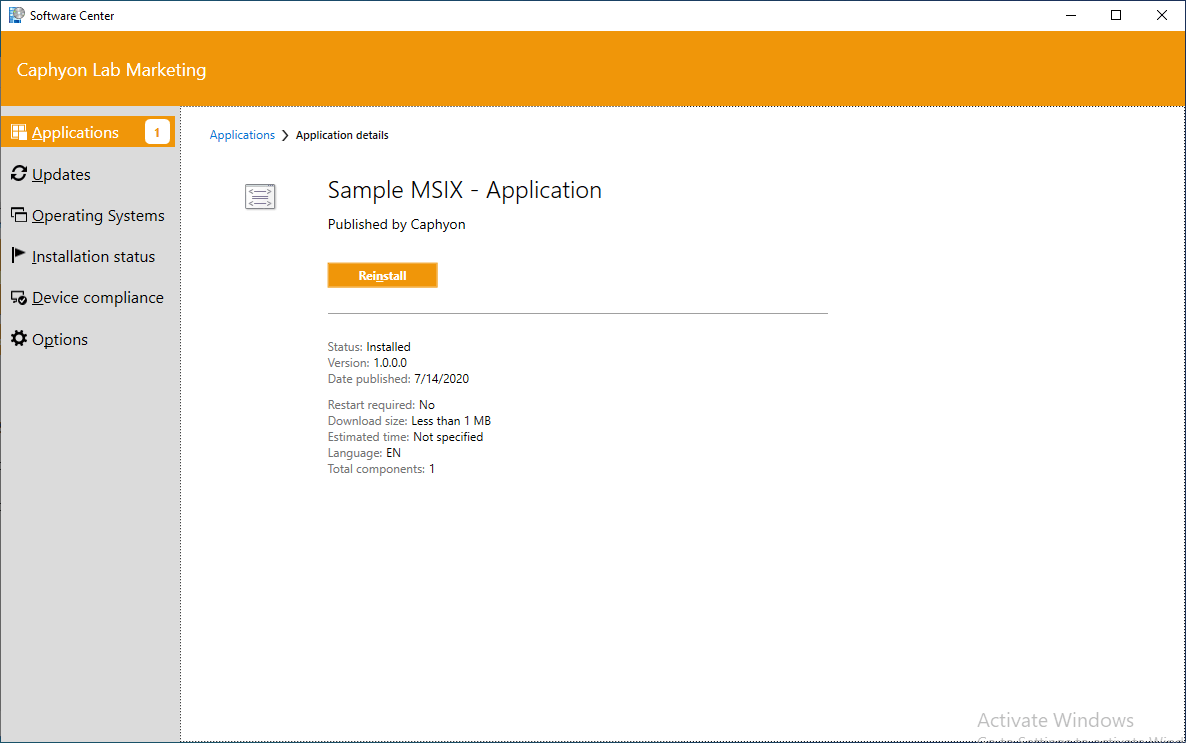
You will see an option to Reinstall the package in the Software Center, but note that MSIX limitations on provisioned packages make the applications impossible to republish on the users' profiles once these are uninstalled
The Uninstall button is not present either.
The Packages model from SCCM is certainly not my first choice for package deployment in the Software Center, but is a good and easy way to add provisioned packages in Task Sequences.
Conclusion
As we've seen, the different deployment options have their strengths and weaknesses.
The native way of deploying MSIX packages with SCCM using the Applications model is easy, doesn't require almost any additional details, and is great for reporting. However, it lacks the option to uninstall it from all users via the Software Center.
The alternative way with PowerShell cmdlets does the job in terms of provisioning and removing the msix package per-machine compared to the native way, but not without some issues, as we've seen.
The good part with provisioned packages via the PowerShell cmdlets is that it can be used in both Applications model and Packages model in SCCM, giving more freedom to the IT Pro.
The main drawback is that if a user manually uninstalls the MSIX package through the Start Menu or the Add or Remove Programs, the Software Center does not give him the option to reinstall it. The only choice to sort this out is through uninstalling the application from all the users' machines and reinstalling it.
At the end of the day, it's your choice to use what works best in your situation.
