How To Package Adobe Reader DC for AVD MSIX AppAttach
Adobe Reader DC (Document Cloud) is one of the most popular tools to manage PDFs. Adobe Reader DC installation is an executable (EXE) file.
However, IT Professionals are aware that this executable contains a base MSI and a Patch that updates the installation to the latest version. You can perform changes on the installation with the Adobe Customization Wizard, which outputs an MST file.
In this article, we'll see how to repackage Adobe Reader DC and make it ready for Azure Virtual Desktop MSIX App Attach.
How to Repackage Adobe Reader DC?
The first thing we need to do is repackage the installation into an MSIX. For this scenario, we’ll be using Advanced Installer, however, you can use any tool of your choice that allows you to create an MSIX package.
Advanced Installer’s Repackager allows you to convert legacy installations into MSIX, MSI, APP-V all from one single project.
Give it a try through our 30-day full featured free trial.
To create an MSIX package in Advanced Installer, you need to follow these steps:
1. Open the Advanced Installer Repackager and click on Capture Setup.
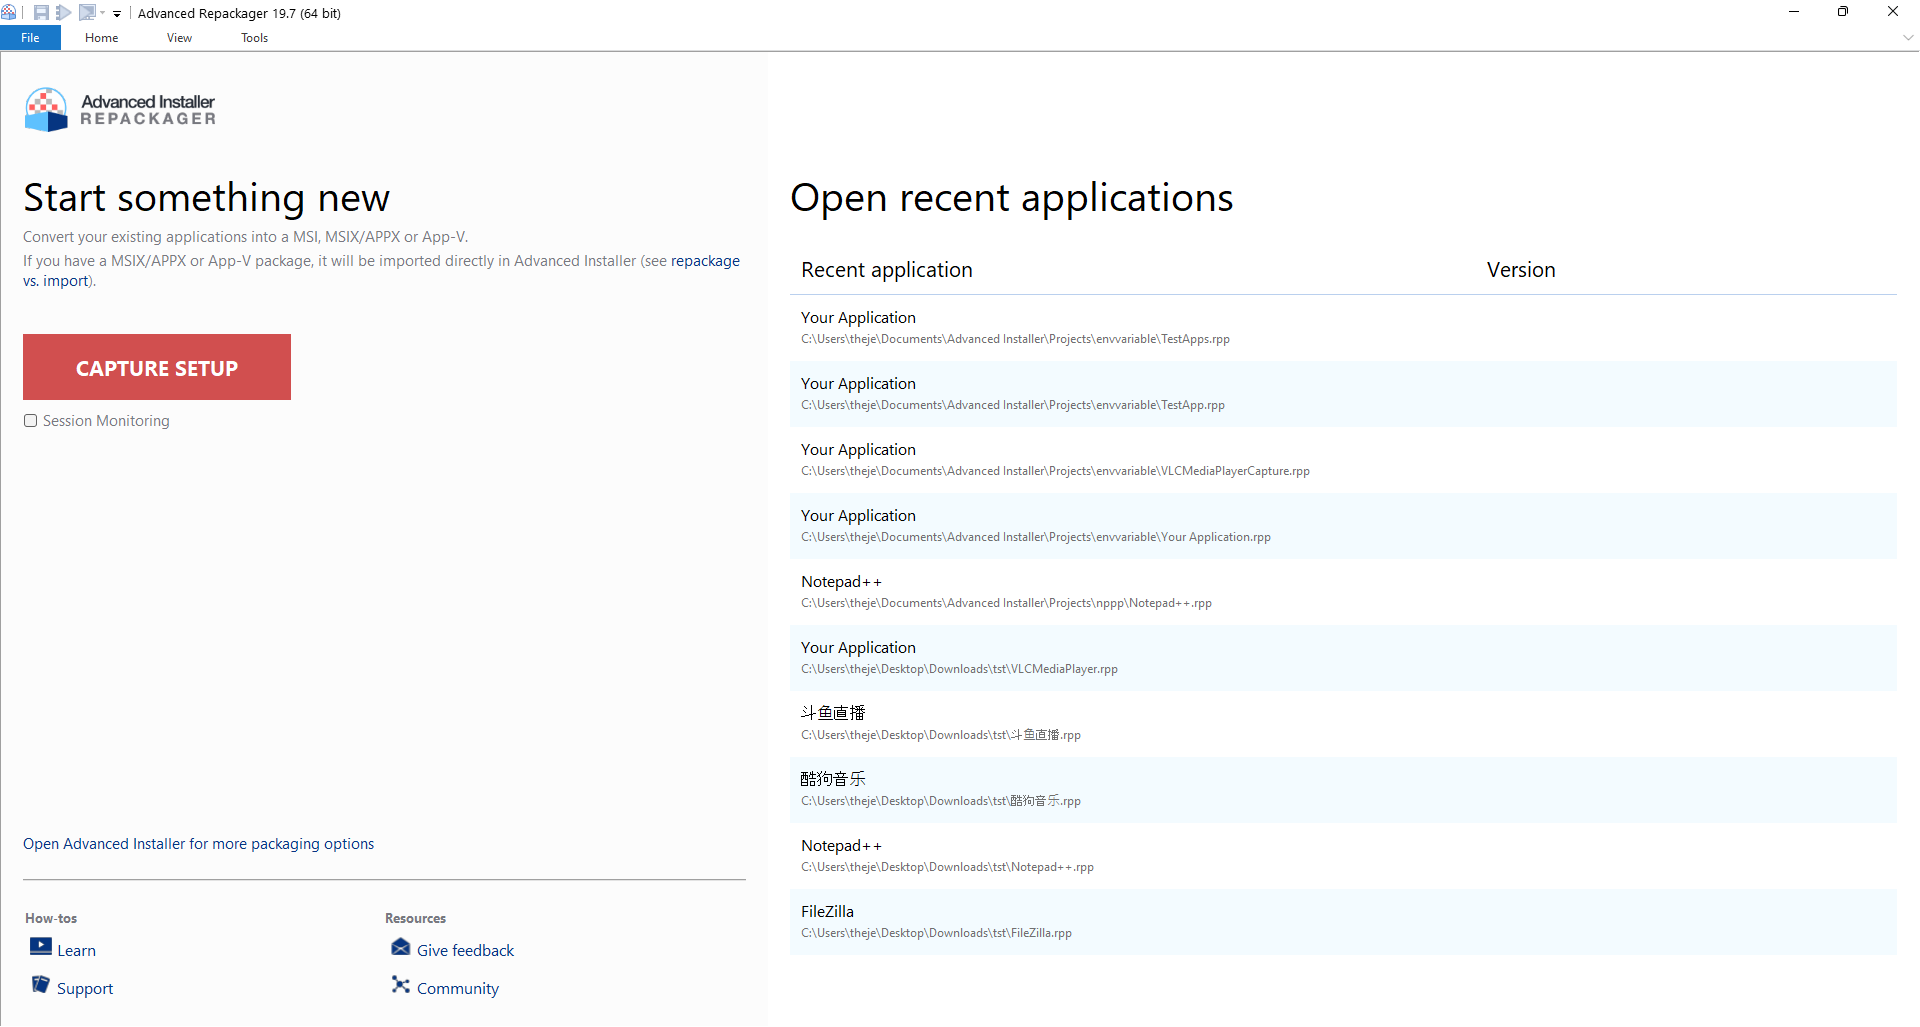
2. Select the Adobe Reader DC installer and paste the following command line:
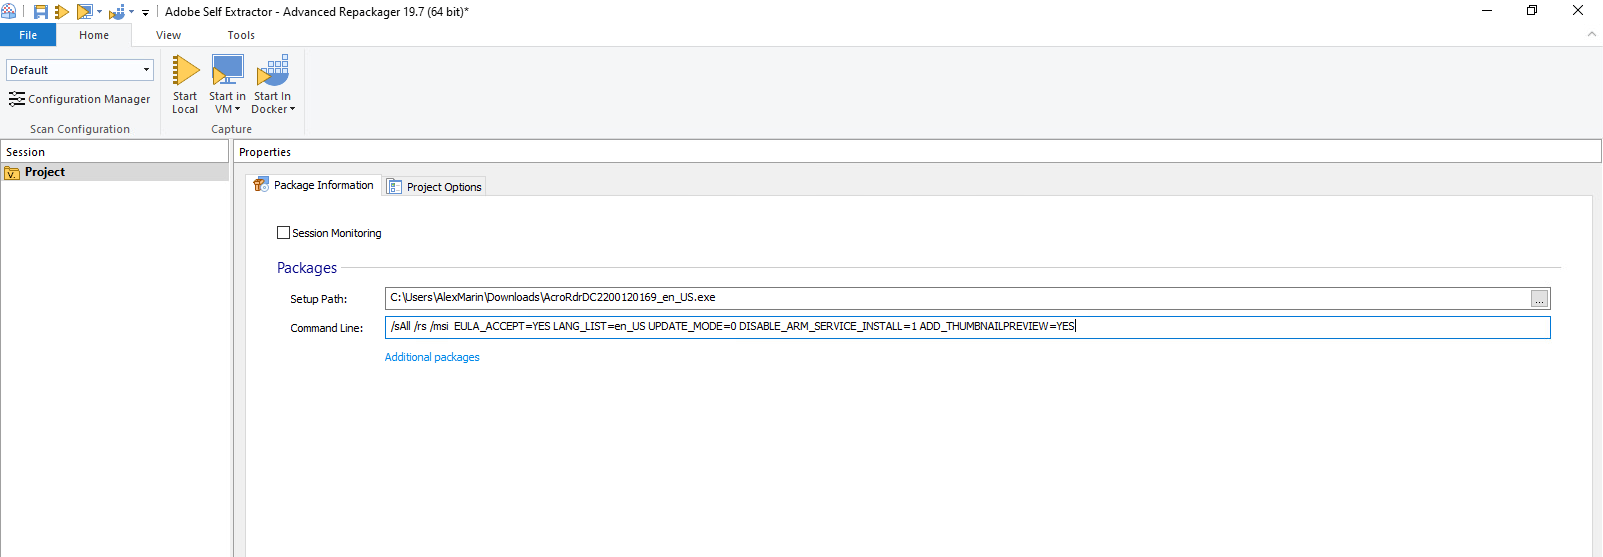
/sAll /rs /msi EULA_ACCEPT=YES LANG_LIST=en_US UPDATE_MODE=0 DISABLE_ARM_SERVICE_INSTALL=1 ADD_THUMBNAILPREVIEW=YES
This command line does the following:
- /sAll : It runs installer in silent mode
- /rs : Reboot Suppress. The Setup.exe will not initiate reboot even if it is required
- /msi : It identifies the portion of CmdLine for additional MSIEXEC command line parameters. Everything following /msi is passed to MSIEXEC without analyzing and without any changes
- EULA_ACCEPT=Yes : It accepts the EULA agreement
- LANG_LIST=en_US : This property specifies the language to English (US)
- UPDATE_MODE=0 : If updates have not been disabled, use this property during the initial installs and patches to control how the product updates. 0 means manually check for and install updates
- DISABLE_ARM_SERVICE_INSTALL=1 : This property disables the installation of ARMsvc.exe as part of the Updater which enables silent and automatic updates on Windows 7 and Windows Vista machines. A value of 1 prevents the installation of the ARM service on Windows.
- ADD_THUMBNAILPREVIEW=YES : It installs and uninstalls the Windows Explorer thumbnail preview handler. While this property can only be used during an initial install, we can run the ThumbnailPreviewHandler property anytime after installation.
3. Choose between Start Local, Start in VM, or Start in Docker according to your setup.
4. The repackaging operation will now begin.
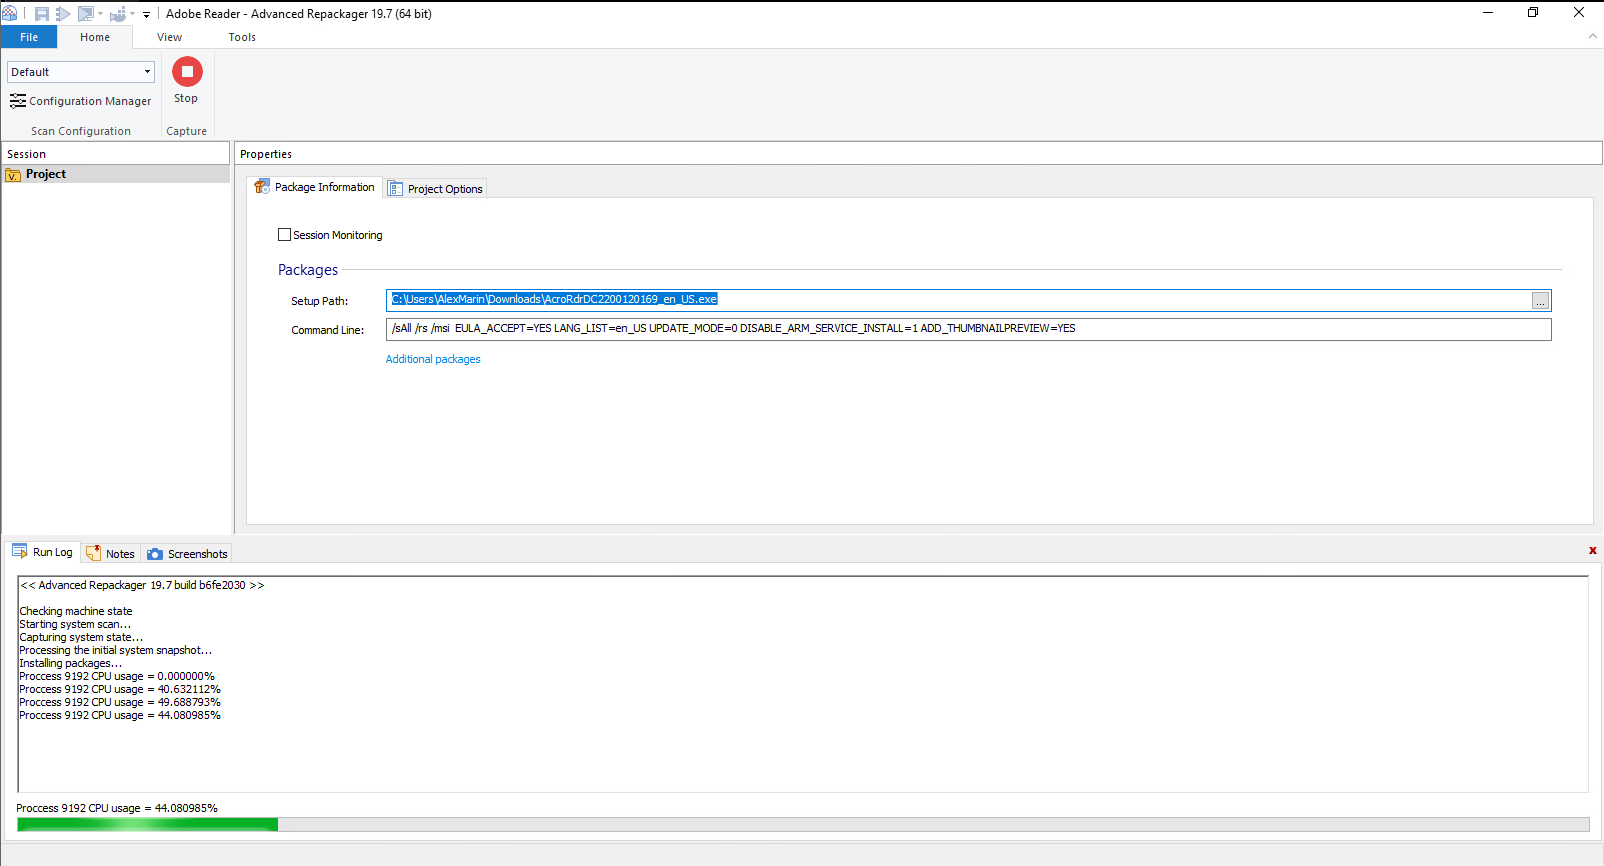
5. At the end of the session, select MSIX/APPX Package and click on Open in Advanced Installer.
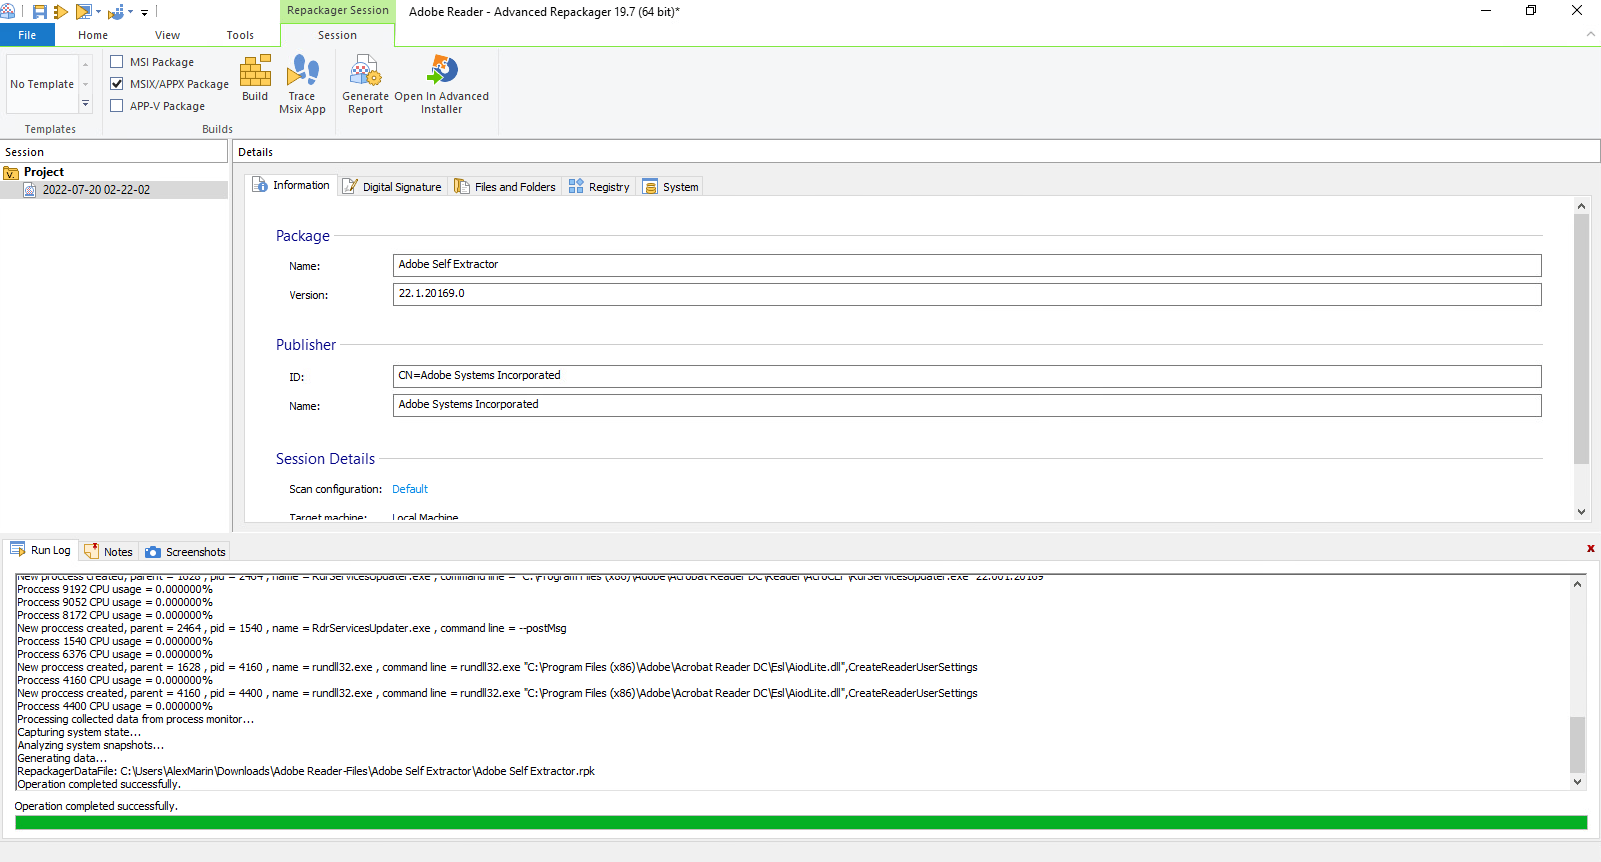
That’s it! Now that we've repackaged our installation into an MSIX, we’ll go through some additional steps so you can build and install your MSIX package.
What should we do after repackaging?/ Post-Repackaging Steps You Should Take
Now that the repackaging process is finished and you have opened the project in Advanced Installer, we need to make sure Adobe Reader DC functions properly as an MSIX package.
Here are the steps we need to take:
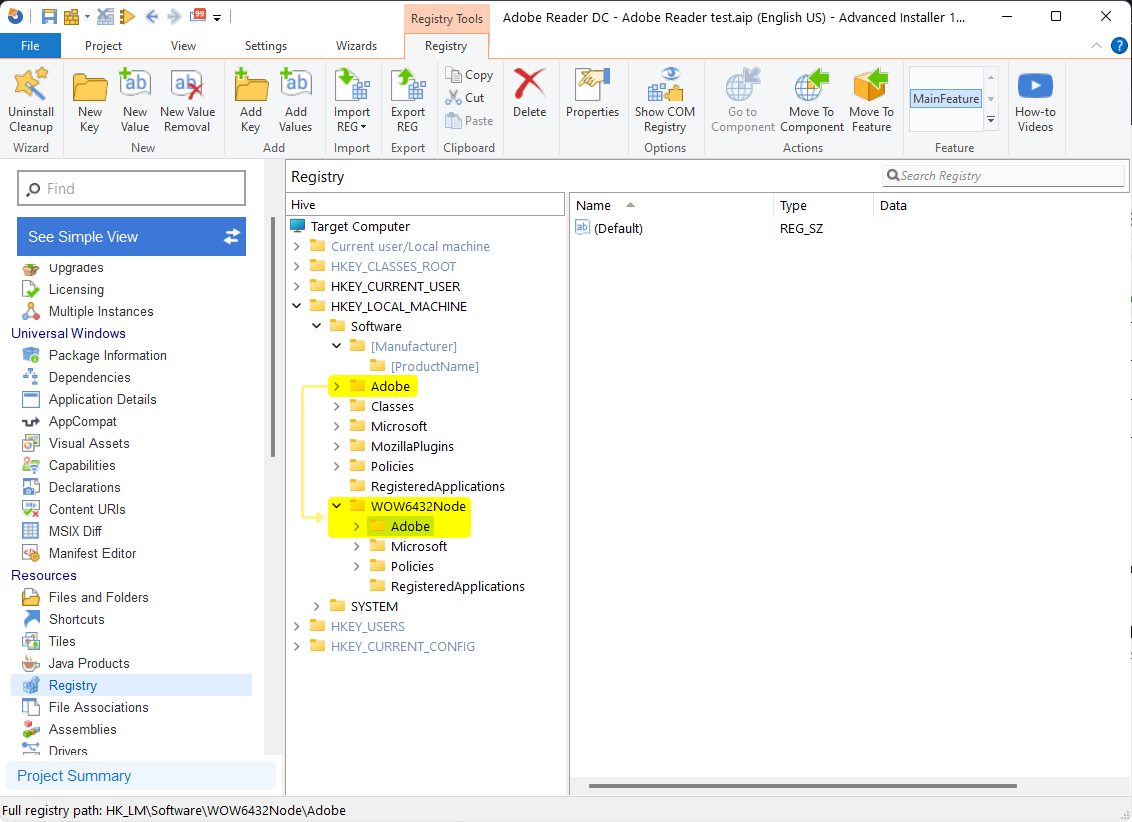
1. We need to navigate to the Registry page and copy the Adobe hive. You will find the Adobe hive under HKLM/Software to HKLM/Software/WOW6432Node.
This issue shows for 64bit apps that also need 32bit registry hive information.
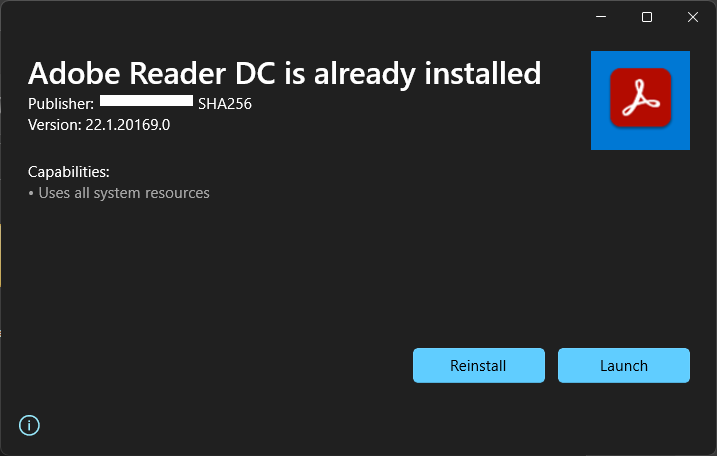
2. We need to remove the Adobe Reader DC incompatibility message. It is prompted when it detects that the execution is happening inside an AppContainer:

To remove the message, add the bEnableProtectedModeAppContainer registry key under HKEY_LOCAL_MACHINE\SOFTWARE\Policies\Adobe\Acrobat Reader\DC\FeatureLockDown:

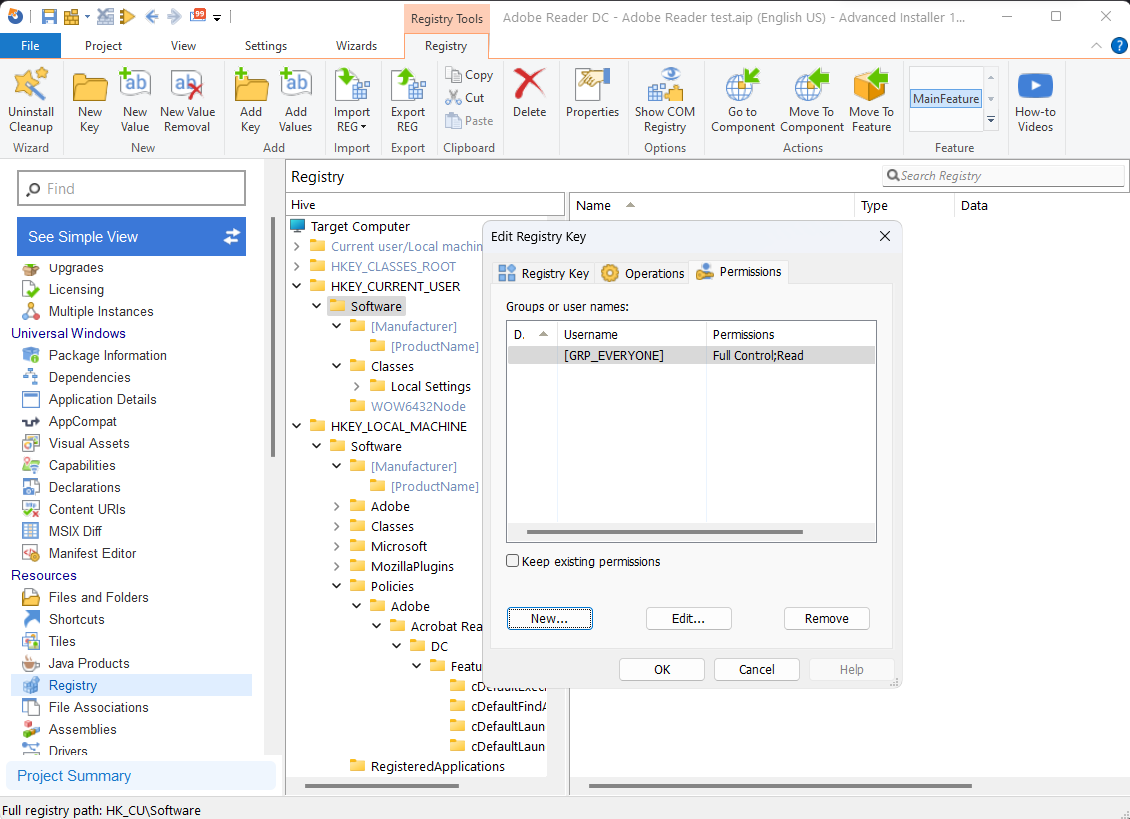
3. Once we tackle that message removal, we need to solve another issue. This one occurs when the packaged app tries to save the user's preferences to the virtual registry (user.dat) inside the container. To fix this, right click on Software under HKEY_CURRENT_USER hive and select Properties.
4. In the new window that pops-up, navigate to the Permissions tab and click on New. Under Username, paste [GRP_EVERYONE] and select Full Control and Read.
At the end, it should look something like this:
5. Now, we can't forget to navigate to the Digital Signature Page and sign the MSIX package. Once all the previous steps are completed, we can build and install the MSIX package.
How to create a VHDX image?
To use Azure Virtual Desktop MSIX App Attach, you will need a VHD, VHDX or CIM file. To create a VHDX image from an MSIX package, we can use the MSIXMGR tool.
Once you download the tool, extract it to your preferred location, in our case C:\AVD.
Next, run a PowerShell script with Admin rights to create the VHDX. Here's the script:
# size of the vhdx file
$vhdSize = 1300
# folder that will created inside the vhdx (You can get this name from the manifest file or via Get-AppPackage *adobe*)
$appParentFolder = "AdobeReaderDC"
# vhdx destination. Notice that I am using the appParentalFolder to set the name
$vhdFullPath = "C:\avd\VHDS\$appParentFolder.vhdx"
#application package name that can be obtained in the appxmanifest.xml or Get-AppPackage *adobe*  | select PackageFullName
$packageName = "AdobeSystemsIncorporated.AdobeSelfExtractor_22.1.20169.0_x64__r21n0w1rc5s2y"
# msix file
$msixPath = "C:\msix\avd\msix\AdobeReaderDC_1.0.1.0_x64__kz5d2ck10dqg4_1.msix"
#Expand the MSIX to VHDX
cd "C:\avd\x64\"
.\msixmgr.exe -Unpack -packagePath $msixPath `
-destination $vhdFullPath `
-applyacls -create -vhdsize $vhdSize -filetype "vhdx" -rootDirectory $appParentFolder
What does this script do?We are basically using the standard MSIXMGR tool commands to build the VHDX. As you can see in the code we are defining:
- the place where our tool is
- where the MSIX package can be found
- where to output the VHDX
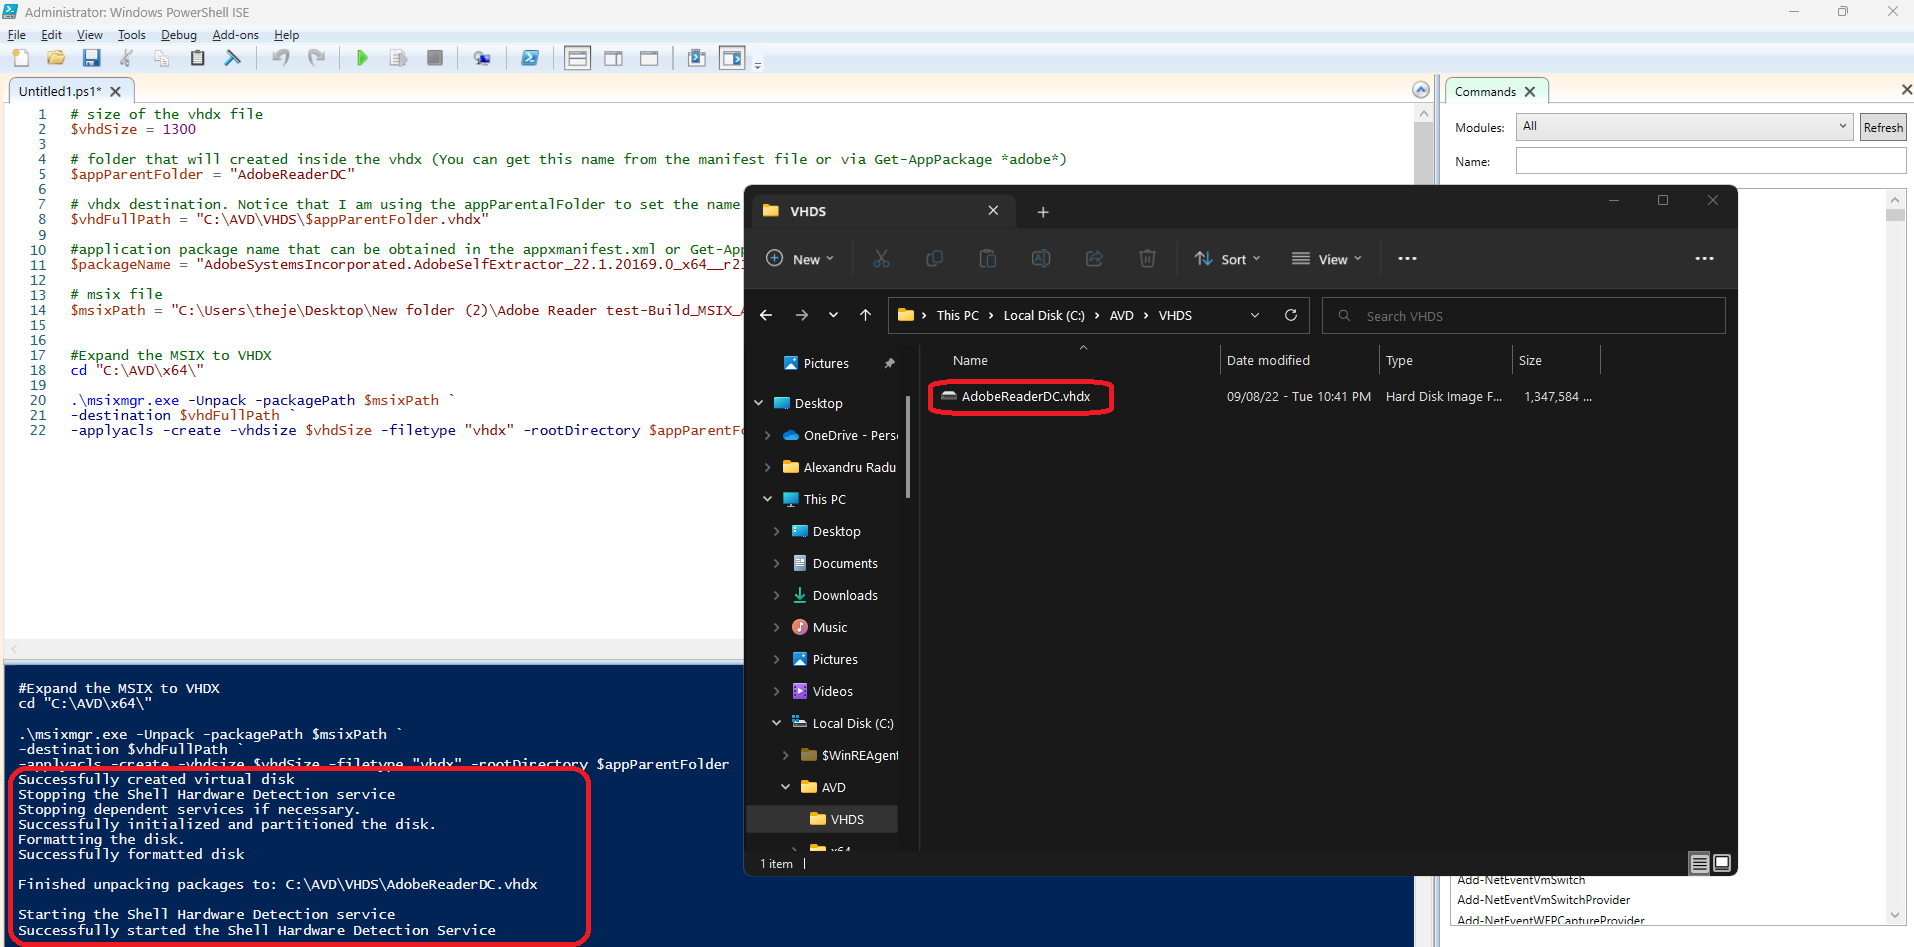
The result should look like this:
Conclusion
After following these steps, you now have a packaged Adobe Reader DC application that you can use for AVD MSIX AppAttach.
Let us know if this was helpful. Also, please comment below on any topic you'd like us to cover.
Subscribe to Our Newsletter
Sign up for free and be the first to receive the latest news, videos, exclusive How-Tos, and guides from Advanced Installer.