32-bit vs. 64-bit Office Add-ins Installation: Step-by-Step Guide
Microsoft Office introduced add-ins, replacing the old COM plugins for developers. Now, developers create applications using Office Add-Ins, expanding the range of possibilities and features within the operating system.
Microsoft Office is widely used in enterprise environments. There is also a growing need for solutions that extend Office applications and interact with content in Office documents:Word documents, Excel spreadsheets, PowerPoint presentations, etc.
Office is available in two formats: 32-bit (x86) and 64-bit (x64), and Office add-ins can be installed depending on the format being used, which entails different installation parameters for each.
In this article, we will go through this common scenario together and see how to install an Office add-in using the Advanced Installer based on Office bitness.
What are the prerequisites to installing an Office Add-In?
Before we get started on installing an Office add-in based on Office bitness, let's first see what we need. There are two main prerequisites:
- Advanced Installer Professional Edition or a higher version.
- The specific Office Add-In you wish to install.
In this article, we'll use a custom-created Word Add-In (WordAddInSample - VSTO.zip) as an example. By following the step-by-step guide, you can create the Office Add-In installer for your own Add-In.
How to Create an Office Add-In Installer: A Step-by-Step Guide
Once we have everything ready, we can create our installer.
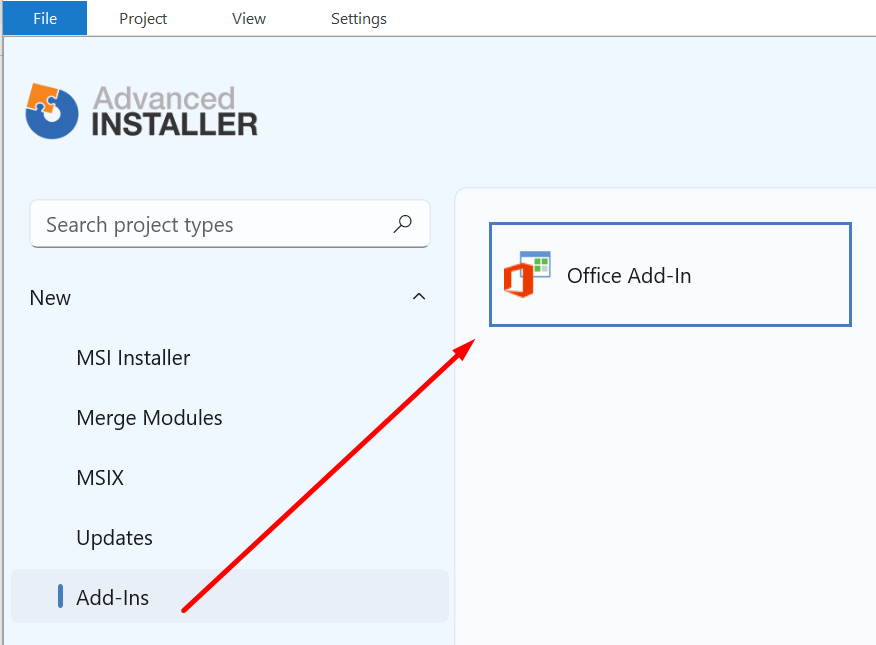
1. Launch Advanced Installer, navigate to the "Add-Ins" tab under "Project Category", and double-click on "Office Add-In". A wizard will appear to guide you through the remaining steps.
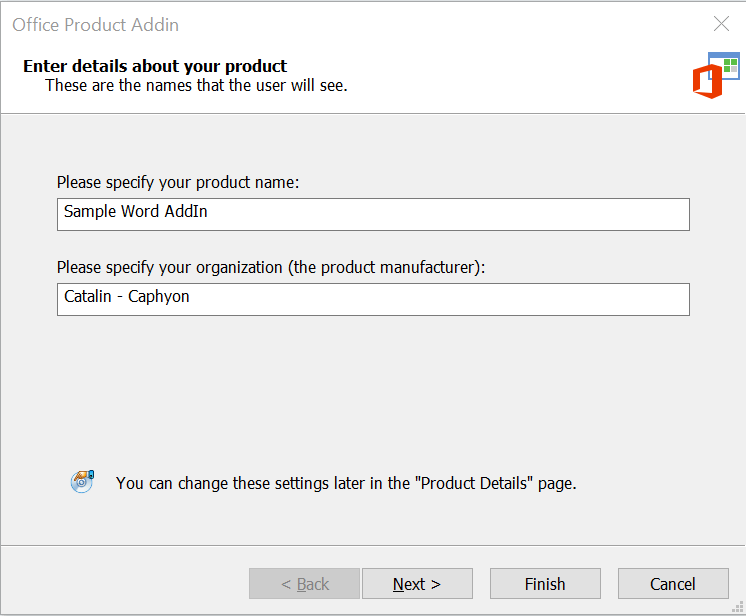
2. Provide the Office Add-in details, such as the Product Name and Product Manufacturer.
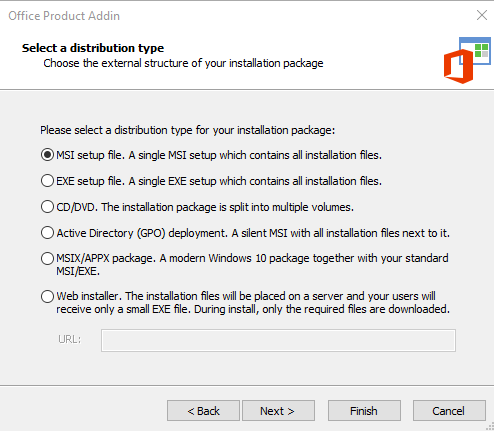
3. Select the suitable package type (e.g., MSI, EXE, etc.).
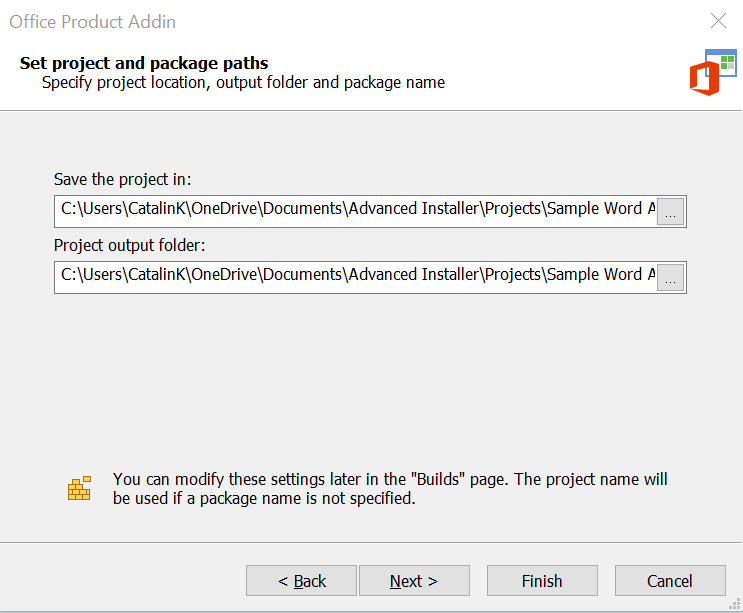
4. Define the project file location and the output folder.
5. Choose the desired Add-in type for deployment. In this example, we'll select "Deploy a VSTO Office Add-In" since the Office Add-in was created with Visual Studio Tools for Office (VSTO).

6. Choose the location for the Add-In resource files. In this example, we'll import files from the Visual Studio Solution.

7. Choose the project configuration to import. In this example, we'll import the "Debug" configuration since it contains the resource files.
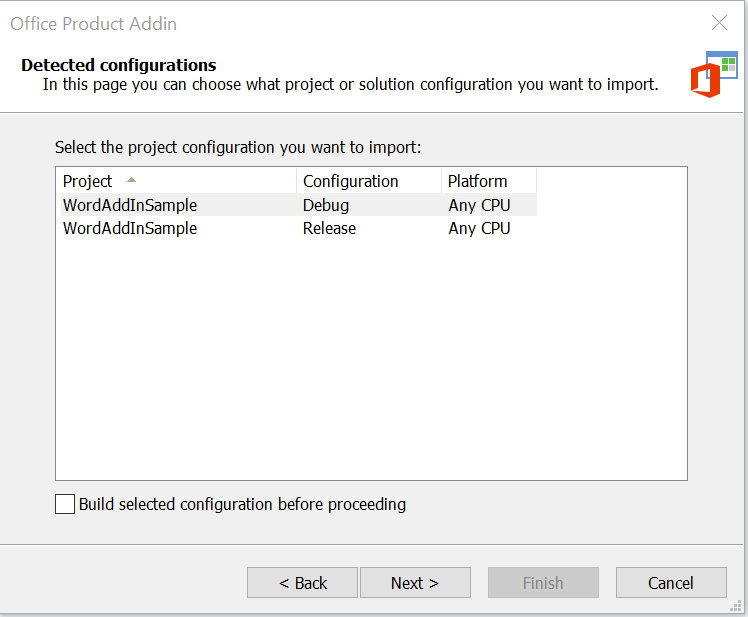
Note: The screenshot above shows the option to build the configuration by selecting the "Build selected configuration before proceeding" option. But we're not using this option for this example because we already built the configuration before starting the Wizard.
8. The resource files will be automatically detected, allowing you to select the files you wish to include in the project.

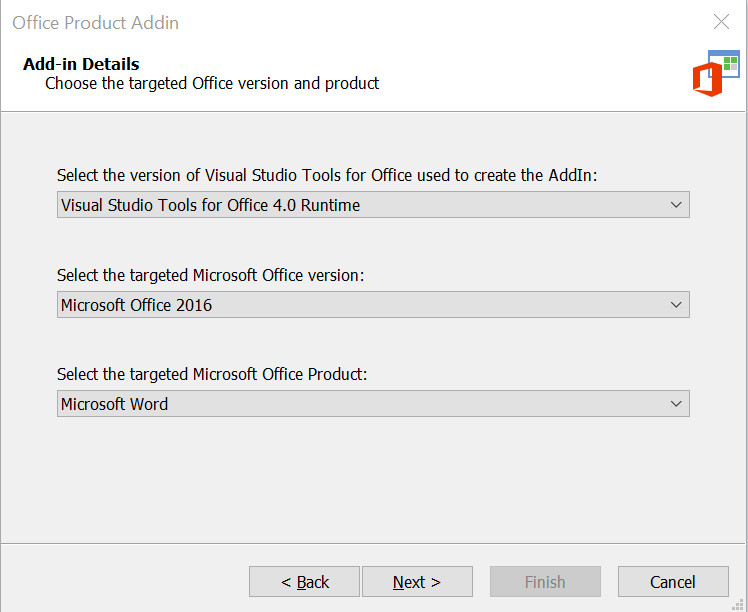
9. You'll have the opportunity to configure additional details for your Office Add-in, including:
- the version of Visual Studio Tools for Office used, the targeted Microsoft Office version, and the targeted Microsoft Office Product
- the Add-in description, friendly name, load behavior, etc.

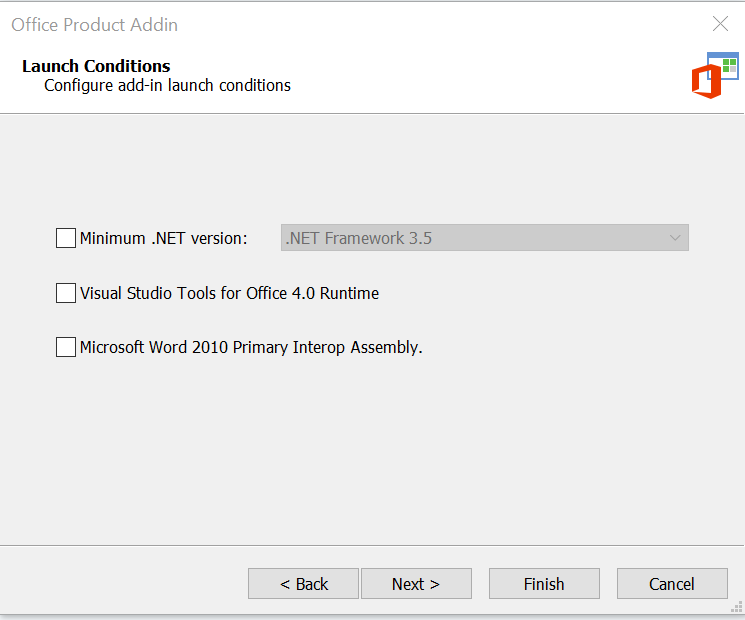
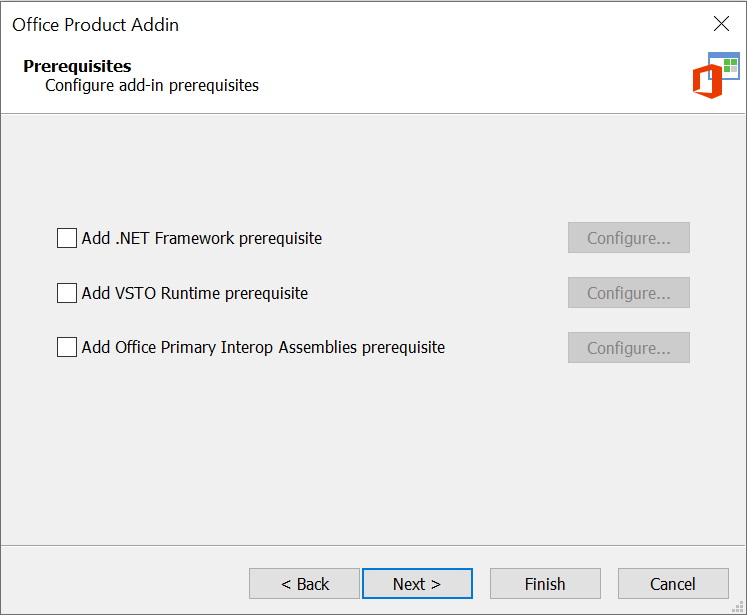
- The Add-In launch conditions and prerequisites. For the sake of keeping this project as simple as possible, we will leave all these unchecked.
- The build language.
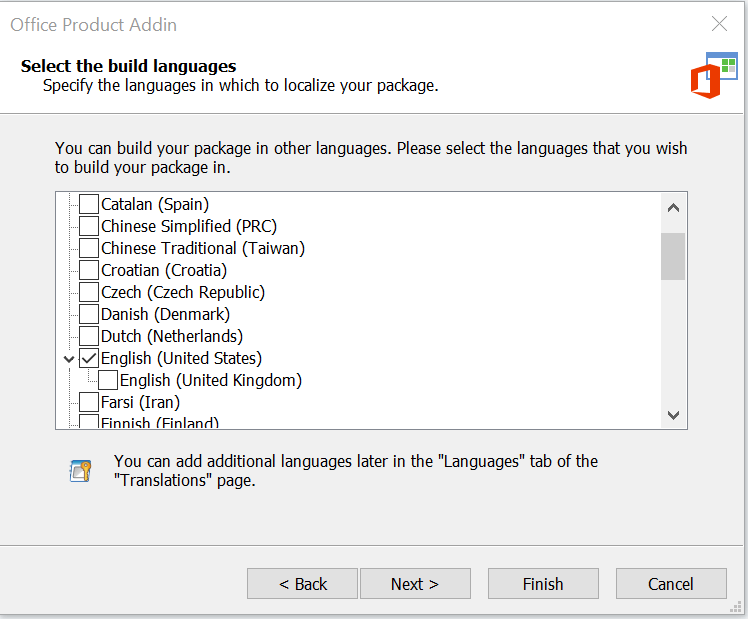
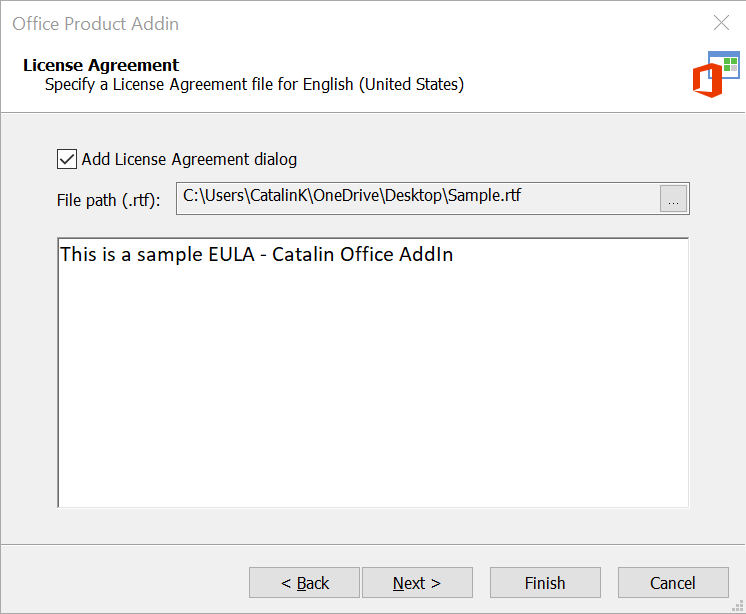
- The option to add the License Agreement dialog to your project.
After completing the above settings, the final dialog from the Wizard will appear. You can now build your project by selecting the "Build the project now" checkbox.

Office Add-in Registry Entries
Your Office Add-in is now added to our project, and it is time to configure it as needed. As we mentioned at the beginning of this article, we will be installing the Office Add-in resources based on the Office bitness.
An important aspect worth highlighting here is the fact that "only" the registry entries are different when working with Office Add-Ins.
So, upon completing the Office Add-In wizard, if we go to the "Registry" page, we will notice that, besides the default registry entries that are automatically added in every Advanced Installer project, there are a few more entries specific to Office Add-Ins: Description, FriendlyName, LoadBehavior and Manifest which are located under:
HKLM:\Software\Microsoft\Office\Word\AddIns\[Manufacturer].[ProductName]

The above key is present when going into the "Registry" page. However, in our screenshot, you will see two keys:[Manufacturer].[ProductName]_x86 and [Manufacturer].[ProductName]_x64. This is because we duplicated the registry entries and then renamed both of them.
- To copy the key:
- Select it and elect it
- Press CTRL+C
- Choose the "AddIns" key and,
- Press CTRL+V.
- Then, you can select each key and press F2 to rename it.
Every registry value from the "Registry" page is reflected in the "Organization" page as a component. Since we duplicated the key, we will now have 8 distinct components in the "Organization" page, such as:
- Description, respectively Description_1
- FriendlyName, respectively FriendlyName_1
- LoadBehavior, respectively LoadBehavior_1
- Manifest, respectively Manifest_1
Moving the subfeatures
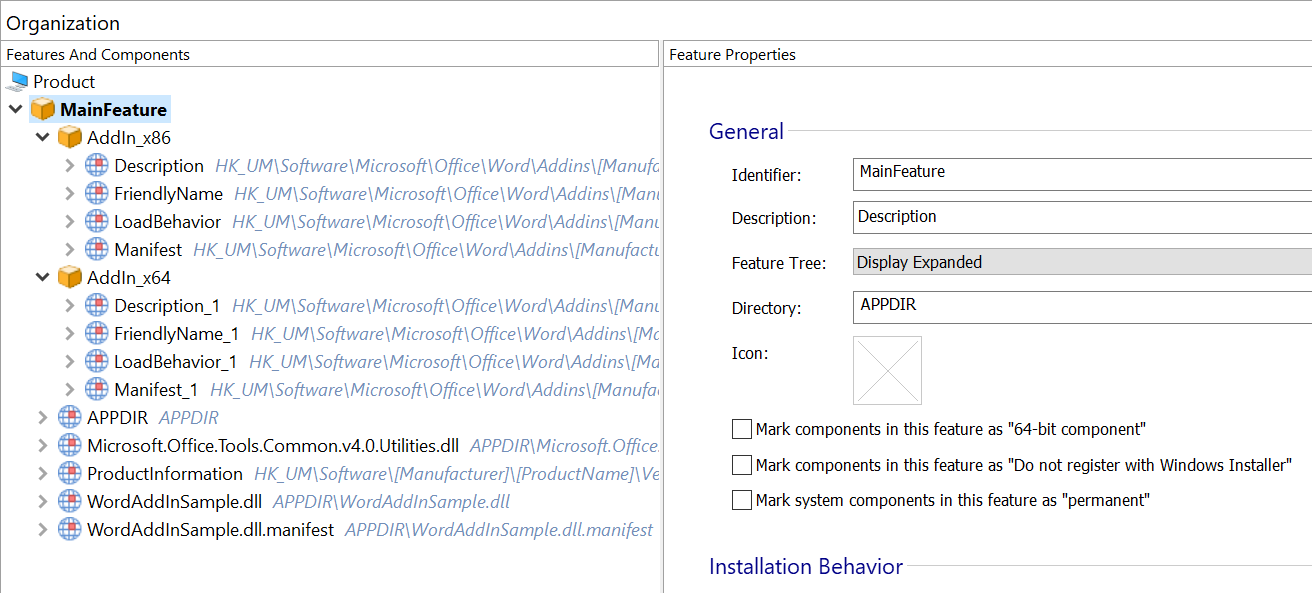
To make an easier-to-follow UI, we have created two subfeatures under the MainFeature feature:: AddIn_x86 and AddIn_x64.
To create a subfeature:
- Click on the MainFeature feature --> "New Feature"
- Next, we are going to move the above mentioned components to their appropriate features:
- Move the following components: Description, FriendlyName, LoadBehavior and Manifest to the "AddIn_x86" feature. To move a component to another feature, simply select the component and then drag and drop it to the appropriate feature.
- Move the following components: Description_1, FriendlyName_1, LoadBehavior_1 and Manifest_1 to the "Addin_X64" feature.
It should end up looking like this:
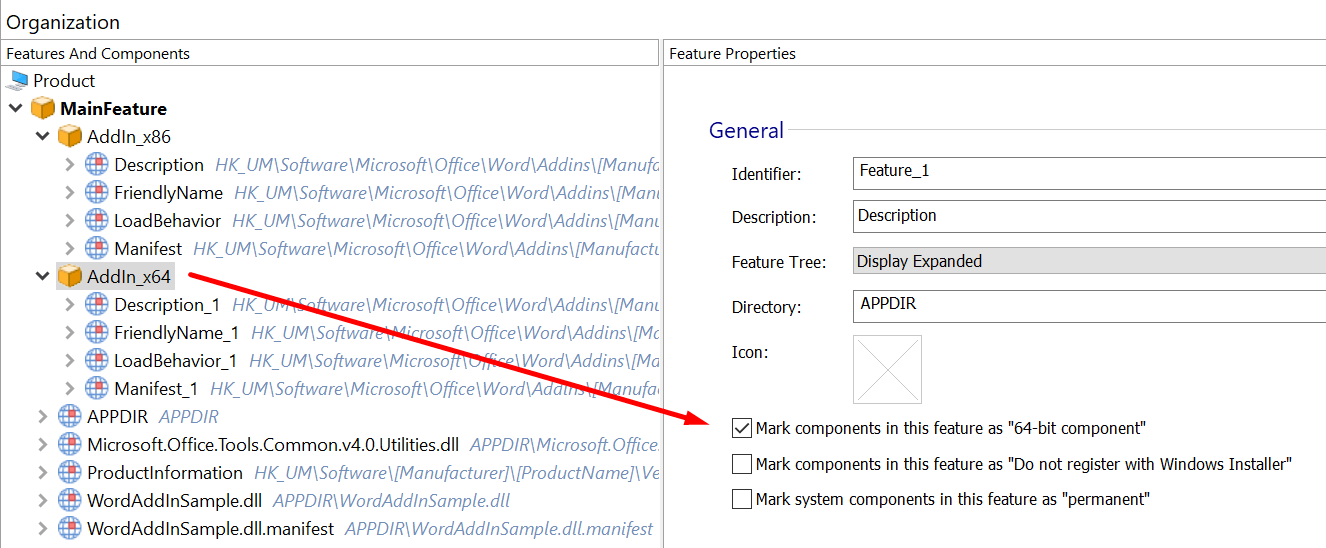
Important: Please select each component from the "Addin_x64" feature and check the "64-bit Component" option for it.
Conditioning each feature to install based on Office bitness
What you will need to do next is condition each feature to install based on the Office bitness.
Before we do that, we need to obtain the Office bitness, which you can safely get from the following registry entry: HKLM:\SOFTWARE\Microsoft\Office\16.0\Access\InstallRoot\Path.
Here is how this works: we will have two searches, both looking for the above registry key (one set to look in the 64-bit location and the other one in the 32-bit location).
To achieve this:
1. Go to the "Search" page and create these two searches: WORD_x64_EXISTS and WORD_x86_EXISTS
2. Right click on the WORD_x64_EXISTS --> "Add search location" --> "Registries". The search settings should look like the following:

Note: For this search, it is important to check the "Search the 64-bit portion of the registry" option. This way, the search will be performed in the following location: HKLM:\SOFTWARE\Microsoft\Office\16.0\Access\InstallRoot\Path
Repeat the above step for the second search. Remember to leave the "Search the 64-bit portion of the registry" option unchecked. The search will look for the following location: HKLM:\SOFTWARE\WOW6432NODE\Microsoft\Office\16.0\Access\InstallRoot\Path
3. Now, go back to the "Organization" page, then select the AddIn_x64 feature.
4. Under the "Installation Behavior" section, set its behavior to "Not installed" by default and "Installed if": WORD_x64_EXISTS
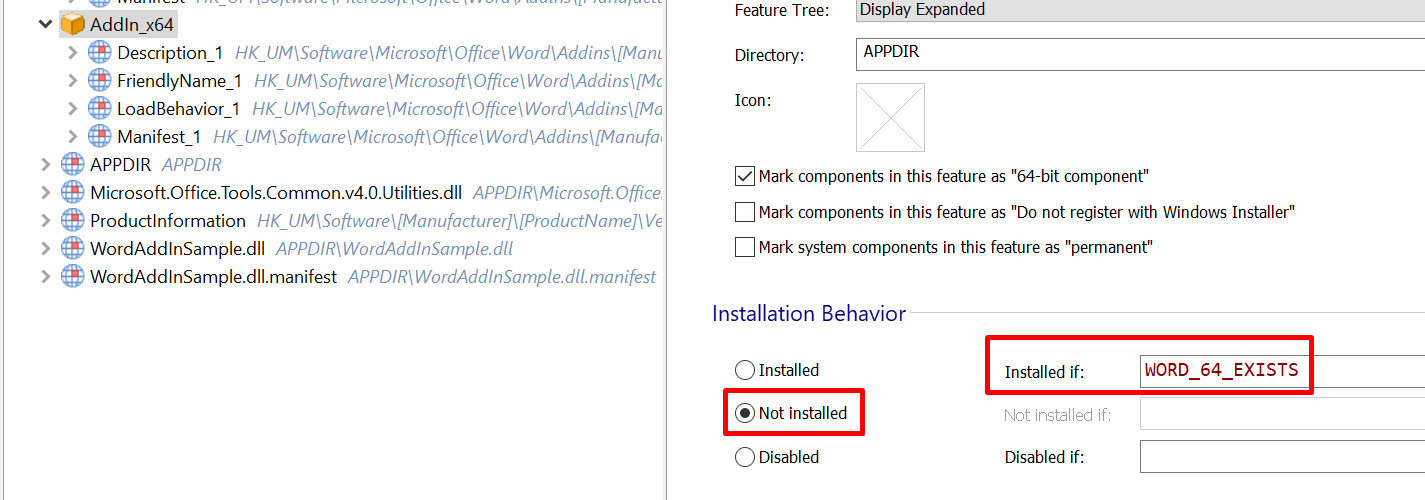
Repeat the above steps for the "AddIn_x86" feature as well. This time, set the condition to WORD_x86_EXISTS
Conclusion
And that’s it! You can now build your project. Your Office Add-in will install its resources based on the Office bitness.
You can find the attached Visual Studio Solution and Advanced Installer project for your reference.
Click here to Download: WordAddInSample - VSTO.zip
I hope this article was helpful. Let us know what topic you'd like us to cover.
