MSIX Per-User Deployment via SCCM
Before we begin, it is important we know that starting with SCCM version 1806, MSIX application is supported in System Center Configuration Manager. Integrating MSIX apps in previous versions, does not work. Also the current version of Windows 10 that supports MSIX is version 1809. It is announced that Microsoft will add support for MSIX also on other versions of Windows 10.
In this article we assume we have our MSIX application packaged and we want to make it available for client machines in our Enterprise Infrastructure.
For the MSIX per-machine installation scenario, check our complete
guide: Per-machine
deployment of MSIX in SCCM.
In case you missed out our MSIX application in depth explanation,
check out our introduction
guide.
We are going to split the process in 3 major steps:
- Client machine requirements and preparation
- Adding application in SCCM
- Deploying to the client machine
1. Client machine requirements & preparation
a) In order to accept MSIX packages, all targeted machines must have Windows 10 compatible versions(current compatible version is 1809). Previous versions of Windows 10 do not support .msix deployment through SCCM at the moment.
b) All MSIX packages must be digitally signed. Publishing in Microsoft Store automatically signs the application, but in this case we need a certificate from a Certified Authority or we can generate a self-signed one.
If we choose to use a self-signed certificate we must deliver this certificate to our targeted client machines, before deploying the MSIX packages. The certificate must be found under “Local Machine -> Trusted Root Certification Authorities” certificates store.. Because delivering certificates alongside with the MSIX is not yet integrated in SCCM , a way to deliver them is via GPO (Group Policy). To learn more see this article.
c) Sideloading must be enabled on the targeted machines. This setting can also be done via GPO.
2. Adding the MSIX application in SCCM
In your SCCM console, navigate to Software Library Workspace – Application Management > Applications

- Right Click on Application node and click Create Application
- “Create Application Wizard” page appears
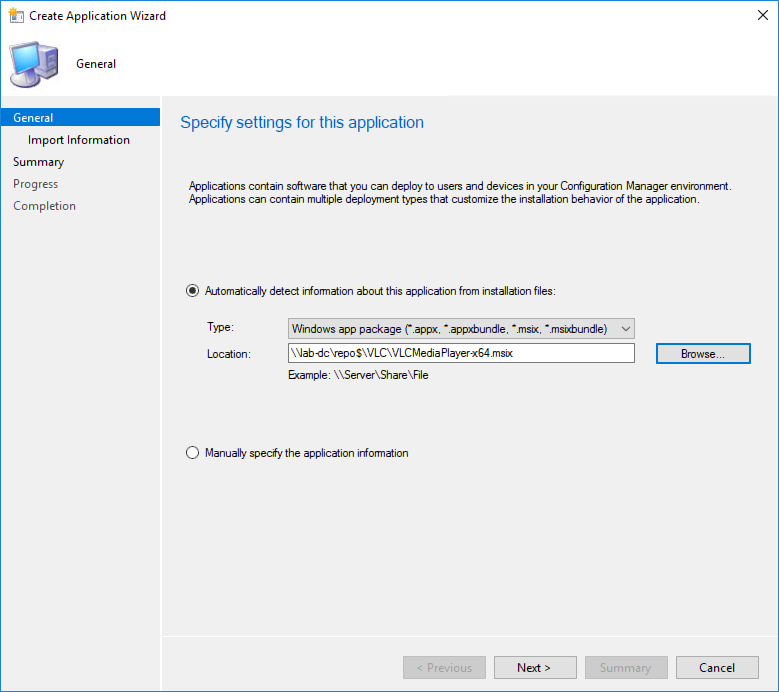
On Specify settings for the application:
- Select the option “Automatically detect information about the application from installation files“
- For “Type”, select from the dropdown -> Windows App packages (*.appx, *.appxbundle, *.msix, *.msixbundle)
- For “Location” click the Browse button to provide the source location of the MSIX package, for this example we are using the package for VLC. It should be UNC path(network share)
- Click Next until you reach Specify information for the application
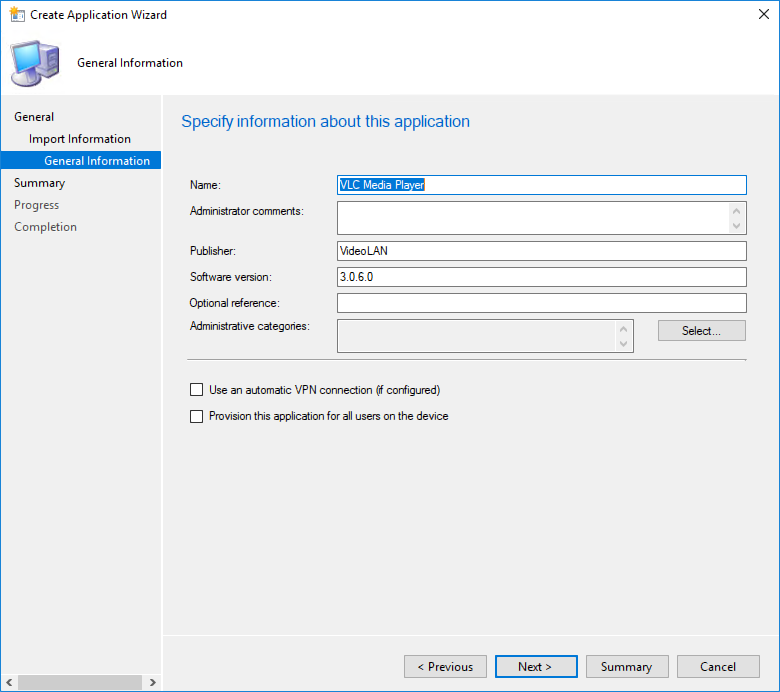
- On Specify information for the application you can see SCCM already detected information. You can modify or add additional information if you want
- Click Next for the upcoming windows until you reach the end of the wizard
3. Deploying to client machine
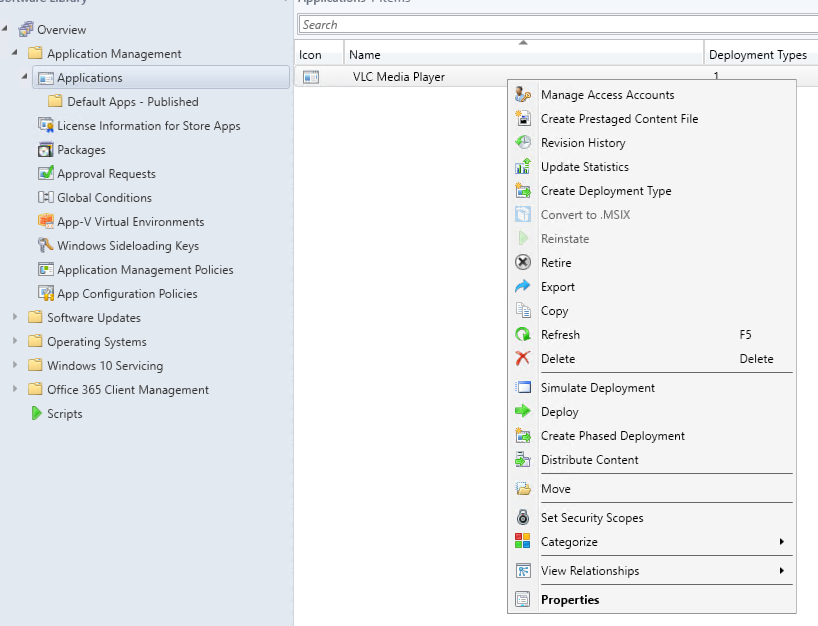
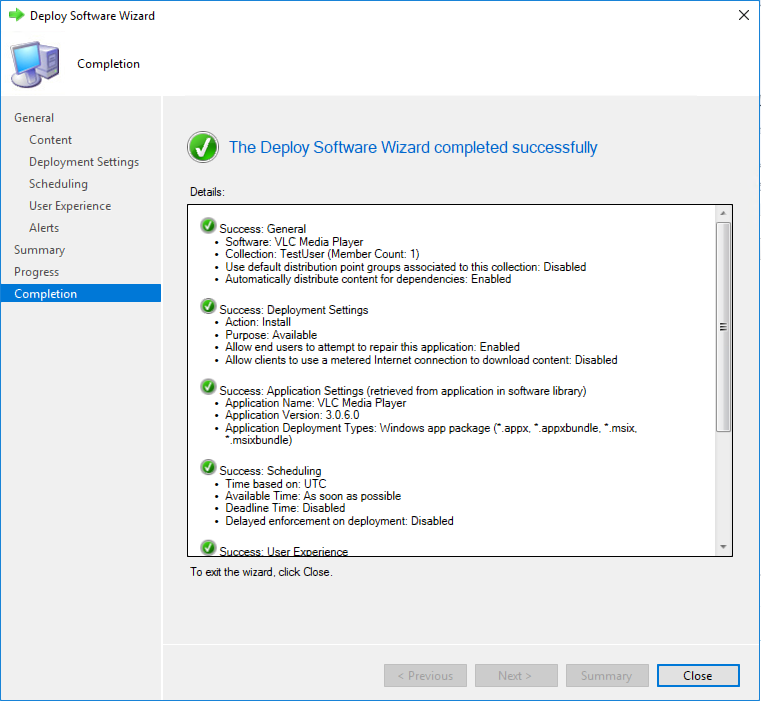
- Right click on the VLC.MSIX application (from SCCM console) and Deploy
- Select a Collection (test User) from Deploy Software Wizard page. Only user based collection works for distributing MSIX application
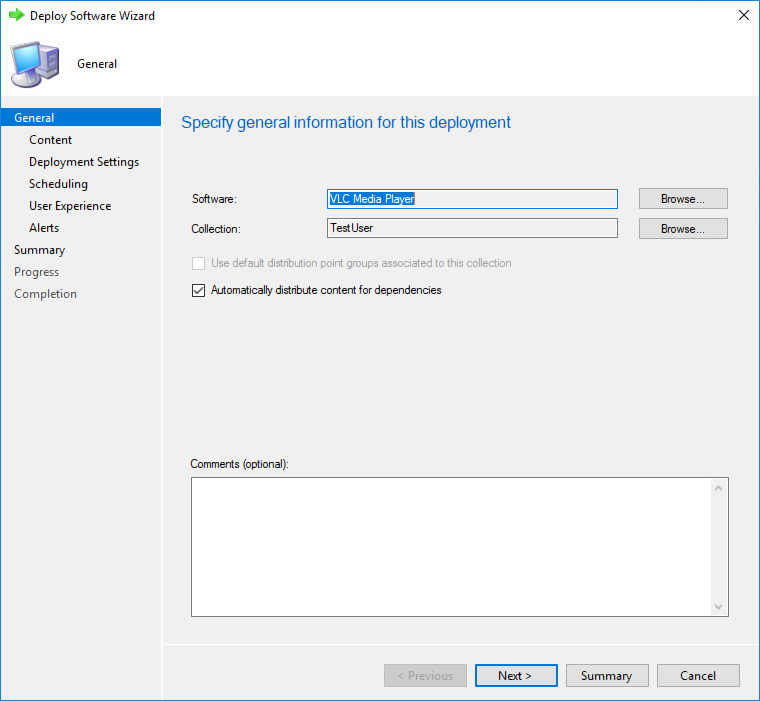
- Click Next
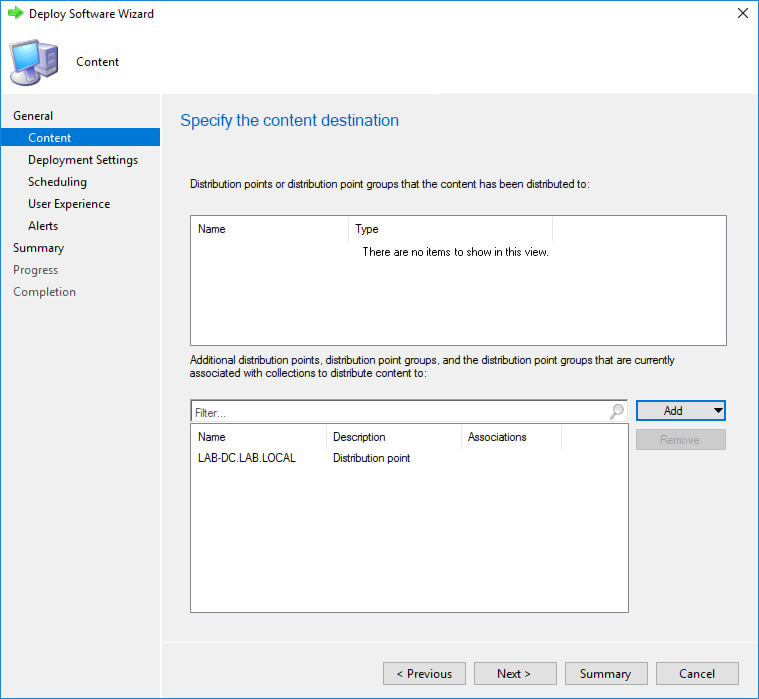
- Click on Add – Distribution Point button from Specify the content destination
- Select the SCCM Distribution Point to distribute the content of the MSIX application
- Click Next
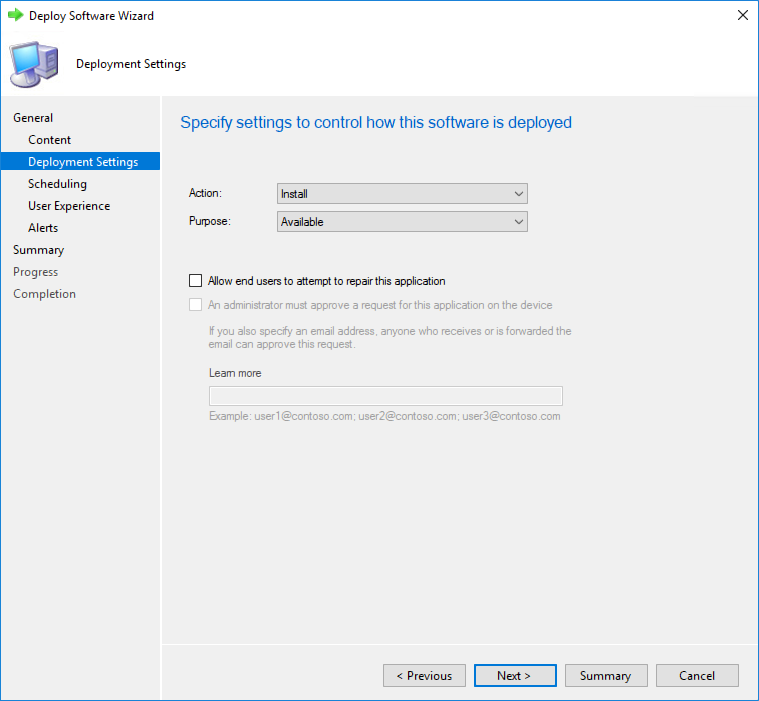
- Select Action “Install” and Purpose “Available”
- Check “Allow end users to attempt to repair the application"
- Click Next
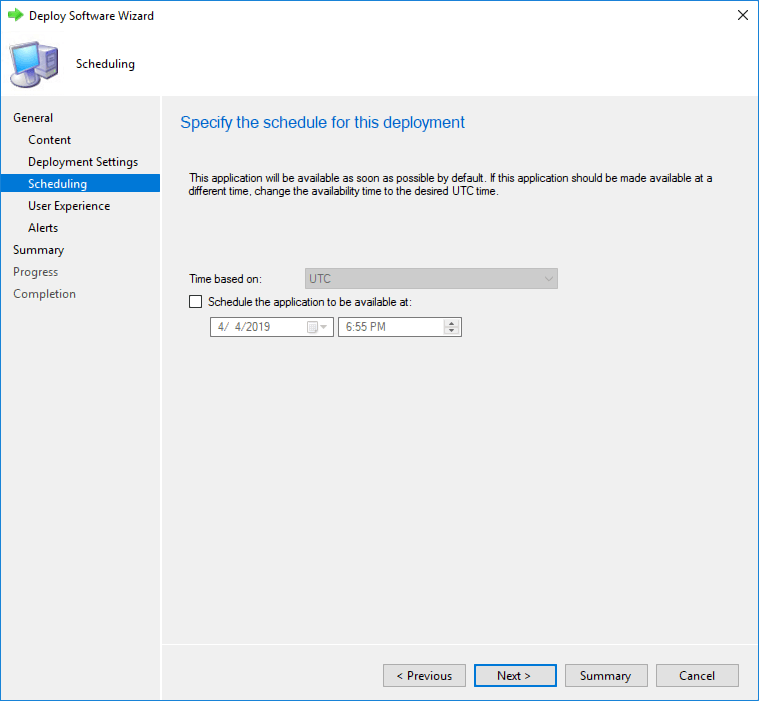
- On Specify the schedule for this deployment, leave default and click Next
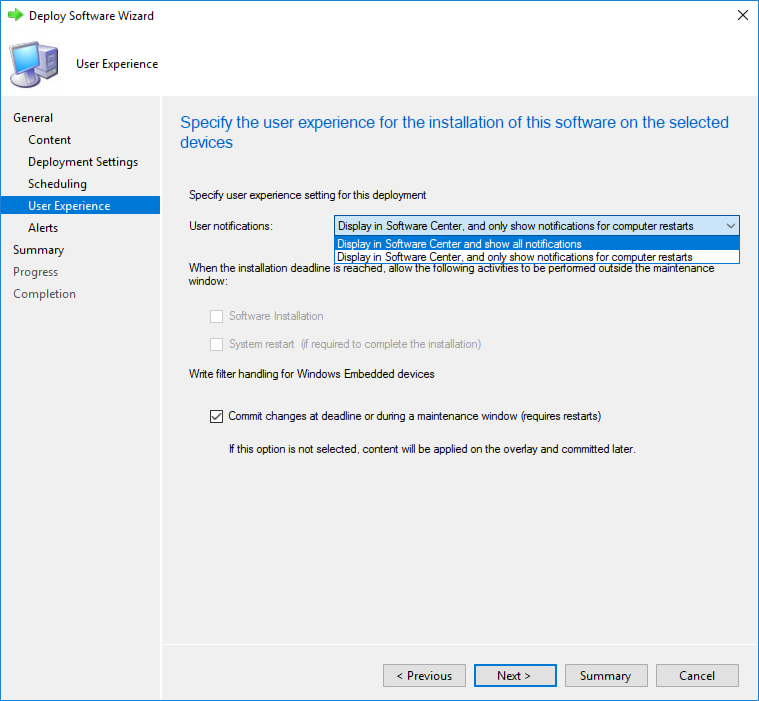
- Select the appropriate User notifications for the installation of an SCCM MSIX app from the user experience page (Display in Software Center and show all notifications in my situation) and click Next
- Click on the next button until the end of the install wizard
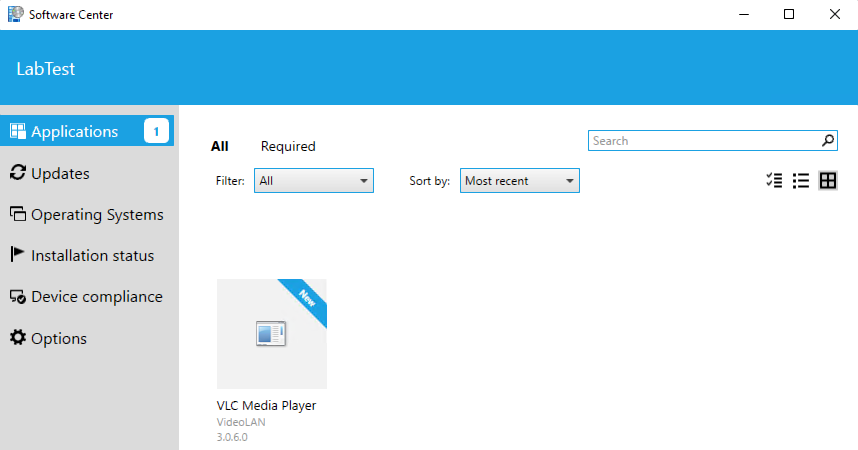
Now that we deployed our application, users can open Software Center and see the VLC application now available and ready for installation.
If you have many distribution points on your infrastructure, make
sure you also distribute the content of the application to each
Distribution Point. Otherwise, the application file won’t reach targeted
client machines belonging to those Distribution Points.
From the window “Specify settings to control how this software is deployed” where we selected Action “Install” and Purpose *“Available”, you can also put the Purpose as Required
Available means that the end user will trigger the installation.
Required means there is a time-frame in which the end user can install the application. If the deadline is due, the installation of the app will be automatically triggered.
Subscribe to Our Newsletter
Sign up for free and be the first to receive the latest news, videos, exclusive How-Tos, and guides from Advanced Installer.