Configure a Digital Certificate in a Jenkins Build Step: Jenkins Credentials and Azure Key Vault
Digitally signing your application is not only mandatory, it is an essential step to making your software secure and trustworthy.
For those looking for alternatives, we will now show you how to add digital signing from a Jenkins build step. As you will see, the process is very similar to the Azure DevOps method.
Before getting started, make sure that Advanced Installer MSI Builder is installed in your system and that the Advanced Installer Tool is configured. Find all the steps you need to follow in this article: How to configure an Advanced Installer build step into a Jenkins pipeline.
In this tutorial, we’ll be exploring two methods for storing the certificate:
- As a Secret File using Jenkins Credentials
- In Azure Key Vault
1. Store the certificate file as a Secret File using Jenkins Credentials
We will store the certificate file using the Jenkins Credentials Manager and later on, we will use it when we invoke the Advanced Installer build step.
1.1 Set up the Advanced Installer project
1. Launch Advanced Installer and load your AIP file.
2. Go to the Digital Signature page.
3. In the Software Publisher Certificate group, choose Use file from disk and select your certificate when prompted.
4. Save and upload the project file to the DevOps repository -- the one you're using in the Jenkins pipeline.

1.2 Uploading the certificate to Jenkins Credentials Manager
To store the certificate file, perform the following steps:
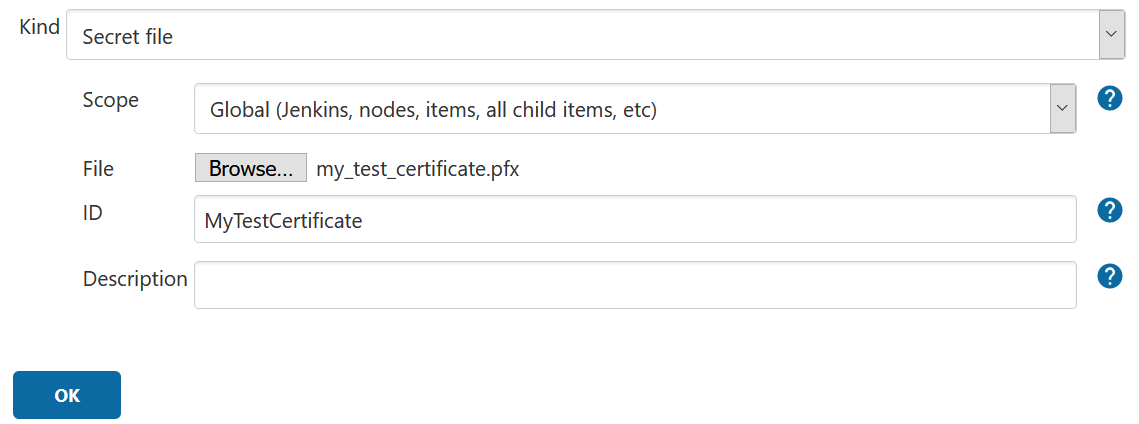
1. Switch to Credentials view and use Add Credentials to upload the file under the global scope.

2. Configure it as follows:
a. Kind: Secret file
b. Scope: Global
c. File: select your certificate file
d. ID: Friendly name for the file
1.3 Configure the pipeline
Now it’s time to configure the pipeline. We will do this in two steps.
1.3.1 Certificate file binding
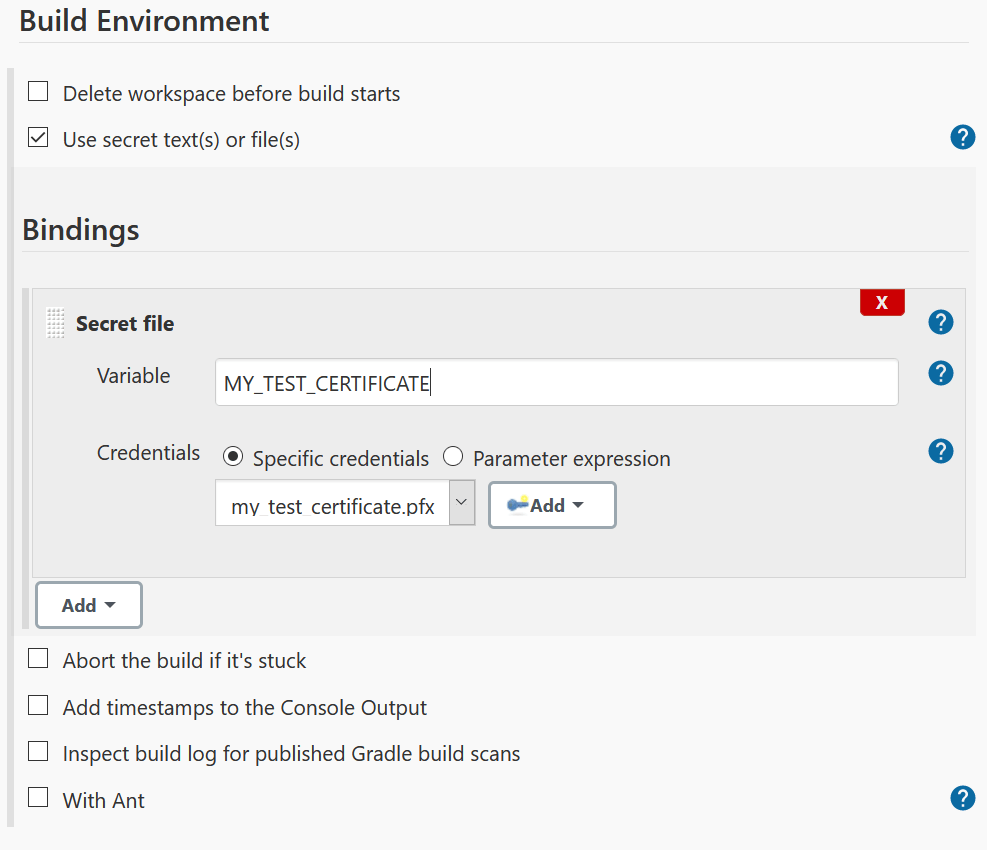
We will start with binding the secret file we configured earlier to a Jenkins pipeline variable.
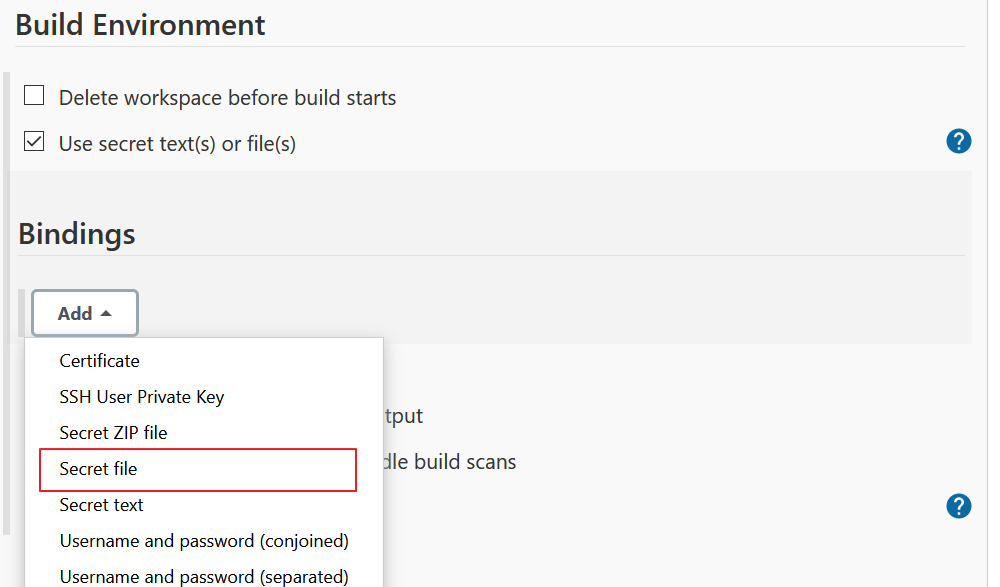
1. In your pipeline, switch to the Build Environment section;
2. Check Use secret text(s) or file(s);
3. Click Add and select Secret File;
4. Configure the file binding.
1.3.2 Add the Advanced Installer build step
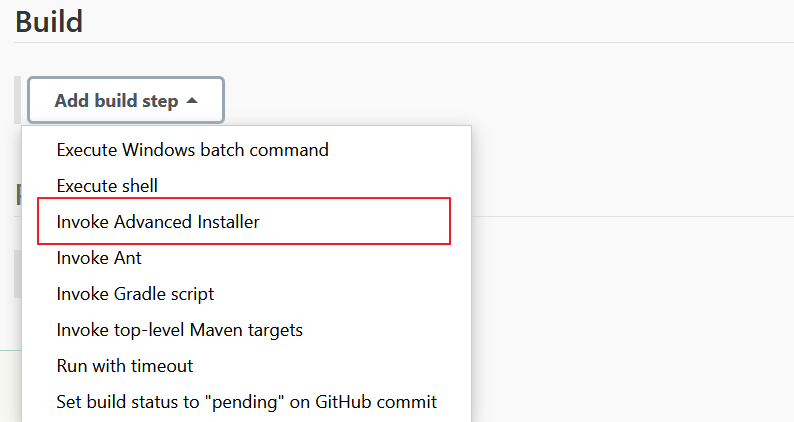
Switch to the Build section, use Add build step, and select Invoke Advanced Installer.
The relevant setting for this tutorial is the Additional commands field, where you specify the certificate file.
SetDigitalCertificateFile -file "${MY_TEST_CERTIFICATE}"
SetDigitalCertificatePassword -password <certificate_password>In this example, I used a test certificate file with no password. If your certificate requires a password, you need to add the <certificate_password> command to specify it.

2. Load the certificate from Azure Key Vault
In the first part of this article, we used a certificate file uploaded in Jenkins Credentials. Now, let’s see how we can reference a certificate that is managed by Azure Key Vault.
Before completing this tutorial, you need to have a configured Key Vault under your Azure account. You need Windows 10 to perform the signing process with Advanced Installer, so make sure that your Azure DevOps build agent fulfills this requirement.
2.1 Preparing the project
1. Launch Advanced Installer and load the AIP file.
2. Switch to the Digital Signature page.
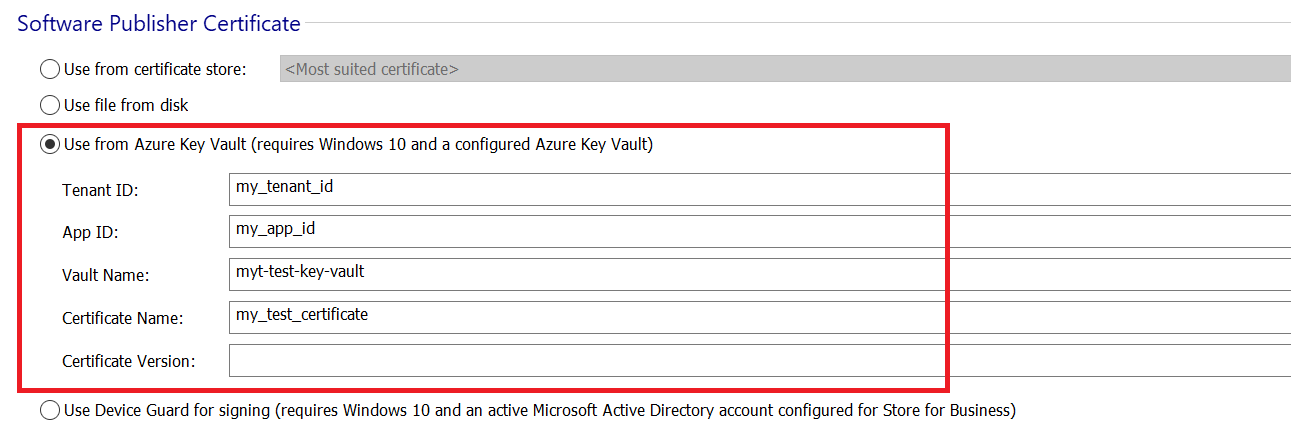
3. In the Software Publisher Certificate group, choose Use from Azure Key Vault and input the required information.
Here's the information you need:
- Tenant ID
- App ID
- Vault Name
- Certificate Name and Version
These settings will be stored in the AIP project file.
During the signing process, Advanced Installer requires the Azure Key Vault Secret. Since this is sensitive information, we do not store it in the project file but will store it as a Secret Text in the Jenkins Credentials Manager.
4. Save and upload the project file in the DevOps repository -- yes, the same one you are using in the Jenkins pipeline.
2.2 Store the Key Vault secret in Jenkins Credentials Manager
Generate a new credential as described in the first part of this tutorial and configure it as follows:
- Kind: Secret text
- Scope: Global
- Secret: your Azure Key Vault secret
- ID: used for later referencing the secret text

2.3 Configure the pipeline
2.3.1 Certificate file binding
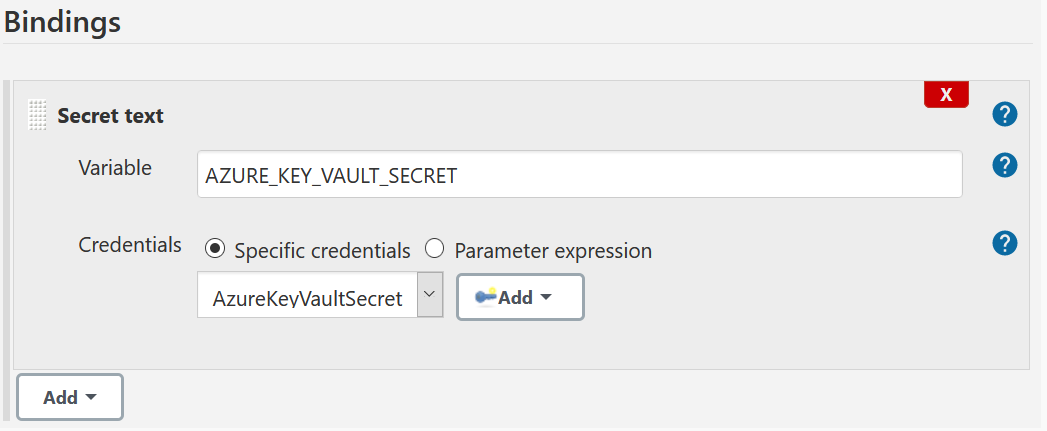
To create the binding, follow the same steps from the first part but select Secret Text instead on Secret File.
Configure the binding as follows:
2.3.2 Configure the Advanced Installer build step
Here, you need to add an Advanced Installer build step and set the Additional commands field to:
SetAzureKeyVaultSecret ${AZURE_KEY_VAULT_SECRET}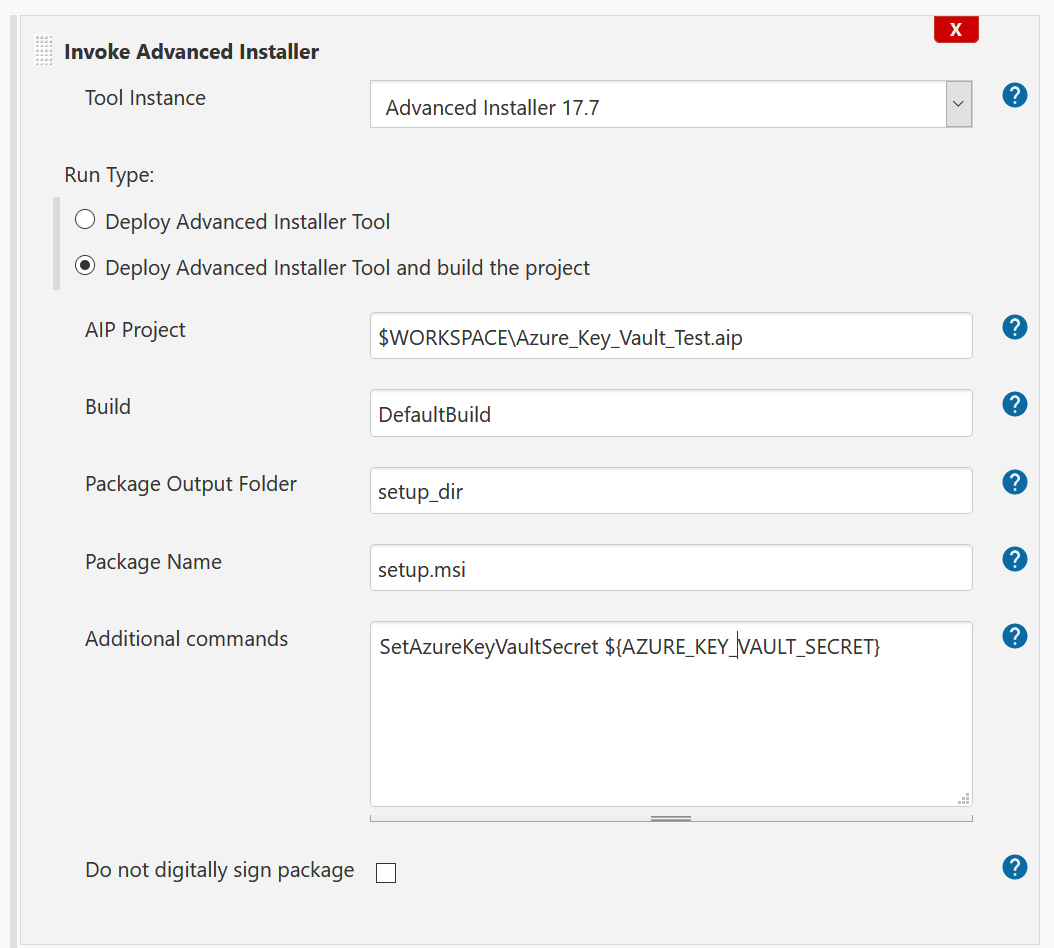
Conclusion
That's it! Now you can easily configure your application's digital signature using a Jenkins build step.
I hope you found this article useful!
For any questions or suggestions feel free to comment down below.
Subscribe to Our Newsletter
Sign up for free and be the first to receive the latest news, videos, exclusive How-Tos, and guides from Advanced Installer.