Installing Fonts in MSIX Package
If you have ever wondered how fonts are installed in an MSIX package or if you want to master all MSIX concepts, you landed on the perfect page. In the following article, we’ll see how to add and register fonts so your package will be more impactful.
We know that windows fonts are stored in %windir%\fonts, but just putting a font file here won’t actually make it used. You also need to register it.
When adding or deleting a font, the information is also stored in the registry in HKEY_LOCAL_MACHINE\SOFTWARE\Microsoft\Windows NT\CurrentVersion\Fonts.
In MSI, we use the Font table for registration.
The same principle applies to MSIX. It’s not enough to add it in the virtual file structure of the package - you need also to register it.
For MSIX, fonts must be declared in the AppxManifest.xml file, and are added as extensions under an Application element.
Find out more about MSIX in MSIX
Tutorial: A comprehensive 24-chapter guide.
Example:
To add a font named Radiant, the following
lines have to be added in the AppxManifest.xml:
<Applications>
<Application Id=.....................................................>
<Extensions>
<uap4:Extension Category="windows.sharedFonts">
<uap4:SharedFonts>
<uap4:Font File="VFS\Fonts\Radiant.ttf"/>
</uap4:SharedFonts>
</uap4:Extension>
</Extensions>
</Application>
</Applications>
Font File refers to the path of the font location in the package.
Registering fonts with Advanced Installer
With Advanced Installer the task of adding fonts is painless since it’s based on modern and easy to use GUI.
Example
We created a small MSIX
package that contains an executable that displays all the fonts
available on the machine, and the font file
was added in the "Fonts" folder in "Windows
Volume\Windows".
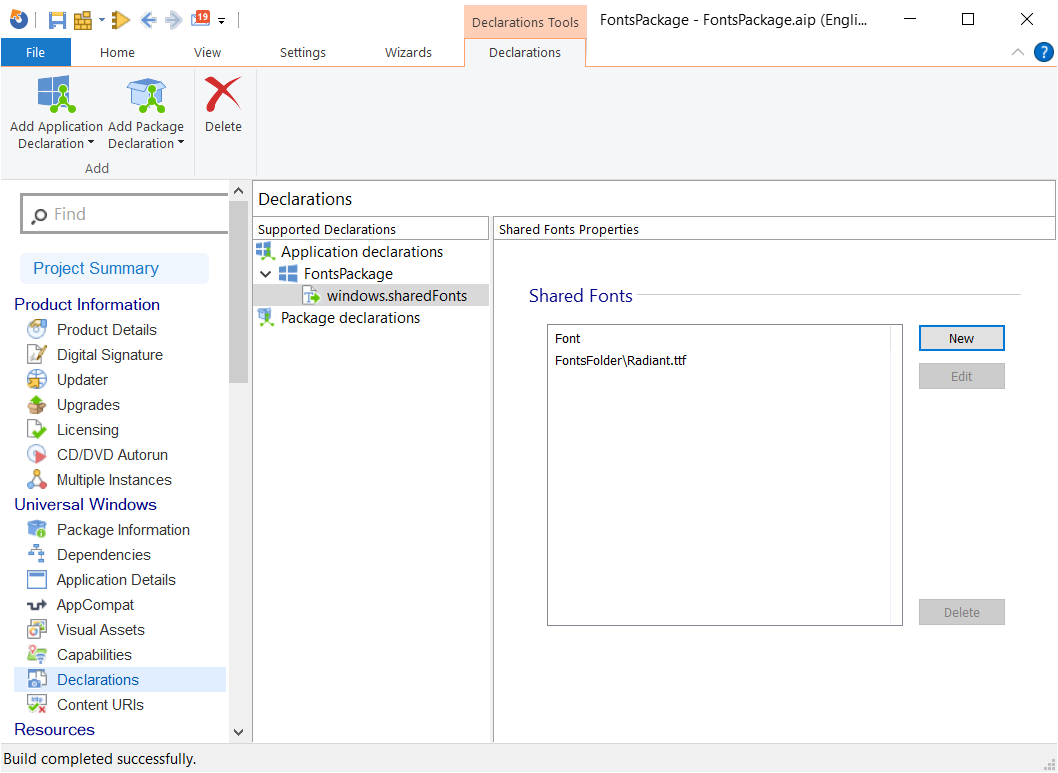
To declare the font, navigate to the Declarations page. Here, perform the following steps:
- Under Application Declarations right-click on the application name, select Add Application Declaration>Shared fonts
- In the Shared Fonts Properties on the right pane, click on New
- In the additional dialog that appears, to select a Font path, click on the … button
- Select the font desired and click OK

The font is now declared and the package can now be built.
In terms of uninstallation of the font files, since MSIX is containerized and cleans everything after uninstallation, the font files are deleted in the process and no additional input is required.
Don’t forget to configure the build and
sign the package prior to package building.
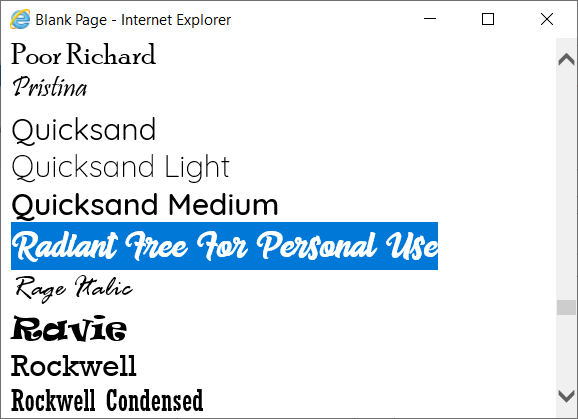
Once the package is installed, and the application is executed, we see that our new font is detected.

If you have multiple applications in your package, you only
need to declare the font for one of them. All applications in your
package will automatically recognize it.
Video Tutorial
You might find it useful:
- How to publish your MSIX package to the Microsoft Store?
- How does Files Redirection work with MSIX?
- MSI vs MSIX: Practical Side-by-Side Comparison
Subscribe to Our Newsletter
Sign up for free and be the first to receive the latest news, videos, exclusive How-Tos, and guides from Advanced Installer.