How to: Set up Firewall Rules in MSIX
A firewall is a network security system that can be found on any modern operating system. It's purpose is to act as a barrier against network-based intrusions, to monitor and control incoming and outgoing traffic following an organization's predetermined security rules.
Although Windows Installer doesn't offer a direct way to implement firewall rules inside a package, you can do so with modern software packaging tools like Advanced Installer. Also, you can use MSIX technology to implement firewall rules inside a package, but even then, Advanced Installer proves to be faster.
Advanced Installer offers the Windows Firewall integration , where you can easily configure
any type of firewall rule with just a few clicks.
But, let's put it right into practice and find out how it works.
Defining firewallRules in MSIX packages
Within the MSIX packages, there are two types of extensions: application extensions and package extensions.
In a previous article, we presented how to deal with startup applications in your MSIX package. If you look closely in that article, the windows.startupTask extension was added to a specific application from the package.
Firewall rules, on the other hand, are package extensions, meaning that they don’t have to be placed as an extension to an application.
To define a firewall rule inside an MSIX package, just add the following code in the manifest (for example, after the Capabilities element):
<Extensions>
	<desktop2:Extension Category="windows.firewallRules">
  	<desktop2:FirewallRules Executable="sample.exe">
    	<desktop2:Rule Direction="in" IPProtocol="TCP" LocalPortMax="4810" LocalPortMin="4810" Profile="all"/>
  	</desktop2:FirewallRules>
	</desktop2:Extension>
</Extensions>The above code creates an inbound rule for the sample.exe executable present in the package. The rule allows all incoming network traffic using the TCP protocol over port 4810.
You don’t need to add the direct path to your executable. You must
use only the executable name when defining the firewall rule.
Adding firewall rules in Advanced Installer
Advanced Installer has a simple option to add firewall rules to your MSIX package. You just have to go through the following steps:
1. Navigate to the Declarations Page.
2. Right-click Package Declarations.
3. Hover over Add Package Declaration and select Firewall Rules.
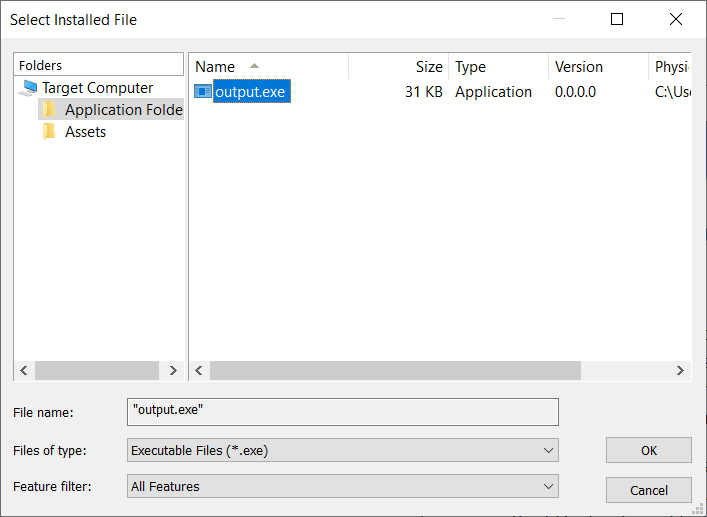
4. Select the executable for which the firewall rules will be applied and press OK

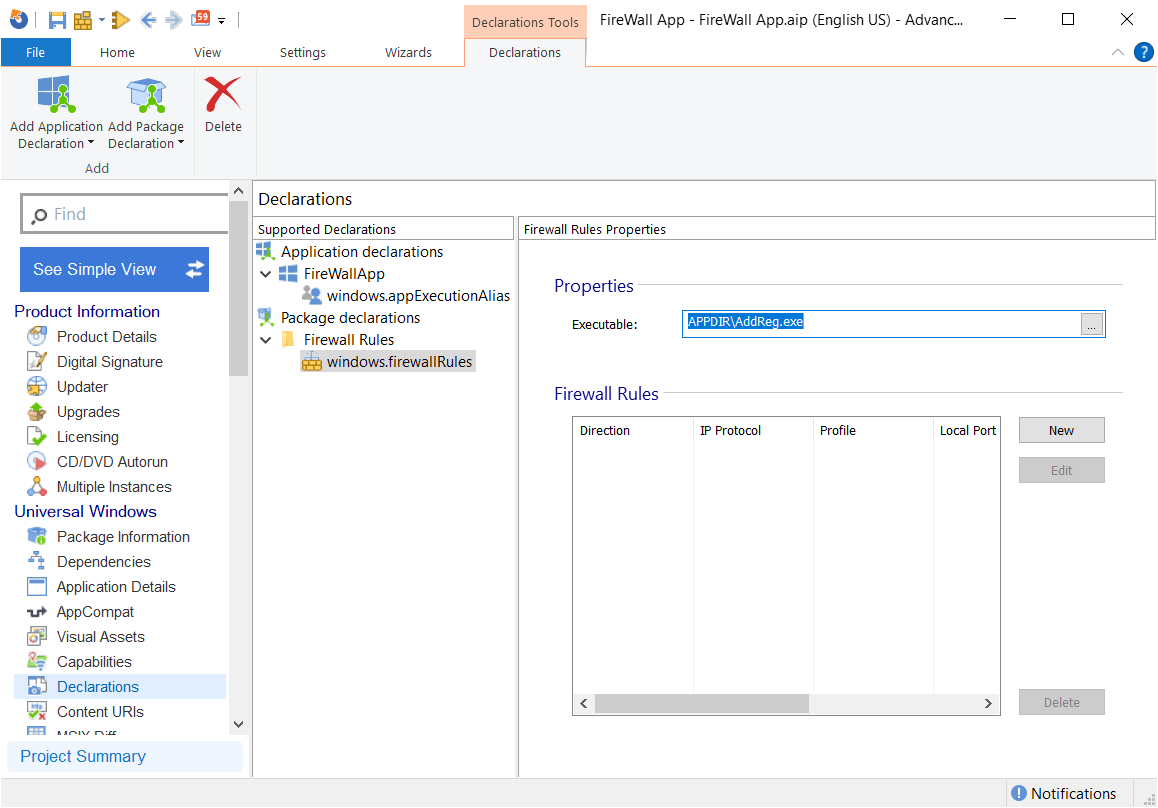
5. In the Firewall rules properties, click on New.

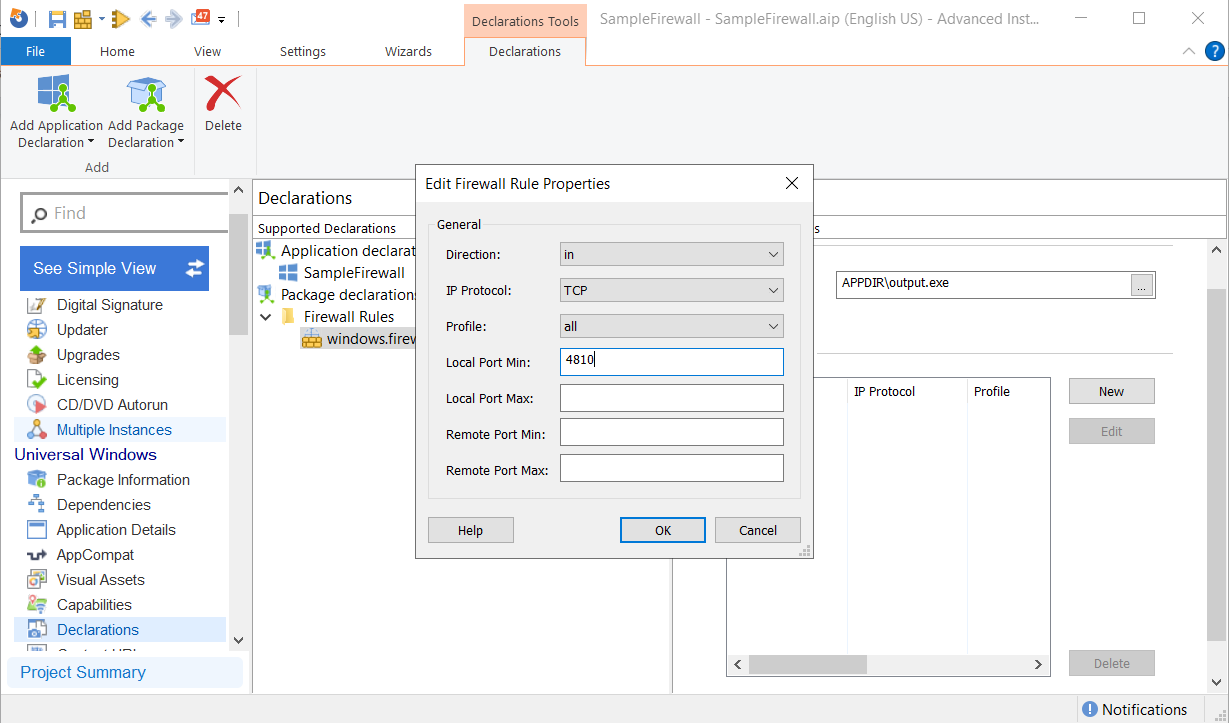
6. Define the rule. For this article, we defined the rules as in the example below.

7. Click OK.
Conclusion
After following the steps I've listed above, you will have a firewall rule declared to your executable. And, since you're using Advanced Installer, it automatically adds it to your AppXManifest.xml when the package is built.
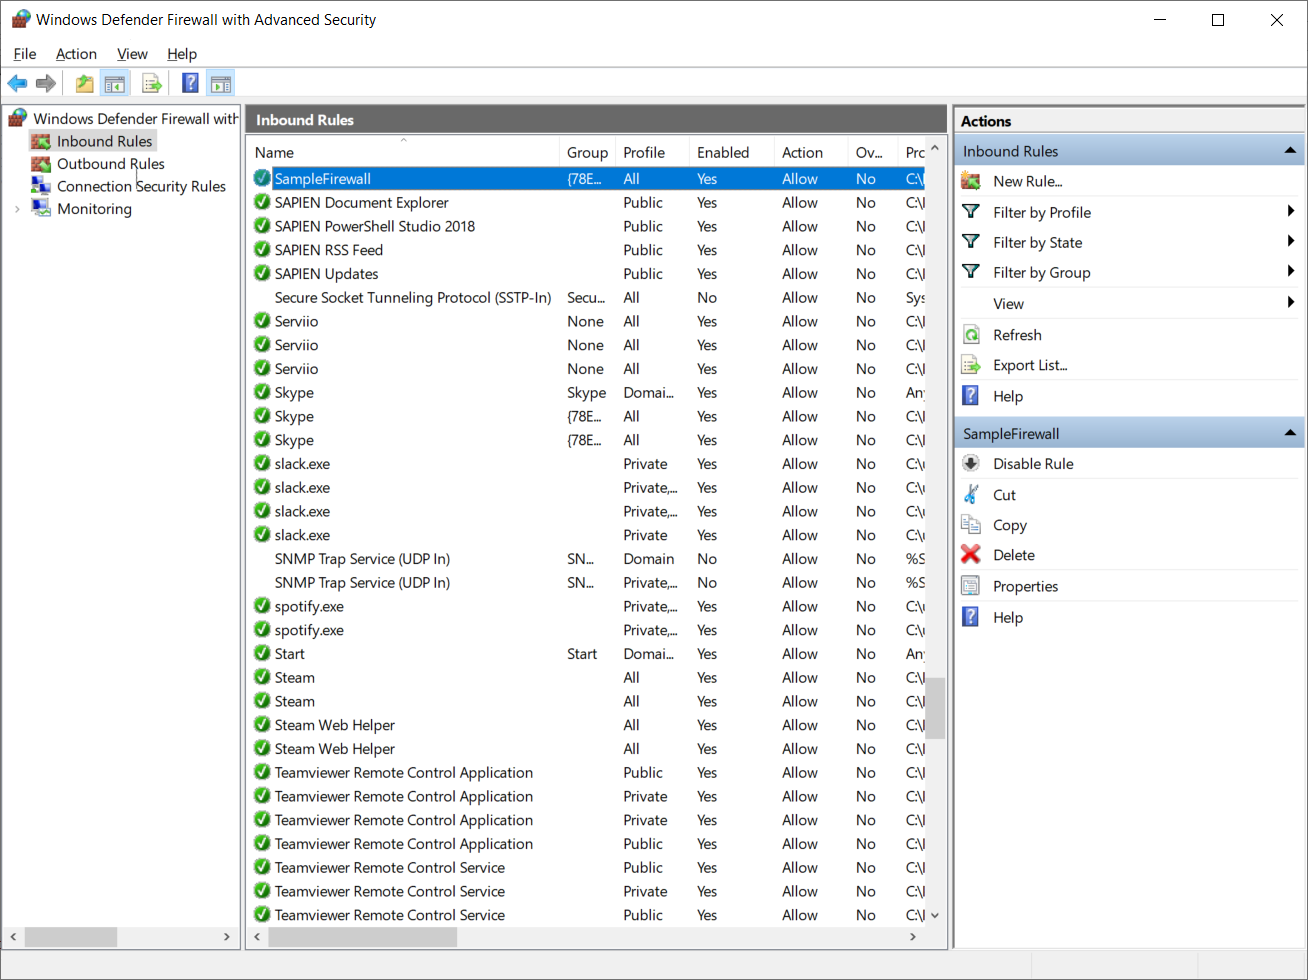
After the installation of the MSIX package, you can check that the firewall rule is present in the Inbound Rules of Windows Defender Firewall page from Windows Control Panel.

We wish that you find this step-by-step tutorial useful, and try using MSIX to natively implement your firewall rules.
Good to know: Advanced Installer offers you a seamless
integration with Windows
Firewall, enabling you to configure any type of firewall rules
according to your organization predetermined security rules.
If you’re new to Advanced Installer check out the 30-day Free Trial.
We'd love to hear from you. Let us know your experiences in the comments!
Subscribe to Our Newsletter
Sign up for free and be the first to receive the latest news, videos, exclusive How-Tos, and guides from Advanced Installer.