How to Edit an MSI File using ORCA Editor (plus alternative tool)
What's the most efficient way to perform quick edits to an MSI package?
There are various tools that can help you edit an MSI package, but ORCA is the most popular free MSI editor available to achieve this, since it can help to validate and debug errors.
However, it is not a secret that ORCA is a bit challenging to use since you have to perform modifications to the MSI database.
But, we do have a solution for that! Advanced Installer allows you to edit MSI files within its GUI without making any changes in the background.
We will show you how you can use Advanced Installer to edit MSI files as an alternative or complement to the ORCA tool.
But first, let’s see how we can edit the three most common MSI package edit operations using ORCA.
- Modify registry keys,
- Add files,
- Change property values.
Without further ado, let's download ORCA to get started.
How to download and install Orca - the free MSI Editor
In the past, Orca used to be available as standalone software but these days, you can only install it as a component of Microsoft Windows SDK. To download and install ORCA, follow these steps:
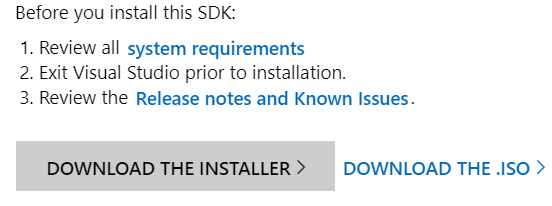
1. Download Microsoft Windows SDK here.
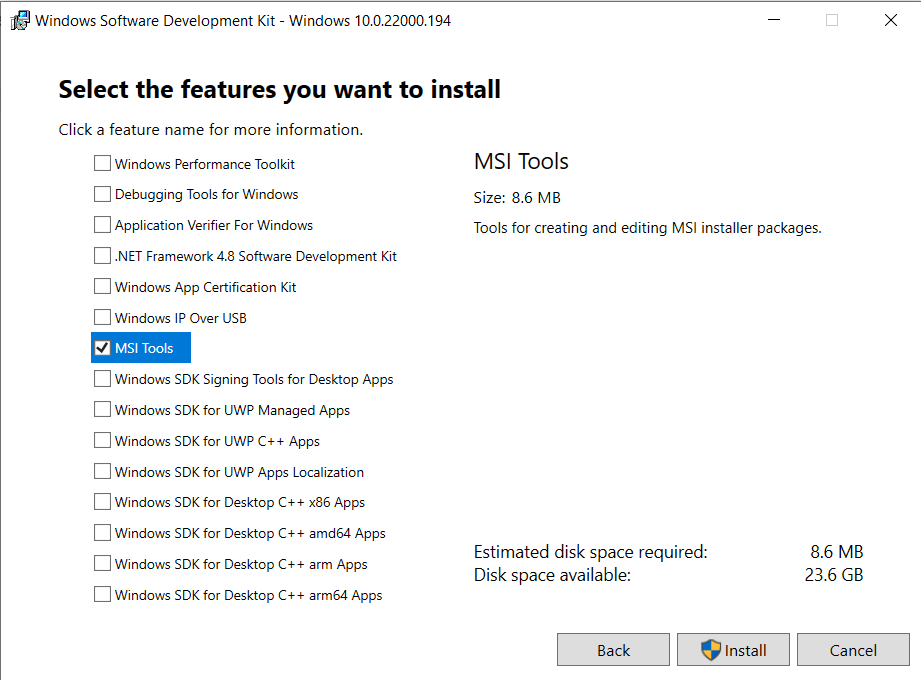
2. Open the installation, go through the basic wizard, and select the MSI TOOL feature when prompted.
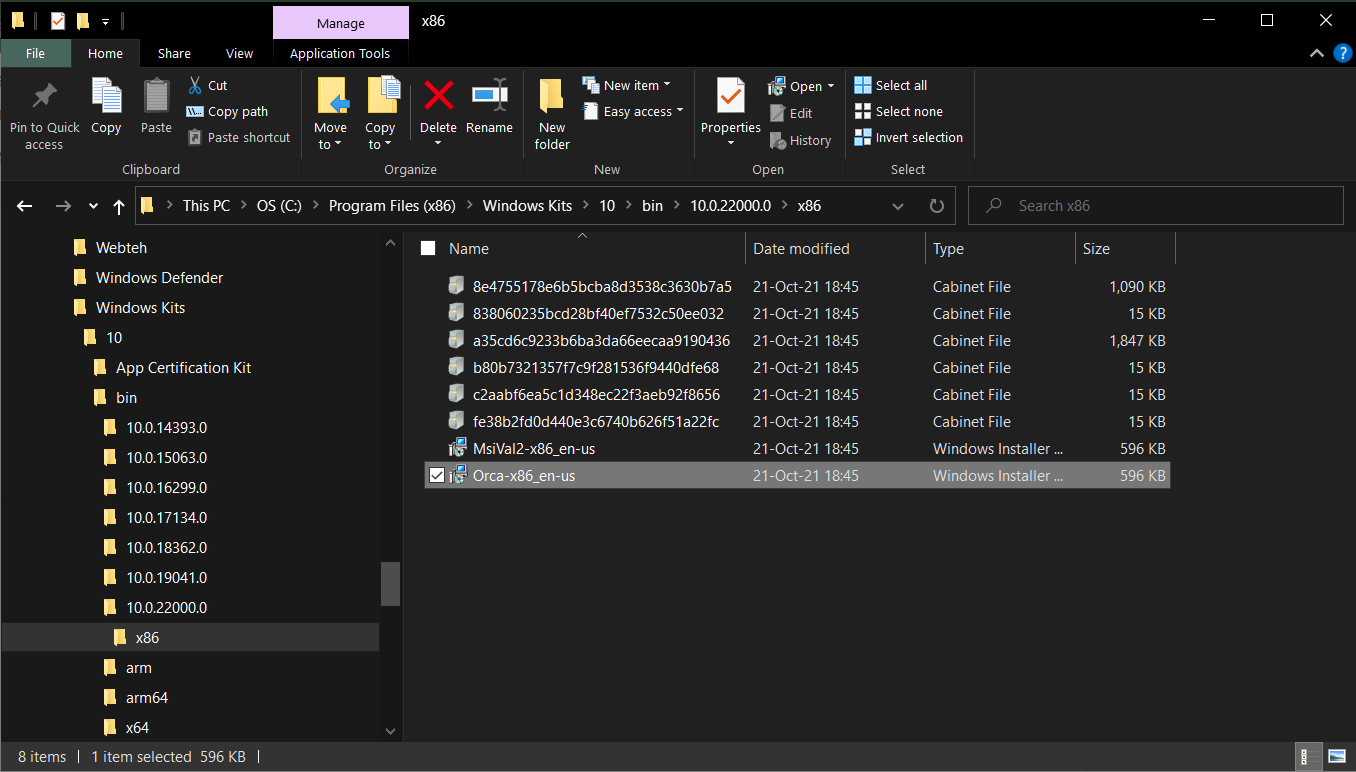
3. Go to the SDK install location and run the Orca.msi. This will automatically install ORCA.
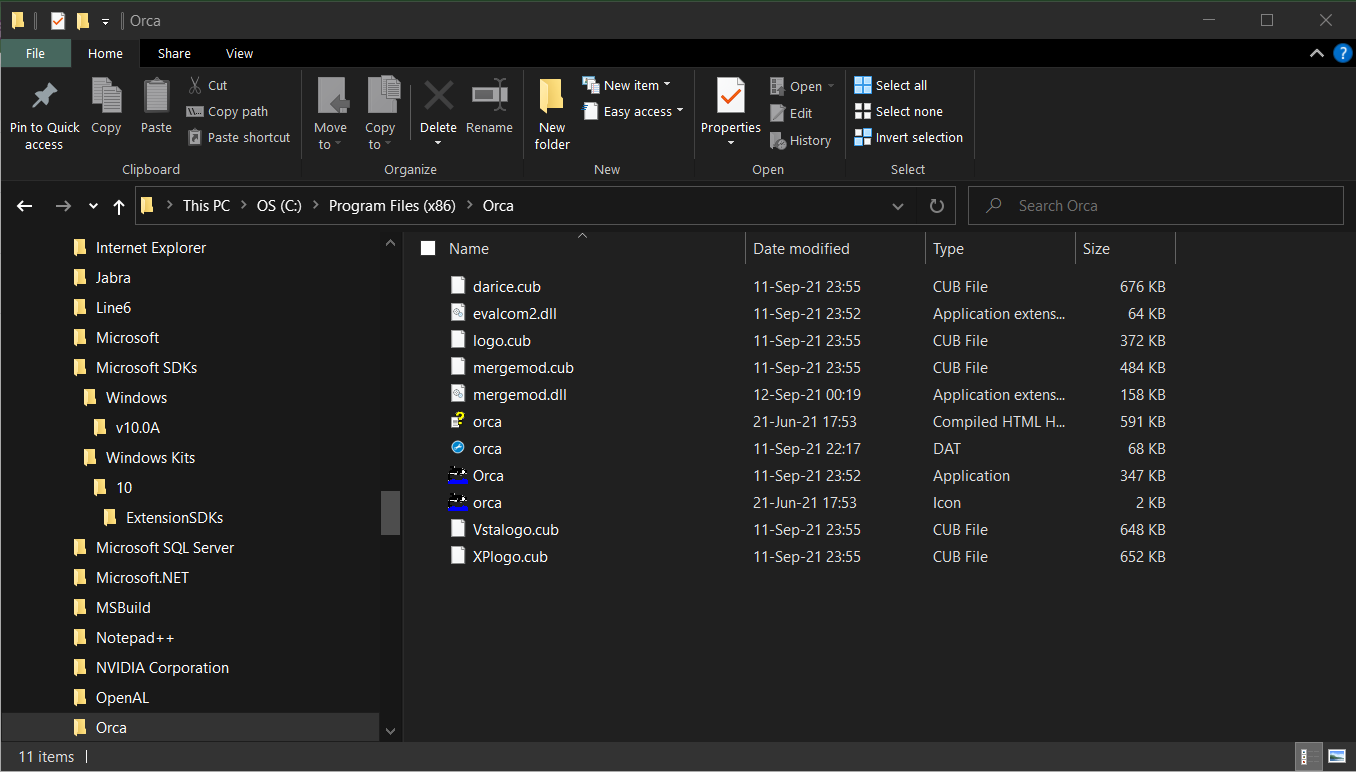
4. A start-up shortcut should be created – and Orca will be located in C:\Program Files (X86)\Orca
How to Edit Your MSI Package using Orca?
Now that you have Orca installed, you can navigate to the location where your MSI package is stored, right-click on it and select Edit with Orca.

This will load your MSI database package into the Orca interface.
Before you start making changes, you should be aware that directly editing vendor MSI packages is NOT recommended.
As a best practice, we suggest using a transform file to save and apply any modifications you make to the MSI when the installation is triggered.
To do that with ORCA, click on Transform/New Transform.
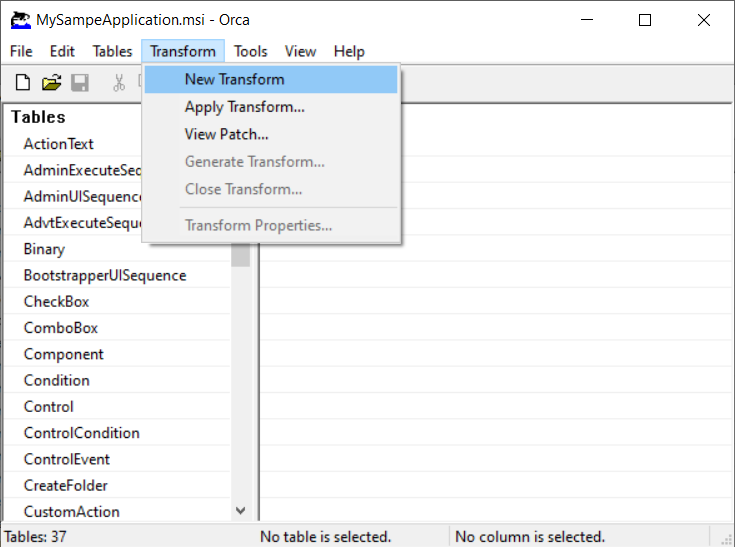
We're all set – now, we can move on to performing the three most common modifications on an MSI.
1. Change a property value with ORCA
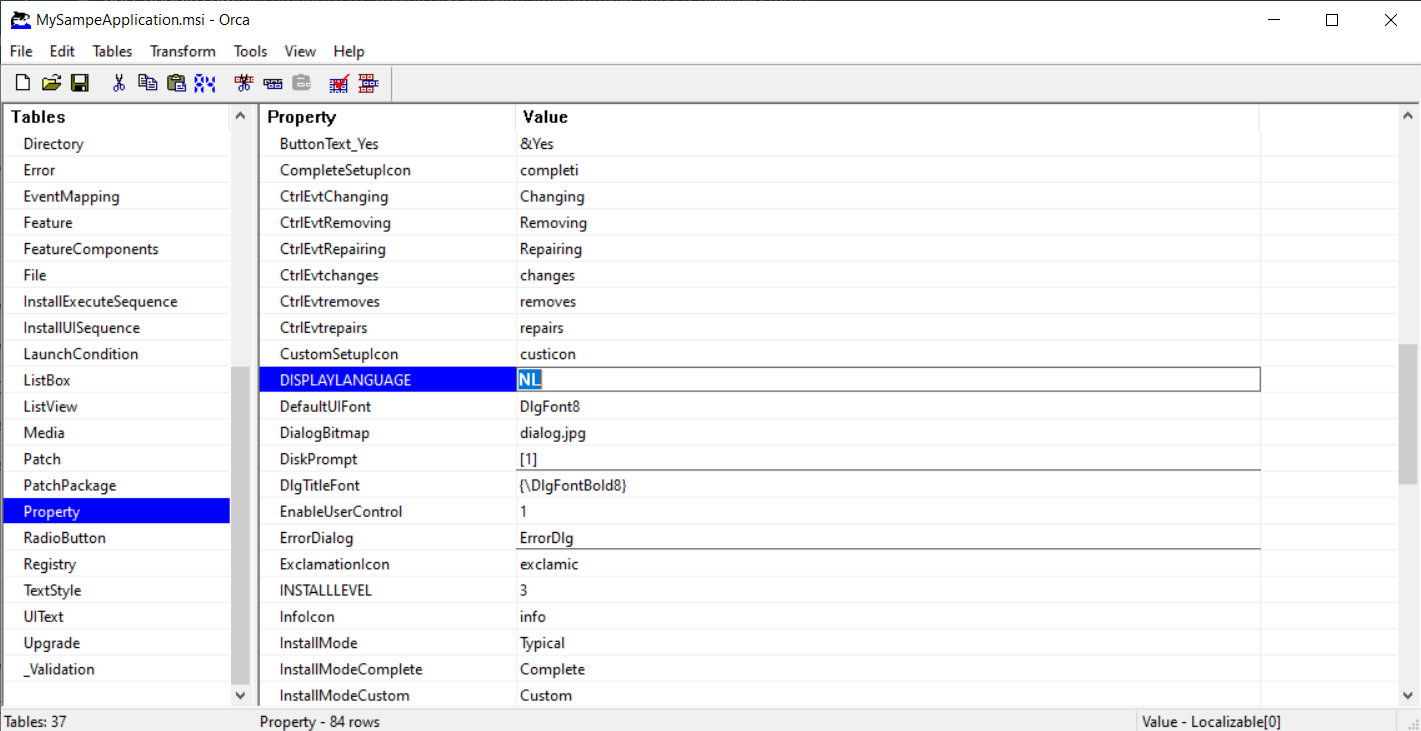
For this example, we want to change the value of the property DISPLAYLANGUAGE which controls the application interface display language.
From the left pane:
1. Navigate to the Property Table.
2. Locate the DISPLAYLANGUAGE property.
3. Double click on the value.
4. Replace it with the value NL.
2. Add registry key with ORCA
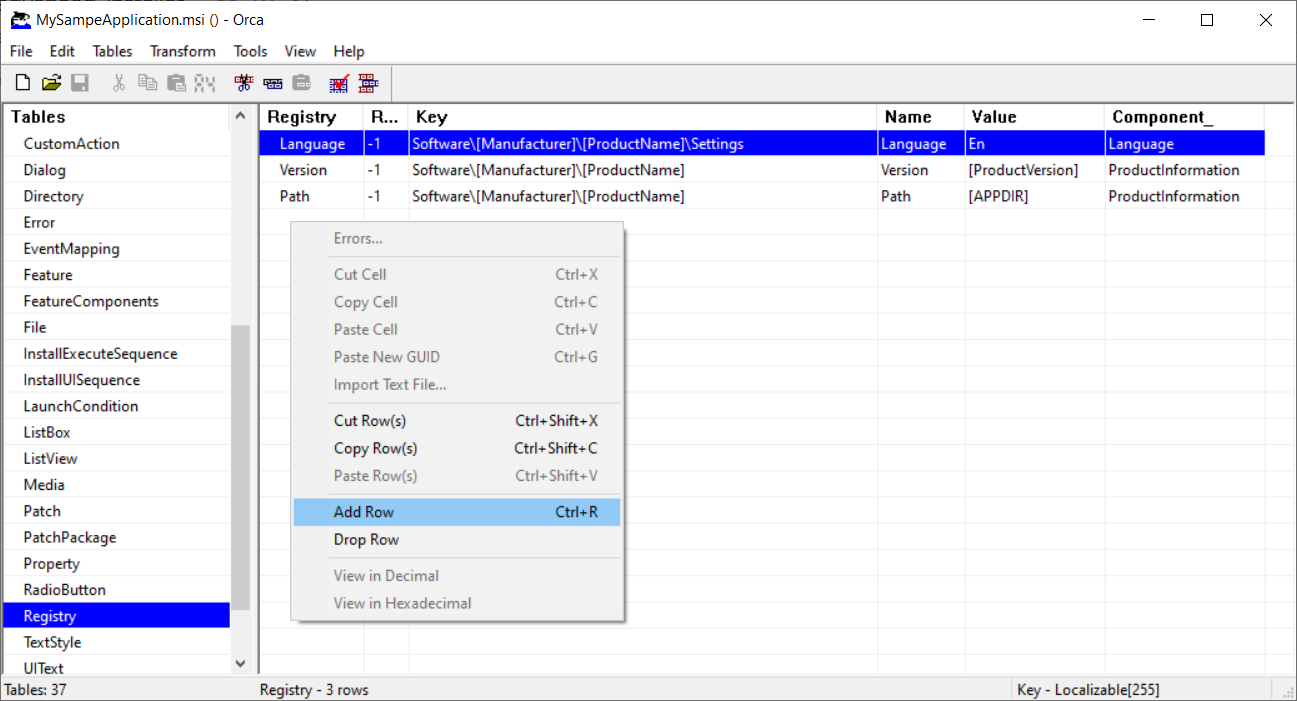
For this example, we want to add a registry key that disables the auto-update function of our application.
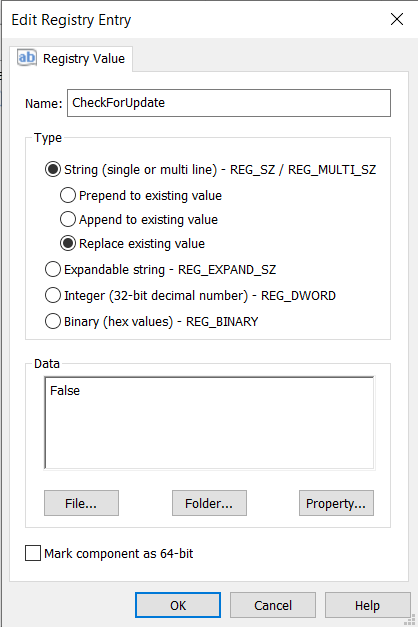
Let’s assume that the registry key is CheckForUpdate and the value is False. It should be present in the HKLM hive under the following path Software\[Manufacturer]\[ProductName]\Settings
To achieve this, navigate to the Registry table, right-click inside the table and choose “Add Row”.
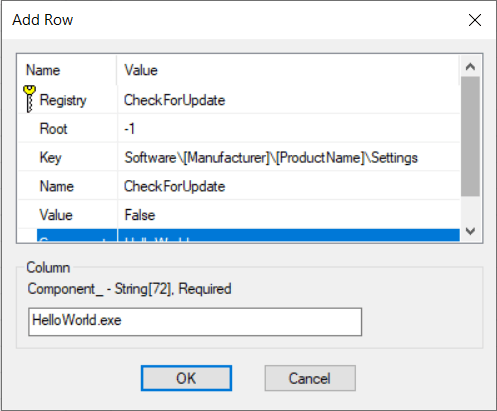
Fill in each row with the corresponding value (as seen below):
- Registry: the identification name of our registry
- Root: the hive (-1) corresponding to HKLM
- Key: the registry key itself
- Name: the name of the registry
- Value: the name's value that we want it to have
- Component: to which component we want our registry to belong (components can be displayed under the Component table).
3. Add a file with ORCA
For this example, we want to add a file containing additional application settings named settings.config.
To do this, you need to edit the following tables:
- Component;
- FeatureComponents;
- File, Media;
- And if the table is already present, MSIFileHas.
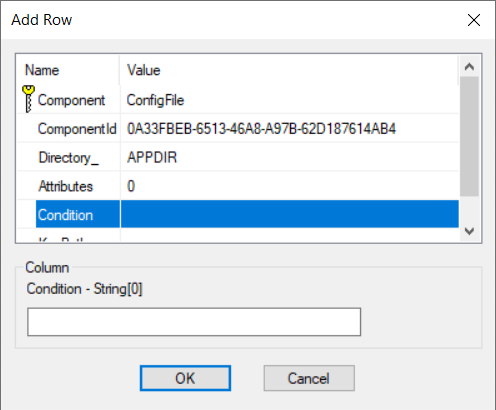
3.1. Component Table
Go to the Component table and add a new row. Complete the information accordingly.
Component: The identification name of the component. Must be unique
ComponentID: For this, use https://www.guidgenerator.com/ to generate a GUID
Directory_: The Directory name where the file will be located
Attributes: Enter 0. For more information, check MSI Documentation
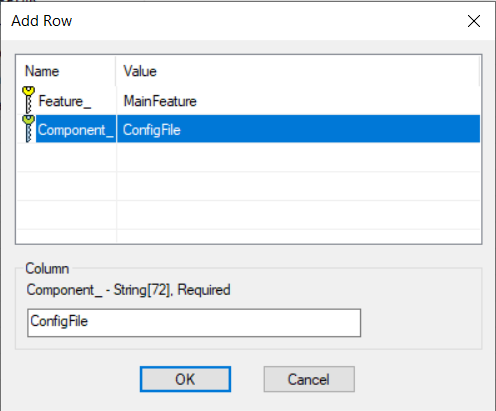
3.2. Feature Component Table
Go to the FeatureComponent table and add a new row. It’s time to link the created component to a feature.
3.3. File Table
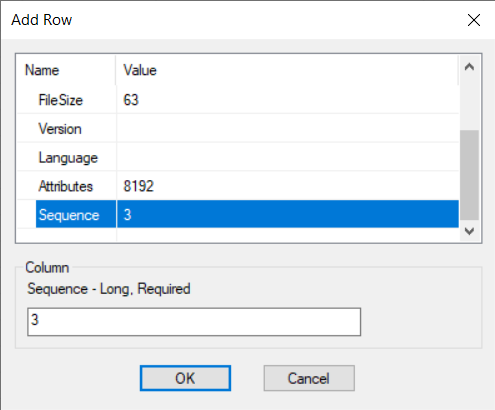
Go to the File table and add a new row. It’s time to associate the file to the recently created component. Complete the information accordingly.
- File: File name (Settings.config)
- Component_: The component created on the previous step (ConfigFile)
- FileName: Enter both short and long filename separate by the vertical bar char (|) Short filename can be found by opening a cmd, navigating to the folder containing the file, and typing the dir /x command
- FileSize: The file size in bytes. You can right-click on the file and type property
- Version: Only if needed
- Language: Only if needed
- Attributes: 8192 for uncompressed file. For more information, check MSI Documentation
- Sequence: Should have the value of the current biggest sequence number in table +1.
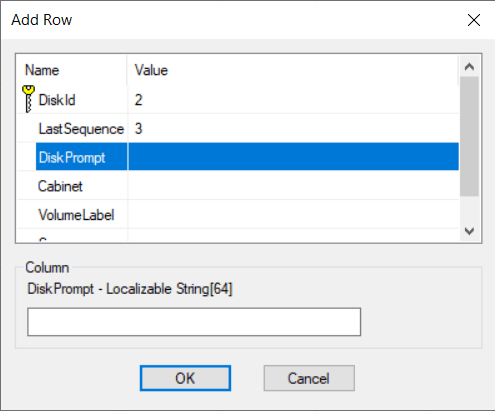
3.4. Media Table
Go to the Media table and add a new row. Increase the DiskId and LastSequence just like in the previous step. Search for the biggest previous value in the table and increment it by 1.
Once your modifications are done, all you need to do is save your transform file.
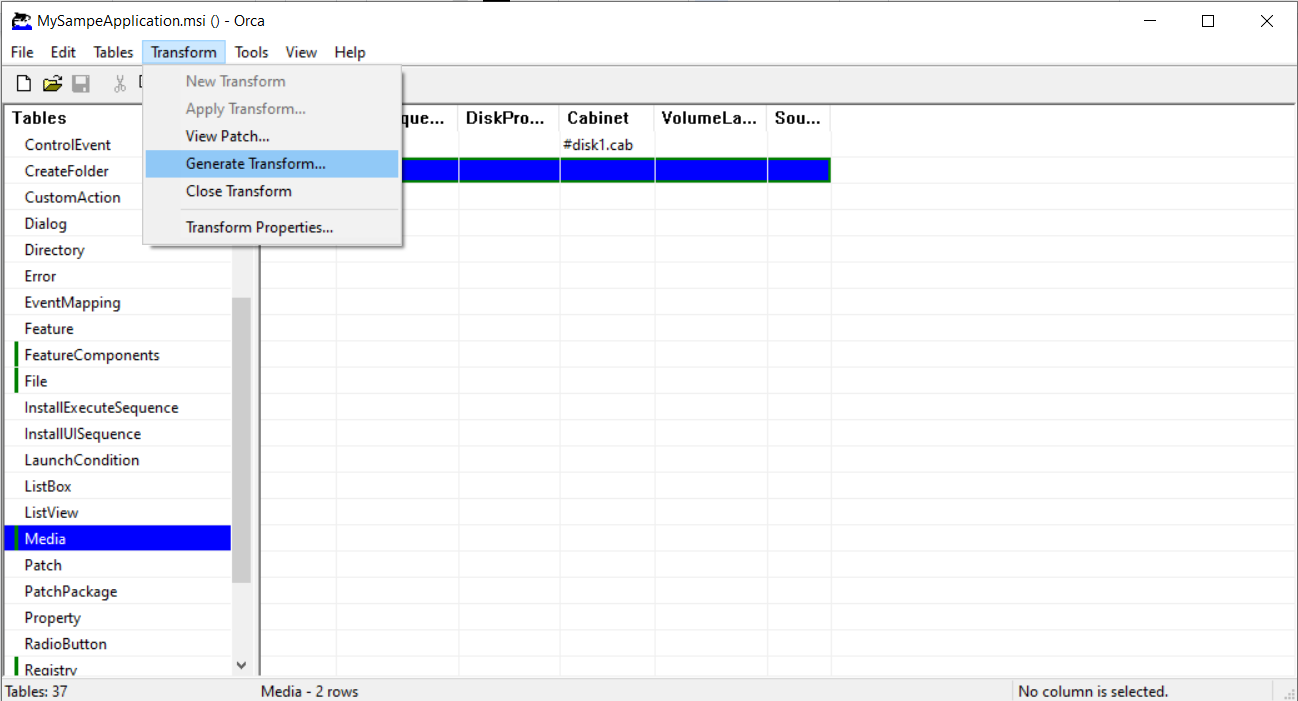
Coming up next, let’s see how we can edit an MSI file using Advanced Installer.
How to Edit Your MSI Package using Advanced Installer?
Let's see how we can perform quick-edits from Advanced Installer's user interface – extremely easy and intuitive.
If you are familiar with the Advanced Installer tool I would suggest you check the predefined support for editing an MSI file using our dedicated dialog: MSI Quick-Edit Mode.
Similar to Orca, to edit your MSI package, right-click it and select “Open with Advanced Installer”.

Once the MSI database has loaded in Advanced Installer, you will notice a left menu pane where you will find all the options you need to directly edit your MSI.
The changes you perform in the GUI will be automatically reflected in all the related tables from the MSI. This will save you time from manually editing each MSI table and decrease the chance of human error.
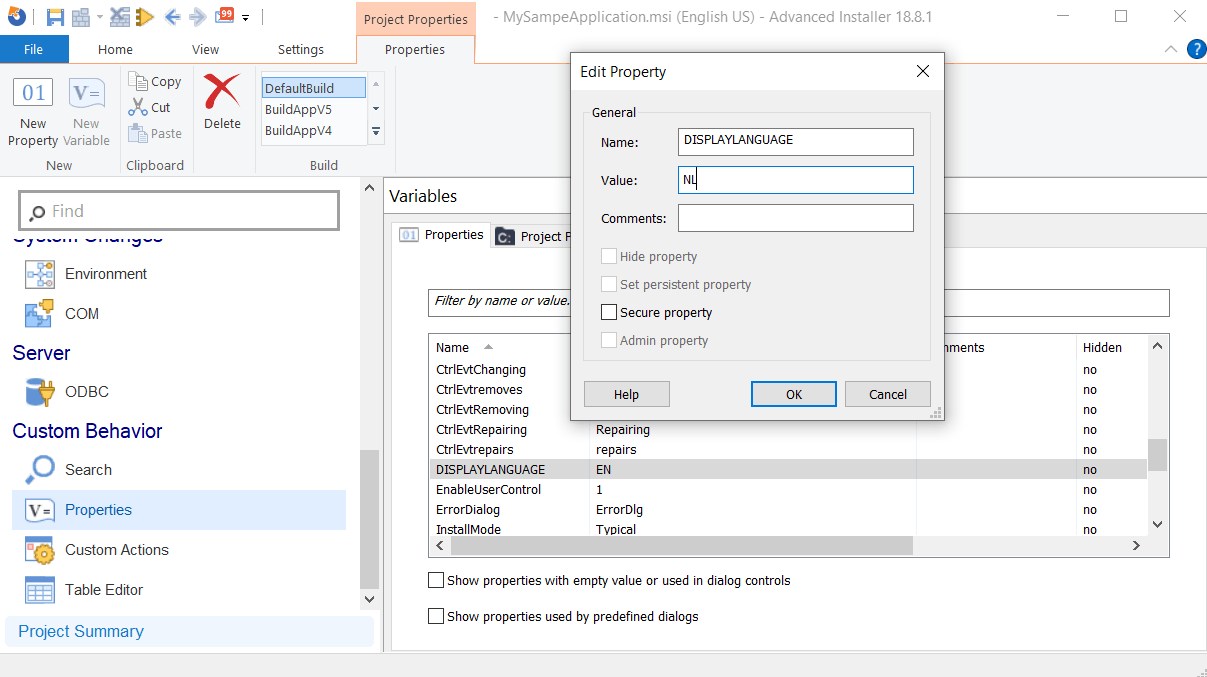
1. Change an MSI property value with Advanced Installer
1.1 From the left pane, navigate to the Property tab,
1.2. Find the property you want to modify and double click on it to edit its value.
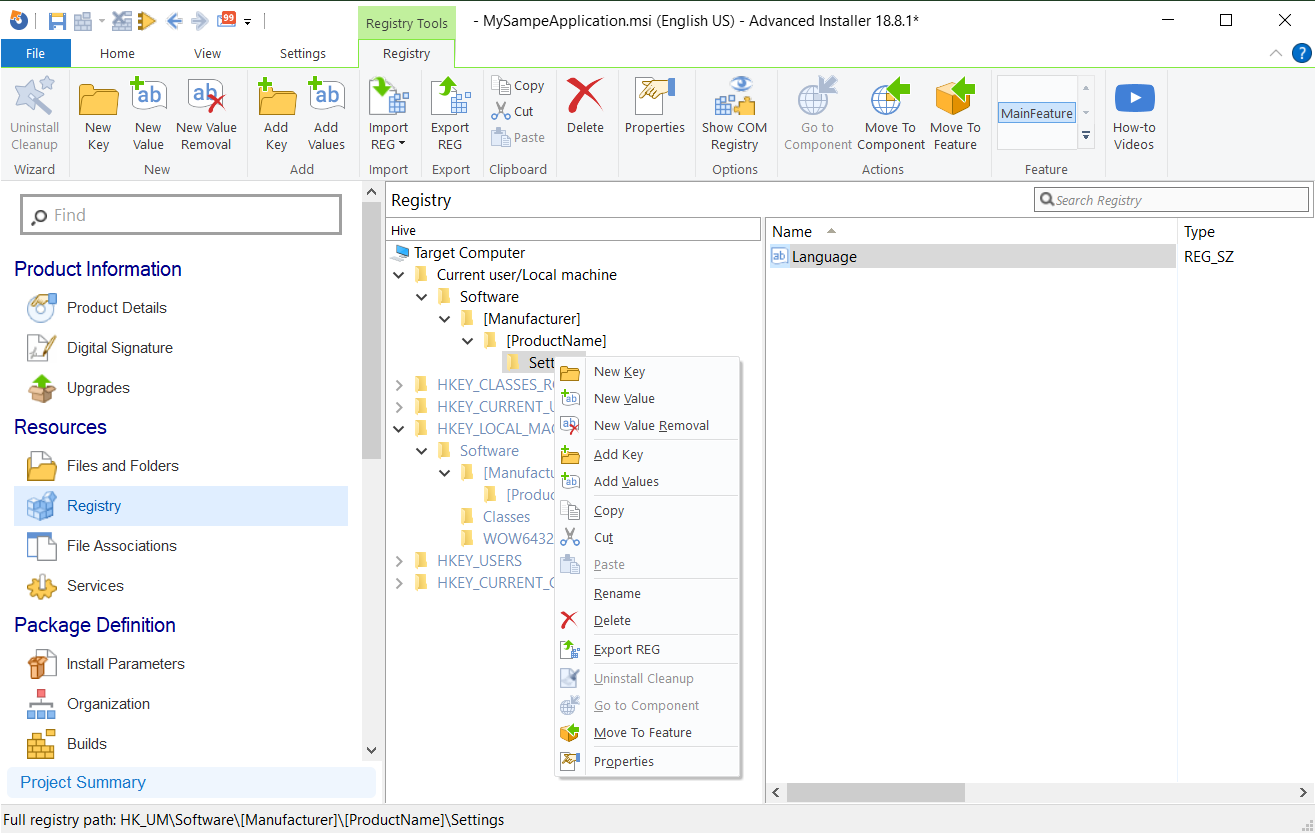
2. Add registry key to your MSI
2.1 From the left pane, navigate to the Registry tab,
2.2 Right-click on the registry path,and choose New Value,
2.3. Fill in the Name and the Data field with the corresponding value.
3. Add a file to your MSI package
When you directly modify an MSI with Advanced Installer, Advanced Installer will update the MSI during the build operation following best practices and rules such as “Short-names in the File Table”, “Separating components for each EXE, DLL, and OCX file”, “Setting the key path for each component”.
Advanced Installer generates builds in accordance with ICE Validation Standard and industry best practices gathered in over 15 years of constant contact with our customers.If you are eager to test it for yourself, try our 30-day full feature trial.
When you add any files into the MSI by using a transform file and saving it, a cabinet file will be created alongside the MST. This is NOT an Advanced Installer custom implementation, but a default behavior of MSI databases.
Conclusion
Now you know two ways to edit your MSI packages.
Both Orca and Advanced Installer are perfectly capable of editing an MSI.
However, as you can see, editing your MSI directly through the Advanced Installer GUI saves time and prevents you from having to completely repackage your MSI - which is especially important when making quick edits to your MSI package.
We hope you try this method and let us know what you think.
If you want to see how the MSI Editor works, give it a try through the Advanced Installer 30-day full-featured free trial.
Subscribe to Our Newsletter
Sign up for free and be the first to receive the latest news, videos, exclusive How-Tos, and guides from Advanced Installer.